
Steampunk Harley - Tamiya 1/6 HD FLH Classic 'extreme' kit bash (Very Photo Heavy)
Page 4 of 25 •  1, 2, 3, 4, 5 ... 14 ... 25
 ![]()
Re: Steampunk Harley - Tamiya 1/6 HD FLH Classic 'extreme' kit bash (Very Photo Heavy)
![]() by Guest Sun 29 May 2016, 10:12 pm
by Guest Sun 29 May 2016, 10:12 pm

What scale is this again,1;1 surely.

Guest- Guest
Re: Steampunk Harley - Tamiya 1/6 HD FLH Classic 'extreme' kit bash (Very Photo Heavy)
![]() by KatsZenJammer Mon 30 May 2016, 12:17 am
by KatsZenJammer Mon 30 May 2016, 12:17 am

I believe I've heard mention of that chap Tesla. He sounds a bit of a quack, if truth be told.
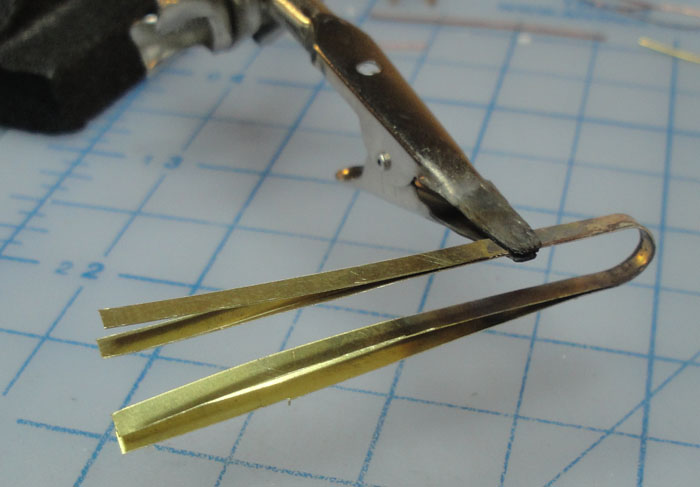
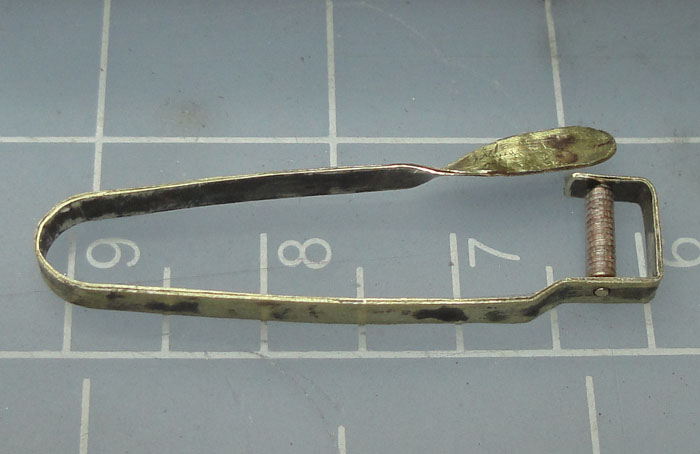
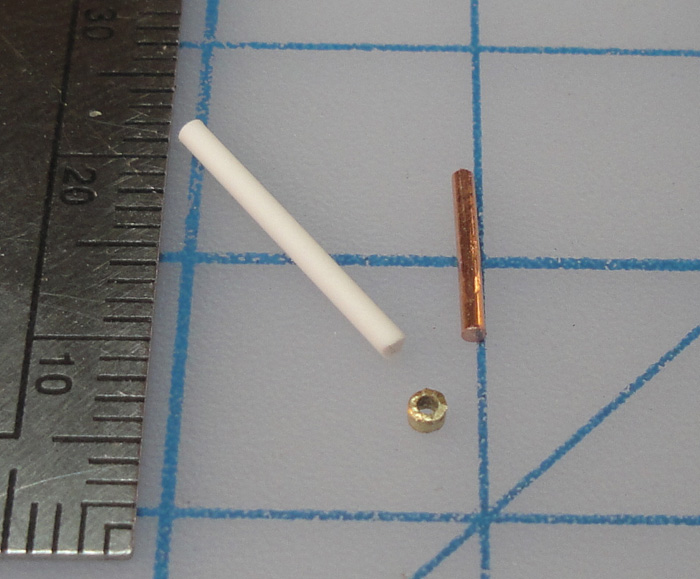
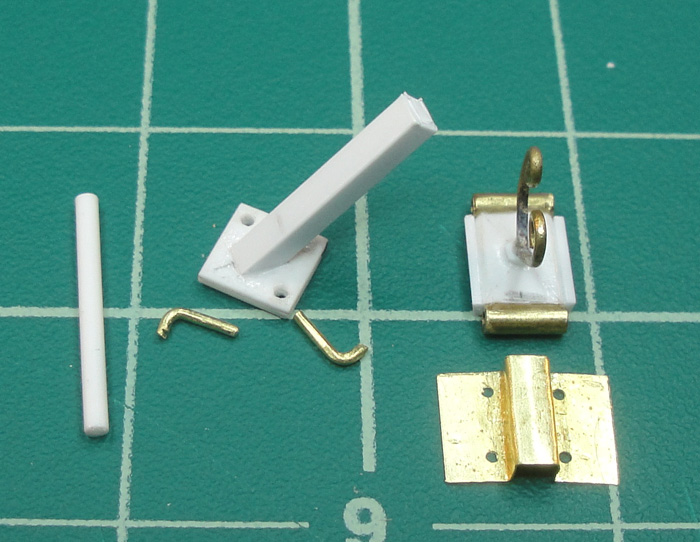
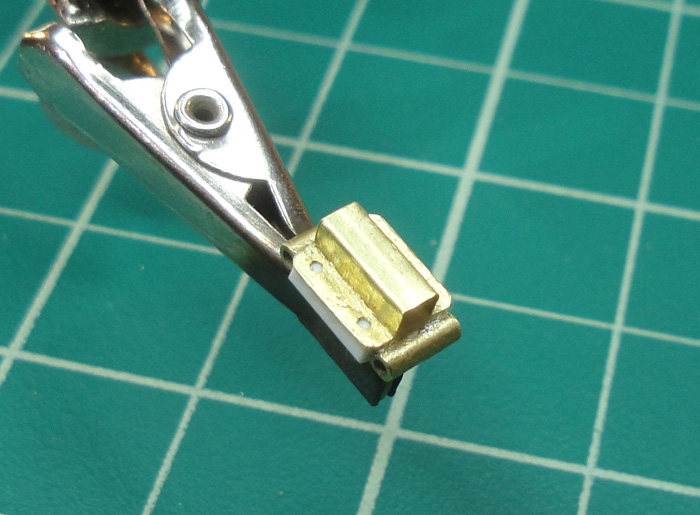
We're now at mid-August, 2015, in terms of the backlog and it was at this time that I realized I was trying to do too many different things at once - as evidenced by the last few posts. I'd been thinking about the accessories for the steam cycle for a while and so in order to kind of clear my head and give myself a morale boost by actually completing something I chose to build a 1/6 scale flint sparker. Looking on the Net only gave me lots of modern versions then I saw that we had an older version at work so I borrowed it for long enough to use it for reference. Here's the start where I am soldering brass strips together for the handle of the sparker.
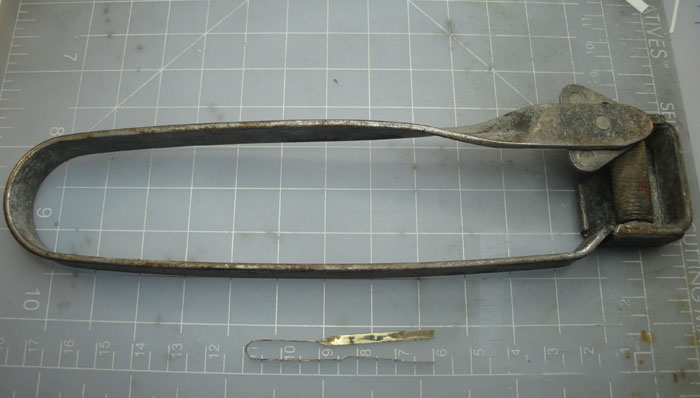
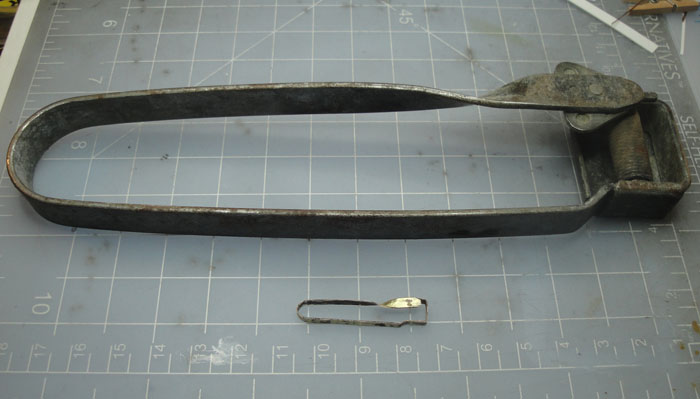
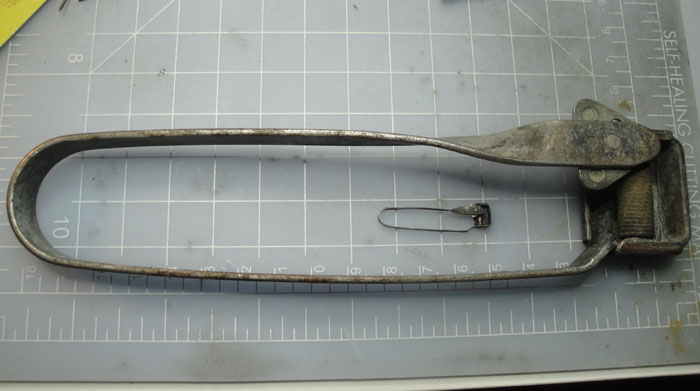
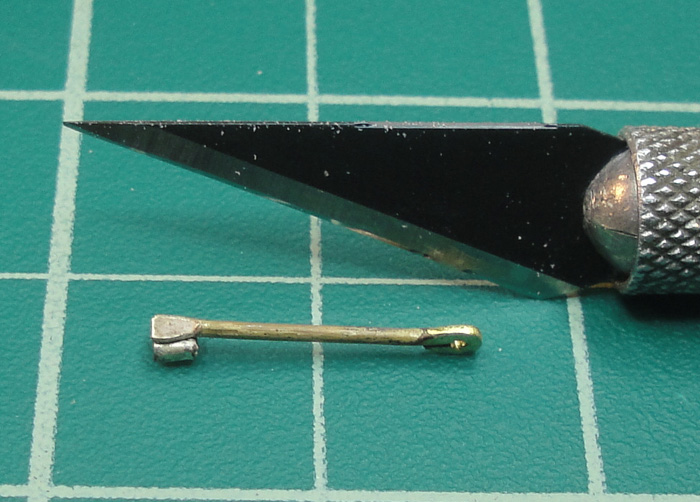
The real thing and the little brass version below. When I saw how simple the construction of the real thing was I chose to follow what was rather than trying to figure out a different way to make it.
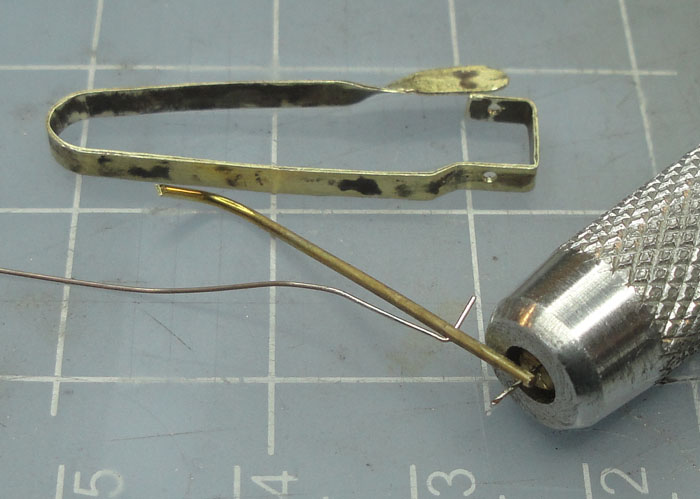
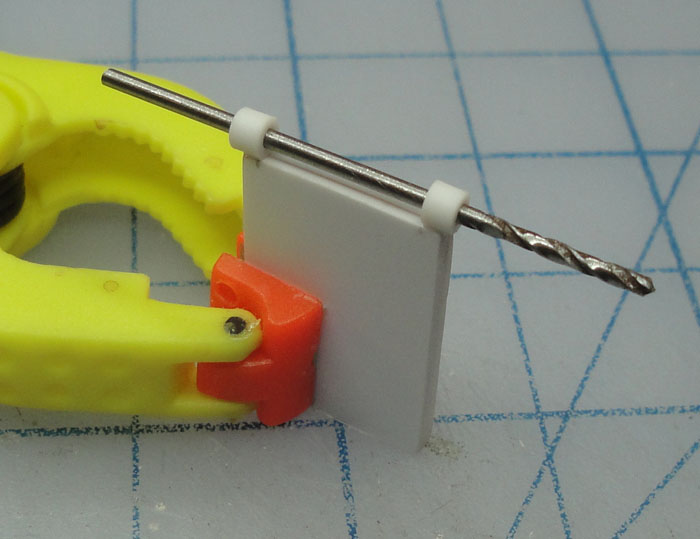
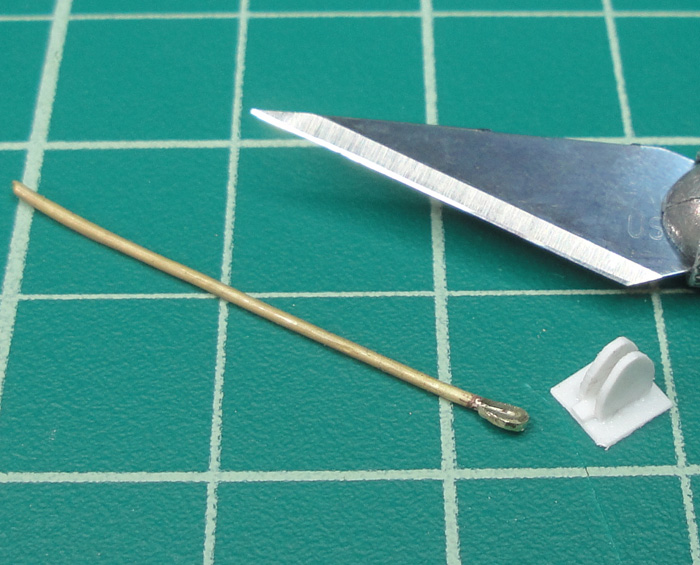
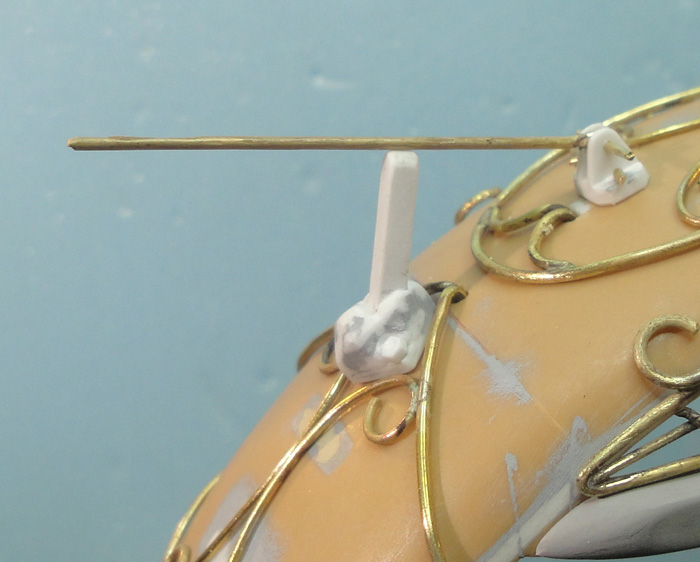
Mimicking the striker portion took some thought but I settled on wrapping wire with much thinner wire. I also drilled out the holes for the striker post to seat into in the handle.

The look of the wire striker was a bit 'clean' for my tastes and after some thought I chose to wrap some FireLine over the existing coil and set it with thin CA. FireLine is a brand of jewelry cord that is thin but nubbed so that it 'locks' with even a simple tie. That rough surface should translate as the rough texture of a striker in scale, I hope.
Comparison photo.

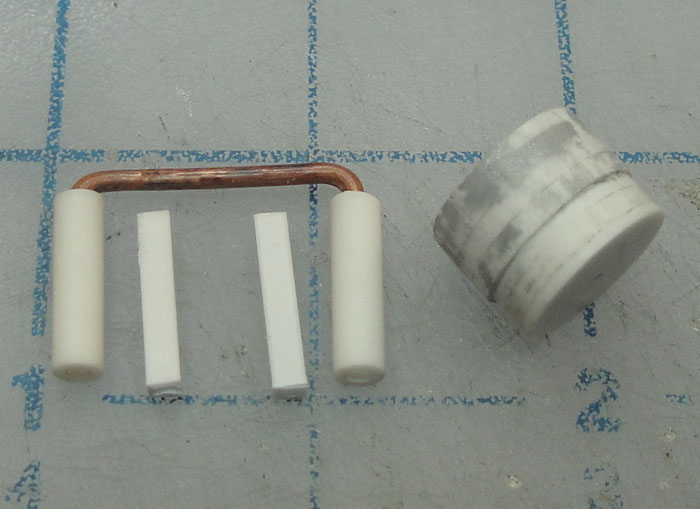
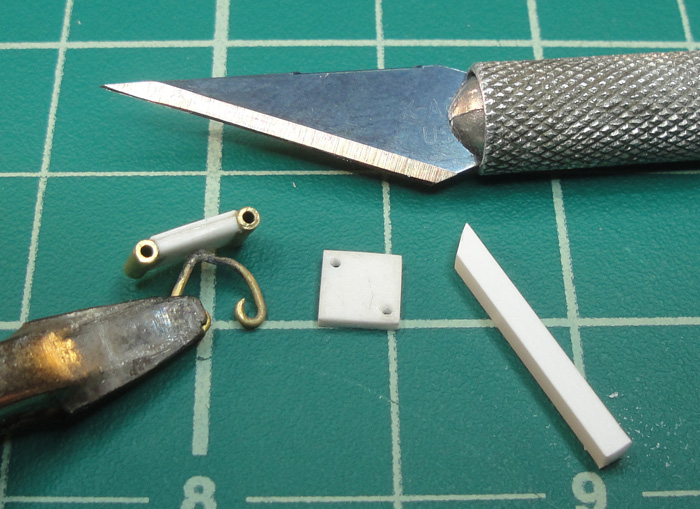
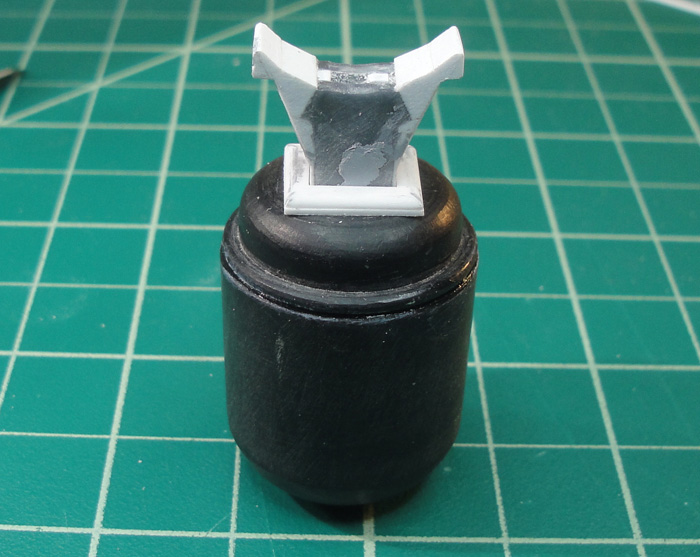
The cup and the triangular flint holder, also made from the brass sheet stock I used for the handle. The post in the flint holder is copper wire.
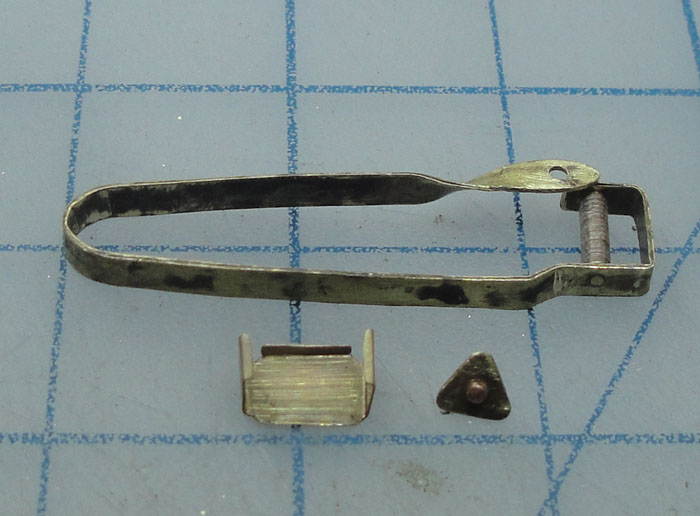

Comparison photo.

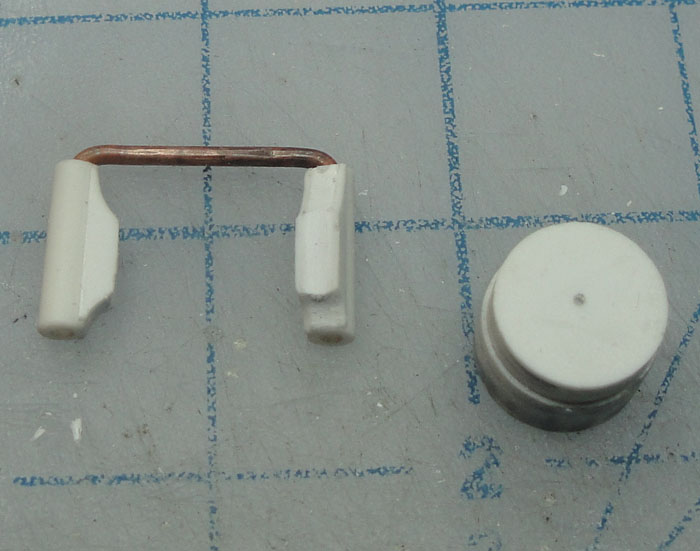
After blackening.

Final comparison photo. At this point I called it a success and I even took the replica to work to show my mates, not to show off but to ask, "Does this look ok?" Their votes of approval helped me out my creative slump in the same way that the on-going encouragement from the online community help keep me motivated.

KatsZenJammer- Resident member

- Posts : 2600
Join date : 2016-05-20
Age : 57
Location : Vancouver, BC
Re: Steampunk Harley - Tamiya 1/6 HD FLH Classic 'extreme' kit bash (Very Photo Heavy)
![]() by Guest Mon 30 May 2016, 12:28 am
by Guest Mon 30 May 2016, 12:28 am
Guest- Guest
Re: Steampunk Harley - Tamiya 1/6 HD FLH Classic 'extreme' kit bash (Very Photo Heavy)
![]() by KatsZenJammer Mon 30 May 2016, 12:35 am
by KatsZenJammer Mon 30 May 2016, 12:35 am
Having gotten out of my slump it became an issue of getting things done and out of the way. Here's the left handlebar with more added detail in the form of tabs and hex nuts to finalize the clamps.
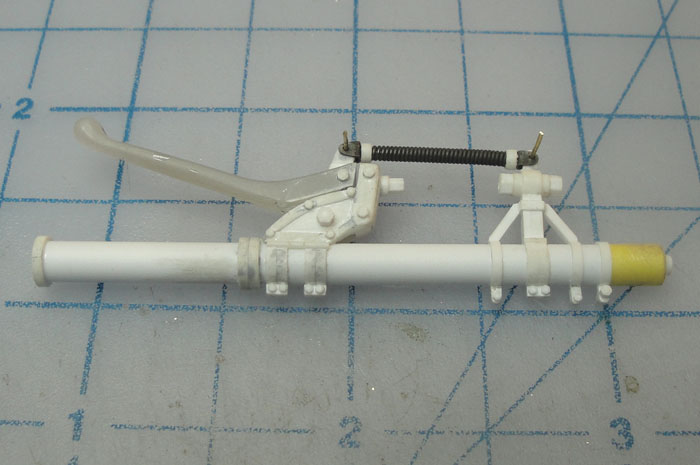
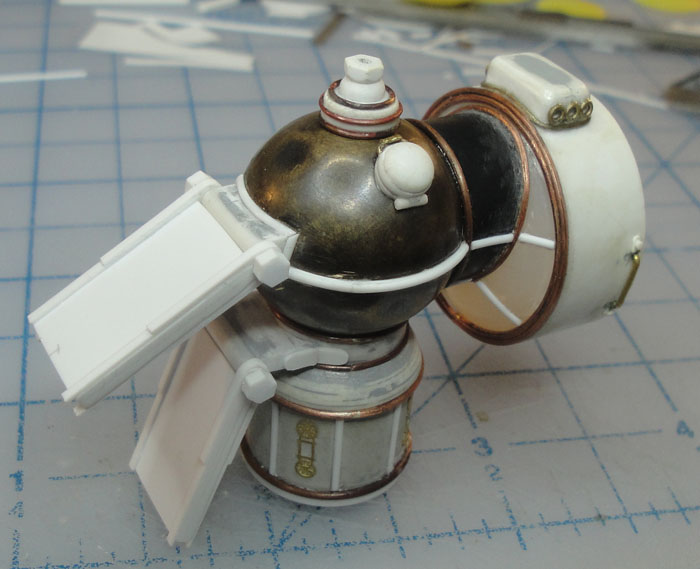
Affixed the water tank to the head light body with 2 part epoxy.
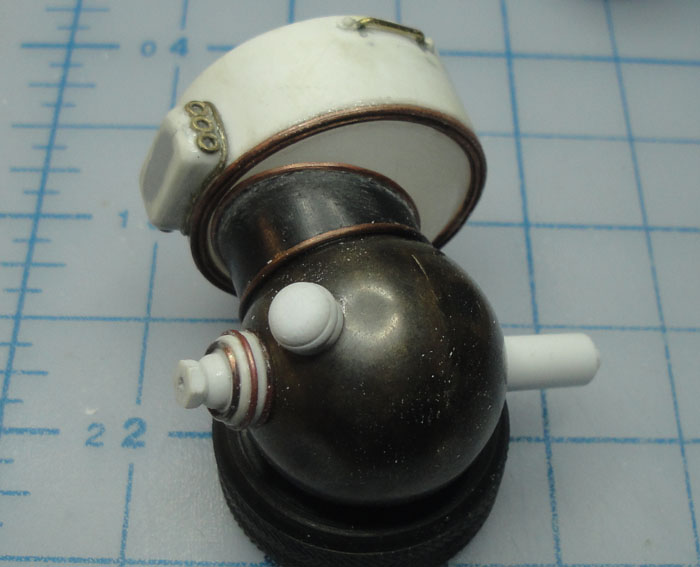
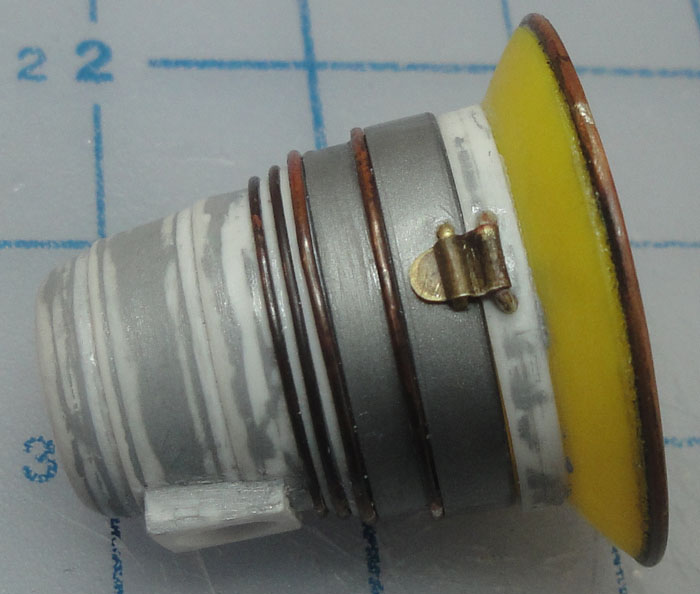
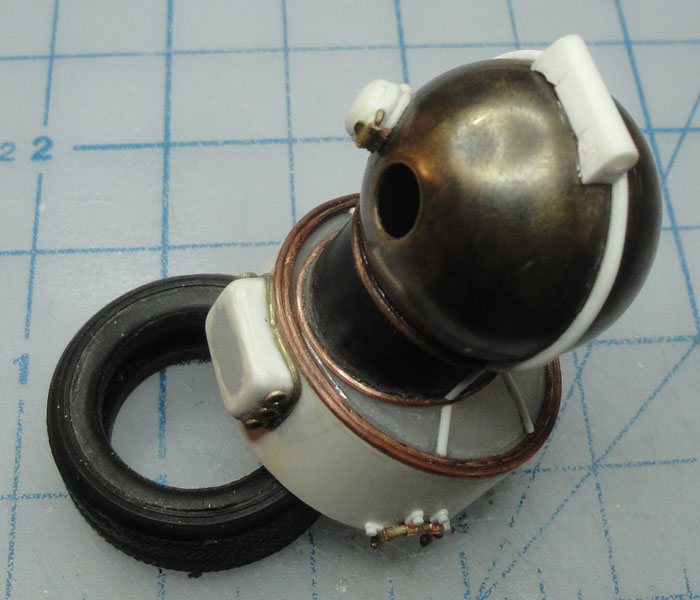
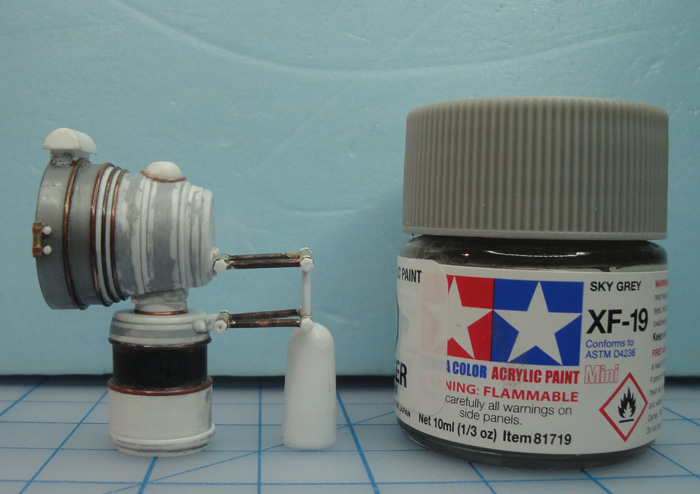
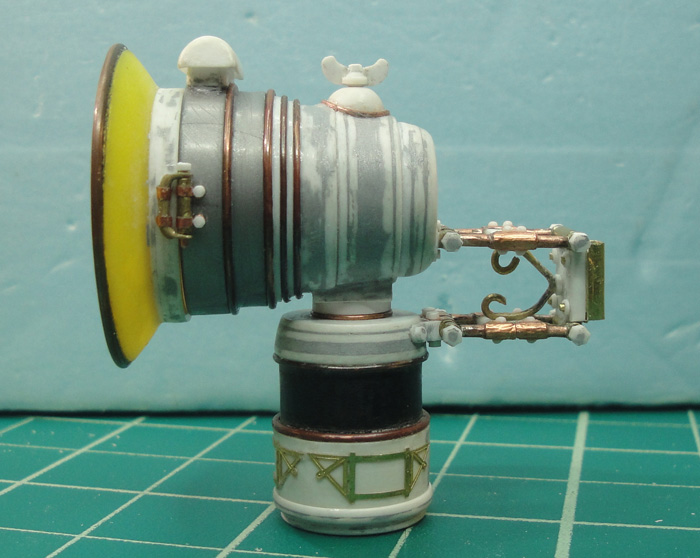
Test fit and the overall look of the headlight emerges. The little 'flame' looking water tap handle is a part of a charm bracelet charm with excess stuff cut away. I believe the original was more Fleur-De-Lys looking.

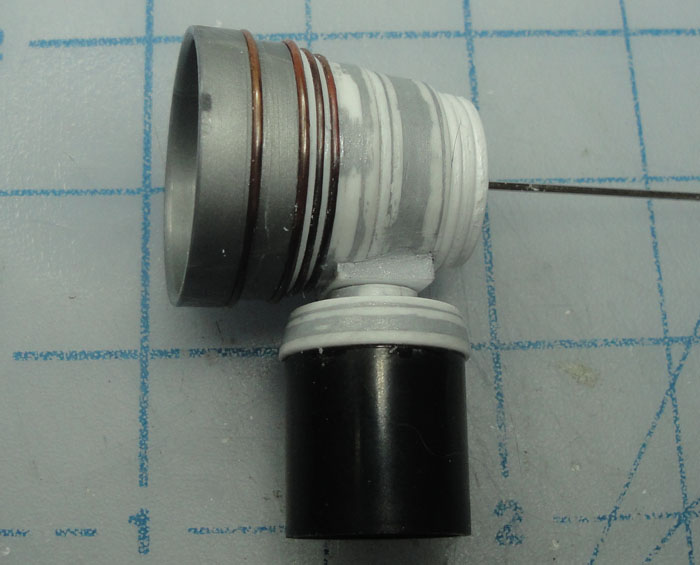
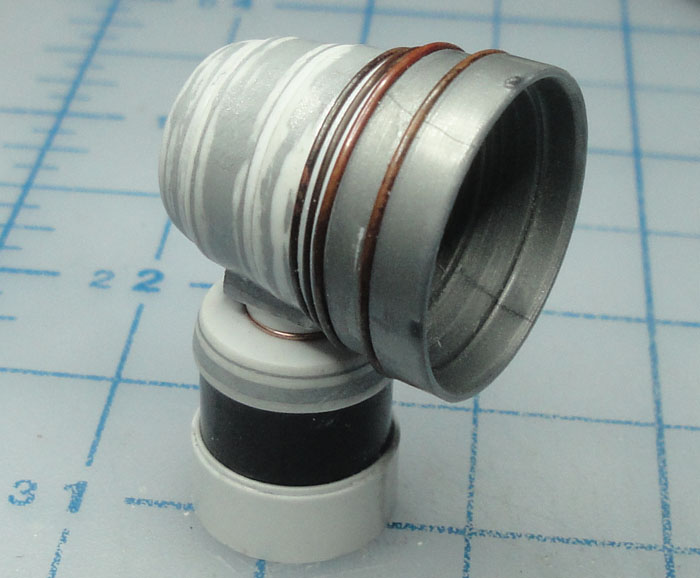
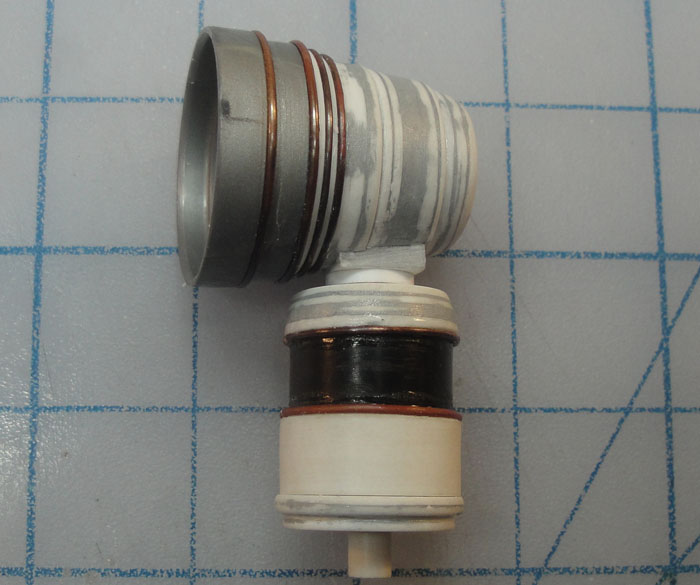
Adding detail to the reaction chamber.
The setting for the offset water fill. Most of the carbide lamps I saw incorporated the fill cap with the water tap but I chose to go this route because I thought it would look cool.
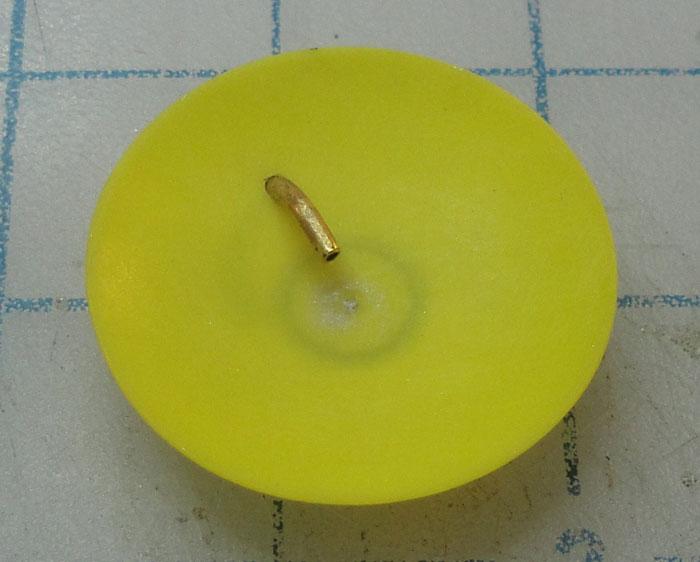
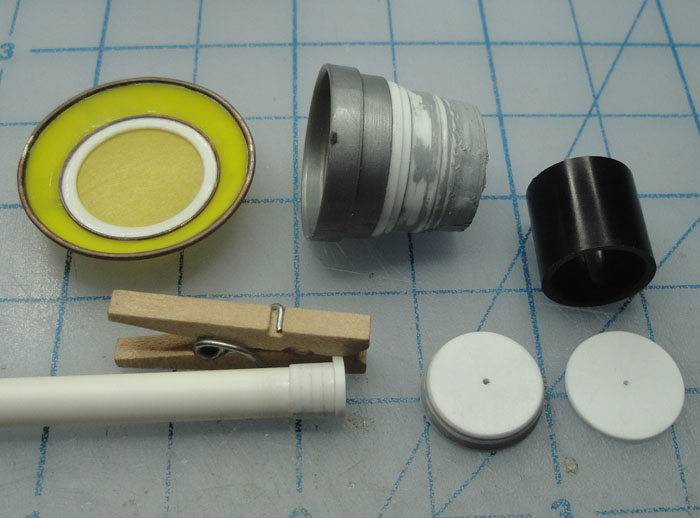
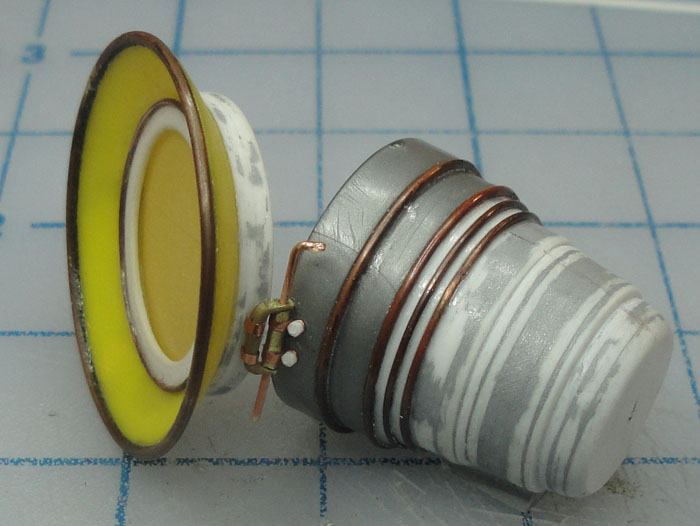
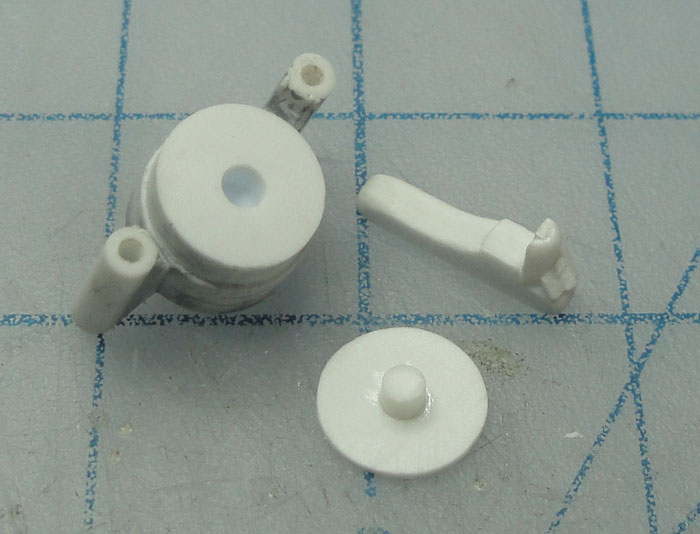
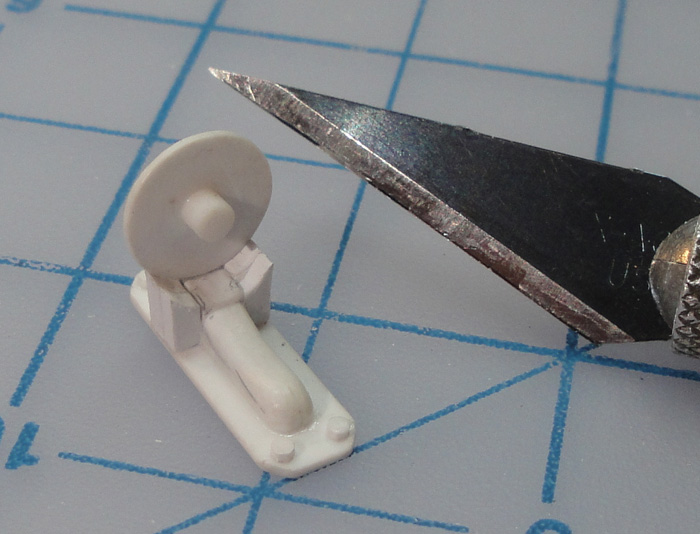
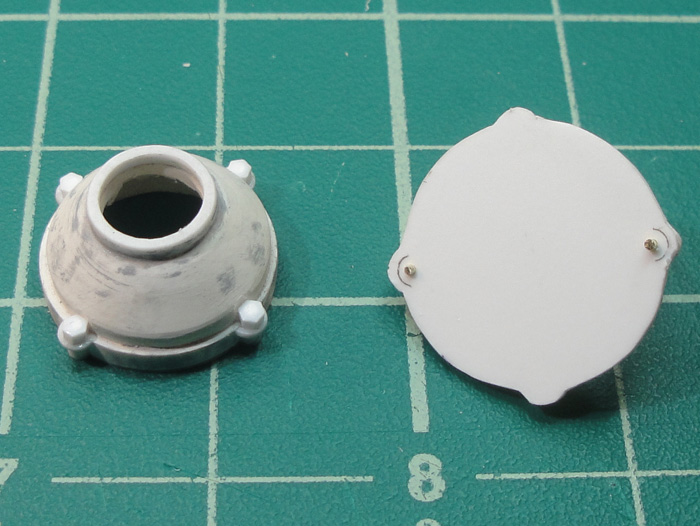
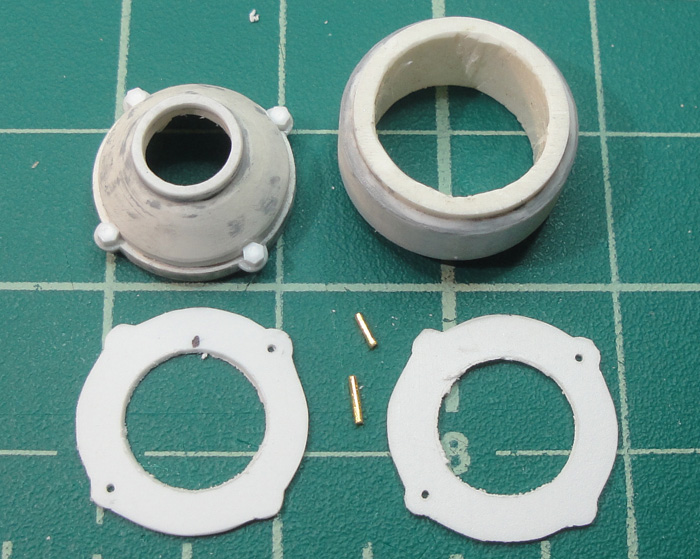
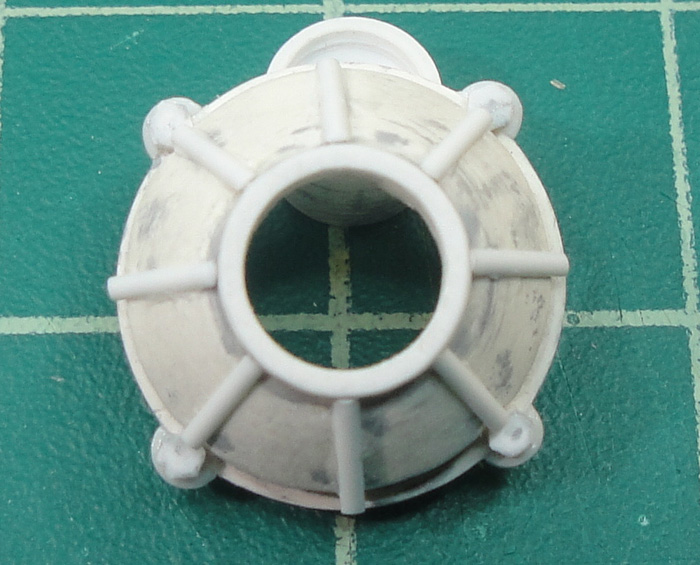
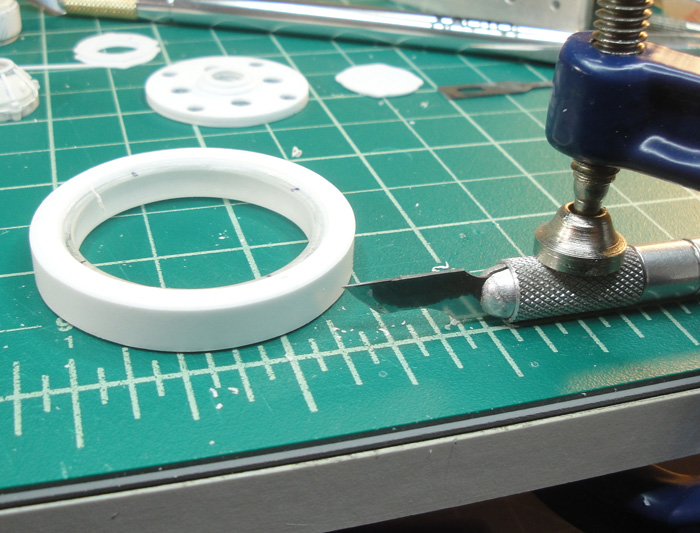
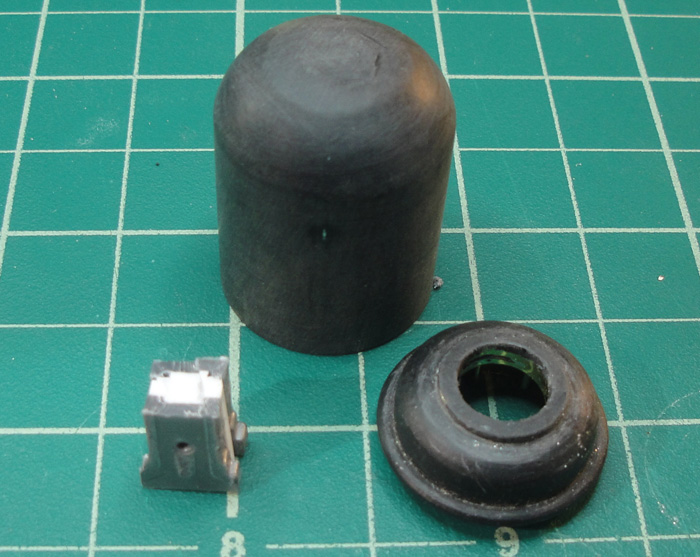
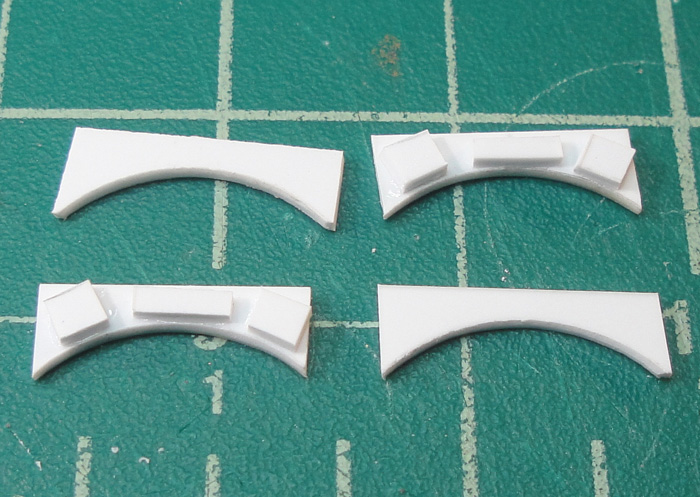
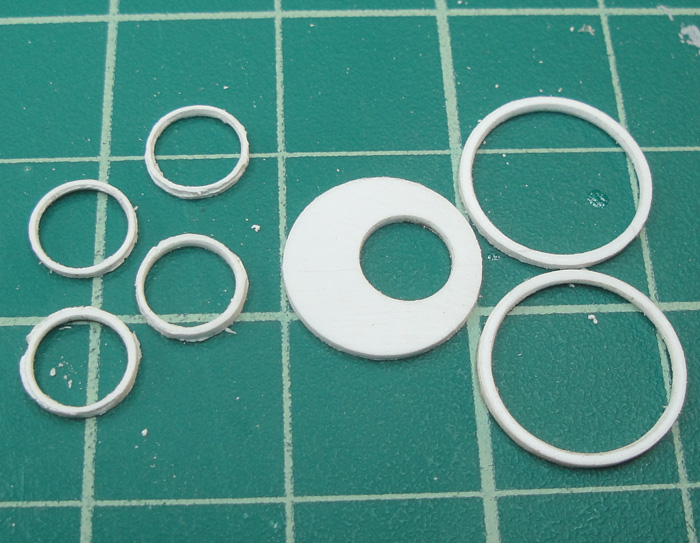
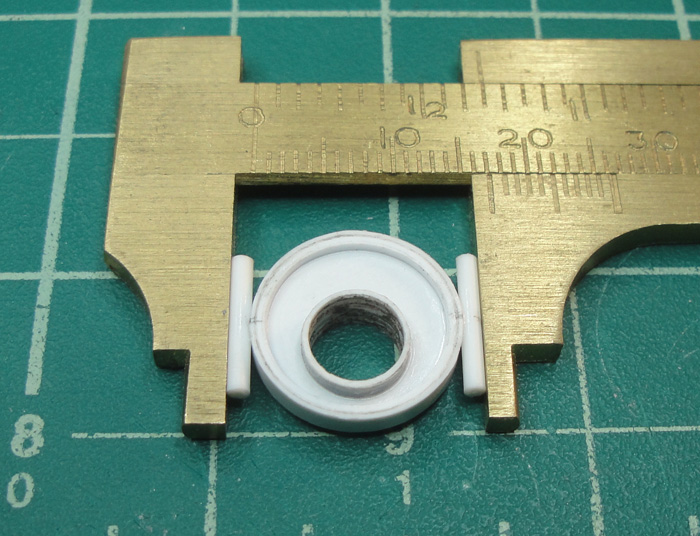
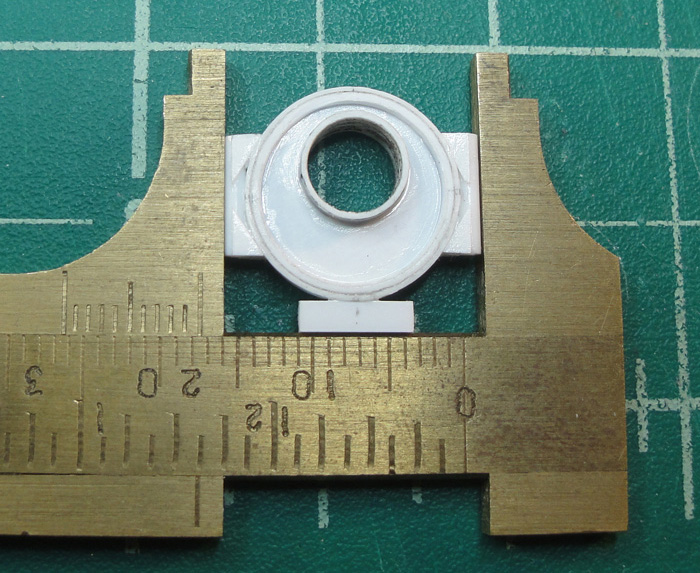
The reflector dish for the headlight. I had originally thought of just using the back of the head light body for this but a separate reflector dish is kind of the norm so here we go. The black ring is the seat which will be affixed to the reflector dish and the white bit will be affixed to the back of the headlight body. The putty in the middle of the reflector is to fill the hole I made for cutting the part out of a ping pong ball.
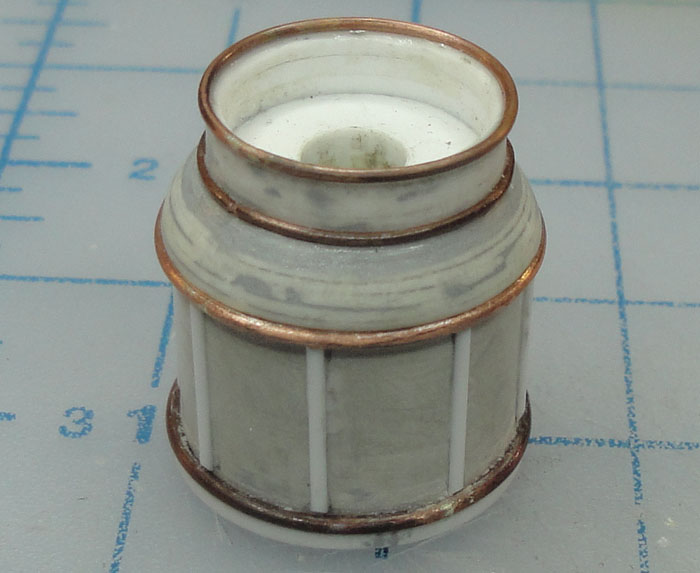
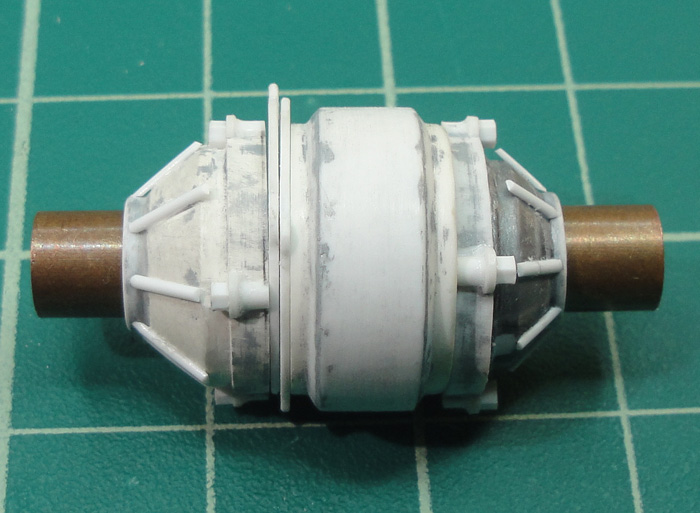
The tail light shroud, reflector dish and parts for body, water tank and reaction chamber.

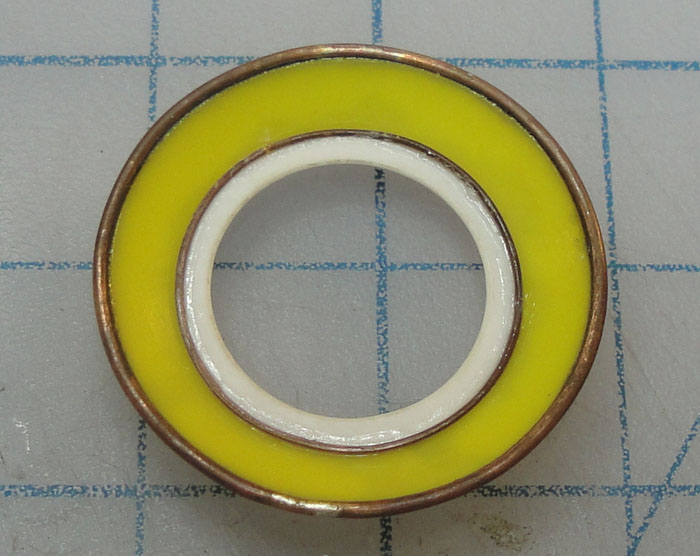
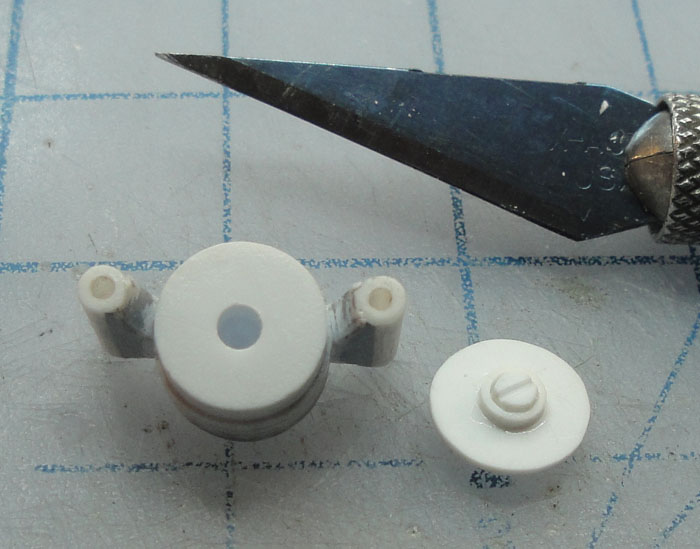
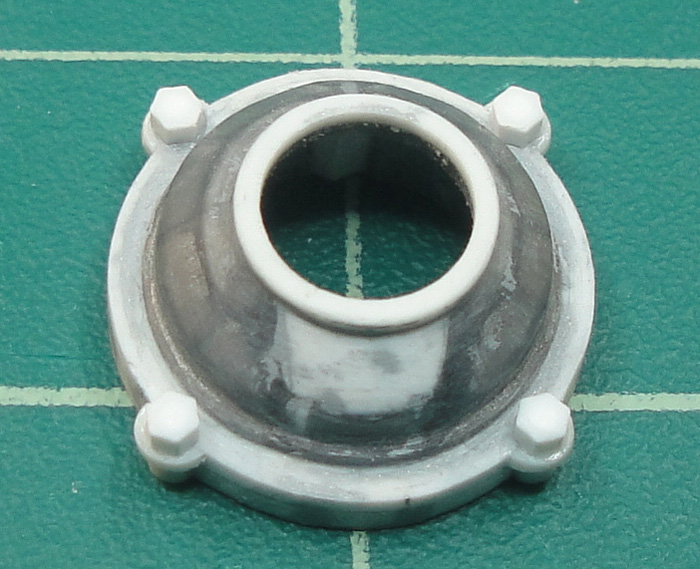
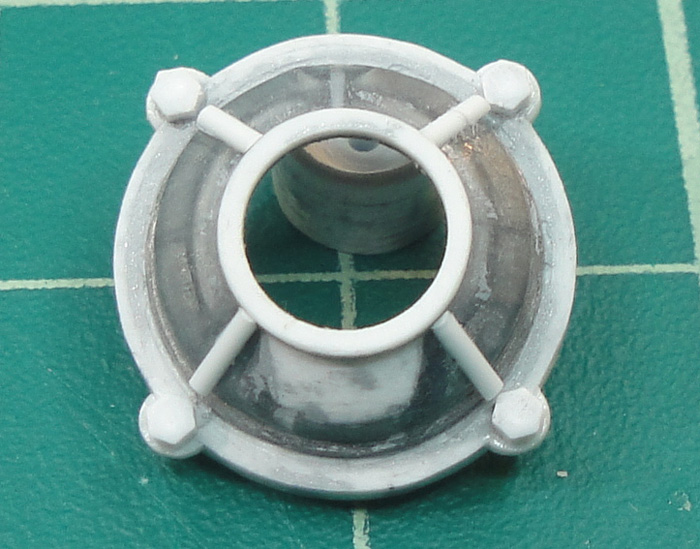
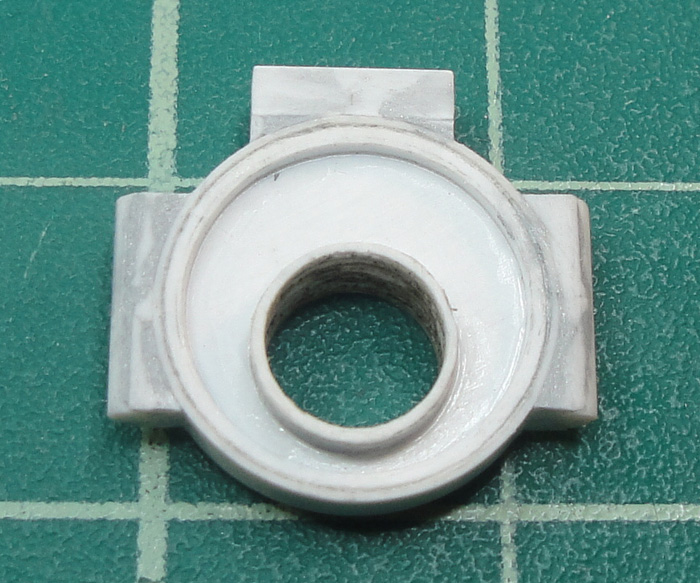
Reflector dish for the head light set up for easy fitting and removal.

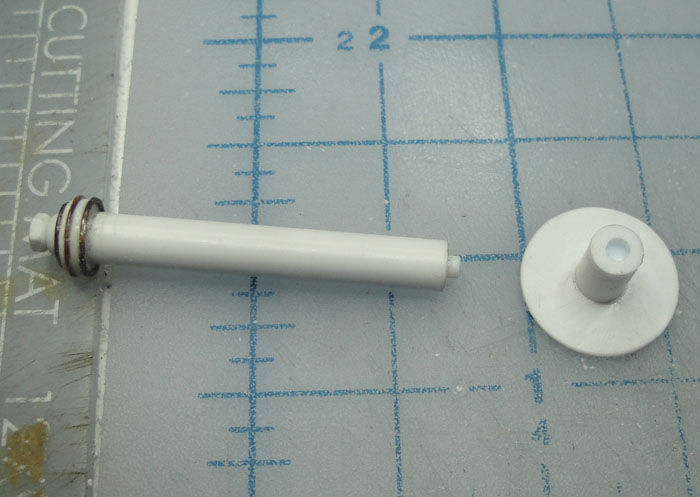
The gas feed tube for the lamp.
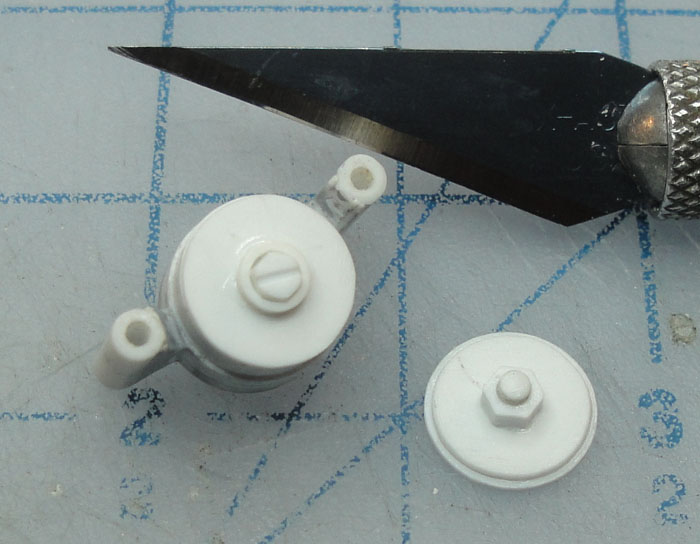
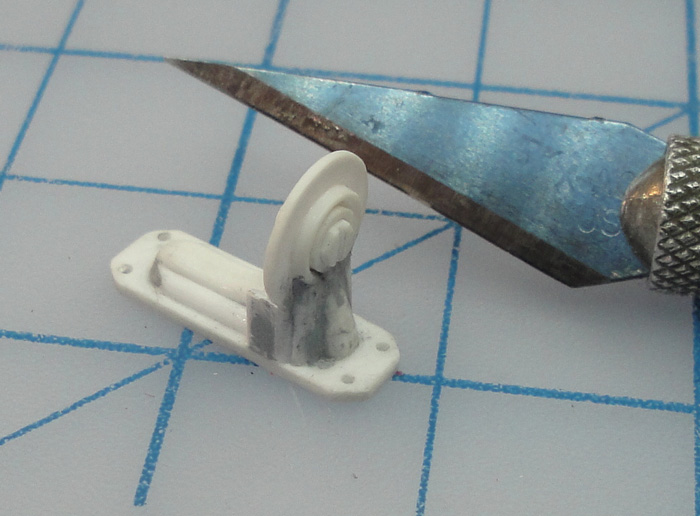
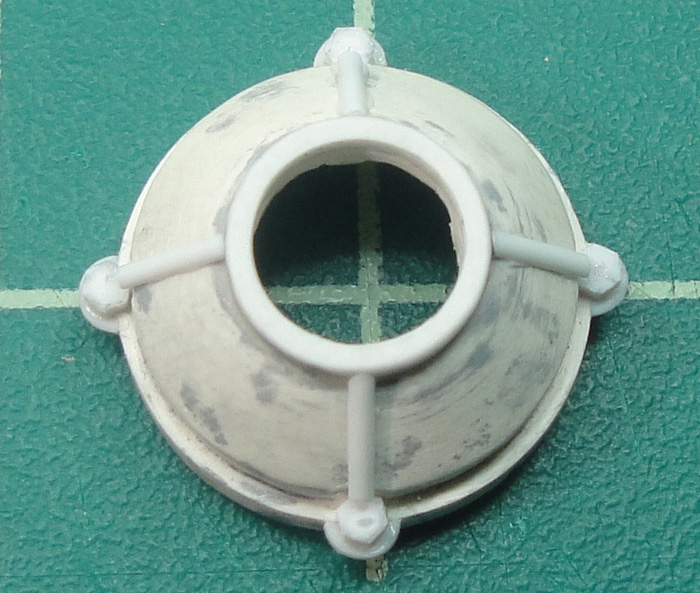
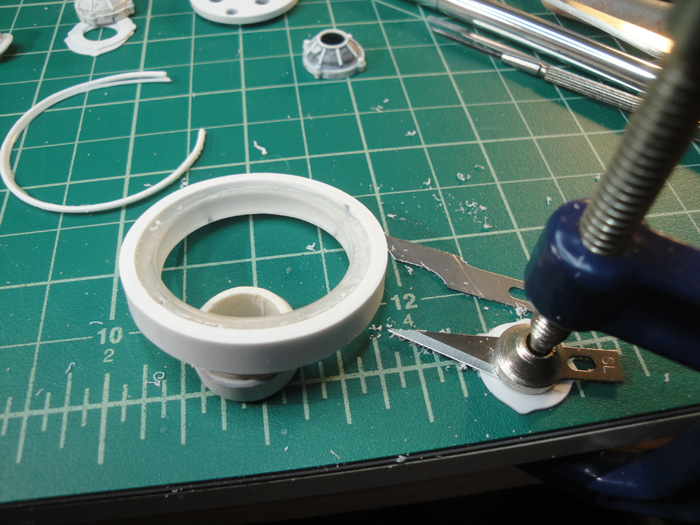
A ring around the reflector - this is one of those rare cases where I use CA to affix metal to plastic instead of epoxy.

Added another detail ring in the tail light shroud, just because.
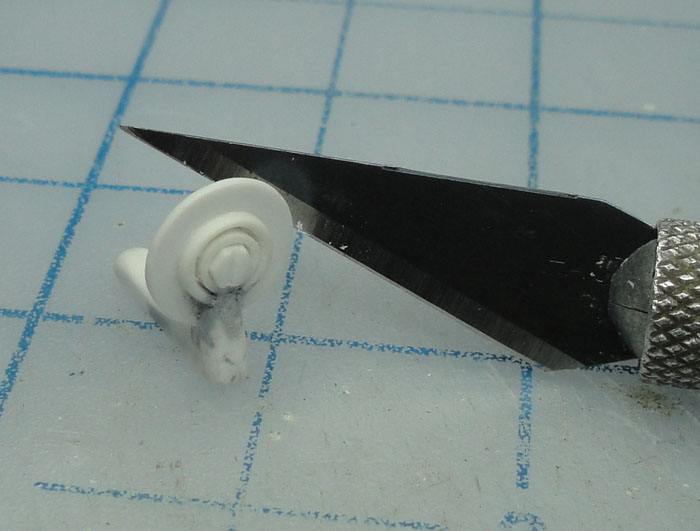
The tail light parts start to take shape.

At this point I'm getting closer to the now, close enough that I can almost see my own behind if I use strong binocs.
KatsZenJammer- Resident member
- Posts : 2600
Join date : 2016-05-20
Age : 57
Location : Vancouver, BC
Re: Steampunk Harley - Tamiya 1/6 HD FLH Classic 'extreme' kit bash (Very Photo Heavy)
![]() by KatsZenJammer Mon 30 May 2016, 4:58 am
by KatsZenJammer Mon 30 May 2016, 4:58 am
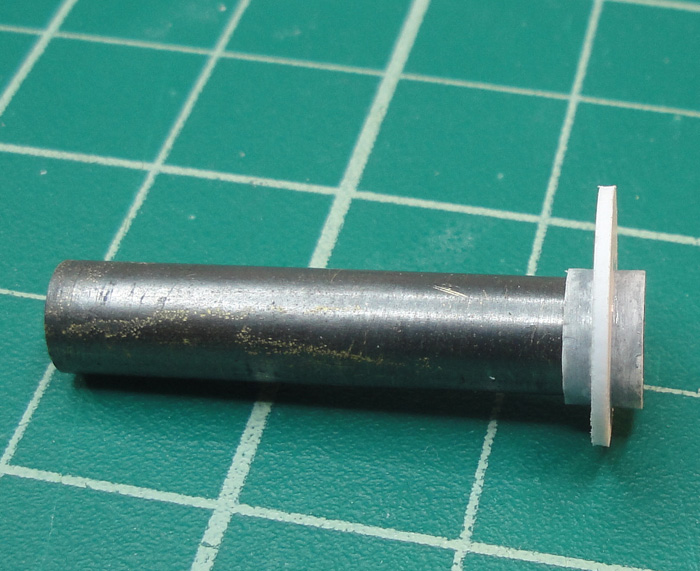
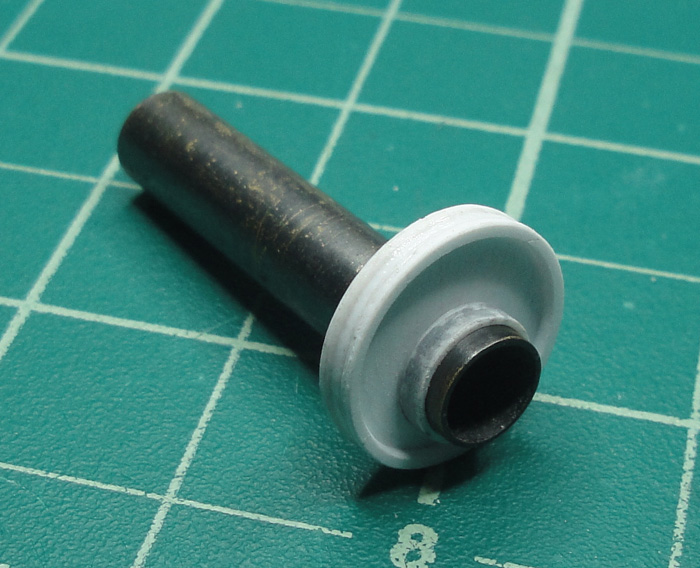
The centre post which will secure the water tank to the reaction chamber and the base plate.
Test fit and a view of the hinge added to the water fill cap.
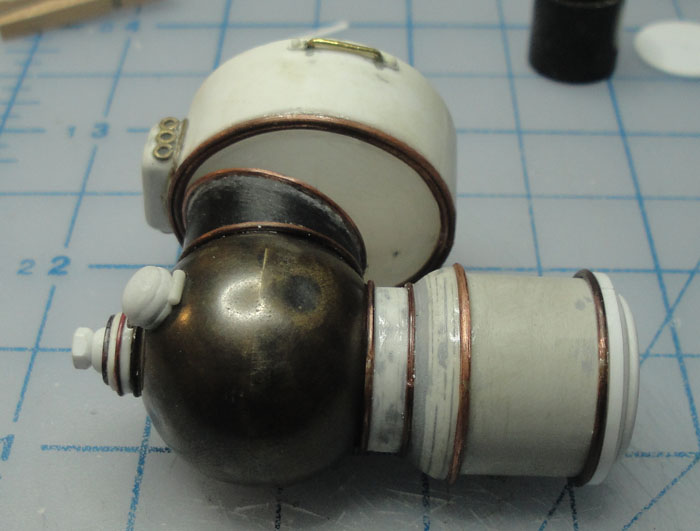
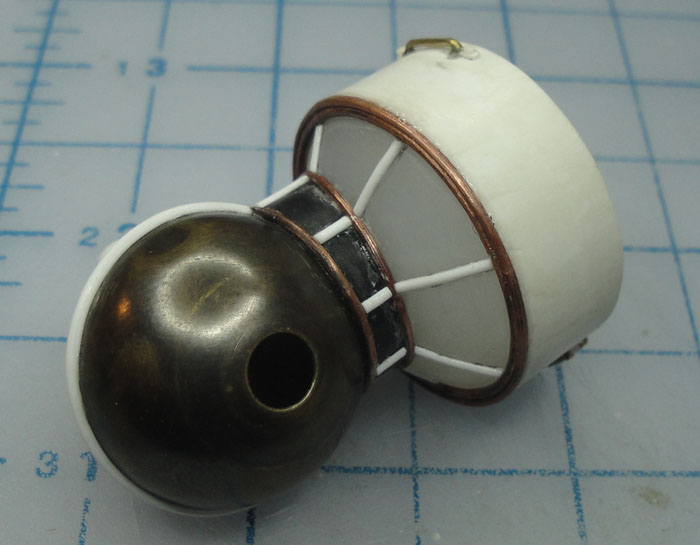
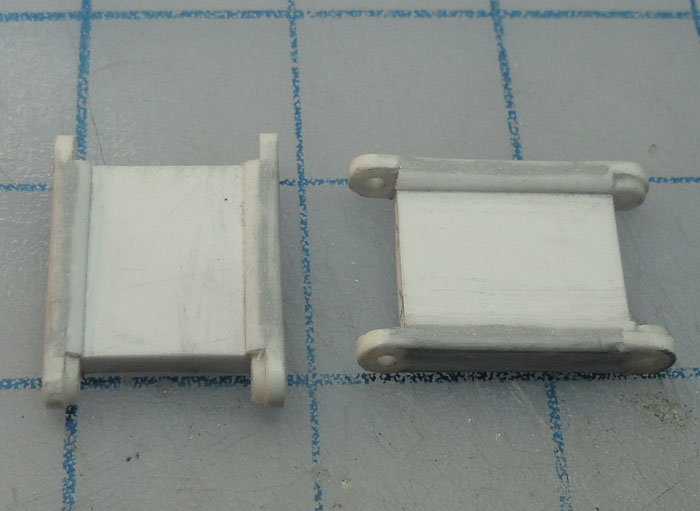
The tail light body/water tank combo and the reflector dish.

Tail light shroud, body/water tank and reaction chamber.

Tail light body with added ring details.

Head light - the water fill cap closure clip added.

Adding decorative 'ribbing' to the parts of the head light. I have no idea if these are structurally necessary but they make things look more ornate without being overly difficult to make.

The tail light parts - the body/water tank has had some depth added with an addition to the rear. The post being 'thickened' with styrene strips will be the centre post to secure the upper and lower parts.
KatsZenJammer- Resident member
- Posts : 2600
Join date : 2016-05-20
Age : 57
Location : Vancouver, BC
Re: Steampunk Harley - Tamiya 1/6 HD FLH Classic 'extreme' kit bash (Very Photo Heavy)
![]() by GaryDainton Mon 30 May 2016, 9:24 am
by GaryDainton Mon 30 May 2016, 9:24 am
Seriously though, this gets better and better.

GaryDainton- Advanced Member
- Posts : 4433
Join date : 2014-03-06
Age : 57
Location : Bolton UK
Re: Steampunk Harley - Tamiya 1/6 HD FLH Classic 'extreme' kit bash (Very Photo Heavy)
![]() by Guest Mon 30 May 2016, 2:14 pm
by Guest Mon 30 May 2016, 2:14 pm
Guest- Guest
Re: Steampunk Harley - Tamiya 1/6 HD FLH Classic 'extreme' kit bash (Very Photo Heavy)
![]() by Guest Mon 30 May 2016, 4:10 pm
by Guest Mon 30 May 2016, 4:10 pm
Guest- Guest
Re: Steampunk Harley - Tamiya 1/6 HD FLH Classic 'extreme' kit bash (Very Photo Heavy)
![]() by KatsZenJammer Tue 31 May 2016, 3:59 am
by KatsZenJammer Tue 31 May 2016, 3:59 am
Gaz - that peg took a lot of work, I was 'milling' it from larger stock then it occurred to me that I had stuff the size I needed on hand
Buck - this build just celebrated it's 2nd birthday on May 29th - soon I will post the Big Test Fit shots.
So, the tail light reflector dish gets a mount point, the rod I was thickening turns out to be a tube and is pretty much ready and the water tank portion gets a square base.

Filling in the voids with styrene bits.

The tail light reaction chamber appears, in pieces, and the base of the water tank gets drilled. The centre portion of the top piece is the hunk of tube I was working on, set into discs.

And I decided to add even more depth to the headlight body/water tank. The rough outline is now about right.
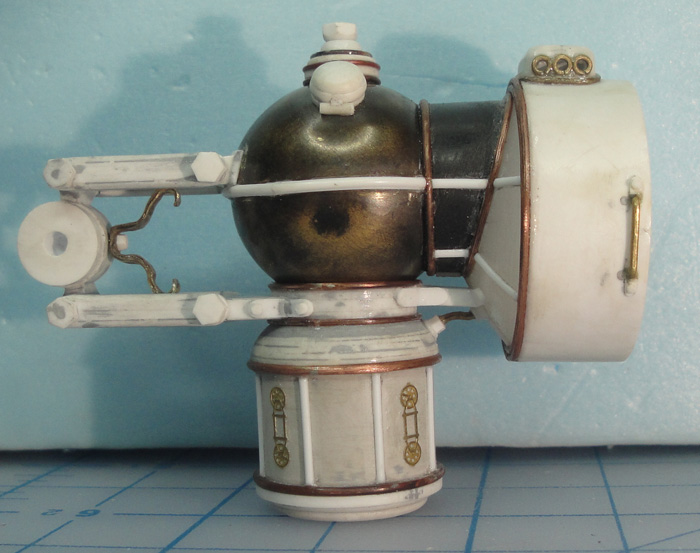
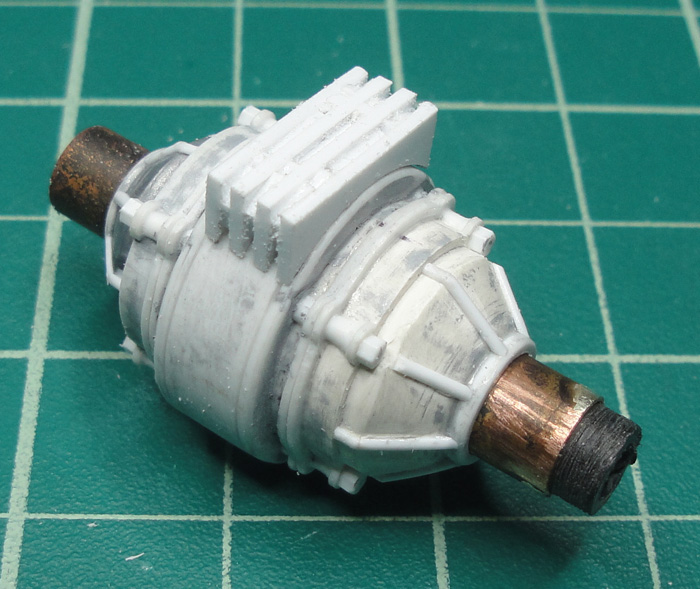
It occurred to me that I hadn't taken a photo of the head light since I'd added detail so here it is.

The reaction chamber get widened at the base.
The tail light parts with connecting rod. Added details to the reaction chamber in the form of rings.

Test fit.
Time to get the shroud onto the body, using the same techniques as the head light.
A different sort of vent.

Jumping to the Head light once more - I bought a discounted PE set (damaged so some of it was unusable) for a 1/350 IJN warship because some of the shapes appealed to me. Here's the start of adding PE but not in their intended form.

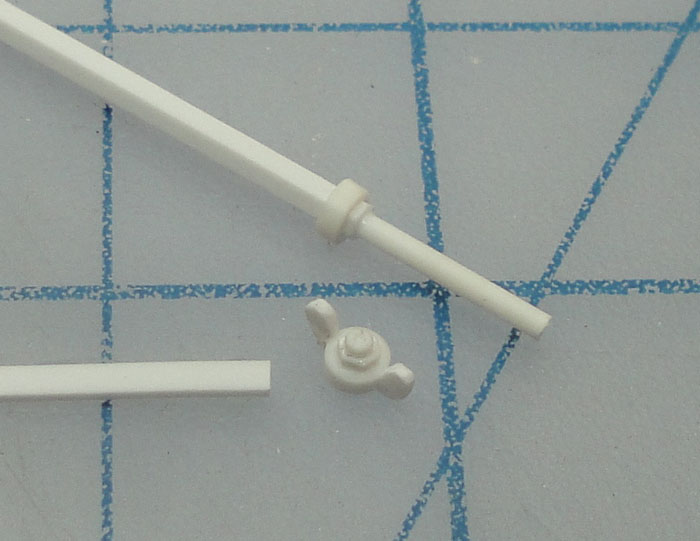
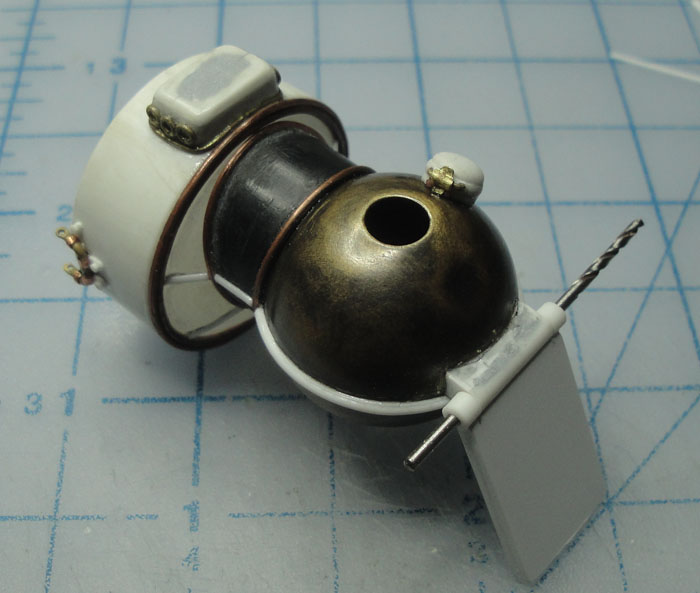
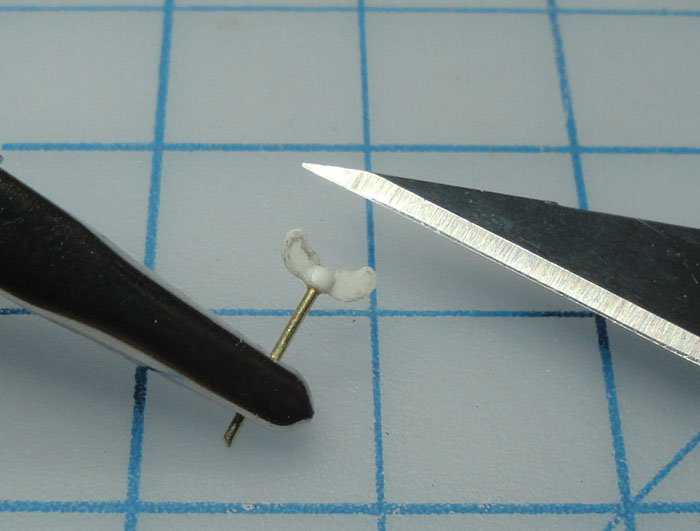
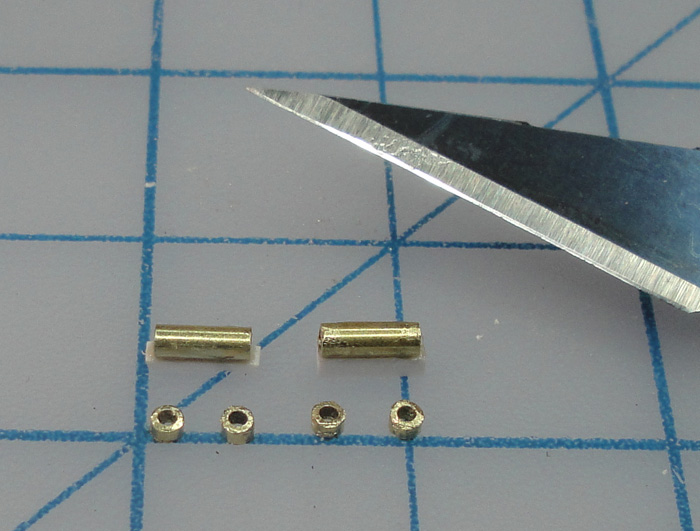
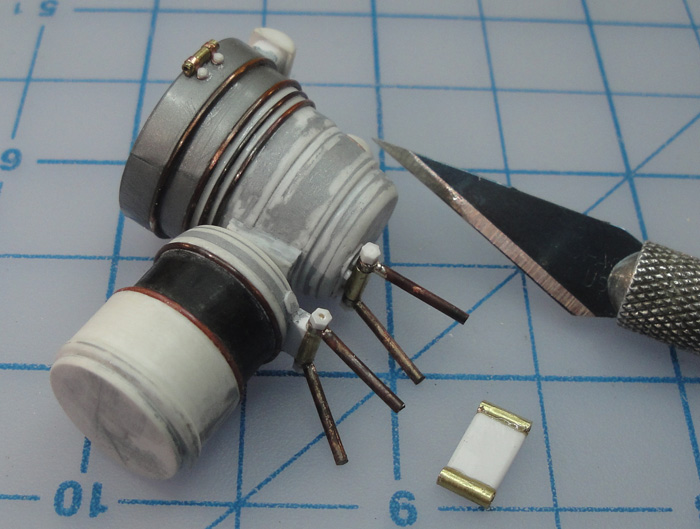
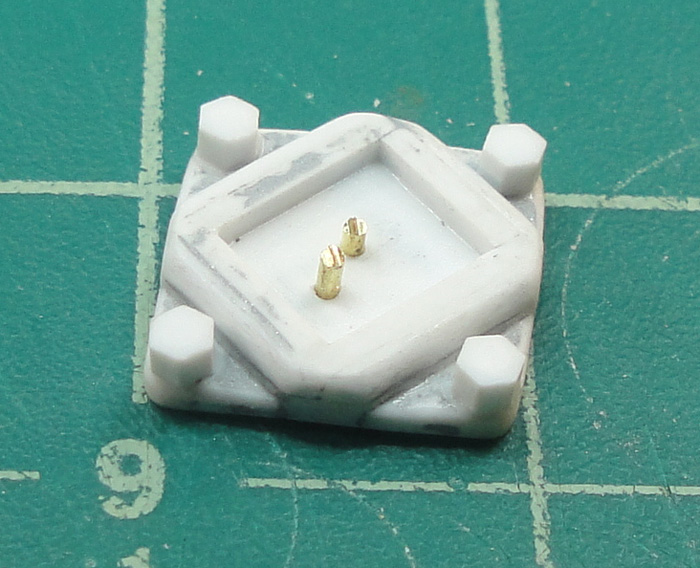
Somewhere along the line I decided to re-think the gas tube flame feed for the lamp. This might be a bit modern-ish for the whole steampunk thing but I chose to go with centre mounted ones in the wing nut style. Pictured here is my lucky first attempt and the bits which make it up. Tube slice over hex rod, drill out end of hex rod and add round rod, make appropriate cuts, shape 'wings' from flat strip, attach. You may or may not wish to utter repeated profanities during the process, lol.
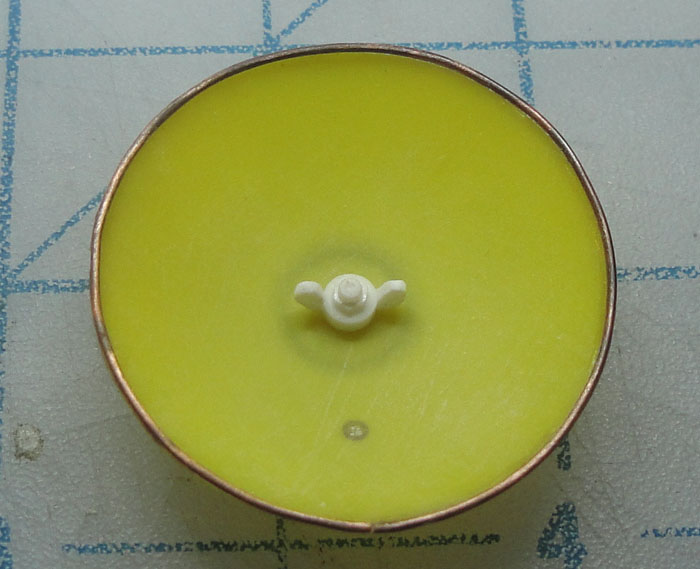
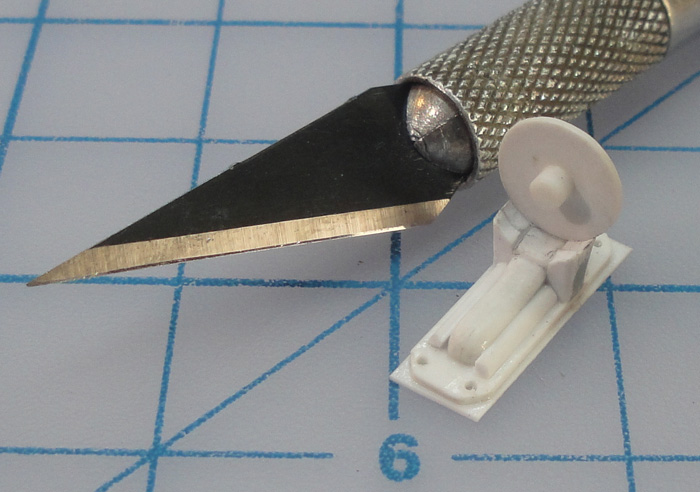
Test fit with head light reflector. I filled the previous hole with medium thick gap fill CA.
KatsZenJammer- Resident member
- Posts : 2600
Join date : 2016-05-20
Age : 57
Location : Vancouver, BC
Re: Steampunk Harley - Tamiya 1/6 HD FLH Classic 'extreme' kit bash (Very Photo Heavy)
![]() by GaryDainton Tue 31 May 2016, 9:07 am
by GaryDainton Tue 31 May 2016, 9:07 am
GaryDainton- Advanced Member
- Posts : 4433
Join date : 2014-03-06
Age : 57
Location : Bolton UK
Re: Steampunk Harley - Tamiya 1/6 HD FLH Classic 'extreme' kit bash (Very Photo Heavy)
![]() by KatsZenJammer Tue 31 May 2016, 5:13 pm
by KatsZenJammer Tue 31 May 2016, 5:13 pm
Idle day with a tweaked back, nothing serious but enough to keep me at home. So I'll utilize the opportunity to do some more photo slammin' in an effort to get caught up. Here's the start of the mounting assembly for the head light using styrene tubing which was then affixed to the water tank with 2 part epoxy.

Tail light reflector dish with the 'new' version of the gas feed.

Filling in the voids on the head light water tank mount.
The head light reaction chamber mount getting shaped to fit. You can also see the PE parts set into place.


The 'plates' for the headlight mount start taking shape.

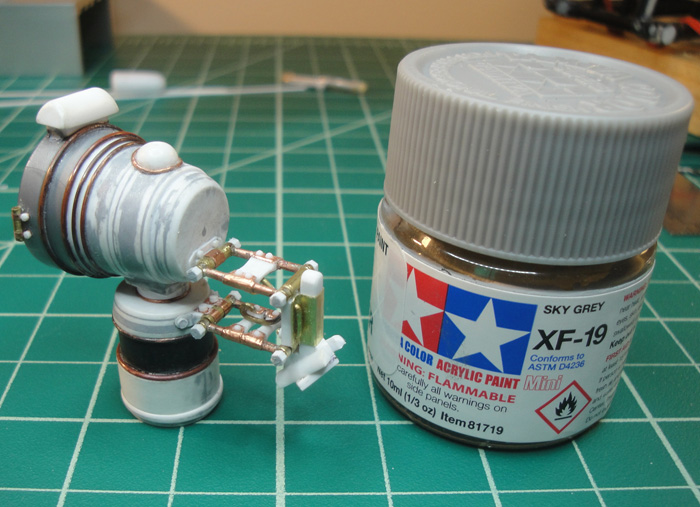
And a scale shot of both lamps.

KatsZenJammer- Resident member
- Posts : 2600
Join date : 2016-05-20
Age : 57
Location : Vancouver, BC
Re: Steampunk Harley - Tamiya 1/6 HD FLH Classic 'extreme' kit bash (Very Photo Heavy)
![]() by KatsZenJammer Tue 31 May 2016, 5:24 pm
by KatsZenJammer Tue 31 May 2016, 5:24 pm
A simple jig to insure proper spacing and alignment, both for the rear mount portion and for further development.
The basics are laid out, now for some detailing.
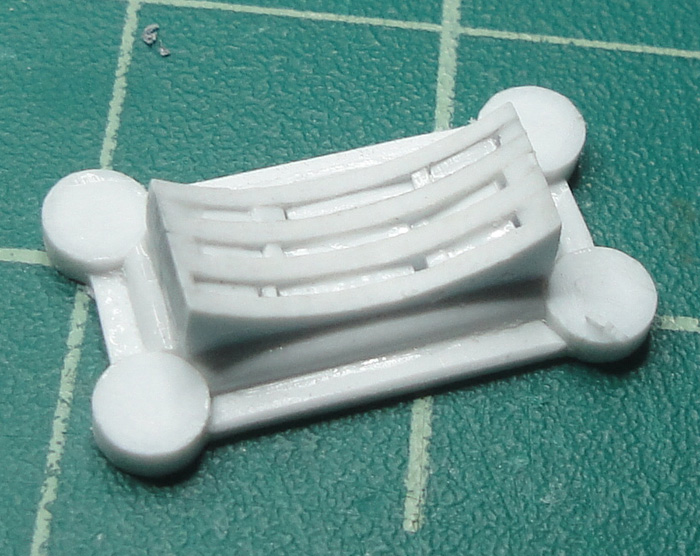
Working up the base plate for the mount and some seating pegs set into the fork crossmember.
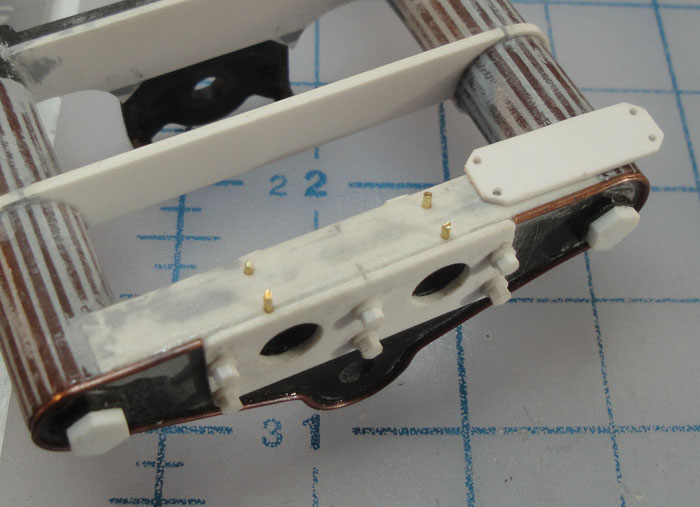
Because of the 'one way only' fitting of this style of scratch building I often use offset pegs to insure there's no chance of putting it in the wrong way.
The mount part starts to 'look the part.'
Test fit with springer forks in place. This was crucial because of the limited space available.

The two sides of the head light with scale comparison.

KatsZenJammer- Resident member
- Posts : 2600
Join date : 2016-05-20
Age : 57
Location : Vancouver, BC
Re: Steampunk Harley - Tamiya 1/6 HD FLH Classic 'extreme' kit bash (Very Photo Heavy)
![]() by KatsZenJammer Tue 31 May 2016, 5:38 pm
by KatsZenJammer Tue 31 May 2016, 5:38 pm
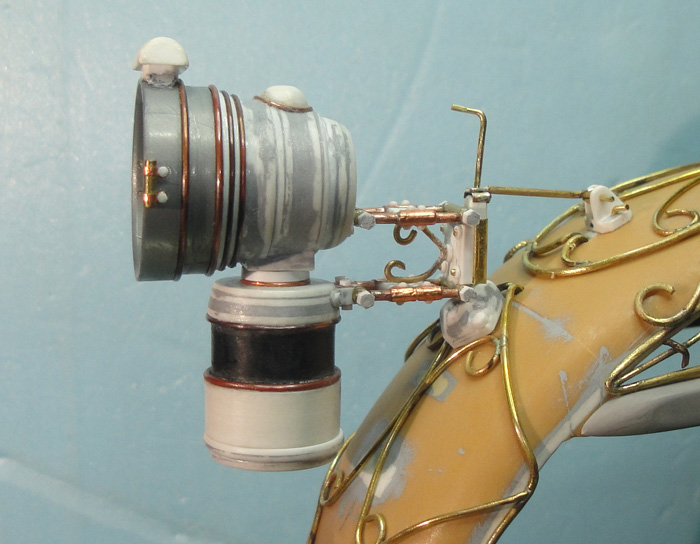
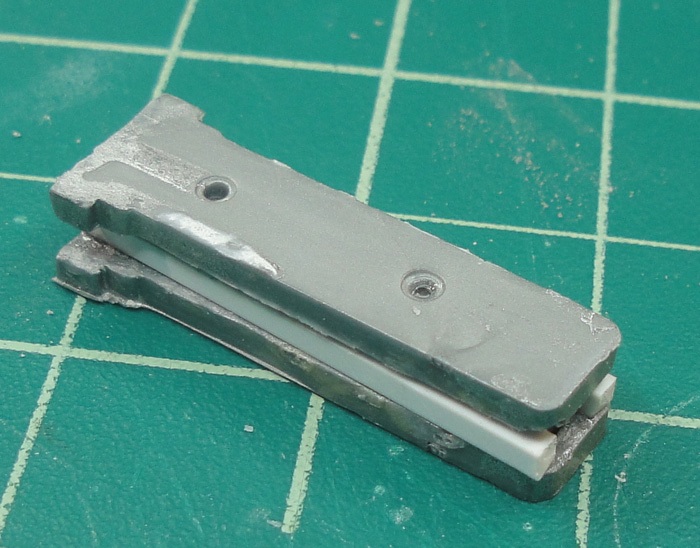
Now to form a 'spring' for the mount - this is based on designs I saw for bicycle mounted carbide lamps which actually exist even today. I 'sweated' two strips of brass sheet together then shaped them.

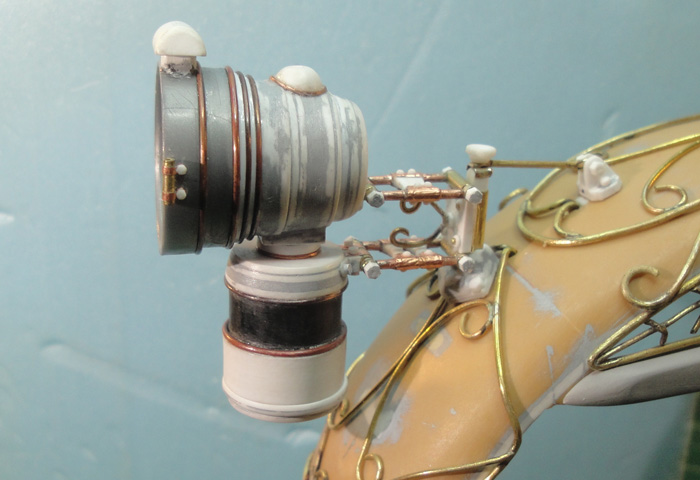
Scale photo and hand held test fit.


A hex nut makes it's appearance, with a slot added once I realized it was too tight to get a socket in there.
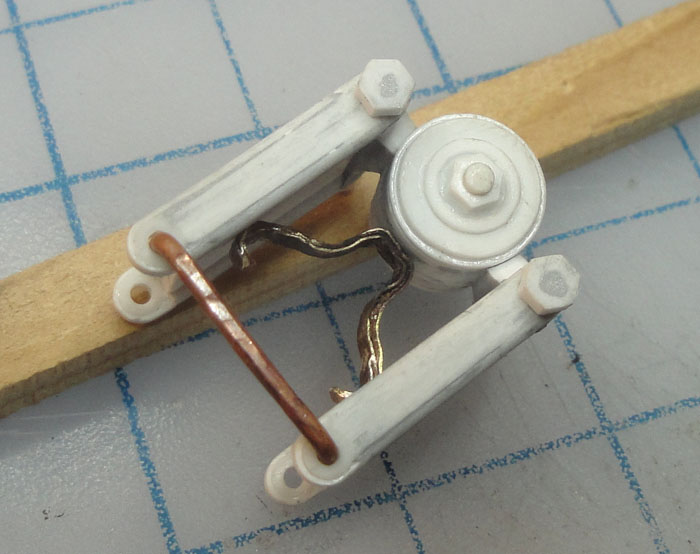
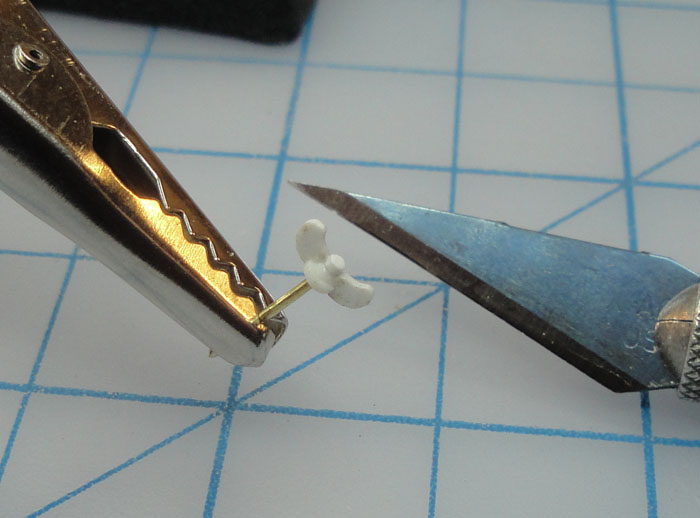
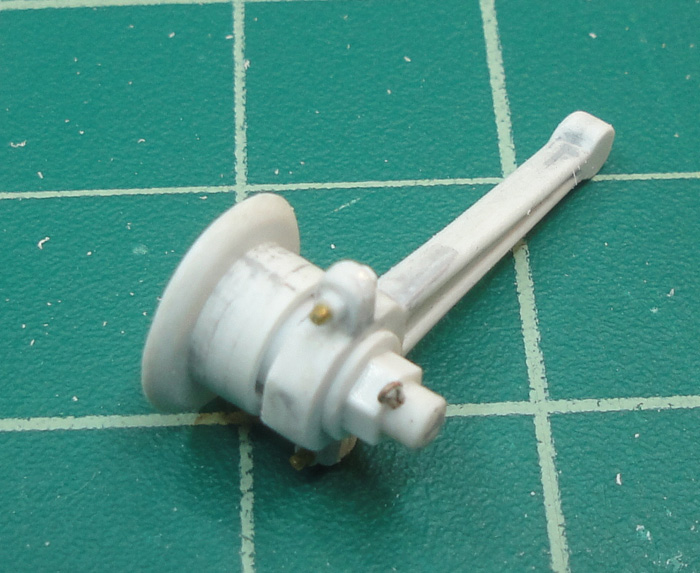
The tail light gets detailed and gets its water tap, not as fancy as the head light. After some thought I went with the wing nut idea which worked well for the gas feeds. Same basic principle of construction.

Test fit with scale comparison.

The head light needs a gas feed from the reaction chamber to the reflector dome, here's the start - a simple rectangular chunk which will act as a 'brace' since the head light body is pretty big and sits out quite a bit.

KatsZenJammer- Resident member
- Posts : 2600
Join date : 2016-05-20
Age : 57
Location : Vancouver, BC
Re: Steampunk Harley - Tamiya 1/6 HD FLH Classic 'extreme' kit bash (Very Photo Heavy)
![]() by GaryDainton Tue 31 May 2016, 5:59 pm
by GaryDainton Tue 31 May 2016, 5:59 pm
GaryDainton- Advanced Member
- Posts : 4433
Join date : 2014-03-06
Age : 57
Location : Bolton UK
Re: Steampunk Harley - Tamiya 1/6 HD FLH Classic 'extreme' kit bash (Very Photo Heavy)
![]() by KatsZenJammer Tue 31 May 2016, 6:03 pm
by KatsZenJammer Tue 31 May 2016, 6:03 pm
The front 'brace' roughed out. Also, adding tabs to the mount point and brace.

The gas feed tube shaped from copper wire. The ends are hex nuts with 'washers' added just because.


Test fit.
More hex nuts.

The head light mount gets hex nuts but I was unhappy with the way it looked ... more on that in a bit.
For the tail light mount assembly I chose a similar path as with the head light but with slight variations. Because it would be that much smaller than the head light assembly I decided to go with brass tube instead of styrene.

The first try at making 'rods' instead of plates for the mount. I will say now that this idea failed, but more on that in a bit.

The rear portion of the tail light mount. Brass affixed to plastic with 2 part epoxy.

Returning to the head light mount, I realized it looked too 'insubstantial' so I started adding depth all over.

KatsZenJammer- Resident member
- Posts : 2600
Join date : 2016-05-20
Age : 57
Location : Vancouver, BC
Re: Steampunk Harley - Tamiya 1/6 HD FLH Classic 'extreme' kit bash (Very Photo Heavy)
![]() by KatsZenJammer Tue 31 May 2016, 6:12 pm
by KatsZenJammer Tue 31 May 2016, 6:12 pm


Test fit.

Adding stabilizers to the rods. I made them different in order to not confuse top and bottom.


Adding details - copper foil tape secured with thin CA followed by rivets made from round rod instead of hex nuts (gasp!).


Test fit with scale comparison.

I forgot to take photos of the process of making the spring for the tail light mount but it's a lot simpler than the head light spring, just some wire and a small post soldered in the appropriate spot.

KatsZenJammer- Resident member
- Posts : 2600
Join date : 2016-05-20
Age : 57
Location : Vancouver, BC
Re: Steampunk Harley - Tamiya 1/6 HD FLH Classic 'extreme' kit bash (Very Photo Heavy)
![]() by KatsZenJammer Tue 31 May 2016, 6:27 pm
by KatsZenJammer Tue 31 May 2016, 6:27 pm
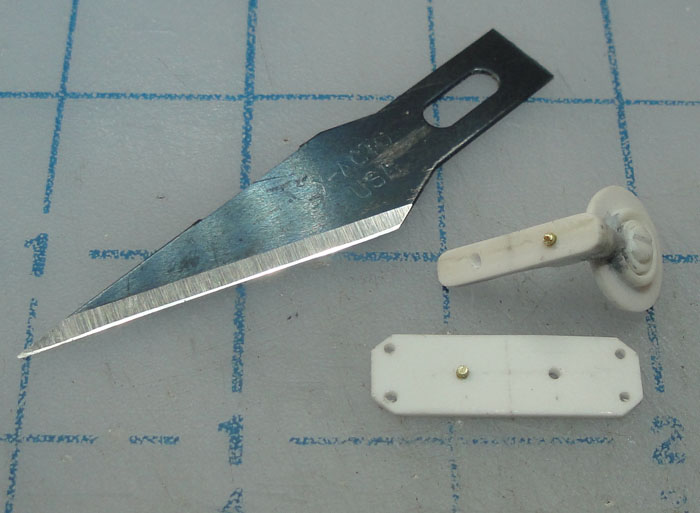
Fender mount post and plate affixed together, brass sheet shaped into a sleeve for the rear of the tail light mount assembly and a bit of round rod which I think didn't get used.
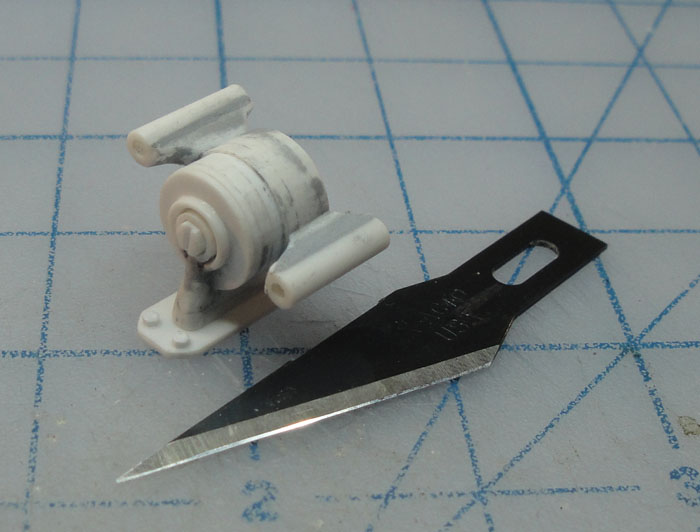
The sleeve in place.
Sleeve detail added and the bits ready for further development.


Test fit and things are looking as I hoped they would.

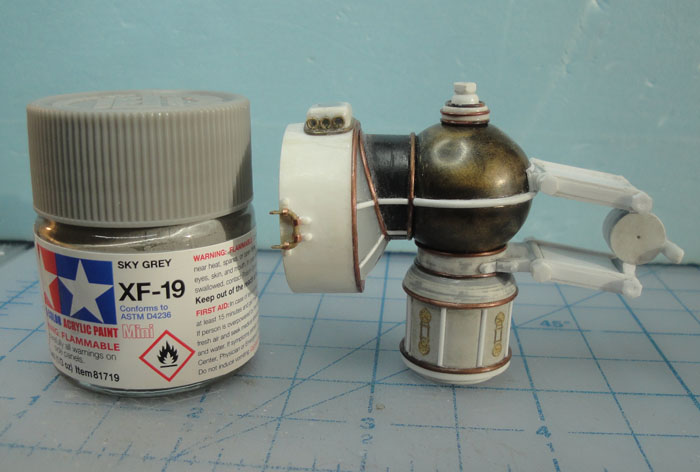
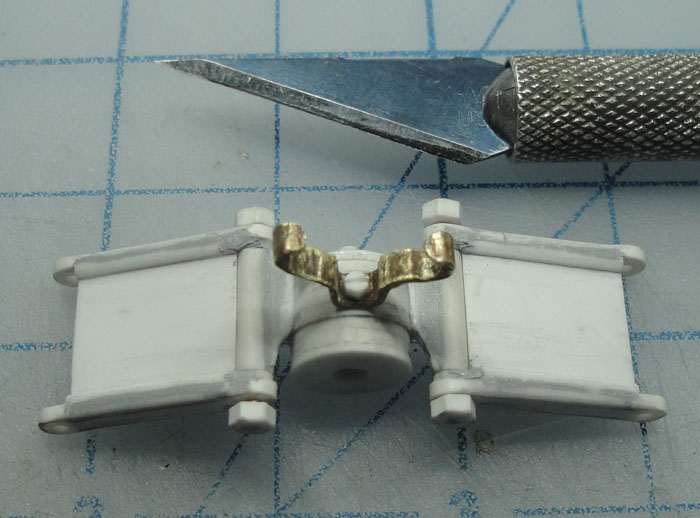
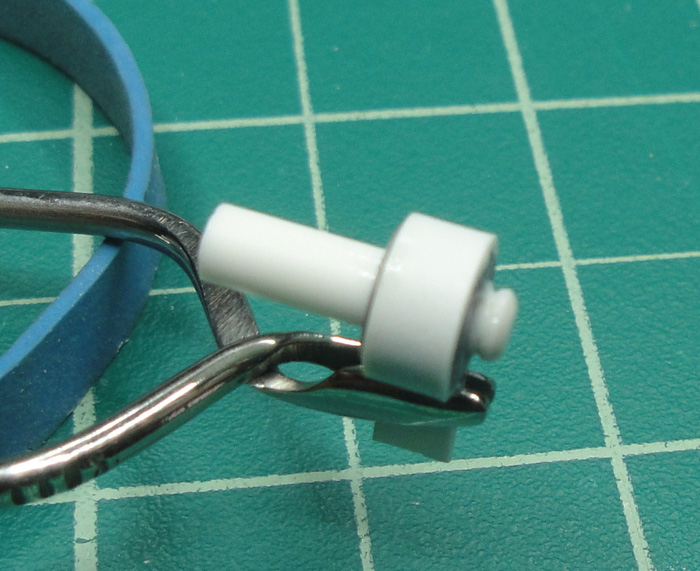
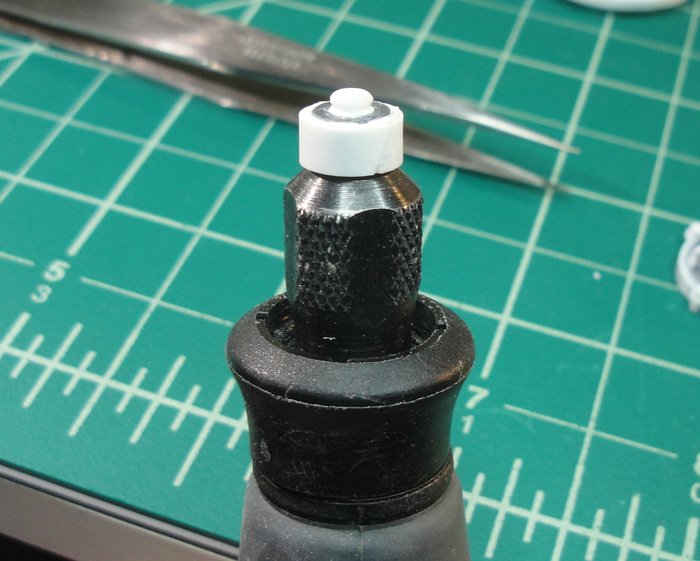
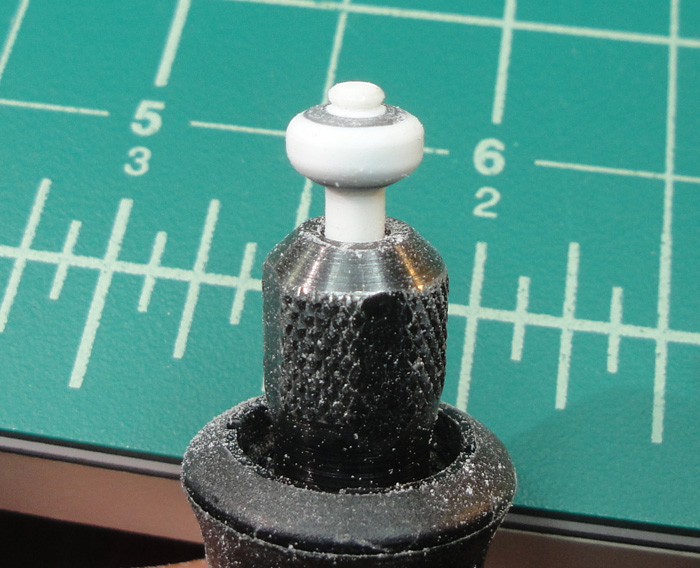
In order to keep the tail light secure I decided to go a bit elaborate. Instead of a simple 'cap' I wanted something more Steampunk so here's what I came up with.
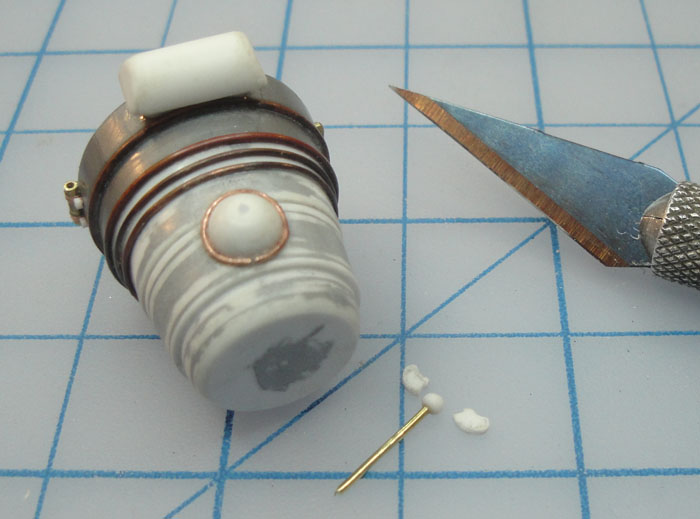
The little knob at the top is styrene rod that I 'milled' with the Dremel. I use a flex-arm attachment for the Dremel so I stuck some styrene rod into the chuck, set it at the lowest possible speed (5 000 rpm) and carefully shaped it with an X-Acto blade tip.
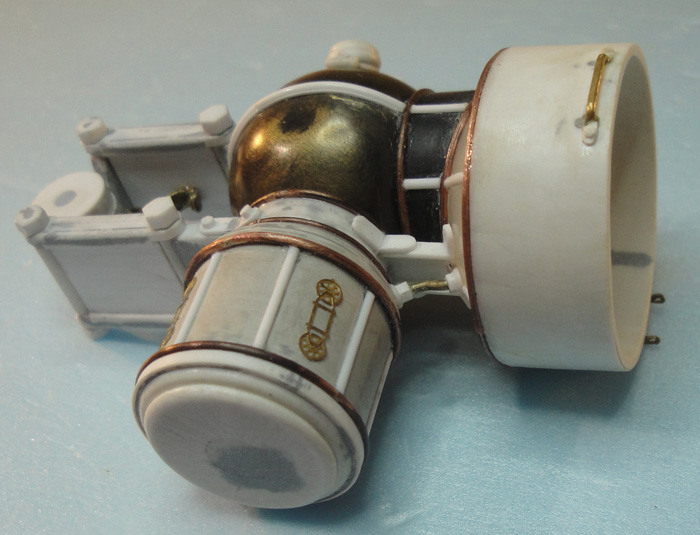
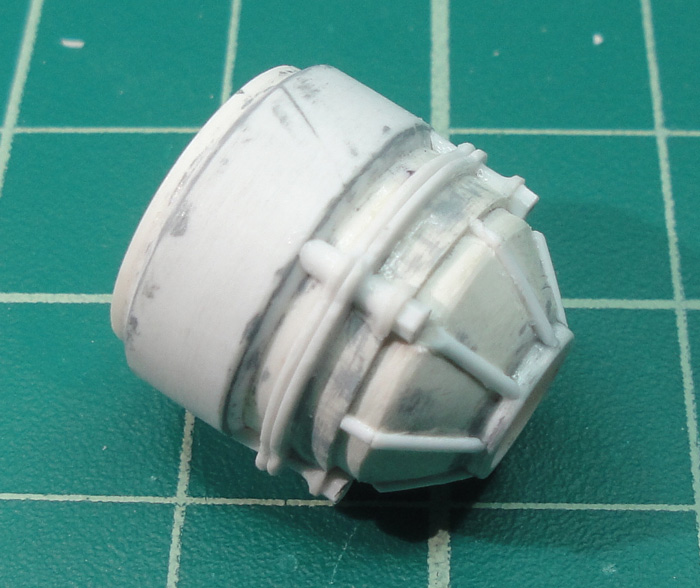
At this point I declared the tail light complete. Here's a couple of photos where you can see the added PE details around the base of the reaction chamber.

KatsZenJammer- Resident member
- Posts : 2600
Join date : 2016-05-20
Age : 57
Location : Vancouver, BC
Re: Steampunk Harley - Tamiya 1/6 HD FLH Classic 'extreme' kit bash (Very Photo Heavy)
![]() by KatsZenJammer Tue 31 May 2016, 6:46 pm
by KatsZenJammer Tue 31 May 2016, 6:46 pm
If I remember correctly my caption of this photo was, "From such crap I will build a Steam Engine! *maniacal laughter*" In the end a lot of this stuff didn't wind up being utilized, what else is new, lol.
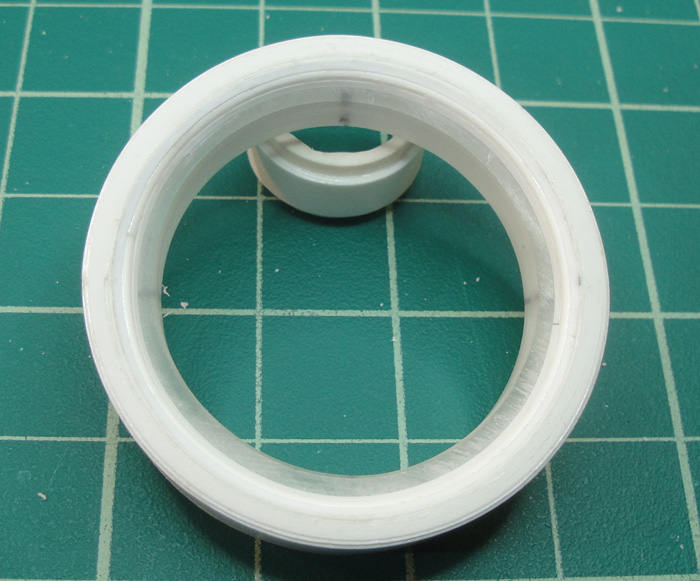
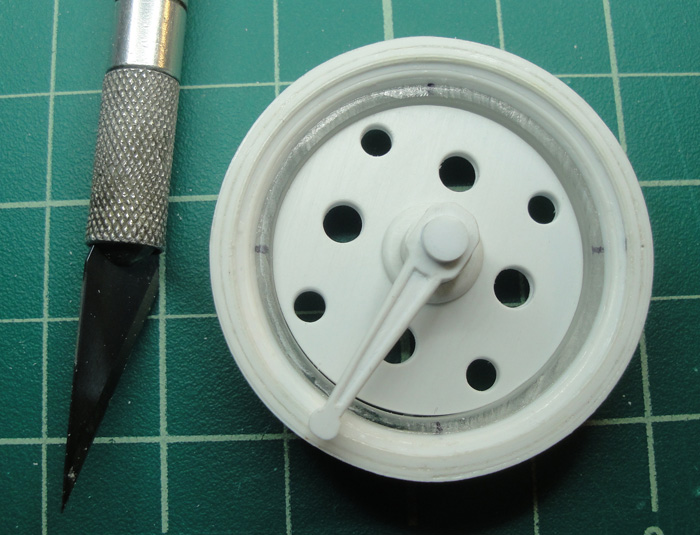
The ring with the quadrant marks was cut from Plexiglass tube and will be the flywheel. The discs are styrene sheet and will become the centre of the flywheel.
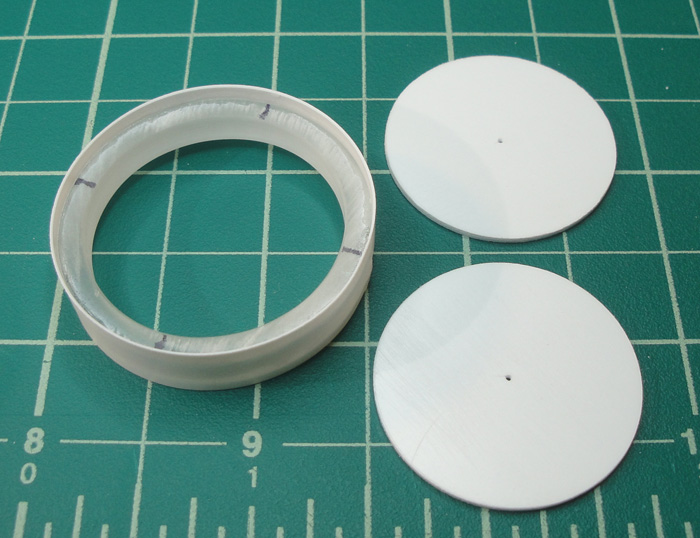
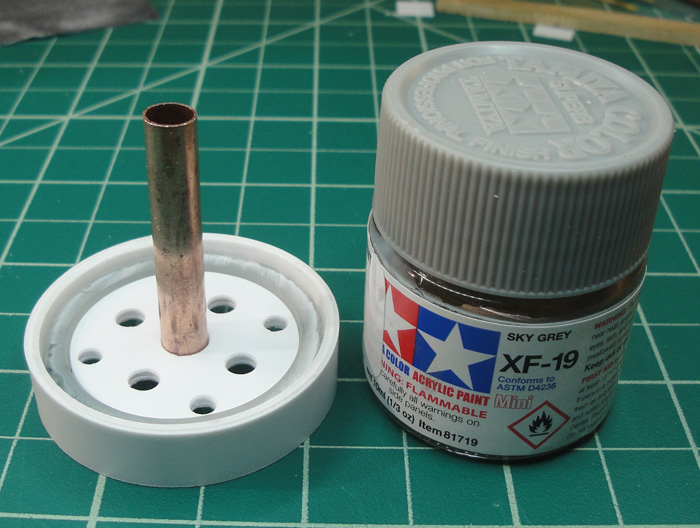
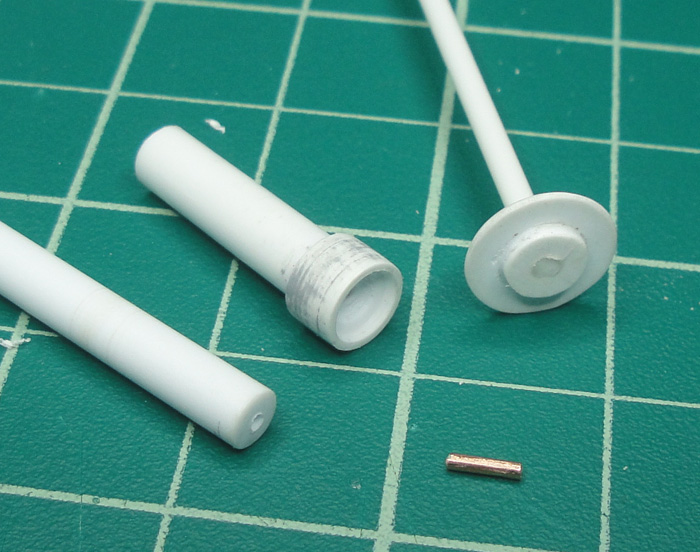
One of the discs with the hole pattern cut into it, the flywheel gets more added circumference and the crankshaft slides into view. This piece of copper tube wasn't going to be the actual crankshaft but a sizing reference.


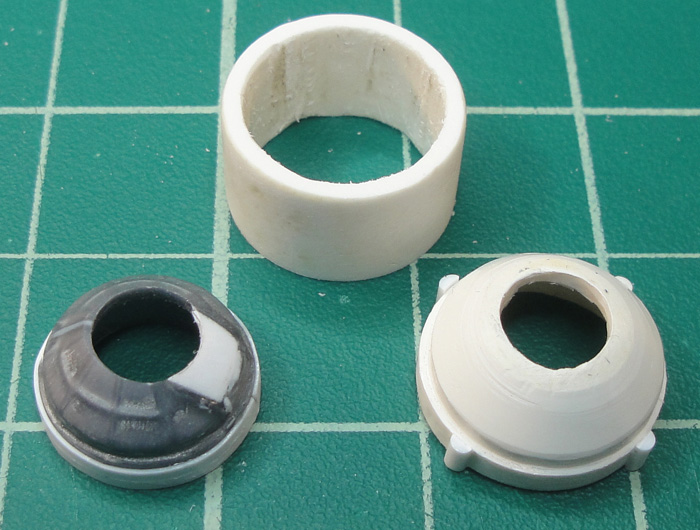
Time to start adding details. The bras ring will wind up being used somewhere as a spacer. The styrene discs are for the cap.

For the crankcase I dug out bits from a parts box, specifically a wrecked Bugatti model I found somewhere.
Inspiration comes in many forms. In this case, a Lego keychain R2 D2 which I took apart and modified.

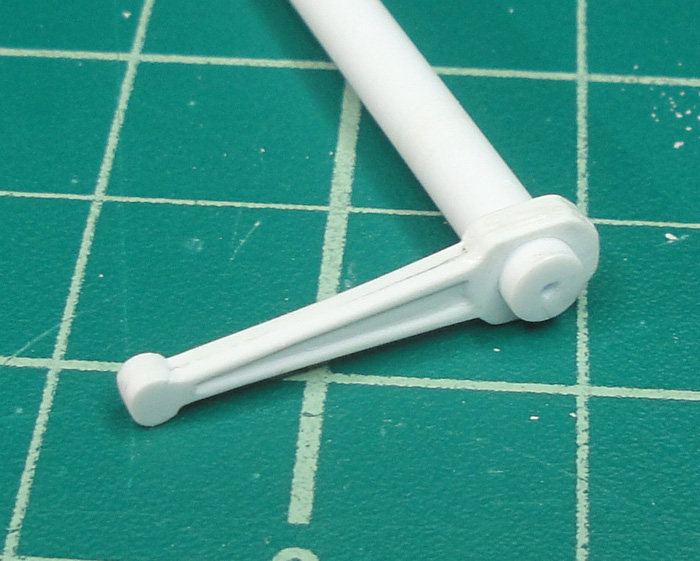
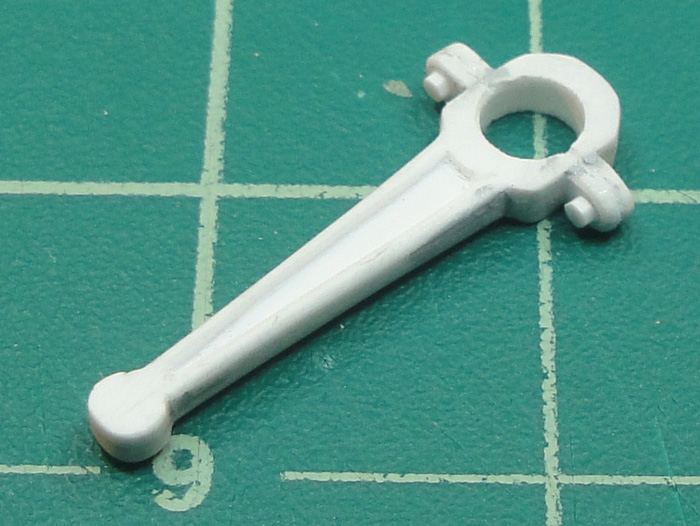
The flywheel will need a manual crank arm, why I'm not sure but aesthetically it should look cool, I hope. Here's the start of making the mount point for it.
Shaping, cutting, coring and so forth. The body of R2 D2 winds up becoming the body of the crankcase.

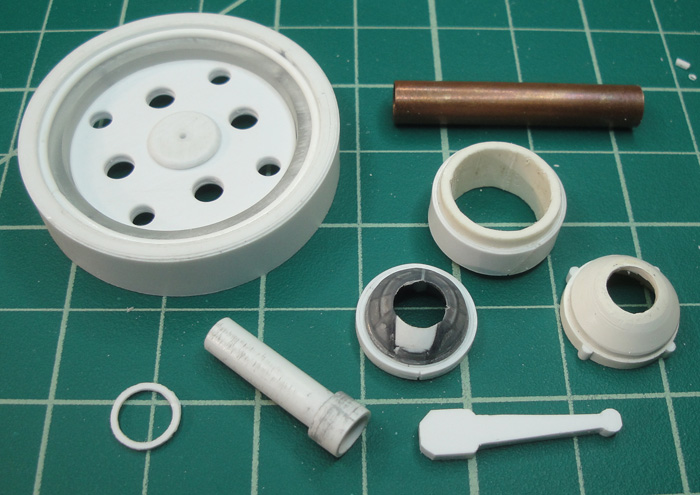
All the parts featured and the first appearance of the manual crank arm.
KatsZenJammer- Resident member
- Posts : 2600
Join date : 2016-05-20
Age : 57
Location : Vancouver, BC
Re: Steampunk Harley - Tamiya 1/6 HD FLH Classic 'extreme' kit bash (Very Photo Heavy)
![]() by KatsZenJammer Tue 31 May 2016, 6:59 pm
by KatsZenJammer Tue 31 May 2016, 6:59 pm
The ends of the crankcase develop and the crank arm as well.

Test fit.

Setting up the crank arm mount - I wanted to achieve an old fashioned look and the 'easiest' way to that was to just make it in pieces rather than trying to shape solid bits to look like they were assembled from separate bits.


Crankcase ends developing.
Crank arm detailing. Adding tabs, scribing the seams and adding hex nuts and brass wire bits for bolts.
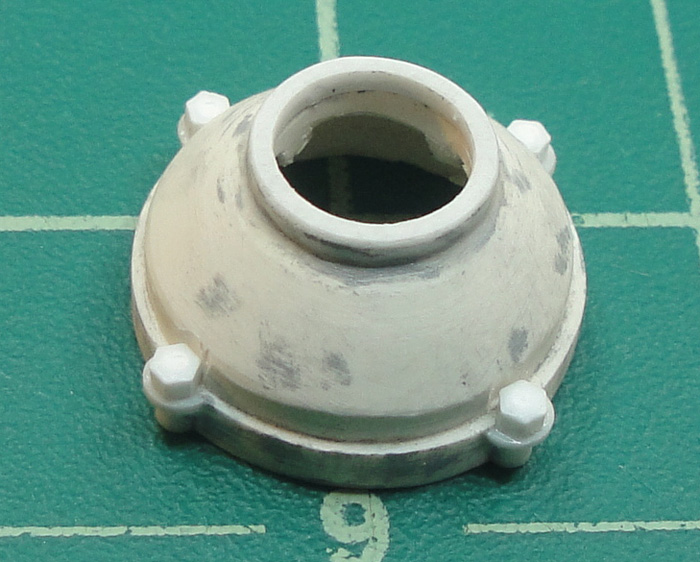
The mount 'gasket flange' for 'drive side' crankcase end.

Here's where I had a major change of thought. The original concept was for the flywheel to sit perpendicular at the front of the frame. Then it occurred to me that switching it up 90 degrees would make things simpler from an engineering standpoint. I posted these photos and asked for advice and everyone thought that the 'in-line' approach looked better so that's the way I'm going.

KatsZenJammer- Resident member
- Posts : 2600
Join date : 2016-05-20
Age : 57
Location : Vancouver, BC
Re: Steampunk Harley - Tamiya 1/6 HD FLH Classic 'extreme' kit bash (Very Photo Heavy)
![]() by KatsZenJammer Tue 31 May 2016, 8:30 pm
by KatsZenJammer Tue 31 May 2016, 8:30 pm
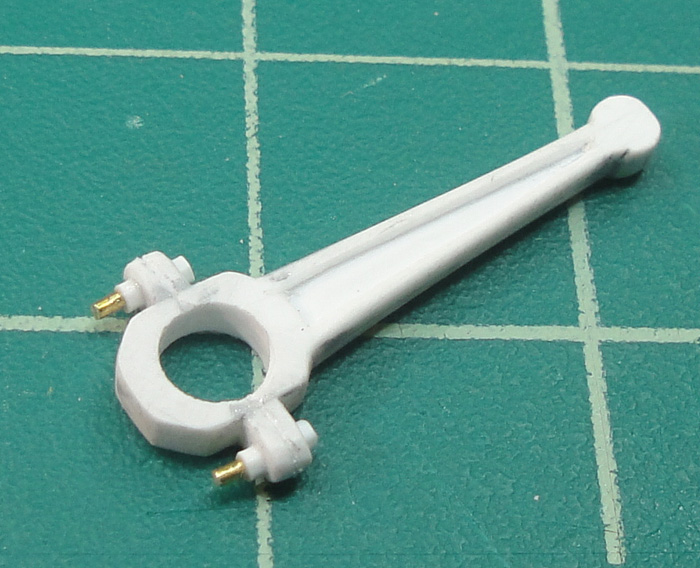
Developing the crank arm mount details. The teeny little cotter pin was a last second inspiration based on real world stuff.


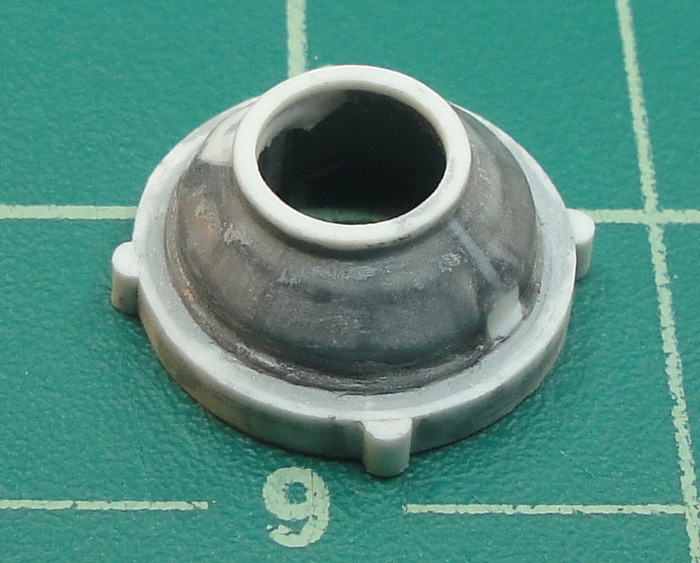
The gasket flanges developing, I chose to cut two of them in order to mimic the look of real world machinery.

The flywheel side cover is a few steps behind the drive side. Here its just had hex nuts added.
Adding 'ribs' to the covers.

Test fit.
KatsZenJammer- Resident member
- Posts : 2600
Join date : 2016-05-20
Age : 57
Location : Vancouver, BC
Re: Steampunk Harley - Tamiya 1/6 HD FLH Classic 'extreme' kit bash (Very Photo Heavy)
![]() by KatsZenJammer Tue 31 May 2016, 8:52 pm
by KatsZenJammer Tue 31 May 2016, 8:52 pm
Modify rig for bevelling the circumference equally.
Added bits of half-round styrene in line with the hex nuts.
The crank arm mount was also too thick with the new arrangement so I cut down the thickest post by a bit.
The crank arm needs a handle but instead of a straight rod style I decided to go with a 'door knob' look to keep the side on profile minimized. First I pre-milled the end of a rod using the Dremel method previously described, then added layers.
A look at the milling set up. I use a flex arm attachment for my Dremel because it's easier to fine control.
The shape is roughed out. I have done similar work by hand in the past, it just takes a lot longer and it's more difficult to make it symmetrical. Using the Dremel took less than fifteen minutes.
Cut from the post, shaped and cleaned up.

After holes are drilled a test fit.

The crankcase gasket flanges are developing.

Both sides worked up and a test fit.

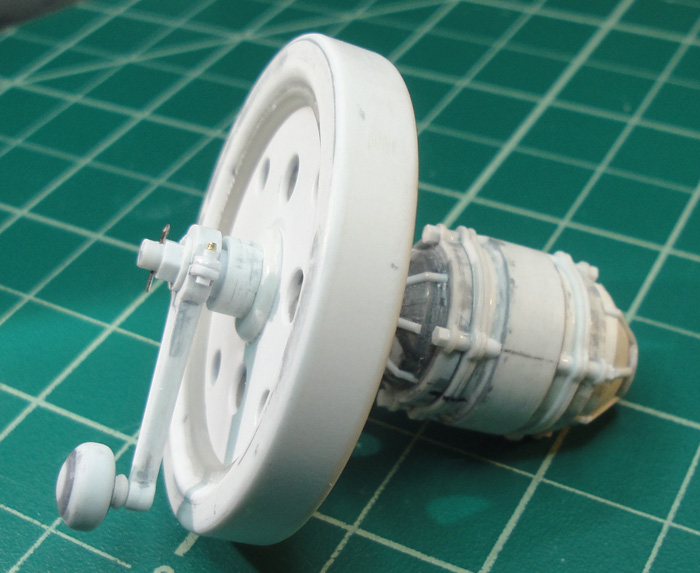
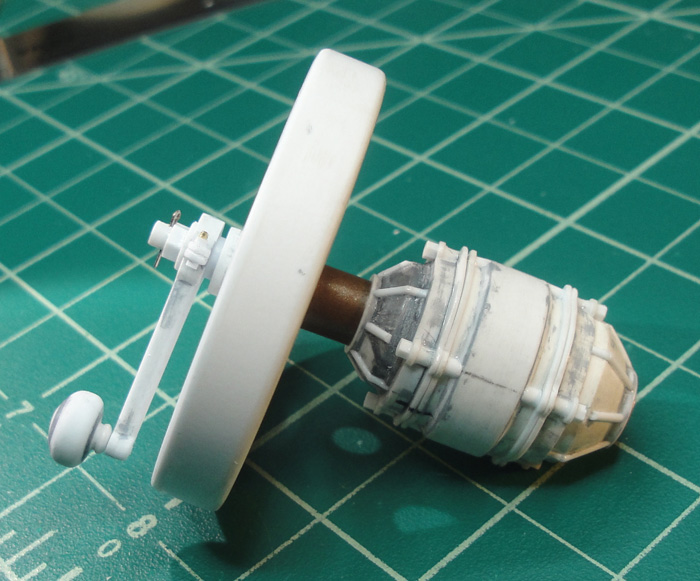
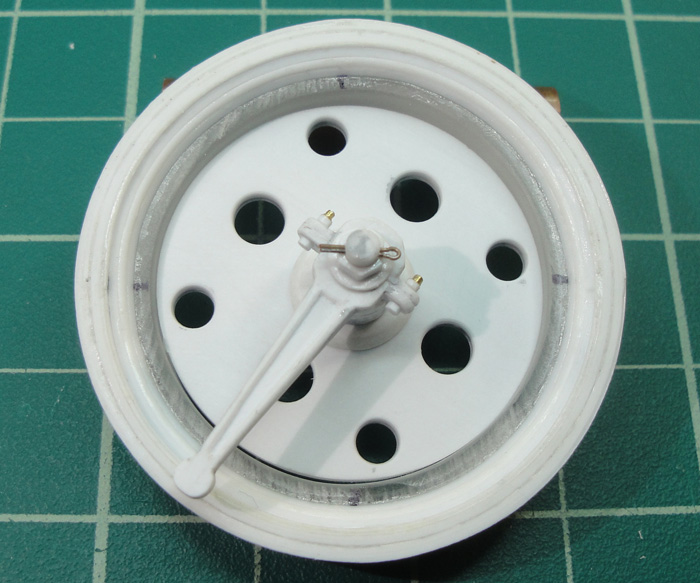
And one of the expected results of a test fit, more modding, lol. Here I'm adding layers to the crankcase body. Also, here's a view of the back of the flywheel.

KatsZenJammer- Resident member
- Posts : 2600
Join date : 2016-05-20
Age : 57
Location : Vancouver, BC
Re: Steampunk Harley - Tamiya 1/6 HD FLH Classic 'extreme' kit bash (Very Photo Heavy)
![]() by kpnuts Tue 31 May 2016, 9:46 pm
by kpnuts Tue 31 May 2016, 9:46 pm
kpnuts- Resident member
- Posts : 1676
Join date : 2015-01-29
Re: Steampunk Harley - Tamiya 1/6 HD FLH Classic 'extreme' kit bash (Very Photo Heavy)
![]() by KatsZenJammer Tue 31 May 2016, 11:12 pm
by KatsZenJammer Tue 31 May 2016, 11:12 pm
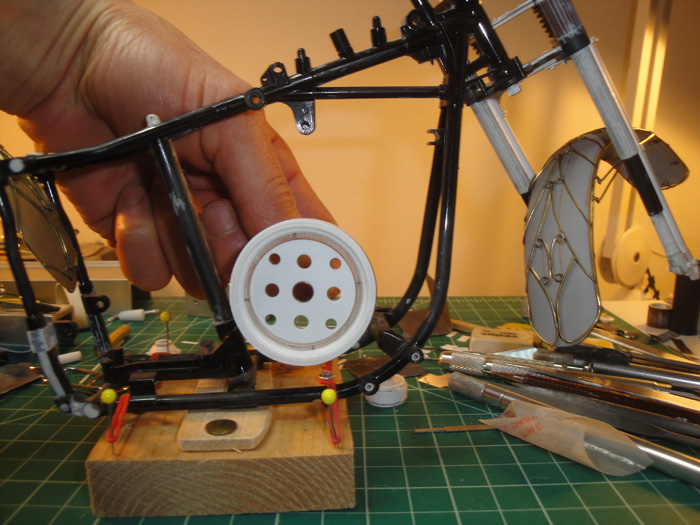
Time to start figuring out how things will fit in the frame and that means I need to know how much room I have to work with. I re-assembled the kit engine and drivetrain parts in oder to get an idea of the original situation.
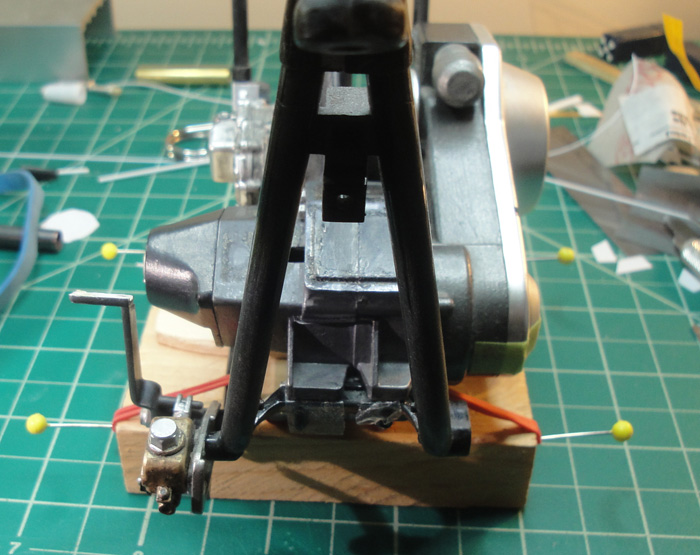
The slightly refined frame rig with little green markers for the width of the original parts.

Thickening the body of the crankcase some more. These bits were compass scribed from sheet and cut into quadrants followed by fitting.


The start of the connecting rod housing. Early in this build I had envisioned having the moving parts in view but after looking at a plethora of steam engines I realized that the majority hid their workings behind housings. This made my life a lot easier, lol.
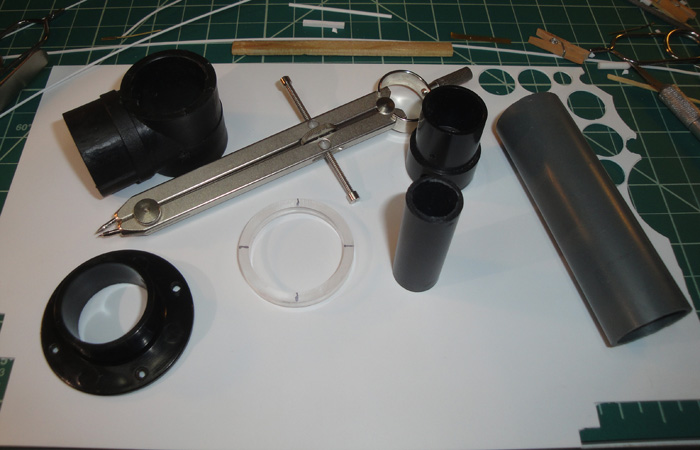
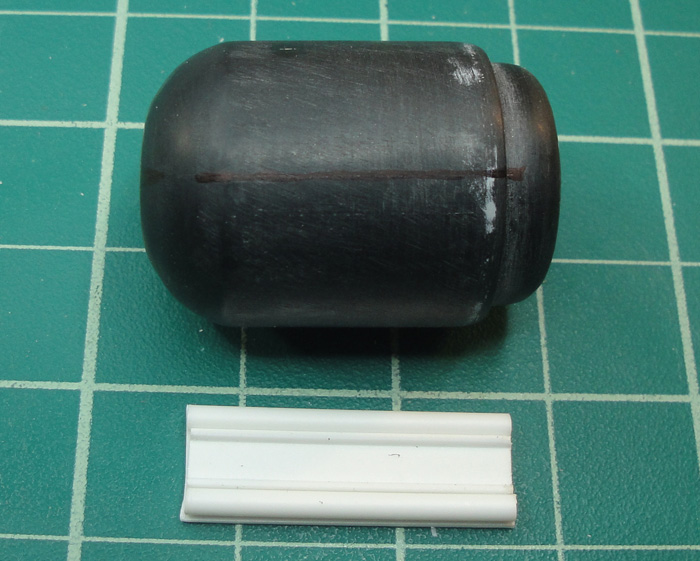
Two different diameter smokestacks from a wrecked toy steam engine. I thought it would be fitting to use these for the main cylinder for my steam engine. Remove the gold chrome, cut and cut some more.

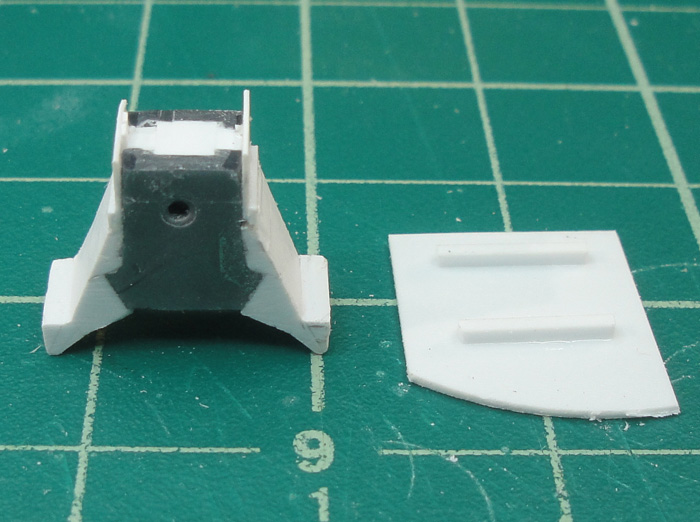
The cylinder in rough form and the connecting rod housing gets some wings, so to speak.

The wings get filled a bit and the housing takes on the triangular shape I was after.

Cleaned up a bit and more structure added. Also, the beginnings of the top plate which will mount to the cylinder.
The mount plate takes form.

Rather than leave it square I clipped the corners because, well, it looks cooler that way, lol.

KatsZenJammer- Resident member
- Posts : 2600
Join date : 2016-05-20
Age : 57
Location : Vancouver, BC
Re: Steampunk Harley - Tamiya 1/6 HD FLH Classic 'extreme' kit bash (Very Photo Heavy)
![]() by KatsZenJammer Tue 31 May 2016, 11:21 pm
by KatsZenJammer Tue 31 May 2016, 11:21 pm

The connecting rod housing now has a defined outline and the crankcase frame mount rough piece seems to work.

Detailing the cylinder mount plate.


The frame mount gets some development.


Test fit.

Mounting pegs for the connecting rod housing - offset so it can only fit the one way.
We're almost to the now, the anticipation of finally getting caught up is growing, lol.
KatsZenJammer- Resident member
- Posts : 2600
Join date : 2016-05-20
Age : 57
Location : Vancouver, BC
Re: Steampunk Harley - Tamiya 1/6 HD FLH Classic 'extreme' kit bash (Very Photo Heavy)
![]() by KatsZenJammer Tue 31 May 2016, 11:32 pm
by KatsZenJammer Tue 31 May 2016, 11:32 pm

Adding the mounts for the eccentric sleeve. To keep things aligned I used brass callipers.

The base for the eccentric rod attached using the calliper for proper squaring.
The start of the housing for the valves on the cylinder.
Frame modding begins anew. The white rod is set in in a better position than the moulded bracket.
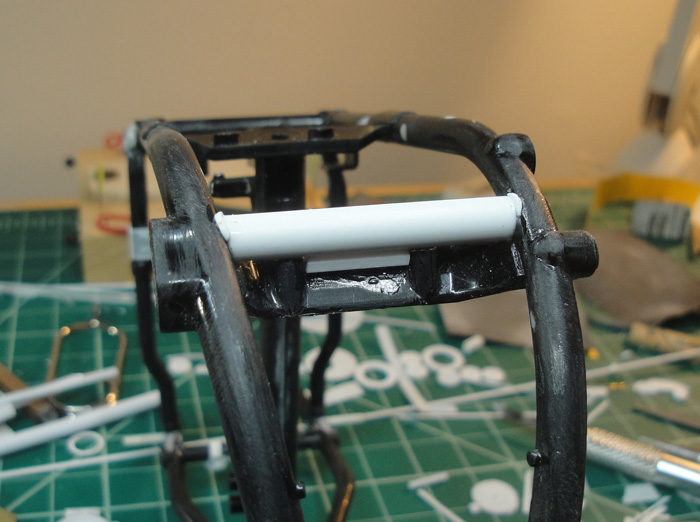
Cut away the parts of the bracket that aren't needed.


KatsZenJammer- Resident member
- Posts : 2600
Join date : 2016-05-20
Age : 57
Location : Vancouver, BC
Re: Steampunk Harley - Tamiya 1/6 HD FLH Classic 'extreme' kit bash (Very Photo Heavy)
![]() by Sponsored content
by Sponsored content
Sponsored content
Page 4 of 25 • 1, 2, 3, 4, 5 ... 14 ... 25 ![]()
» Tamiya 1/6 Harley Davidson Fat Boy Lo
» Tamiya 1/6 Harley Davidson FLH1200
» Steampunk Ducati
» '57 Salvage bash-up