Steampunk Harley - Tamiya 1/6 HD FLH Classic 'extreme' kit bash (Very Photo Heavy)
+17
Geezerman
GaryDainton
Mence
RetiredMike
Nipponrookie
Mr Hirakawa
Ace
kpnuts
hotrodmax
Skid
dublin boy
harron68
disabled modeler
Speed Racer 65
KatsZenJammer
Shelby
A5h
21 posters
Page 3 of 25
Page 3 of 25 •  1, 2, 3, 4 ... 14 ... 25
 Re: Steampunk Harley - Tamiya 1/6 HD FLH Classic 'extreme' kit bash (Very Photo Heavy)
The rear portion of the rear fender gets worked on now. Matching the curve of the sides of the fender was challenging but after that it kind of just fell into place.


Setting the top attachment point to the hole in the fender.


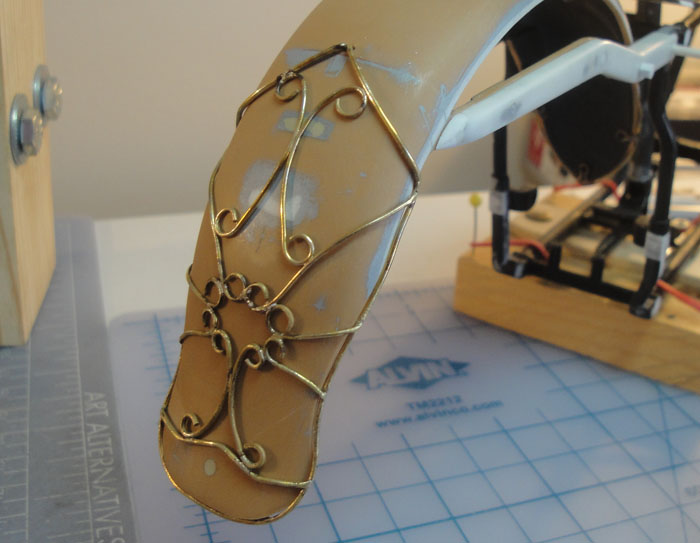
And finally the middle portion starts developing.

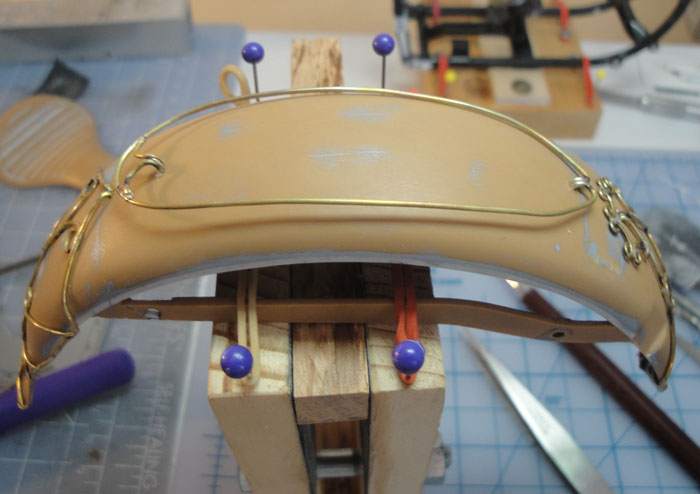


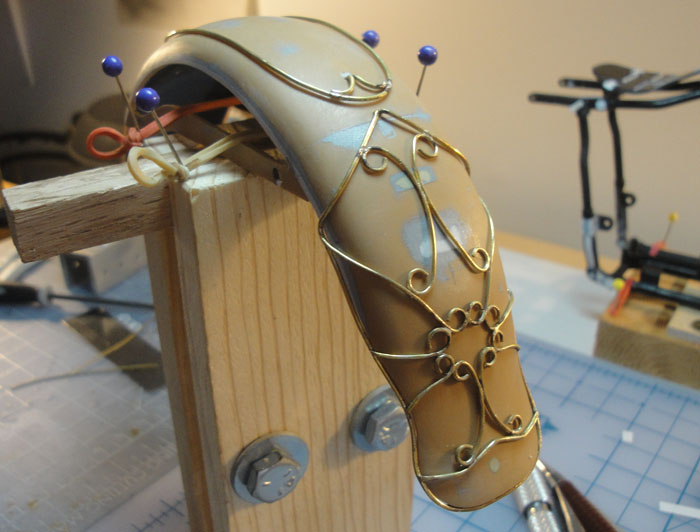
Hopefully I'll be able to post more soon but right now we're getting a freak thunder, hail and lightning storm so I'm gonna shut down, just in case. Then I'm going to go watch it from my patio, lol.


Setting the top attachment point to the hole in the fender.


And finally the middle portion starts developing.


Hopefully I'll be able to post more soon but right now we're getting a freak thunder, hail and lightning storm so I'm gonna shut down, just in case. Then I'm going to go watch it from my patio, lol.

KatsZenJammer- Resident member

- Posts : 2600
Join date : 2016-05-20
Age : 57
Location : Vancouver, BC
 Re: Steampunk Harley - Tamiya 1/6 HD FLH Classic 'extreme' kit bash (Very Photo Heavy)
Ill have a look at the faux paint effects when i next do a heres with molded sale, reins etc. Thanks for that info Curt and Kats.
Superb metalwork Kats it really makes everything 'pop' and creates a superb steampunk effect.
Superb metalwork Kats it really makes everything 'pop' and creates a superb steampunk effect.
GaryDainton- Advanced Member

- Posts : 4433
Join date : 2014-03-06
Age : 57
Location : Bolton UK
 Re: Steampunk Harley - Tamiya 1/6 HD FLH Classic 'extreme' kit bash (Very Photo Heavy)
Brilliant, loving following along on this one.
Guest- Guest
 Re: Steampunk Harley - Tamiya 1/6 HD FLH Classic 'extreme' kit bash (Very Photo Heavy)
Gaz, Curt & Zbuckster - Many thanks for the kind words and encouragement 
Sneaking in a quick post. By now it's obvious that I won't be making the '2nd Birthday' deadline for reposting but I'll still take photos of the Big Test Fit for later display. This one deals with the saddle, starting with the base for the springs. I had considered omitting the saddle springs as there were front and rear shocks but Victorian era roads, and shock technology, were not as smooth as modern standards so I went with them.

First try on the springs, which I didn't like, so ...

Another try and I like the look. The saddle spring bases start as simple rings.


Setting the location of the spring bases on the saddle underside.

Adding clamp bands to the frame portion of the spring bases.

Though the underside won't be easily visible you'll still be able to see parts of it from a lower vantage point so I decided to add detail in the form of 'reinforcement ridges.'


Further detailing on the clamp bands.
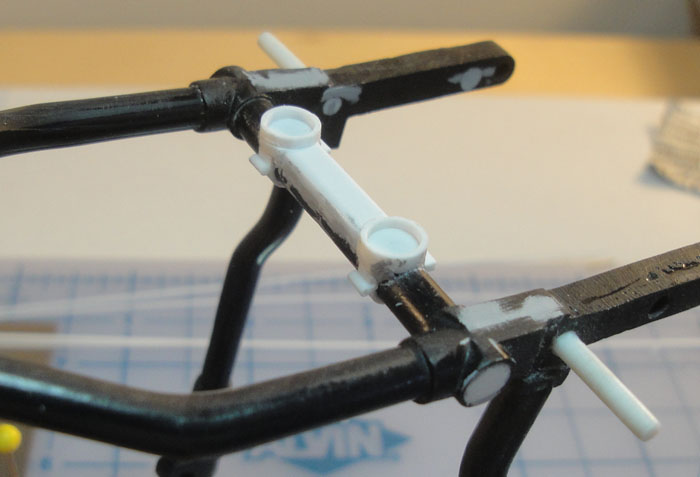

The first stage of the underside detailing is wrapped up.

Test fit with the entire saddle.

Just keep swimming ...

Sneaking in a quick post. By now it's obvious that I won't be making the '2nd Birthday' deadline for reposting but I'll still take photos of the Big Test Fit for later display. This one deals with the saddle, starting with the base for the springs. I had considered omitting the saddle springs as there were front and rear shocks but Victorian era roads, and shock technology, were not as smooth as modern standards so I went with them.

First try on the springs, which I didn't like, so ...

Another try and I like the look. The saddle spring bases start as simple rings.


Setting the location of the spring bases on the saddle underside.

Adding clamp bands to the frame portion of the spring bases.

Though the underside won't be easily visible you'll still be able to see parts of it from a lower vantage point so I decided to add detail in the form of 'reinforcement ridges.'


Further detailing on the clamp bands.


The first stage of the underside detailing is wrapped up.

Test fit with the entire saddle.

Just keep swimming ...

KatsZenJammer- Resident member

- Posts : 2600
Join date : 2016-05-20
Age : 57
Location : Vancouver, BC
 Re: Steampunk Harley - Tamiya 1/6 HD FLH Classic 'extreme' kit bash (Very Photo Heavy)
I've caught up on the WIP and I must say you are doing some fantastic work on this Kats. The time you're devoting to the detailing is really making this pretty outstanding. Keep up the good work!

Shelby- Intermediate Member

- Posts : 947
Join date : 2013-03-02
Location : Alberta, Canada
 Re: Steampunk Harley - Tamiya 1/6 HD FLH Classic 'extreme' kit bash (Very Photo Heavy)
Brilliant work Kats, I think the spring choice makes a huge difference to the effect.

GaryDainton- Advanced Member

- Posts : 4433
Join date : 2014-03-06
Age : 57
Location : Bolton UK
 Re: Steampunk Harley - Tamiya 1/6 HD FLH Classic 'extreme' kit bash (Very Photo Heavy)
Denis & Gaz - Thanks for the very kind words and encouragement! 
This posting deals with the middle piece for the rear fender. Having made the basic shape I started by filling it in with some scrollwork.

Next I made side 'panels' for the space between the fender and frame.

Then came the process of creating a filler for the sides. After some thought I decided to go for a simple design of chevrons - here's the process of doing it.
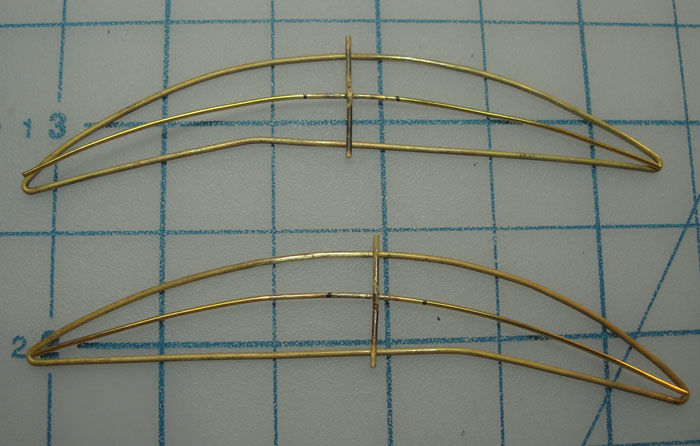
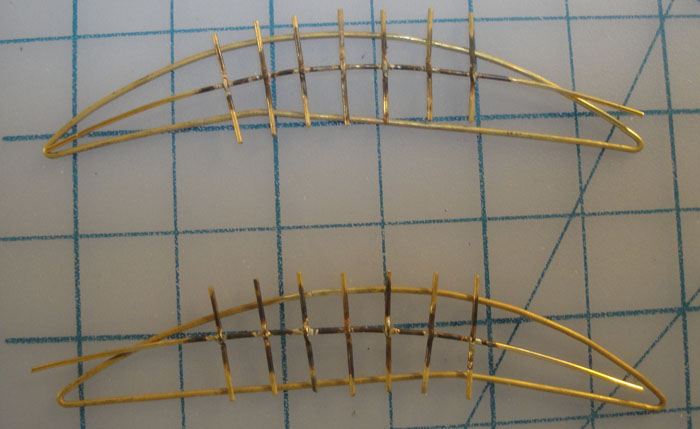

Then comes the bending of the straight wires to form the chevrons.

Followed by clipping the chevrons to size.

And setting it in - I only soldered the ends and left the chevrons free floating. At this point I started calling these bits Anchovies for obvious reasons.

Test fit - view of both sides.


Now the 'connectors' to unify the fender piece with the anchovies.

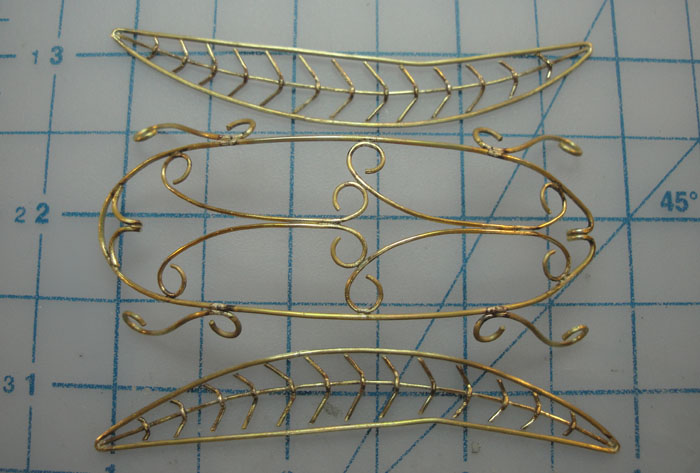
And here's the piece, looks like a beetle surfing on dual anchovies, lol.

Three test fit views, front and rear oblique and a side on.


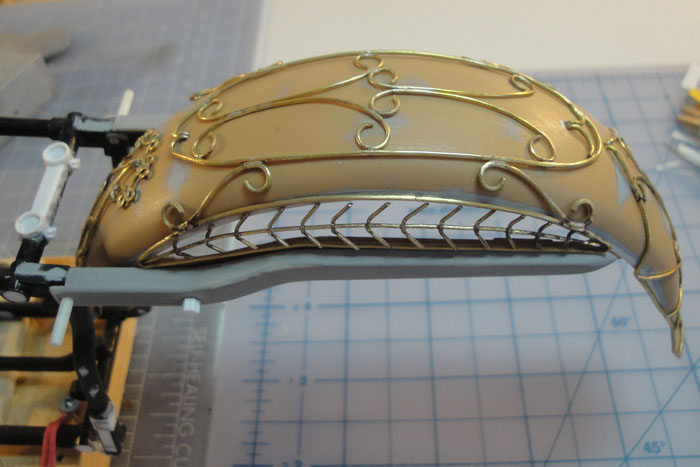
It's a blah day in the neighbourhood, weather wise, so I'm going to try and fight anomie with posting … and posting, lol.

This posting deals with the middle piece for the rear fender. Having made the basic shape I started by filling it in with some scrollwork.

Next I made side 'panels' for the space between the fender and frame.

Then came the process of creating a filler for the sides. After some thought I decided to go for a simple design of chevrons - here's the process of doing it.


Then comes the bending of the straight wires to form the chevrons.

Followed by clipping the chevrons to size.

And setting it in - I only soldered the ends and left the chevrons free floating. At this point I started calling these bits Anchovies for obvious reasons.

Test fit - view of both sides.


Now the 'connectors' to unify the fender piece with the anchovies.


And here's the piece, looks like a beetle surfing on dual anchovies, lol.

Three test fit views, front and rear oblique and a side on.


It's a blah day in the neighbourhood, weather wise, so I'm going to try and fight anomie with posting … and posting, lol.

KatsZenJammer- Resident member

- Posts : 2600
Join date : 2016-05-20
Age : 57
Location : Vancouver, BC
 Re: Steampunk Harley - Tamiya 1/6 HD FLH Classic 'extreme' kit bash (Very Photo Heavy)
Back to the saddle (pardon the pun) wherein I have begun adding detail in the form of clips along the 'bead' which runs along the perimeter.


And what would clips be without Hex Nuts!!!

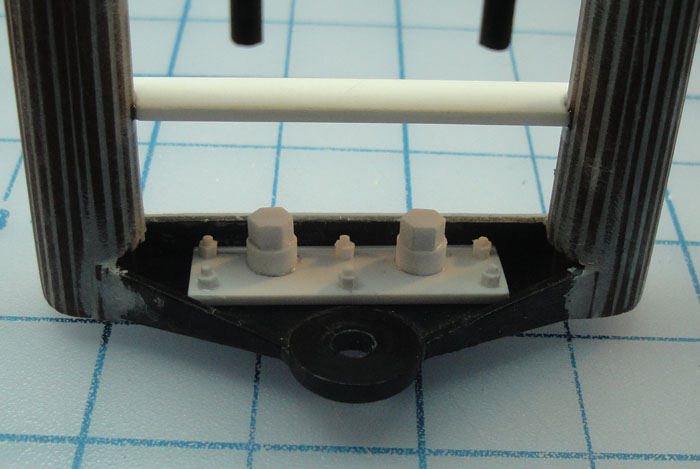
About this time I decided that it was time to make post for the fork attachment to the frame, the Q-Tip was getting old and mushy, lol. Here's an example where I used the brass callipers to make hex nuts of a larger diameter than I had on hand.
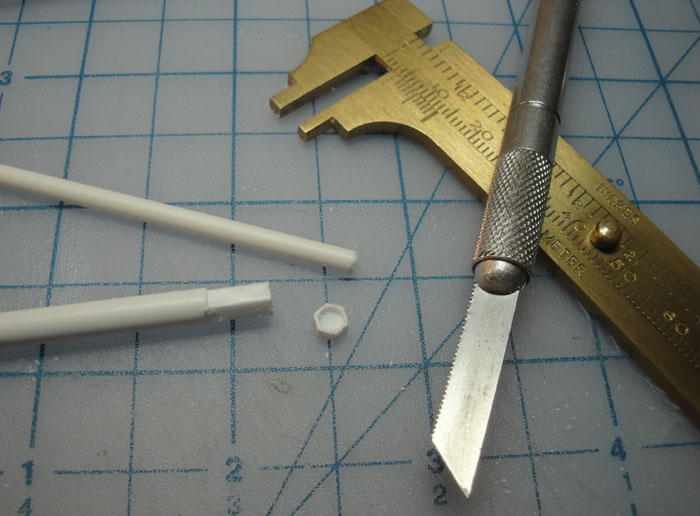

Posts ready. I chose to make two for top and bottom and not one long one with an end cap.

Adding brackets for the inner joins on the saddle underside for the sheer purpose of giving me a place to put more hex nuts.


Here is the development of the underside of the handlebars. This is one of those buried detail things, only slightly visible when all is said and done but that slight visibility will add to the overall effect … I hope.

Getting a bit stupid, or a proof of concept test. I drilled out hex nuts in order to pass thin rod through to mimic the nut and bolt look.


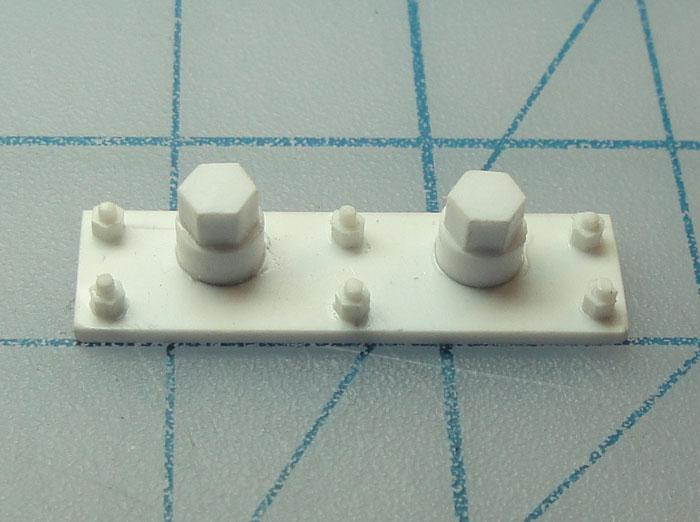
And after doing all that work nothing gives me more satisfaction than burying that piece in a place where it won't be seen. Maybe I should re-phrase that ...
Even my cat is feeling the weather, at least I think so, it's so hard to tell ...


And what would clips be without Hex Nuts!!!

About this time I decided that it was time to make post for the fork attachment to the frame, the Q-Tip was getting old and mushy, lol. Here's an example where I used the brass callipers to make hex nuts of a larger diameter than I had on hand.


Posts ready. I chose to make two for top and bottom and not one long one with an end cap.

Adding brackets for the inner joins on the saddle underside for the sheer purpose of giving me a place to put more hex nuts.


Here is the development of the underside of the handlebars. This is one of those buried detail things, only slightly visible when all is said and done but that slight visibility will add to the overall effect … I hope.

Getting a bit stupid, or a proof of concept test. I drilled out hex nuts in order to pass thin rod through to mimic the nut and bolt look.


And after doing all that work nothing gives me more satisfaction than burying that piece in a place where it won't be seen. Maybe I should re-phrase that ...

Even my cat is feeling the weather, at least I think so, it's so hard to tell ...

KatsZenJammer- Resident member

- Posts : 2600
Join date : 2016-05-20
Age : 57
Location : Vancouver, BC
 Re: Steampunk Harley - Tamiya 1/6 HD FLH Classic 'extreme' kit bash (Very Photo Heavy)
Making caps for the front axle, finally.


Adding detail to the top of the forks.
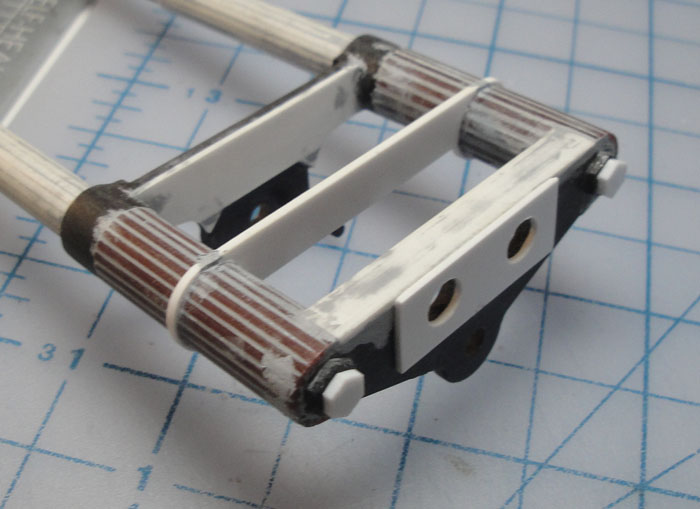
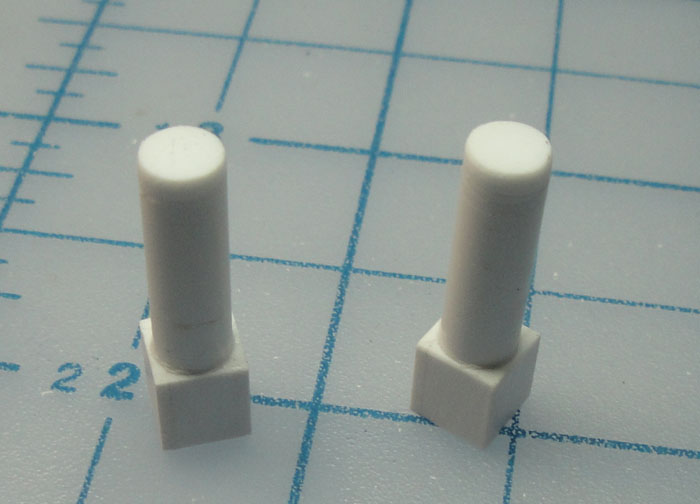
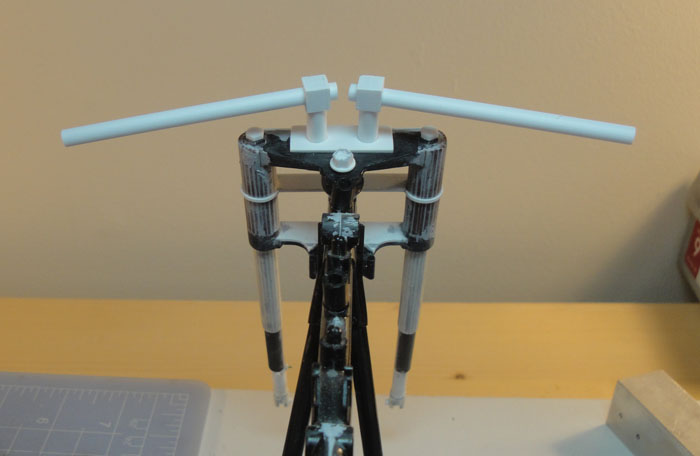
The handlebars were something I held off on in order to think through the various options. In the end I went for the very simple, straight and chunky type instead of something more ornate and curved. First the posts and 'headpieces.'


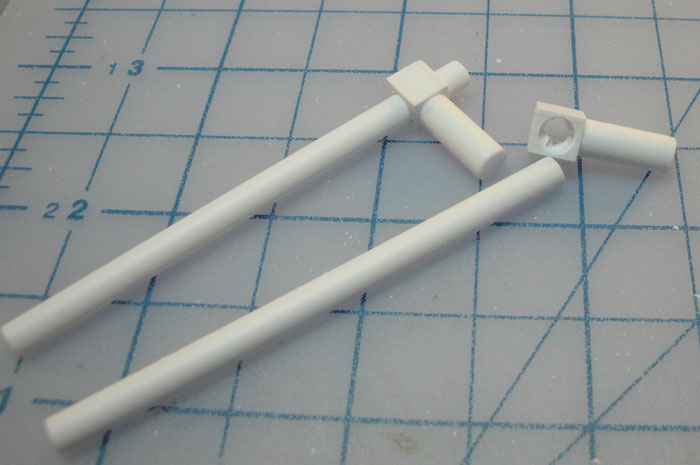
Once those looked ok I drilled through the head pieces for the handlebars themselves.
Test fit. Two views.

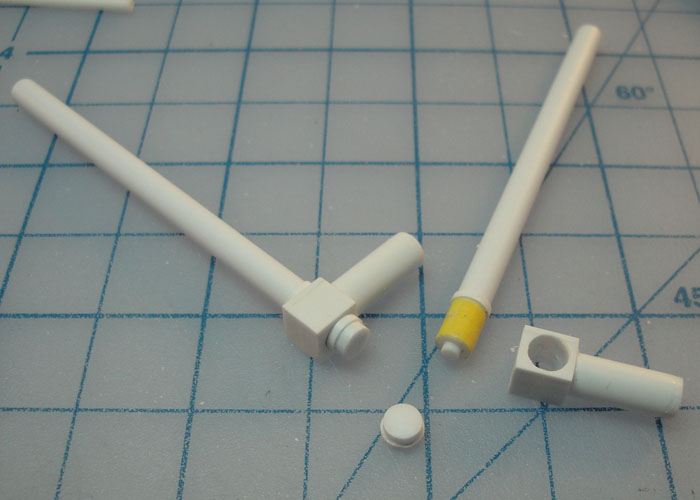
Working up the details, in this case end caps and rings. The yellow tape is Tamiya masking tape to thicken the ends slightly as I drilled the holes a touch too big.

At this point I am a year into the build, I know this because the next set of photos will be from the Steamcycle's First Birthday! But before I get there I need to get some real life stuff in order, like coffee … and eating ...


Adding detail to the top of the forks.

The handlebars were something I held off on in order to think through the various options. In the end I went for the very simple, straight and chunky type instead of something more ornate and curved. First the posts and 'headpieces.'


Once those looked ok I drilled through the head pieces for the handlebars themselves.

Test fit. Two views.


Working up the details, in this case end caps and rings. The yellow tape is Tamiya masking tape to thicken the ends slightly as I drilled the holes a touch too big.


At this point I am a year into the build, I know this because the next set of photos will be from the Steamcycle's First Birthday! But before I get there I need to get some real life stuff in order, like coffee … and eating ...

KatsZenJammer- Resident member

- Posts : 2600
Join date : 2016-05-20
Age : 57
Location : Vancouver, BC
 Re: Steampunk Harley - Tamiya 1/6 HD FLH Classic 'extreme' kit bash (Very Photo Heavy)
Absolutely amazing work, It's so cool to watch this build go from vision to form.

hotrodmax- Rookie Member

- Posts : 379
Join date : 2015-02-15
Age : 67
Location : Willow Spring North Carolina
 Re: Steampunk Harley - Tamiya 1/6 HD FLH Classic 'extreme' kit bash (Very Photo Heavy)
Max, thanks for the kind words and encouragement. 
The First Birthday!
On a whim I decided to do this last May 29th just to give myself a morale maintenance booster. I forgot 2 angles whilst outside so the last photos are in a different setting.

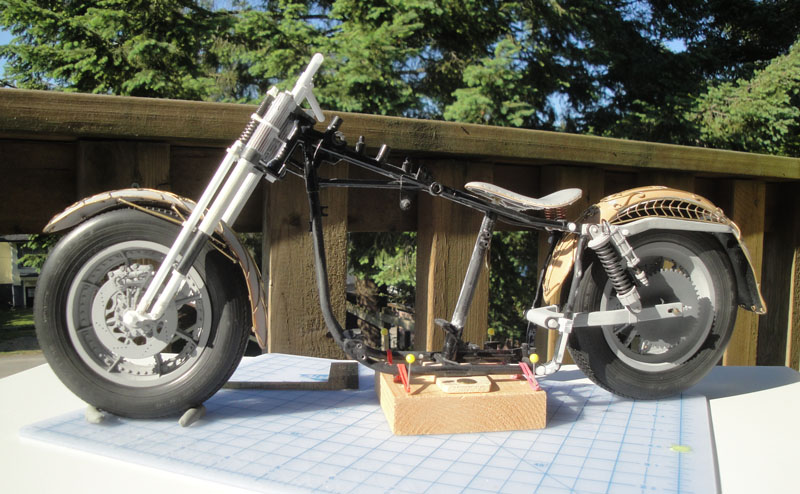


I figure if I can't immediately post the 2nd Birthday photos then its somewhat apropos to post the 1st Birthday shots as an in lieu of.

The First Birthday!
On a whim I decided to do this last May 29th just to give myself a morale maintenance booster. I forgot 2 angles whilst outside so the last photos are in a different setting.


I figure if I can't immediately post the 2nd Birthday photos then its somewhat apropos to post the 1st Birthday shots as an in lieu of.

KatsZenJammer- Resident member

- Posts : 2600
Join date : 2016-05-20
Age : 57
Location : Vancouver, BC
 Re: Steampunk Harley - Tamiya 1/6 HD FLH Classic 'extreme' kit bash (Very Photo Heavy)
Adding detail to the handlebars, stage one. I was trying to work up the details in layers instead of trying to develop one part ahead of the others.


And here begins the saga of the front head light. After a lot of thought I decided to make the head and tail lights carbide lamps instead of anything involving electricity. Pictured here is an actual glass lens, quite heavy, and the parts of the kit headlight.

Glass lens taped over to protect it and the reflector from the kit headlight de-chromed. The fact that I used a part from the original kit in this technically makes the front head light a kit bash, lol.
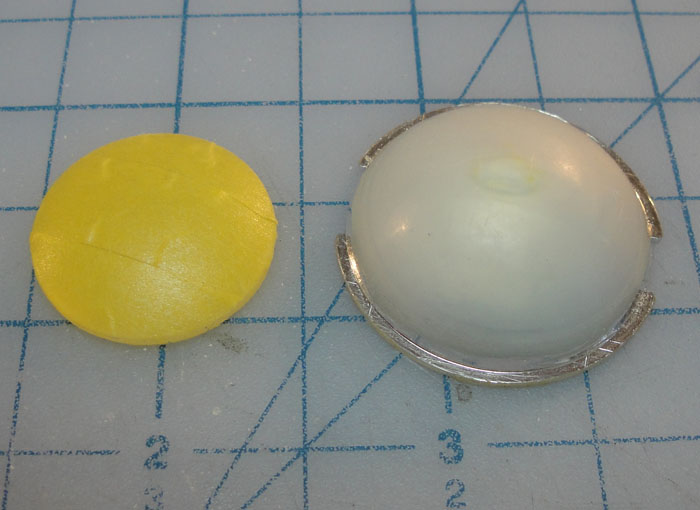
Cutting a slice off the reflector.

Quick return to the handlebars with further development of the details.

The bowl slice of the reflector stays a reflector and the bit that was sliced off becomes part of the shroud for the lens.

Making the body of the head light and the mounting ring for the lens.


Trying to work up a ring for the front of the shroud, the part in the clip, plus the other bits in process.
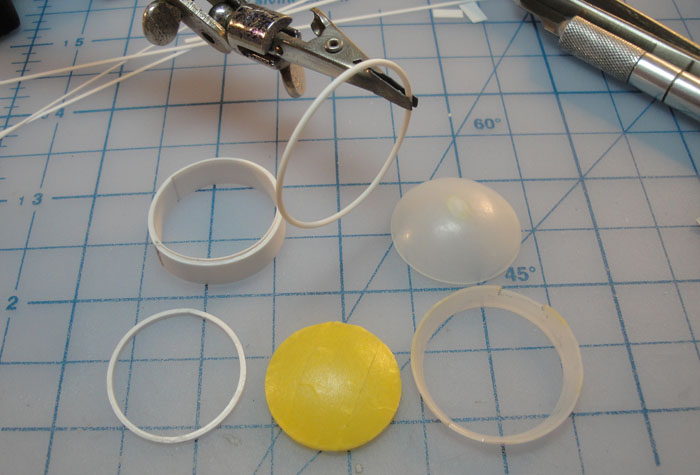
After several failures to form the ring out of plastic I decided to use copper wire, which worked the first time.

Another shot of the revised set of parts. You can see that the proposed 'body' piece is not even close to circular.

I have no idea where I got whatever it is but it proved to be very close to the same diameter so I utilized it as a form for the next try at the head light body.
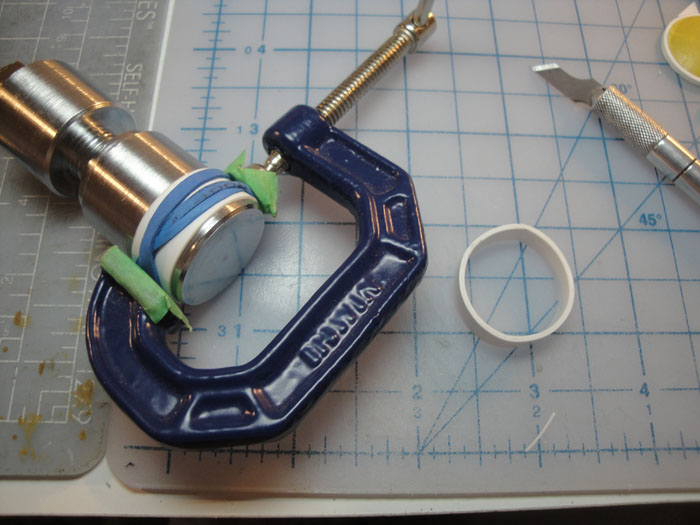
Just keep swimming ...


And here begins the saga of the front head light. After a lot of thought I decided to make the head and tail lights carbide lamps instead of anything involving electricity. Pictured here is an actual glass lens, quite heavy, and the parts of the kit headlight.

Glass lens taped over to protect it and the reflector from the kit headlight de-chromed. The fact that I used a part from the original kit in this technically makes the front head light a kit bash, lol.

Cutting a slice off the reflector.

Quick return to the handlebars with further development of the details.

The bowl slice of the reflector stays a reflector and the bit that was sliced off becomes part of the shroud for the lens.

Making the body of the head light and the mounting ring for the lens.


Trying to work up a ring for the front of the shroud, the part in the clip, plus the other bits in process.

After several failures to form the ring out of plastic I decided to use copper wire, which worked the first time.

Another shot of the revised set of parts. You can see that the proposed 'body' piece is not even close to circular.

I have no idea where I got whatever it is but it proved to be very close to the same diameter so I utilized it as a form for the next try at the head light body.

Just keep swimming ...

KatsZenJammer- Resident member

- Posts : 2600
Join date : 2016-05-20
Age : 57
Location : Vancouver, BC
 Re: Steampunk Harley - Tamiya 1/6 HD FLH Classic 'extreme' kit bash (Very Photo Heavy)
It's mind boggling reading and follow, you're doing so much! You never know what can come in handy to form shapes when you look around. How long did it take you just for the side "panels" with the chevrons?

Shelby- Intermediate Member

- Posts : 947
Join date : 2013-03-02
Location : Alberta, Canada
 Re: Steampunk Harley - Tamiya 1/6 HD FLH Classic 'extreme' kit bash (Very Photo Heavy)
Ive been waiting for the headlamp Kats, this is really going to make the whole thing 'pop'.
If I remember its a lantern style design?
If I remember its a lantern style design?

GaryDainton- Advanced Member

- Posts : 4433
Join date : 2014-03-06
Age : 57
Location : Bolton UK
 Re: Steampunk Harley - Tamiya 1/6 HD FLH Classic 'extreme' kit bash (Very Photo Heavy)
 More great stuff Kat, wow.
Guest- Guest
 Re: Steampunk Harley - Tamiya 1/6 HD FLH Classic 'extreme' kit bash (Very Photo Heavy)
Denis, Gaz & Curt - Thanks for the kind words and encouragement! 
Denis - The chevrons, if I recall correctly, took several hours over a couple of days. I overheated a couple of the 'ribs' so I had to cut new ones but luckily I didn't wreck the spine of them so I didn't have to do a complete re-start.
Gaz - Yuppers, these are indeed the carbide lamps. And though I jokingly noted that the head light is technically a kit bash this is where the serious scratch building starts to ramp up.
This post starts with the lens cover, or grille, for the head light. I wanted a grille rather than a mesh after looking at several images from early 20th century vehicles. To do this I drilled seat holes in the mounting ring for the lens itself then formed the curve of the wires for the grille on the lens itself. This is where having the glass lens proved to be a great asset.


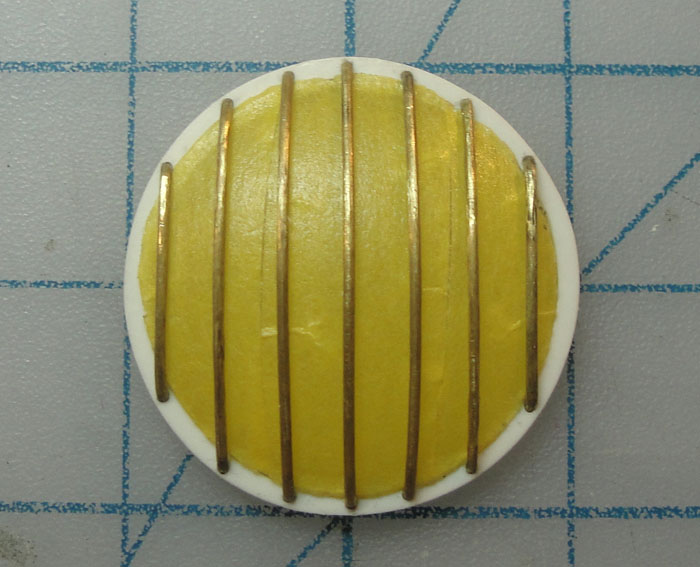
After much tweaking and adjusting I wound up with this - a lens-less photo to compare against the lensed one.

A comparison of the first and second tries at forming the headlight body. This is where I determined that 'larger' scratch built rings and such are best formed on a solid template rather than just winging it.

Adding detail to the clamps on the handlebars using hex nuts *cue spooky theremin sound effects*

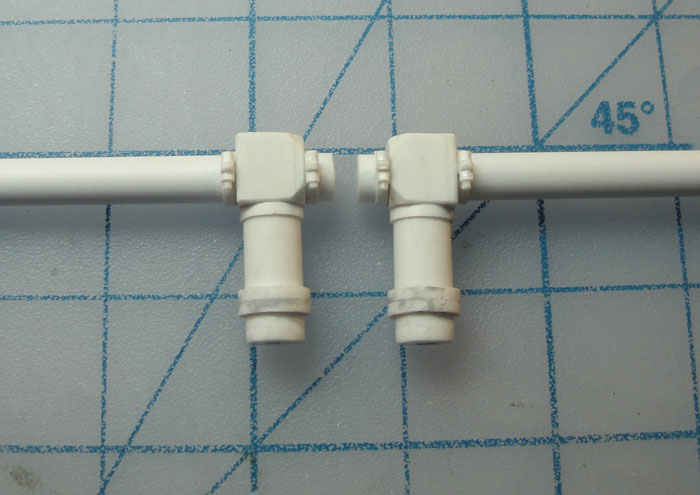
Parts and parts - the lens, the lens shroud with the grille test fit, the head light body and that last, thin ring is for the back of the shroud to seat against the body.

A side view of the shroud to show the curvature of the grille.
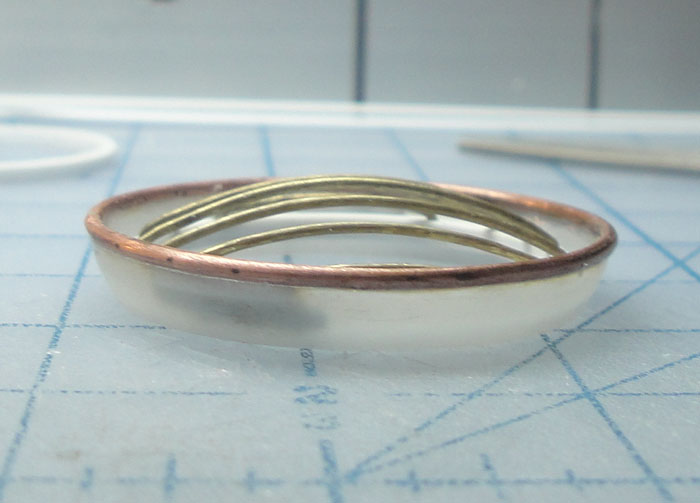
The topside of the handlebar mount comes into focus, the bottom half has yet to be affixed and is included for comparison.

Adding detail to the top of the crossmember int he form of a wire 'bead' along the perimeter.

Test fit of the handlebars to check for fit, look, angle and all that stuff.

Some little tiny hex nuts and 'washers' or bases in process. I forget exactly where these are going at the moment.

The shroud with the body seat ring affixed. This is so that I can hinge the shroud in order for it to open and close like a door.


Denis - The chevrons, if I recall correctly, took several hours over a couple of days. I overheated a couple of the 'ribs' so I had to cut new ones but luckily I didn't wreck the spine of them so I didn't have to do a complete re-start.
Gaz - Yuppers, these are indeed the carbide lamps. And though I jokingly noted that the head light is technically a kit bash this is where the serious scratch building starts to ramp up.
This post starts with the lens cover, or grille, for the head light. I wanted a grille rather than a mesh after looking at several images from early 20th century vehicles. To do this I drilled seat holes in the mounting ring for the lens itself then formed the curve of the wires for the grille on the lens itself. This is where having the glass lens proved to be a great asset.


After much tweaking and adjusting I wound up with this - a lens-less photo to compare against the lensed one.

A comparison of the first and second tries at forming the headlight body. This is where I determined that 'larger' scratch built rings and such are best formed on a solid template rather than just winging it.

Adding detail to the clamps on the handlebars using hex nuts *cue spooky theremin sound effects*


Parts and parts - the lens, the lens shroud with the grille test fit, the head light body and that last, thin ring is for the back of the shroud to seat against the body.

A side view of the shroud to show the curvature of the grille.

The topside of the handlebar mount comes into focus, the bottom half has yet to be affixed and is included for comparison.

Adding detail to the top of the crossmember int he form of a wire 'bead' along the perimeter.

Test fit of the handlebars to check for fit, look, angle and all that stuff.

Some little tiny hex nuts and 'washers' or bases in process. I forget exactly where these are going at the moment.

The shroud with the body seat ring affixed. This is so that I can hinge the shroud in order for it to open and close like a door.


KatsZenJammer- Resident member

- Posts : 2600
Join date : 2016-05-20
Age : 57
Location : Vancouver, BC
 Re: Steampunk Harley - Tamiya 1/6 HD FLH Classic 'extreme' kit bash (Very Photo Heavy)
DO NOT SNEEZE!!! Id loose those hex nuts in about ten seconds Kats LOL.
More brilliant work, I don't know about ramping up the scratch building, you haven't exactly
been playing at it up to now.
More brilliant work, I don't know about ramping up the scratch building, you haven't exactly
been playing at it up to now.


GaryDainton- Advanced Member

- Posts : 4433
Join date : 2014-03-06
Age : 57
Location : Bolton UK
 Re: Steampunk Harley - Tamiya 1/6 HD FLH Classic 'extreme' kit bash (Very Photo Heavy)
Watching this come together is fascinating !!!!
Great workmanship !!


Great workmanship !!


Geezerman- Advanced Member

- Posts : 3651
Join date : 2013-02-24
Age : 89
Location : Gulf coast of central Florids
 Re: Steampunk Harley - Tamiya 1/6 HD FLH Classic 'extreme' kit bash (Very Photo Heavy)
Gaz & Clay - Thank you both for the kind words and encouragement 
Gaz - Sneezing is an occupational hazard when dealing with small parts, especially during hay fever season, lol.
A bit of a chunky post here, starting with a brake lever. The kit original parts are visible here and at this point, because I'm incorporating the kit lever into this, the left handlebar becomes a 'technical' kit bash.

The tiny little hex and washer combos wind up being detail for the headlight grille.


The shroud gets an eyelid. Also you can see the hole for the chimney vent in the body.
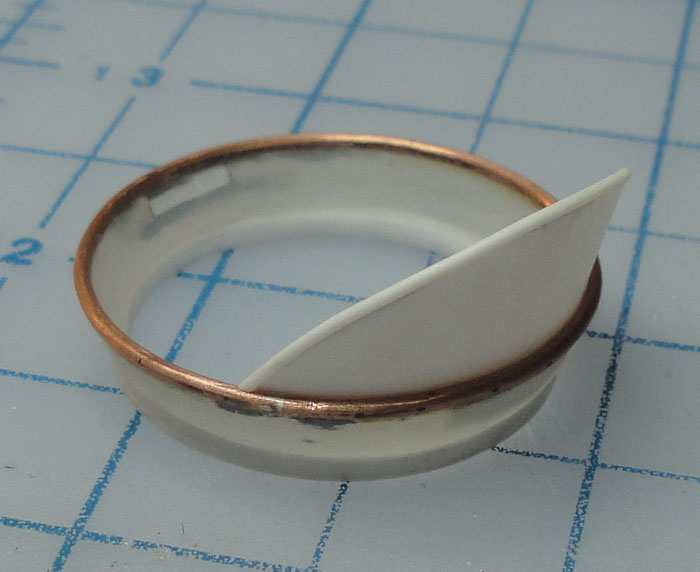

Starting in on the chimney, a housing to sit over the whole and rings for the little venting holes on the sides.
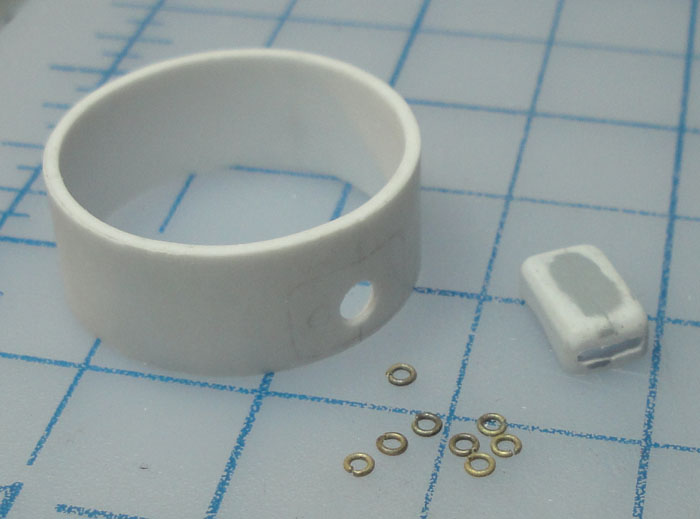
Kit lever with scratch built mount.

The chimney vent in rough form, affixed to the body and an inside view to show the ring I placed as yet more buried detail.


The shroud gets a hinge post/tube attached. This I affixed with 2 part slow cure epoxy for max strength.

The chimney detailed with more wire which was easier to form to these odd curves, it makes gluing a lot easier.

An additional ring added to the shroud.

The other part of the hinge is formed from brass wire flattened on the ends and drilled through. This may seem very tetchy but I found it was easier than I expected.
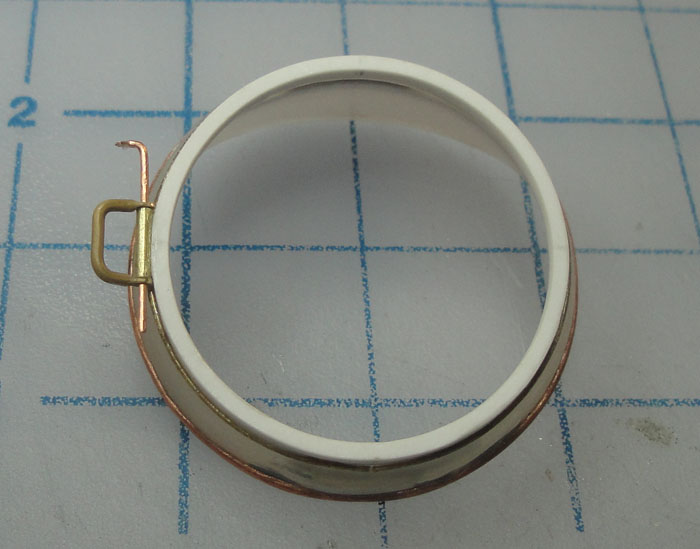
Test fit. You can see I've already added some of that copper tape for accent. I'd like to mention that this is Not BMF but rather actual copper foil tape, industrial stuff and not craft based.


And some plastic tabs to unify the copper tape accents. These tabs are the future home of, what else, hex nuts!

I'm going to try and get a few posts in today if I can manage, please bear with me as I photo-slam this WIP ...

Gaz - Sneezing is an occupational hazard when dealing with small parts, especially during hay fever season, lol.
A bit of a chunky post here, starting with a brake lever. The kit original parts are visible here and at this point, because I'm incorporating the kit lever into this, the left handlebar becomes a 'technical' kit bash.

The tiny little hex and washer combos wind up being detail for the headlight grille.


The shroud gets an eyelid. Also you can see the hole for the chimney vent in the body.


Starting in on the chimney, a housing to sit over the whole and rings for the little venting holes on the sides.

Kit lever with scratch built mount.

The chimney vent in rough form, affixed to the body and an inside view to show the ring I placed as yet more buried detail.


The shroud gets a hinge post/tube attached. This I affixed with 2 part slow cure epoxy for max strength.

The chimney detailed with more wire which was easier to form to these odd curves, it makes gluing a lot easier.

An additional ring added to the shroud.

The other part of the hinge is formed from brass wire flattened on the ends and drilled through. This may seem very tetchy but I found it was easier than I expected.

Test fit. You can see I've already added some of that copper tape for accent. I'd like to mention that this is Not BMF but rather actual copper foil tape, industrial stuff and not craft based.


And some plastic tabs to unify the copper tape accents. These tabs are the future home of, what else, hex nuts!

I'm going to try and get a few posts in today if I can manage, please bear with me as I photo-slam this WIP ...

KatsZenJammer- Resident member

- Posts : 2600
Join date : 2016-05-20
Age : 57
Location : Vancouver, BC
 Re: Steampunk Harley - Tamiya 1/6 HD FLH Classic 'extreme' kit bash (Very Photo Heavy)
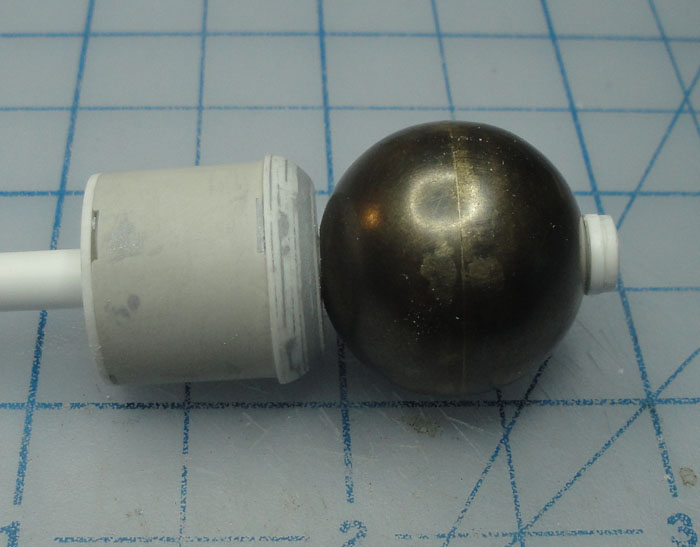
Now we come to a part of the build where a bunch of different parts are being worked on at once. Here is the 'water tank' for the headlight being built from two half spheres of brass I scavenged from one of those spinning pendulum clocks, the kind you usually see under glass. I like the look of the initial solder, kind of like some alien planet. Then some filing and sanding.


I said I was adding hex nuts to the hinge part of the headlight body and I meant it ... lol.

The brake level mount with hex nuts, because you can never have too many hex nuts ...
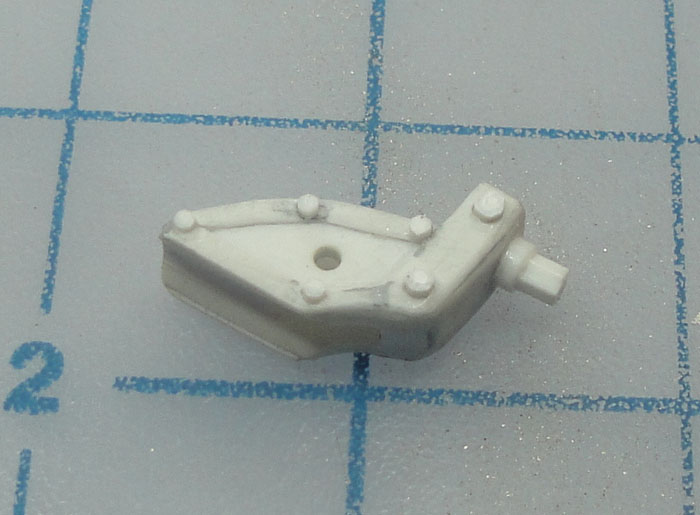
Test fit.

The closure clip for the head light shroud takes shape. At first I was hoping to make this a working clip but the process of soldering the clip to the wire which seats into the shroud softened the metal enough that it is a static part. This means to open and close the shroud I have to remove the hinge pin.


Tabs and hex nuts added.

The water tank in blackening solution, the black ring is the eventual mount for the headlight body to join the water tank and the grey bit is the reaction chamber which will sit under the water tank.

The reflector half dome set into the headlight body and the join mount being shaped. Again, matching the odd curves is a bit of a challenge and requires a lot of tweaking.

Blackened water tank, reaction chamber, join mount and a copper wire ring for the mount.

Epoxying bits together.

Here's where I start carving up yellow ping pong balls to further develop the reflector for the headlight.


Just keep swimming ...


I said I was adding hex nuts to the hinge part of the headlight body and I meant it ... lol.

The brake level mount with hex nuts, because you can never have too many hex nuts ...

Test fit.

The closure clip for the head light shroud takes shape. At first I was hoping to make this a working clip but the process of soldering the clip to the wire which seats into the shroud softened the metal enough that it is a static part. This means to open and close the shroud I have to remove the hinge pin.


Tabs and hex nuts added.

The water tank in blackening solution, the black ring is the eventual mount for the headlight body to join the water tank and the grey bit is the reaction chamber which will sit under the water tank.

The reflector half dome set into the headlight body and the join mount being shaped. Again, matching the odd curves is a bit of a challenge and requires a lot of tweaking.

Blackened water tank, reaction chamber, join mount and a copper wire ring for the mount.

Epoxying bits together.

Here's where I start carving up yellow ping pong balls to further develop the reflector for the headlight.


Just keep swimming ...

KatsZenJammer- Resident member

- Posts : 2600
Join date : 2016-05-20
Age : 57
Location : Vancouver, BC
 Re: Steampunk Harley - Tamiya 1/6 HD FLH Classic 'extreme' kit bash (Very Photo Heavy)
I see that you are going for that new fangled acetylene for lighting..
Guest- Guest
 Re: Steampunk Harley - Tamiya 1/6 HD FLH Classic 'extreme' kit bash (Very Photo Heavy)
Nigel - Yup. Call me old fashioned but I don't trust that electrissy stuff. It might be good for novelty toys and maybe, just maybe, it might be useful for cooking but I can't see that it has the same versatility and adaptability as acetylene. And as for lighting, that electrissy stuff just seems like a disaster waiting to happen. Electrissy is a fad, like that contraption those Wright boys cooked up. Give me steam, acetylene and zeppelins any day.
The brake lever mount gets affixed and, of course, details like clamp bands get added.


Starting on the bracket to support the brake cable.
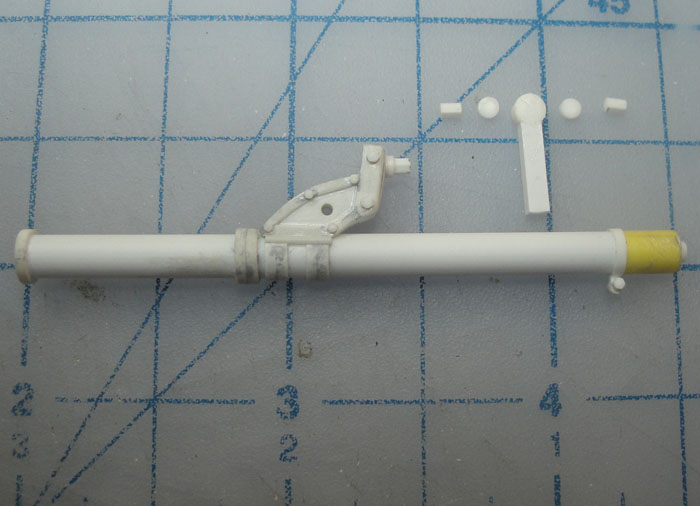
Further development on the reaction chamber, the top plate is pretty much roughed out and the black ring here will be the interface join between the chamber and the water tank.

Adding detail to the back of the headlight body in the form of more rings set around the perimeter.

The reaction chamber bits and some more rings.

The brake cable support bracket takes form. The brake cable is going to be a guitar string - the look suits the build and metal guitar strings are shapeable.


The shroud with added details and the grille has been affixed in place.

Affixing the brake cable support using a bit of wire to insure proper alignment.

Headlight parts starting to develop personality and purpose in their design.

Adding clamp bands to the brake cable support.

The mount zone between the water tank and head light body gets affixed, again with 2 part epoxy.

The brake lever mount gets affixed and, of course, details like clamp bands get added.


Starting on the bracket to support the brake cable.

Further development on the reaction chamber, the top plate is pretty much roughed out and the black ring here will be the interface join between the chamber and the water tank.

Adding detail to the back of the headlight body in the form of more rings set around the perimeter.

The reaction chamber bits and some more rings.

The brake cable support bracket takes form. The brake cable is going to be a guitar string - the look suits the build and metal guitar strings are shapeable.


The shroud with added details and the grille has been affixed in place.

Affixing the brake cable support using a bit of wire to insure proper alignment.

Headlight parts starting to develop personality and purpose in their design.

Adding clamp bands to the brake cable support.

The mount zone between the water tank and head light body gets affixed, again with 2 part epoxy.


KatsZenJammer- Resident member

- Posts : 2600
Join date : 2016-05-20
Age : 57
Location : Vancouver, BC
 Re: Steampunk Harley - Tamiya 1/6 HD FLH Classic 'extreme' kit bash (Very Photo Heavy)
And because nothing confuses the issue better than starting something else before the previous parts are complete here's the beginning of the tail light, starting with a mounting ring formed around another glass lens.

The shroud as cut from a ping pong ball with an inner ring to frame the lens.

Setting the lens mount ring into place on the back of the shroud.

How it looks from the front.

Back to the head light - my original idea of using a bit of black ring for the interface between water tank and reaction chamber was tossed aside and I started forming rings of a different diameter from styrene strips to serve that purpose.


The head light body gets more detail.

Figuring out how it all fits together

The brake cable support needed some more detail, surprise, so some angle supports come into the picture.
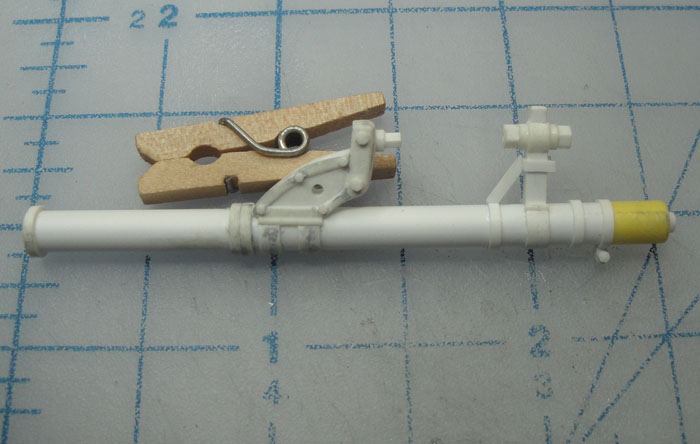

The reaction chamber starts to look its part.

The tail light shroud gets a ring for accent.


The shroud as cut from a ping pong ball with an inner ring to frame the lens.

Setting the lens mount ring into place on the back of the shroud.

How it looks from the front.

Back to the head light - my original idea of using a bit of black ring for the interface between water tank and reaction chamber was tossed aside and I started forming rings of a different diameter from styrene strips to serve that purpose.


The head light body gets more detail.

Figuring out how it all fits together


The brake cable support needed some more detail, surprise, so some angle supports come into the picture.


The reaction chamber starts to look its part.

The tail light shroud gets a ring for accent.


KatsZenJammer- Resident member

- Posts : 2600
Join date : 2016-05-20
Age : 57
Location : Vancouver, BC
 Re: Steampunk Harley - Tamiya 1/6 HD FLH Classic 'extreme' kit bash (Very Photo Heavy)
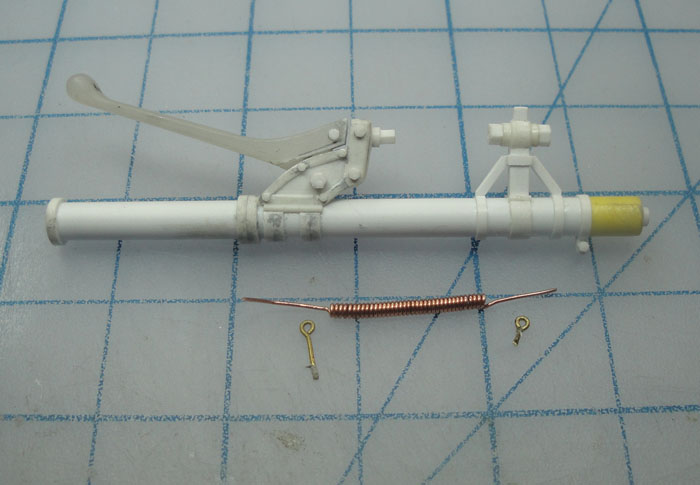
Developing a return spring set up for the brake lever, coiled wire for spring and little rings for the mount points.
The development of the top of the water tank and post that will connect the bits together.

The evolution of ideas is shown here. First I set in the rings, then fabricated some 'U' ends for the spring, then decided I did not like the way it looked so I removed the original rings with the intent of making plastic tabs as mount points.


Added detail for the top part of the water tank.

The brake lever spring blackened, plastic tabs added and things look more the way I wanted.


And on and on and on ...

The development of the top of the water tank and post that will connect the bits together.

The evolution of ideas is shown here. First I set in the rings, then fabricated some 'U' ends for the spring, then decided I did not like the way it looked so I removed the original rings with the intent of making plastic tabs as mount points.


Added detail for the top part of the water tank.

The brake lever spring blackened, plastic tabs added and things look more the way I wanted.


And on and on and on ...

KatsZenJammer- Resident member

- Posts : 2600
Join date : 2016-05-20
Age : 57
Location : Vancouver, BC
Page 3 of 25 •  1, 2, 3, 4 ... 14 ... 25
 Similar topics
» A Steamcycle - an extreme kit bash/scratch build
» Tamiya 1/6 Harley Davidson Fat Boy Lo
» Tamiya 1/6 Harley Davidson FLH1200
» Steampunk Ducati
» '57 Salvage bash-up
» Tamiya 1/6 Harley Davidson Fat Boy Lo
» Tamiya 1/6 Harley Davidson FLH1200
» Steampunk Ducati
» '57 Salvage bash-up
Page 3 of 25
Permissions in this forum:
You cannot reply to topics in this forum