
Steampunk Harley - Tamiya 1/6 HD FLH Classic 'extreme' kit bash (Very Photo Heavy)
Page 14 of 25 •  1 ... 8 ... 13, 14, 15 ... 19 ... 25
 ![]()
Re: Steampunk Harley - Tamiya 1/6 HD FLH Classic 'extreme' kit bash (Very Photo Heavy)
![]() by Geezerman Mon 10 Jul 2017, 12:26 am
by Geezerman Mon 10 Jul 2017, 12:26 am
Once again, awesome project !! Thanks for sharing !


Geezerman- Advanced Member

- Posts : 3651
Join date : 2013-02-24
Age : 88
Location : Gulf coast of central Florids
Re: Steampunk Harley - Tamiya 1/6 HD FLH Classic 'extreme' kit bash (Very Photo Heavy)
![]() by Skid Mon 10 Jul 2017, 12:40 am
by Skid Mon 10 Jul 2017, 12:40 am
_________________
Al.
Constructive criticism is always welcome.
“Success always demands a greater effort.” Winston Churchill
"Success is failure turned inside out" Unknown

Skid- Admin
- Posts : 7128
Join date : 2013-02-15
Age : 75
Location : Newcastle. Good Old Blighty. -

Re: Steampunk Harley - Tamiya 1/6 HD FLH Classic 'extreme' kit bash (Very Photo Heavy)
![]() by GaryDainton Mon 10 Jul 2017, 9:13 am
by GaryDainton Mon 10 Jul 2017, 9:13 am
http://www.sculpt.com/catalog_98/CastingMaterials/magicsculp0001.htm

GaryDainton- Advanced Member
- Posts : 4433
Join date : 2014-03-06
Age : 56
Location : Bolton UK
Re: Steampunk Harley - Tamiya 1/6 HD FLH Classic 'extreme' kit bash (Very Photo Heavy)
![]() by KatsZenJammer Wed 19 Jul 2017, 4:26 am
by KatsZenJammer Wed 19 Jul 2017, 4:26 am

Gary - I have considered sculpting and moulding parts but I have a weird sort of short circuit when it comes to scale models. Thing is, I can and do sculpt things out of various materials, and work the results to add detail and all the things that would apply to scale model situations. But whenever I try to 'cross genre's' so to speak I wind up being unable to make it work. Call it a psychological cross-wiring. If I needed to sculpt a hood ornament, for example, I'd be able to do it but trying to sculpt something like a carburetor is beyond me. This isn't to say it will never happen, but this sort of mental quirk is what's kept me from delving into the world of 3-D printing.
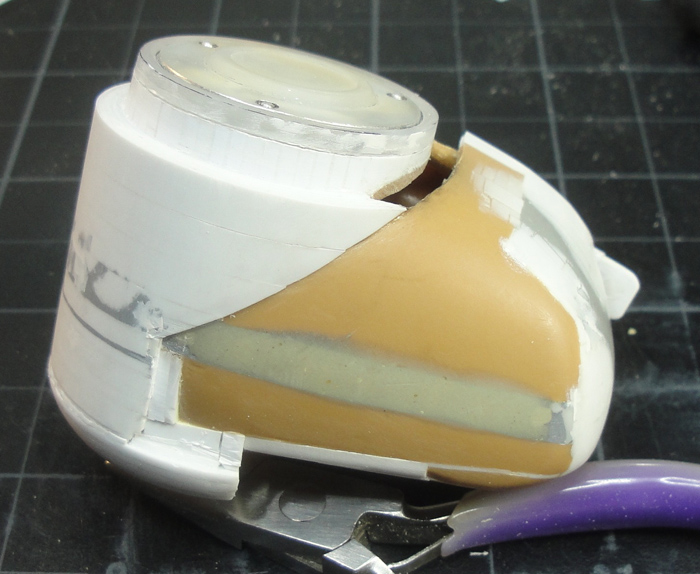
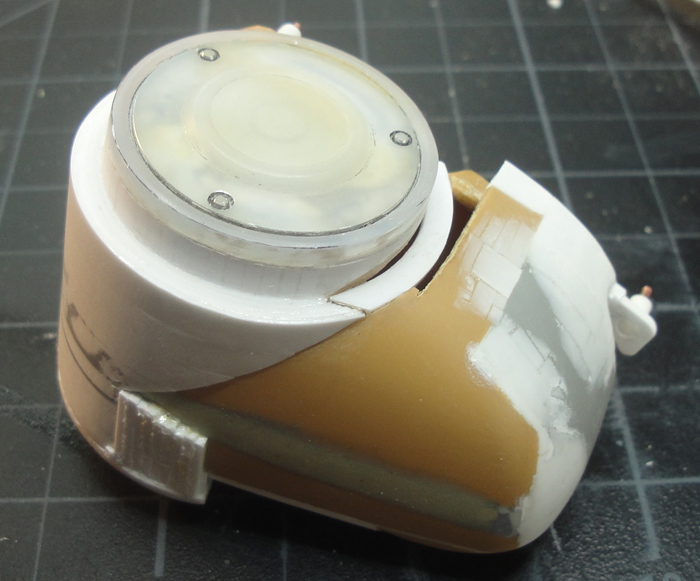
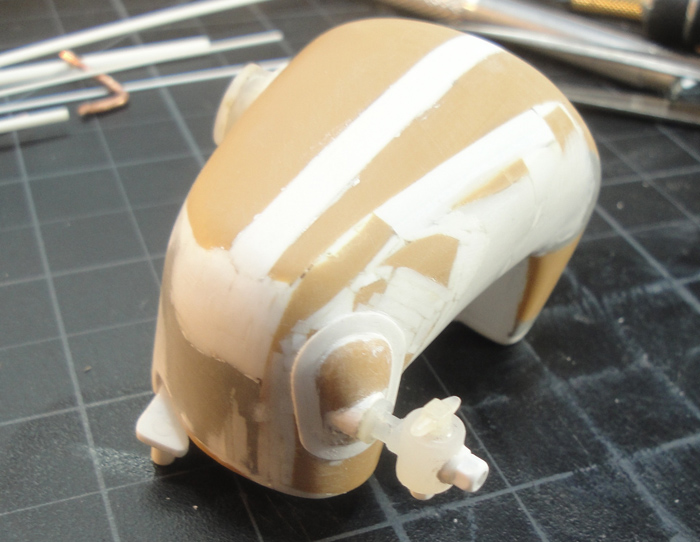
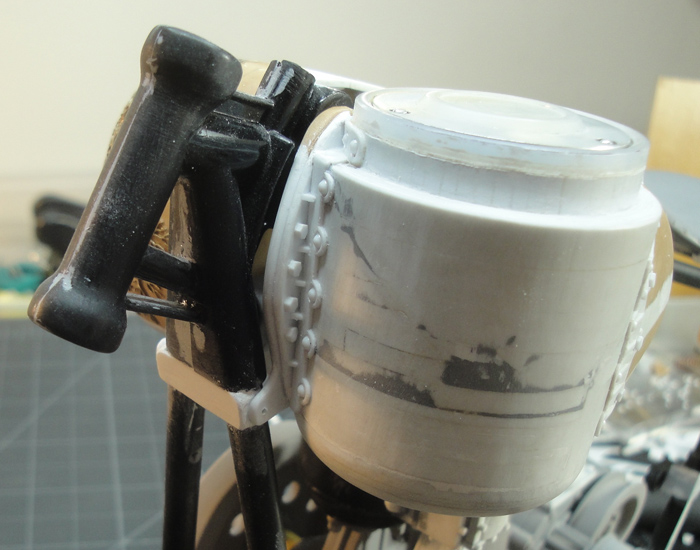
Layers and layers and bits and pieces - I've cut out the front of the fuel tank now that I know where the curve of the cylinder cuts in. The water tank starts to develop the rear bottom portion.
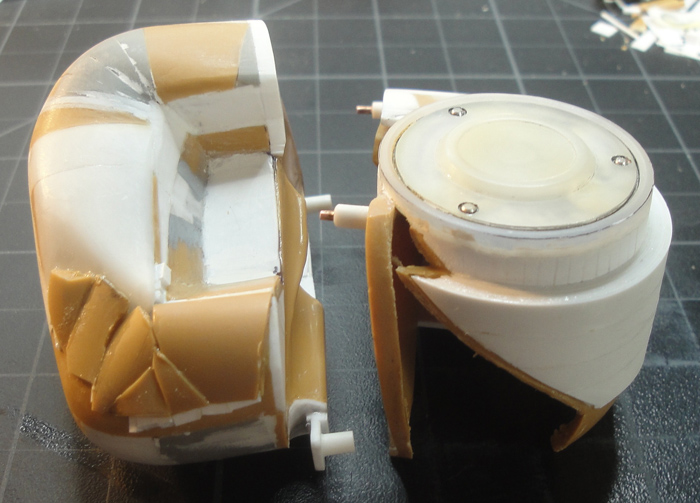
The fuel tank cylinder forms into the gap and the water tank rear gets fill-ins.
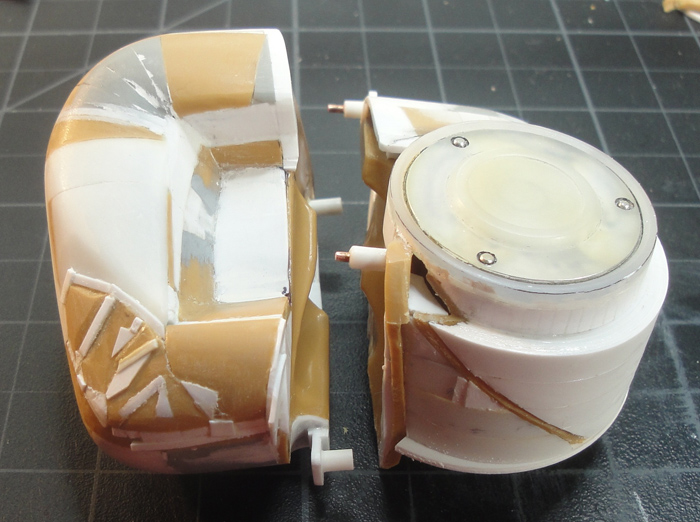
The bottom of the fuel tank with cut off's already marked.

The fuel tank cylinder getting some putty, the bottom of the fuel tank with initial cut off's and the water tank getting some more layering to smooth out curves.
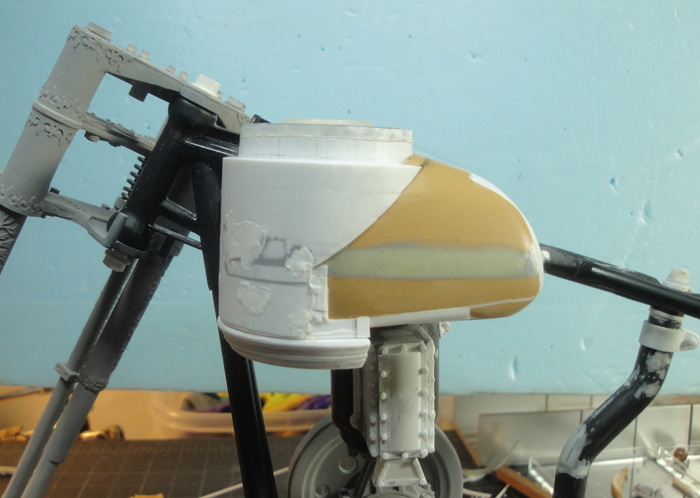
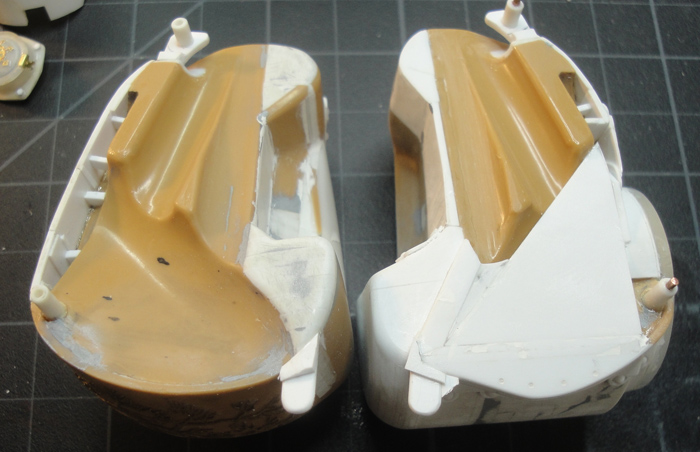
View of the water tank in place. Different from the kit tank but with some of the look retained.

The fuel/water tank combo. There is still a lot of funky shaping and detailing to do but it's been less of a headache than I initially expected.
As far as the 'decor' for the tanks I'm thinking that the fuel/water combo tank will have plenty of stuff like rivets, transitions, braces and brackets to jazz it up. The plain water tank presents a nice surface for PE detailing, perhaps more of the ivy vines, maybe something more involved with the tree skeletons ... but first I must finish forming the parts, lol.
Just keep swimming ...

KatsZenJammer- Resident member
- Posts : 2600
Join date : 2016-05-20
Age : 57
Location : Vancouver, BC
Re: Steampunk Harley - Tamiya 1/6 HD FLH Classic 'extreme' kit bash (Very Photo Heavy)
![]() by GaryDainton Wed 19 Jul 2017, 7:13 am
by GaryDainton Wed 19 Jul 2017, 7:13 am
Rather than sculpting individual whole parts I meant using the material as a filler in some areas rather than plastic-card, obviously you've got your method down to a fine art and the finish you achieve is stunning.
Very much enjoying the build.
GaryDainton- Advanced Member
- Posts : 4433
Join date : 2014-03-06
Age : 56
Location : Bolton UK
Re: Steampunk Harley - Tamiya 1/6 HD FLH Classic 'extreme' kit bash (Very Photo Heavy)
![]() by Geezerman Wed 19 Jul 2017, 10:57 am
by Geezerman Wed 19 Jul 2017, 10:57 am
Geezerman- Advanced Member
- Posts : 3651
Join date : 2013-02-24
Age : 88
Location : Gulf coast of central Florids
Re: Steampunk Harley - Tamiya 1/6 HD FLH Classic 'extreme' kit bash (Very Photo Heavy)
![]() by KatsZenJammer Thu 27 Jul 2017, 9:10 pm
by KatsZenJammer Thu 27 Jul 2017, 9:10 pm
Gary - oops, my bad for replying inaccurately. Dunno where my brain was, lol, blame it on summer. I did consider something like that (and I've bookmarked the link you provided) but in the end I chose to go this route for parts modding - that being said, when it comes time to make stuff like bedrolls, gloves and anything else that needs a 'squishy' look it'll be time to break out the clay/putty/epoxy. It's also possible I will have forgotten this course by the time I get to accessories so if you notice I've strayed please remind me, lol.
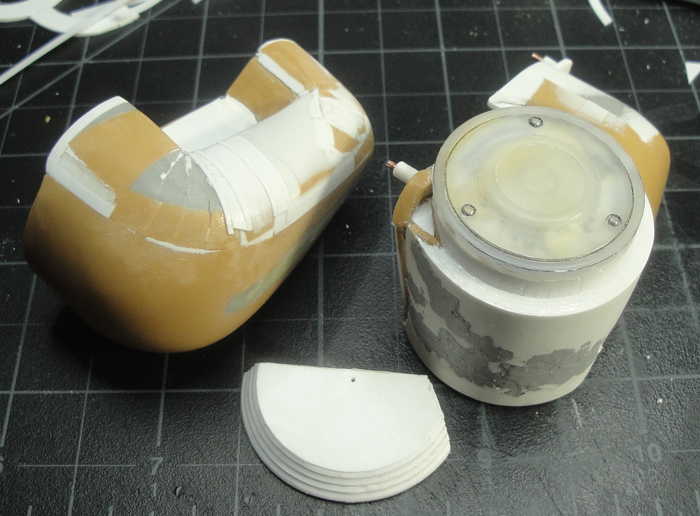
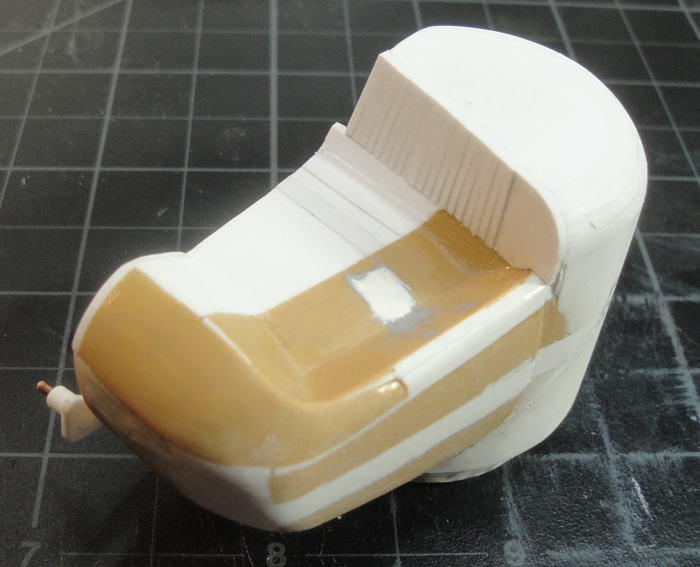
More and more bits of work in between 'think' sessions. The fuel/water tank continues to be shaped.
At some point the putty on the sides started to show its age, I blame it on re-exposure to air after decades of being sealed under paint. So grind it out with the Dremel and refill with styrene rod.

The bottom of the fuel/water tanks gets some filling in. Instead of trying to induce a curve into a piece of flat sheet I went with 1mm square rod pieces. I guess I could have made it flat but something about that didn't appeal to me.
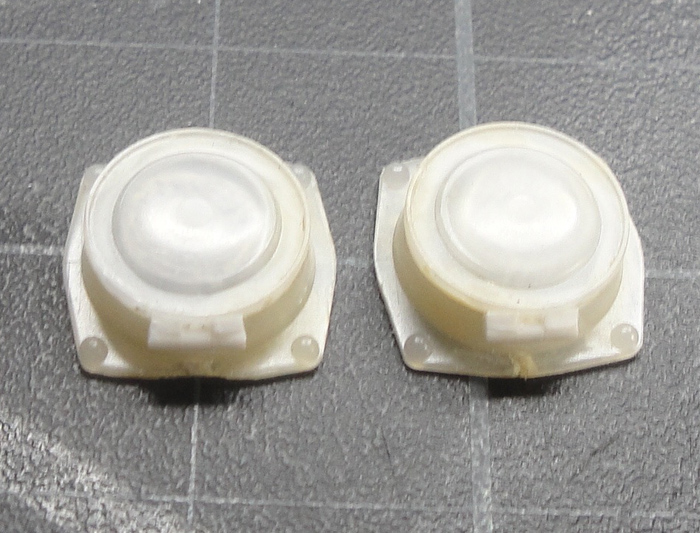
The kit fill caps getting hinges. The plan is to use these for the water tanks and make a separate fill cap for the fuel tank.
And so on, lol. I will say that I've been having trouble keeping the details and plans clear in my head as I'm being distracted regularly by summer stuff. Well, stuff in general, really.
Just keep swimming ...
KatsZenJammer- Resident member
- Posts : 2600
Join date : 2016-05-20
Age : 57
Location : Vancouver, BC
Re: Steampunk Harley - Tamiya 1/6 HD FLH Classic 'extreme' kit bash (Very Photo Heavy)
![]() by GaryDainton Thu 27 Jul 2017, 9:20 pm
by GaryDainton Thu 27 Jul 2017, 9:20 pm
GaryDainton- Advanced Member
- Posts : 4433
Join date : 2014-03-06
Age : 56
Location : Bolton UK
Re: Steampunk Harley - Tamiya 1/6 HD FLH Classic 'extreme' kit bash (Very Photo Heavy)
![]() by Guest Fri 28 Jul 2017, 4:08 pm
by Guest Fri 28 Jul 2017, 4:08 pm
Guest- Guest
Re: Steampunk Harley - Tamiya 1/6 HD FLH Classic 'extreme' kit bash (Very Photo Heavy)
![]() by Geezerman Wed 02 Aug 2017, 10:27 am
by Geezerman Wed 02 Aug 2017, 10:27 am
Geezerman- Advanced Member
- Posts : 3651
Join date : 2013-02-24
Age : 88
Location : Gulf coast of central Florids
Re: Steampunk Harley - Tamiya 1/6 HD FLH Classic 'extreme' kit bash (Very Photo Heavy)
![]() by KatsZenJammer Mon 07 Aug 2017, 2:02 am
by KatsZenJammer Mon 07 Aug 2017, 2:02 am
We've been hit by a dual smack from a mild heat wave and smoke from forest fires this past week so I've been, understandably, about as capable as overcooked pasta. Thankfully it hasn't been as bad as 2 years ago (that one was kinda horrible) and it seems to be ebbing on both fronts. I can't imagine how bad it is where the fires are, hopefully things will be dealt with soon for the sake of those affected.
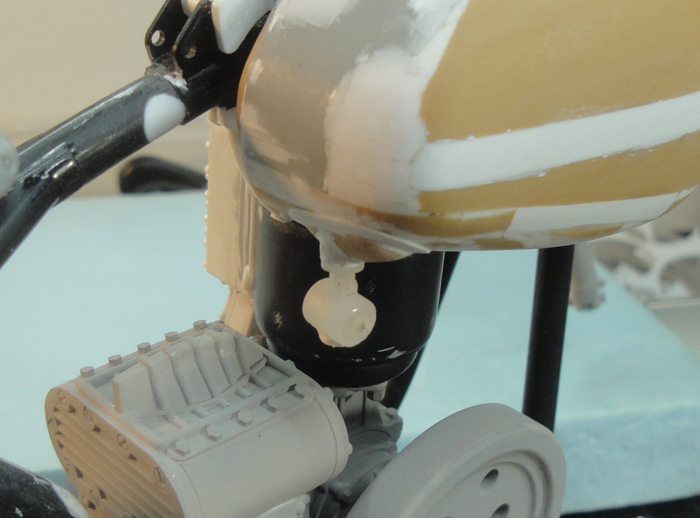
Well, the creation of details continues a bit at a time. The fuel/water tank 'bracket' begins, finally, lol.
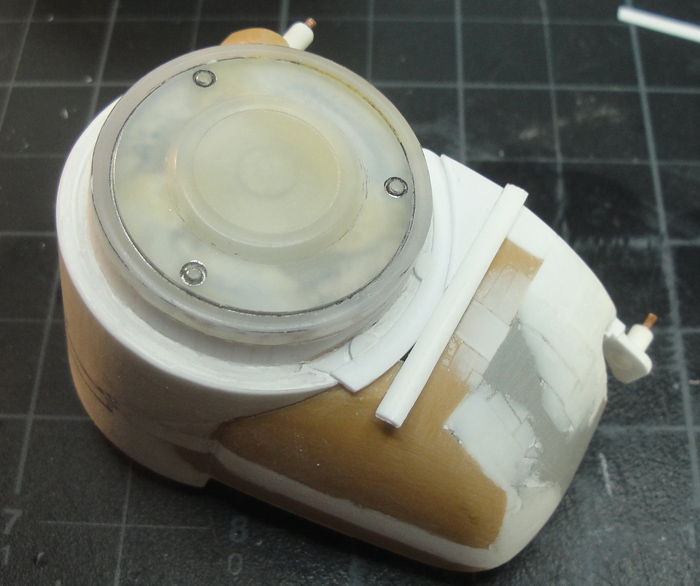
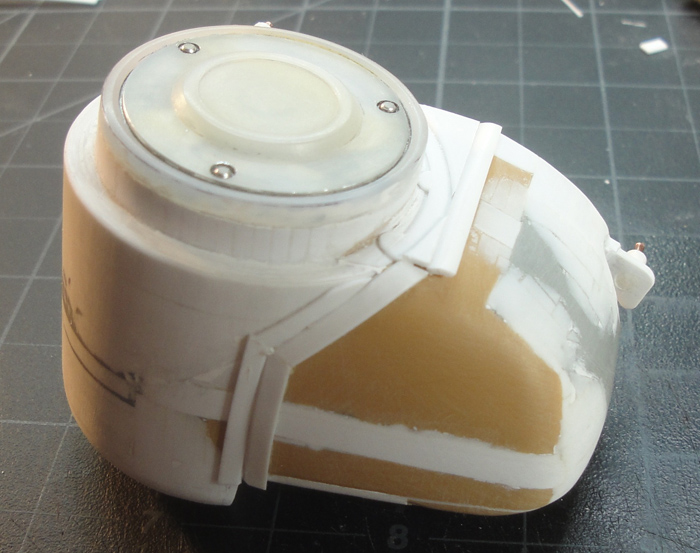

While checking out the placement for the main water tank feed valve I got the inspiration to add a little bit extra in the form of a 'drop reservoir' for the valve to mount to. Re-using a bit of the cut off from the tank and bordering it with sheet styrene cut to shape.

Further development of the bracket and work on the fill cap for the secondary water tank begins.
The main water tank extra bit gets more work and the kit fuel valve in the process of becoming the water feed valve. The original had two valve handles, this one will be one valve handle and a feed from the combo tank.

I'm not going to worry about working in a fuel or water reserve set up given that this is a 'period piece' and I don't know if my fictional manic tinkerer of circa. 1890 would have thought of such a thing. I am, however, considering a smaller, additional fuel tank to imply a binary fuel system to feed the boiler which seems rather steampunk-y. And if I decide to do this the secondary fuel tank will likely be mounted forward, maybe ahead of the crankcase but maybe not. More on this as things evolve.
Just keep swimming ...
KatsZenJammer- Resident member
- Posts : 2600
Join date : 2016-05-20
Age : 57
Location : Vancouver, BC
Re: Steampunk Harley - Tamiya 1/6 HD FLH Classic 'extreme' kit bash (Very Photo Heavy)
![]() by GaryDainton Mon 07 Aug 2017, 8:10 am
by GaryDainton Mon 07 Aug 2017, 8:10 am
GaryDainton- Advanced Member
- Posts : 4433
Join date : 2014-03-06
Age : 56
Location : Bolton UK
Re: Steampunk Harley - Tamiya 1/6 HD FLH Classic 'extreme' kit bash (Very Photo Heavy)
![]() by Guest Mon 07 Aug 2017, 4:57 pm
by Guest Mon 07 Aug 2017, 4:57 pm
Guest- Guest
Re: Steampunk Harley - Tamiya 1/6 HD FLH Classic 'extreme' kit bash (Very Photo Heavy)
![]() by Geezerman Mon 07 Aug 2017, 10:24 pm
by Geezerman Mon 07 Aug 2017, 10:24 pm
Always enjoy these updates !!
The array of components and detail is mind boggling !
Geezerman- Advanced Member
- Posts : 3651
Join date : 2013-02-24
Age : 88
Location : Gulf coast of central Florids
Re: Steampunk Harley - Tamiya 1/6 HD FLH Classic 'extreme' kit bash (Very Photo Heavy)
![]() by KatsZenJammer Mon 14 Aug 2017, 2:40 am
by KatsZenJammer Mon 14 Aug 2017, 2:40 am
Thankfully both the heat and the smoke have dissipated somewhat - I find it's much easier to work on the build when one can see what they're working on, lol.
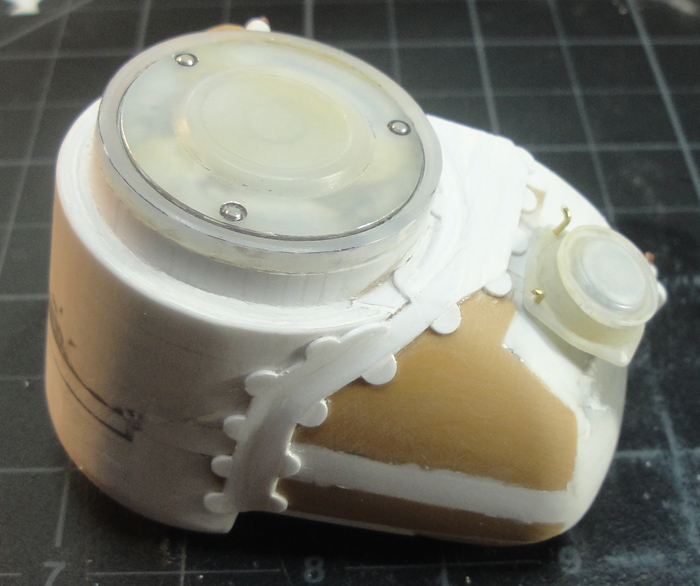
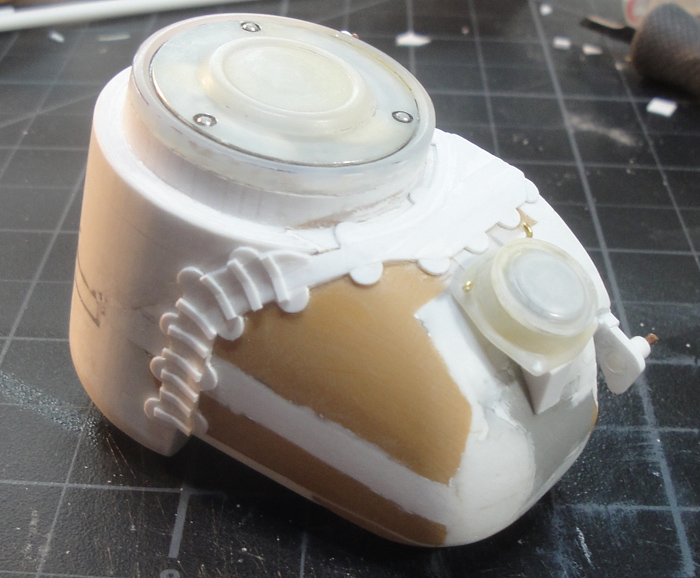
Adding 'ribbing' to the combo tank bracket thing and more work on the fill cap base.

Checking the placement and alignment of the water feed valve.
The valve gets detail, on the outside is the 'knob' on the inside is the feed from the secondary water tank and out the bottom is the feed to the condenser.
Rivets added to the fuel tank side of the bracket.
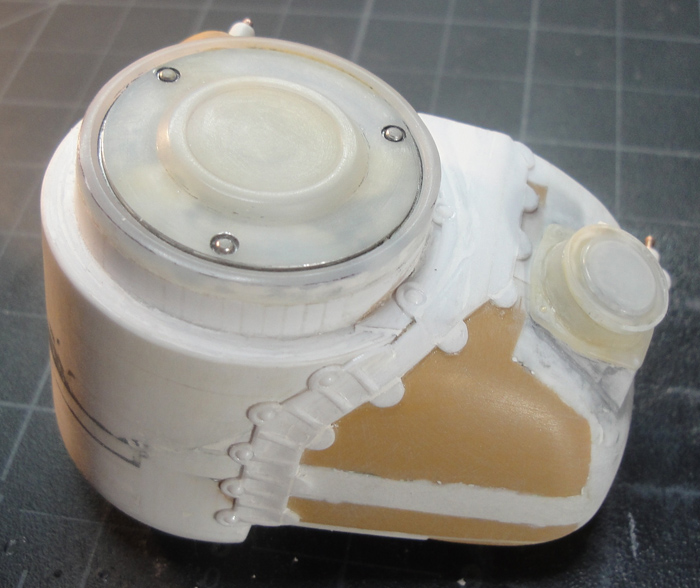
And hex bolt-heads for the water tank side.
The main water tank embellishment begins. I'm using 'tree skeleton' PE and CA with no real plan. Hopefully it will look ok, lol.
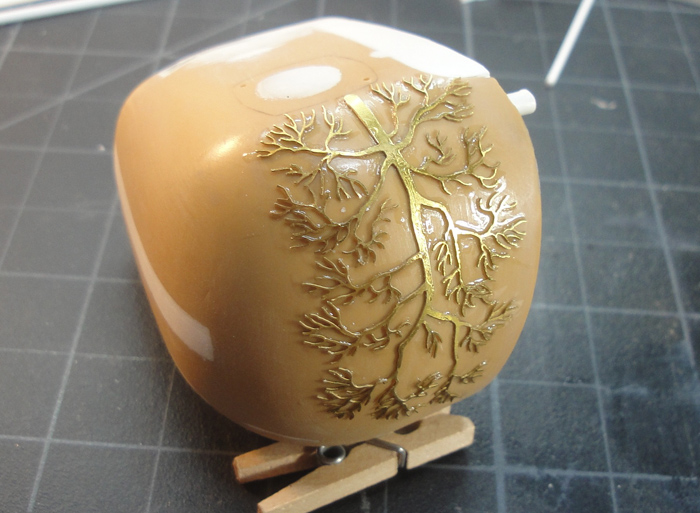
And so on.

Just keep swimming ...
KatsZenJammer- Resident member
- Posts : 2600
Join date : 2016-05-20
Age : 57
Location : Vancouver, BC
Re: Steampunk Harley - Tamiya 1/6 HD FLH Classic 'extreme' kit bash (Very Photo Heavy)
![]() by GaryDainton Mon 14 Aug 2017, 8:14 am
by GaryDainton Mon 14 Aug 2017, 8:14 am
GaryDainton- Advanced Member
- Posts : 4433
Join date : 2014-03-06
Age : 56
Location : Bolton UK
Re: Steampunk Harley - Tamiya 1/6 HD FLH Classic 'extreme' kit bash (Very Photo Heavy)
![]() by Geezerman Wed 16 Aug 2017, 11:53 am
by Geezerman Wed 16 Aug 2017, 11:53 am
Geezerman- Advanced Member
- Posts : 3651
Join date : 2013-02-24
Age : 88
Location : Gulf coast of central Florids
Re: Steampunk Harley - Tamiya 1/6 HD FLH Classic 'extreme' kit bash (Very Photo Heavy)
![]() by Speed Racer 65 Fri 25 Aug 2017, 5:42 pm
by Speed Racer 65 Fri 25 Aug 2017, 5:42 pm

Speed Racer 65- Intermediate Member

- Posts : 865
Join date : 2015-08-06
Location : Louisville KY
Re: Steampunk Harley - Tamiya 1/6 HD FLH Classic 'extreme' kit bash (Very Photo Heavy)
![]() by KatsZenJammer Sun 27 Aug 2017, 6:35 pm
by KatsZenJammer Sun 27 Aug 2017, 6:35 pm
Bit of a gap in posting due to the fact that the sun was going to go out in these parts last week. As I live in one of the good viewing zones I spent some time making a camera obscura, or pinhole camera, out of a meter long cardboard box as I did not have a welder's mask handy. I managed to see most of the show (at work) and when it came time for the Maximum Obscuration I was surrounded by many others with their cardboard boxes. In Vancouver we had 86% coverage and it looked very cool ... but I didn't take any pictures, lol.
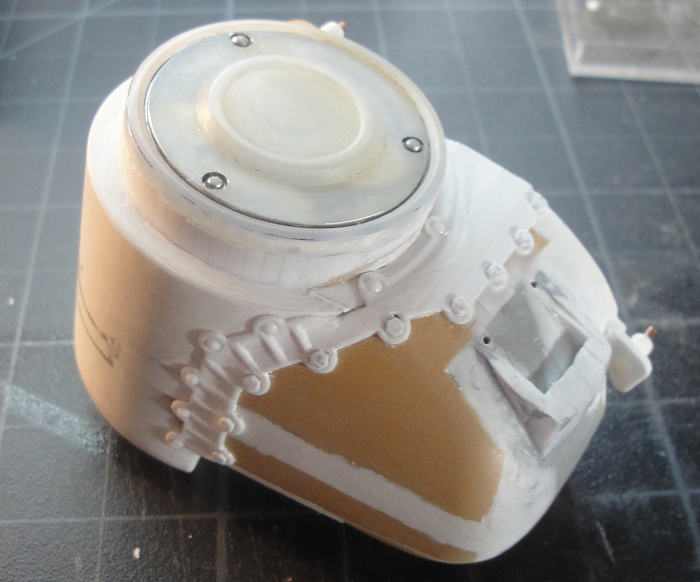
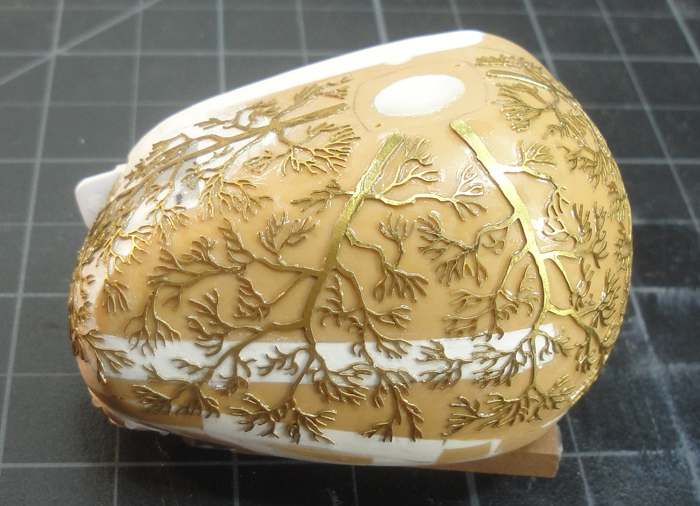
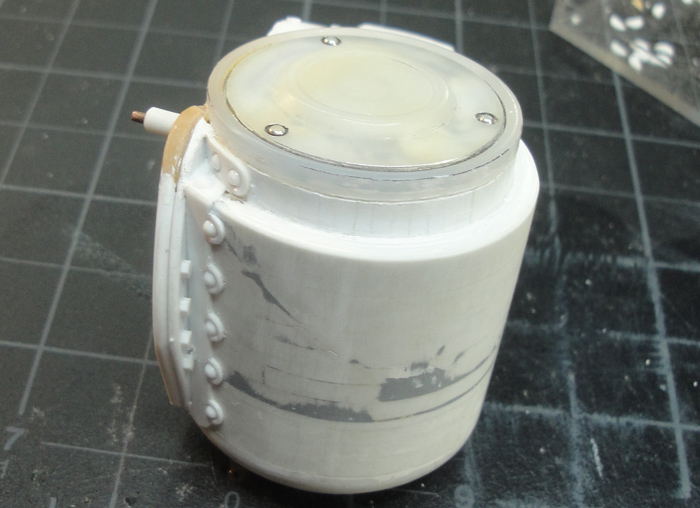
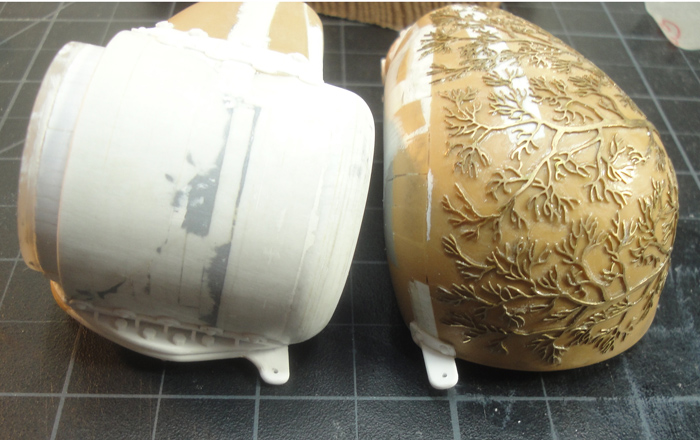
So, the main water tank gets its coating of 'viny' PE.
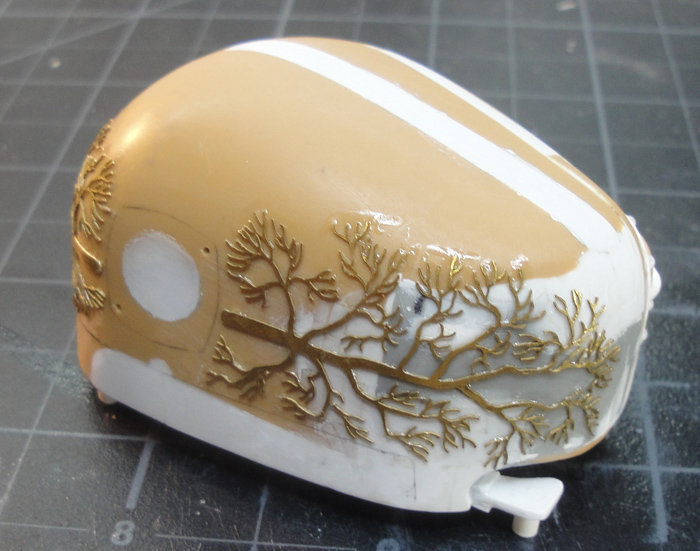

At this point I'm going to call it enough and now I have to spend a lot of time cleaning up the excess CA with X-Acto blade scraping and pinpoint sanding.
The front bracket of the combo tanks starts developing.
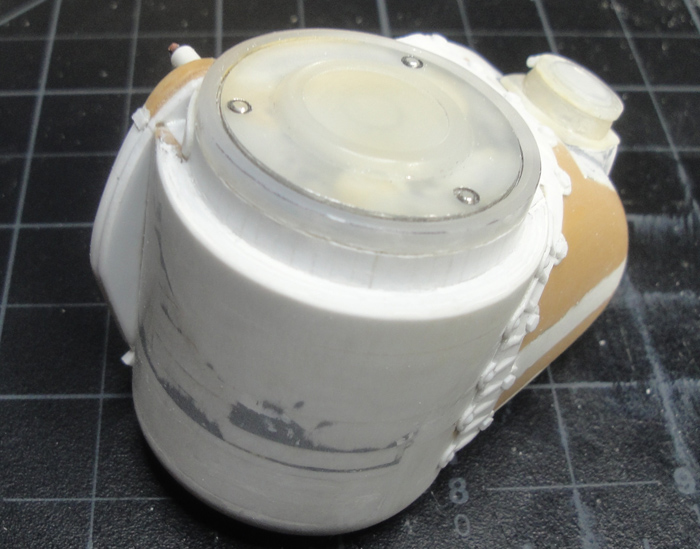

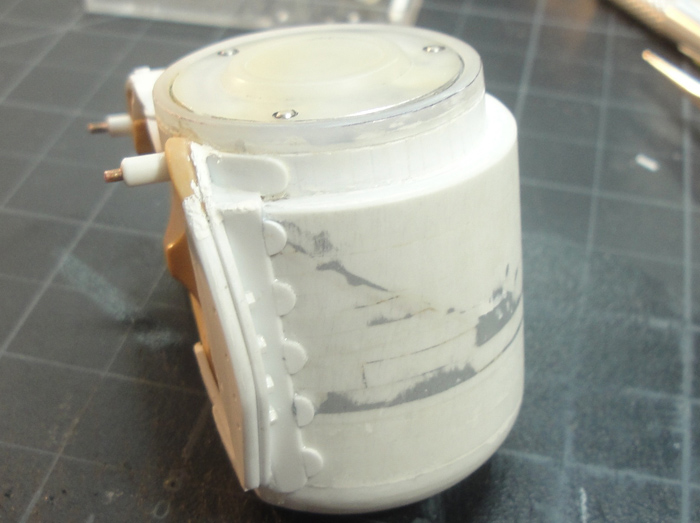
Work on the underside of the combo tank. Though most of this will not be easily visible I'm still adding detail just for the little bit of it that you will be able to see.
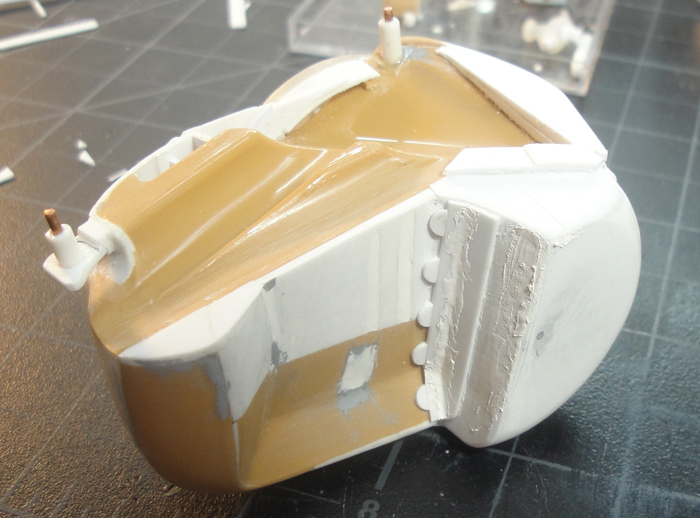
And filling in a bit on the inner side of the tank. Also mostly obscured but just for the little bit of it that will be seen.
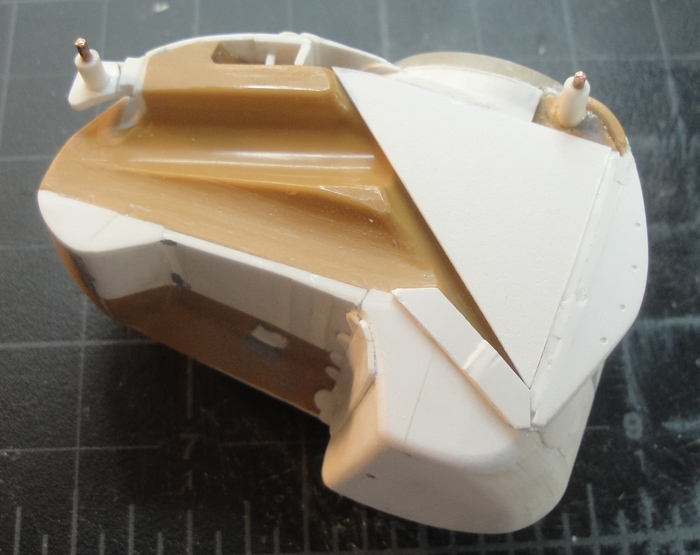
The adding of the hex nuts and rivet heads.

I feel like I'm cresting a rise (I might have said this before) but even so there is a lot of little stuff still to come in the way of water and fuel lines and pumps, as well as the hypothetical secondary fuel tank and then the control stuff like valves and levers and linkages - especially as far as the shifter for the transmission goes. But active and maniacal painting keeps looming ... after so long just working on parts it feels like I'm going to have to re-learn soooo much in the paint department ...
Just keep swimming ...
KatsZenJammer- Resident member
- Posts : 2600
Join date : 2016-05-20
Age : 57
Location : Vancouver, BC
Re: Steampunk Harley - Tamiya 1/6 HD FLH Classic 'extreme' kit bash (Very Photo Heavy)
![]() by GaryDainton Sun 27 Aug 2017, 8:24 pm
by GaryDainton Sun 27 Aug 2017, 8:24 pm
GaryDainton- Advanced Member
- Posts : 4433
Join date : 2014-03-06
Age : 56
Location : Bolton UK
Re: Steampunk Harley - Tamiya 1/6 HD FLH Classic 'extreme' kit bash (Very Photo Heavy)
![]() by disabled modeler Mon 28 Aug 2017, 11:56 am
by disabled modeler Mon 28 Aug 2017, 11:56 am
disabled modeler- Intermediate Member
- Posts : 979
Join date : 2016-05-22
Age : 60
Location : Quincy,IL. USA
Re: Steampunk Harley - Tamiya 1/6 HD FLH Classic 'extreme' kit bash (Very Photo Heavy)
![]() by Geezerman Mon 28 Aug 2017, 2:40 pm
by Geezerman Mon 28 Aug 2017, 2:40 pm
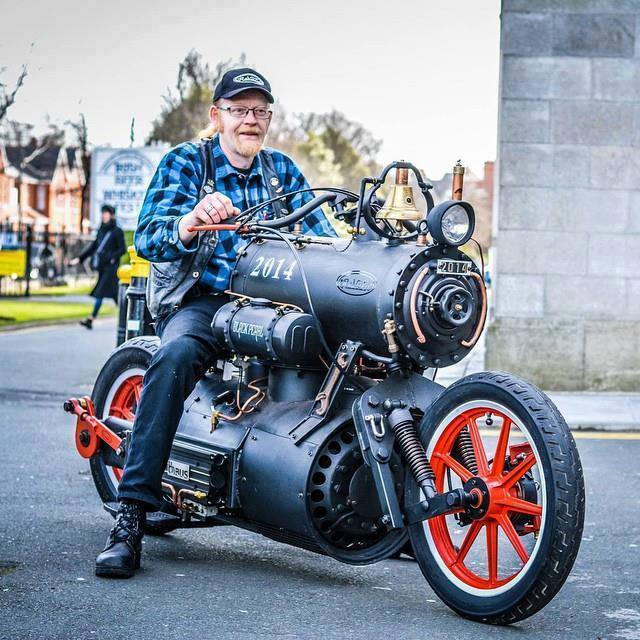
Guess what I came across the other day ! Don't know what all that stuff is, but it was captioned, 'steam powered bike'
Geezerman- Advanced Member
- Posts : 3651
Join date : 2013-02-24
Age : 88
Location : Gulf coast of central Florids
Re: Steampunk Harley - Tamiya 1/6 HD FLH Classic 'extreme' kit bash (Very Photo Heavy)
![]() by GaryDainton Mon 28 Aug 2017, 5:22 pm
by GaryDainton Mon 28 Aug 2017, 5:22 pm
Brilliant Clay, did it actually move under its own steam?
GaryDainton- Advanced Member
- Posts : 4433
Join date : 2014-03-06
Age : 56
Location : Bolton UK
Re: Steampunk Harley - Tamiya 1/6 HD FLH Classic 'extreme' kit bash (Very Photo Heavy)
![]() by KatsZenJammer Tue 05 Sep 2017, 12:12 am
by KatsZenJammer Tue 05 Sep 2017, 12:12 am
Clay - thanks for sharing that totally cool looking ride! There is a lot of inspiration and reference (read: ideas for me to purloin) all over the place, like storing a wrench on a convenient brace. And that front fork assembly is just sick.
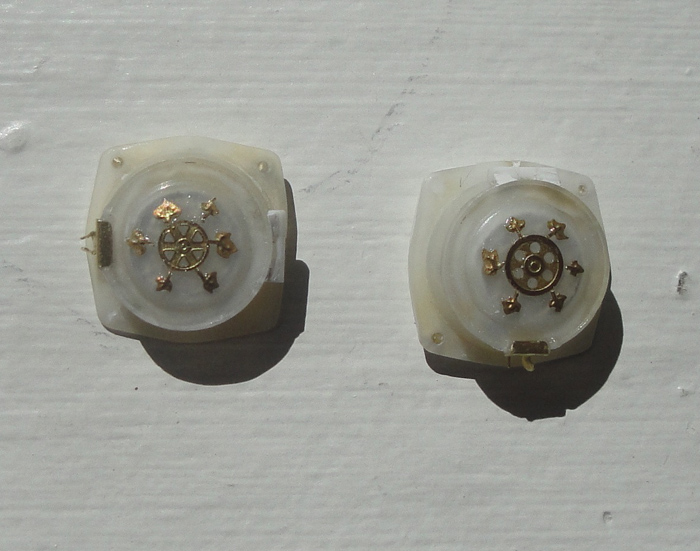
So, in the name of adding as much detail as possible I figured that I could embellish the water fill caps. I used two different centres from the INJ PE to distinguish between them and then added individual ivy leaves as spokes.
The start of the modding of the instrument panel shroud. To accommodate the combo tank requires cutting and rebuilding and shaping, which means it will look pretty ugly until its done, lol.

The front mounts for the tanks take shape.
Further along and details have been added.
Another modification to the frame for the mount points.
Further work on the shroud. At this point I've added a post (not visible) as the first of the frame mounts. This bit is going to get complicated because I plan to cut away the existing panel face so I am working out how to fix the mounting posts so they don't attach to the current one.

And on and on and on, lol.
Just keep swimming ...
KatsZenJammer- Resident member
- Posts : 2600
Join date : 2016-05-20
Age : 57
Location : Vancouver, BC
Re: Steampunk Harley - Tamiya 1/6 HD FLH Classic 'extreme' kit bash (Very Photo Heavy)
![]() by GaryDainton Tue 05 Sep 2017, 8:43 am
by GaryDainton Tue 05 Sep 2017, 8:43 am
GaryDainton- Advanced Member
- Posts : 4433
Join date : 2014-03-06
Age : 56
Location : Bolton UK
Re: Steampunk Harley - Tamiya 1/6 HD FLH Classic 'extreme' kit bash (Very Photo Heavy)
![]() by Sponsored content
by Sponsored content
Sponsored content
Page 14 of 25 • 1 ... 8 ... 13, 14, 15 ... 19 ... 25 ![]()
» Tamiya 1/6 Harley Davidson Fat Boy Lo
» Tamiya 1/6 Harley Davidson FLH1200
» Steampunk Ducati
» '57 Salvage bash-up
|
|
|