
Steampunk Harley - Tamiya 1/6 HD FLH Classic 'extreme' kit bash (Very Photo Heavy)
Page 5 of 25 •  1, 2, 3, 4, 5, 6 ... 15 ... 25
 ![]()
Re: Steampunk Harley - Tamiya 1/6 HD FLH Classic 'extreme' kit bash (Very Photo Heavy)
![]() by KatsZenJammer Tue 31 May 2016, 11:50 pm
by KatsZenJammer Tue 31 May 2016, 11:50 pm
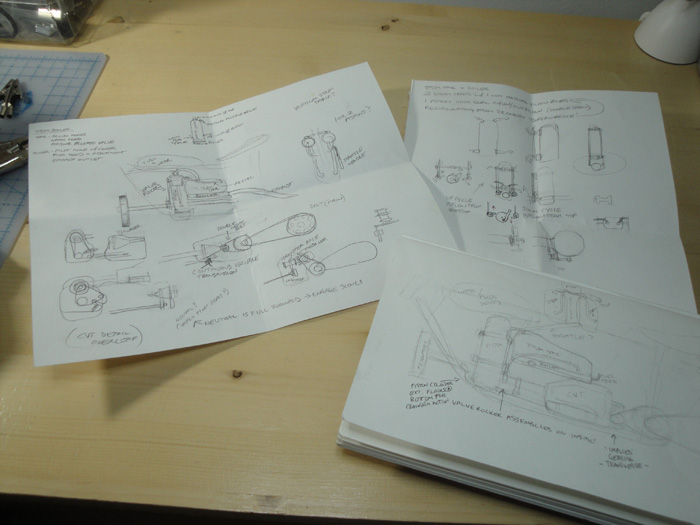

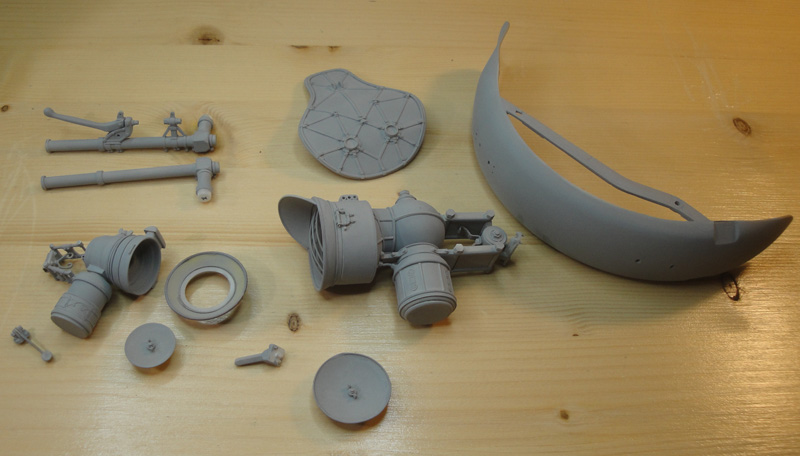
And I also decided that I needed to break out the AB so I primed a bunch of parts that hadn't been primed yet. Interestingly, some of the parts here are also in the second sketch photo - you can compare how much divergence there is between my thoughts/plans and the end results.
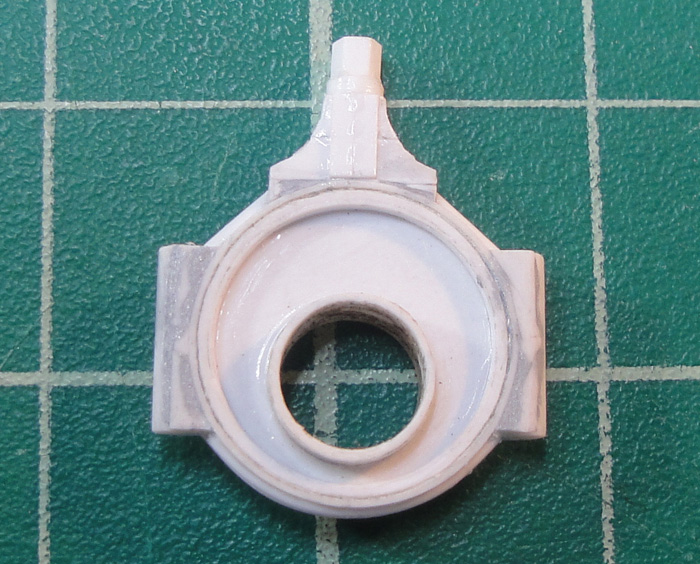
The eccentric wheel gets more detail.

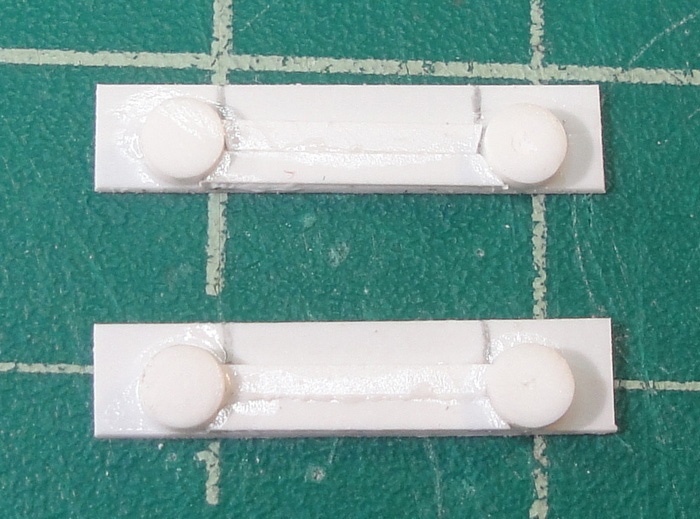
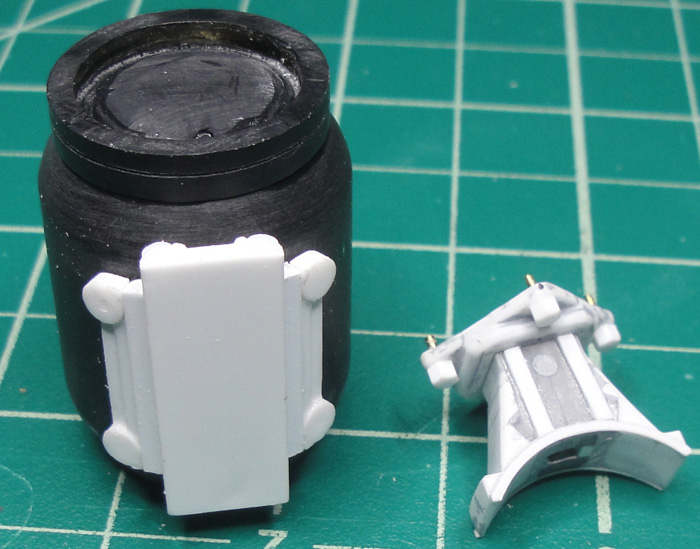
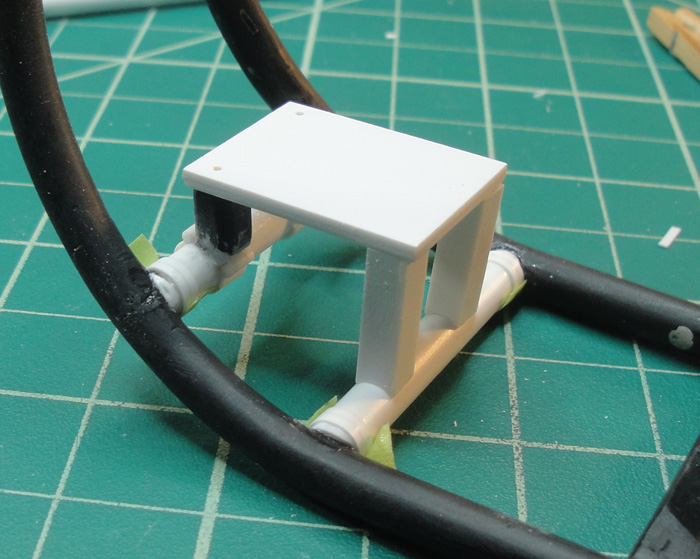
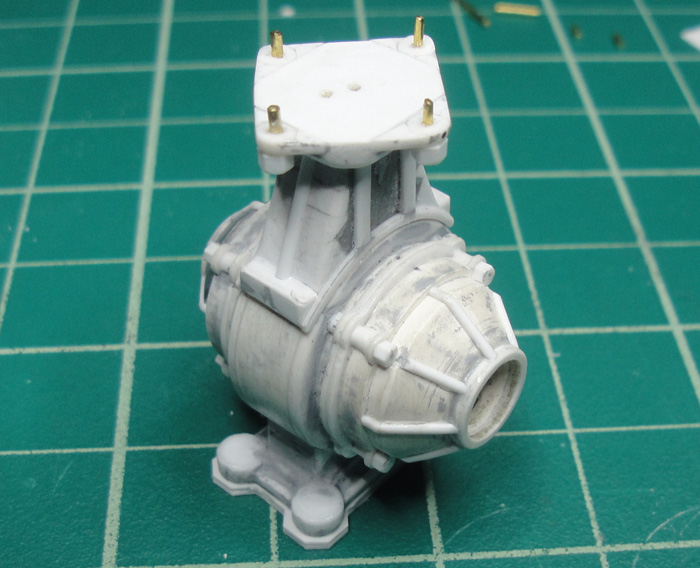
Developing the mounting plates for the cylinder valve housing.
Adding detail to the connecting rod housing.
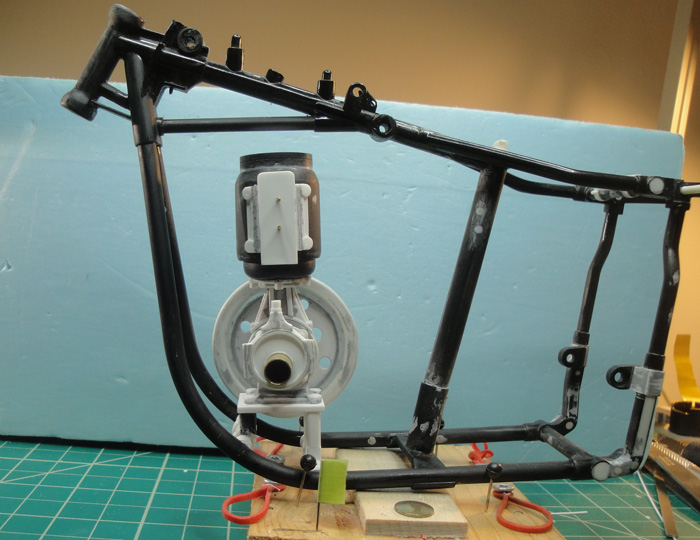
It was finally time to remove the extraneous frame bits that I'd left on up to now. Because I had no idea where I was going with the steam engine I figured better to leave the kit moulded stuff until I was sure of what I wanted.

Starting the additional detailing of the new frame crossmember.

Adding another frame crossmember for the crankcase/engine mount site.
More unexpected inspiration had me cut away the middle of the leftover engine mount piece.
I sense something approaching ...

KatsZenJammer- Resident member

- Posts : 2600
Join date : 2016-05-20
Age : 57
Location : Vancouver, BC
Re: Steampunk Harley - Tamiya 1/6 HD FLH Classic 'extreme' kit bash (Very Photo Heavy)
![]() by KatsZenJammer Wed 01 Jun 2016, 12:01 am
by KatsZenJammer Wed 01 Jun 2016, 12:01 am
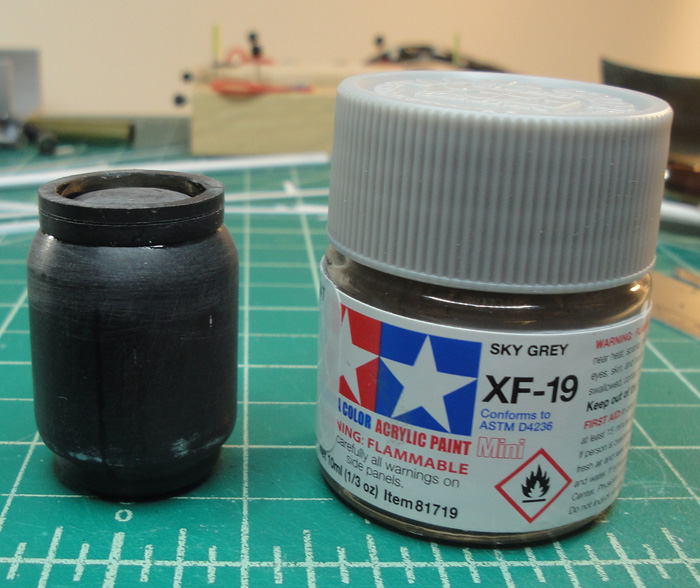
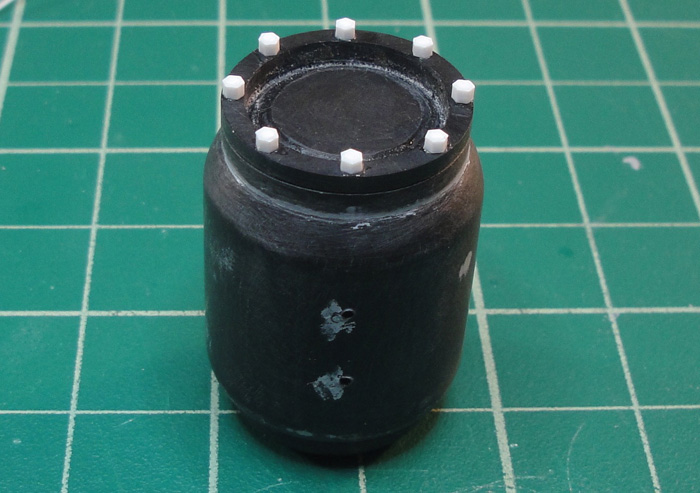
The cylinder with some added detail and a scale comparison.
Test fit.
The cylinder valve housing develops and the connecting rod housing get added details (hex nuts anyone?).
Making a top cap for the cylinder.
Valve housing in process with placement holes drilled.
Detailing the crossmember.
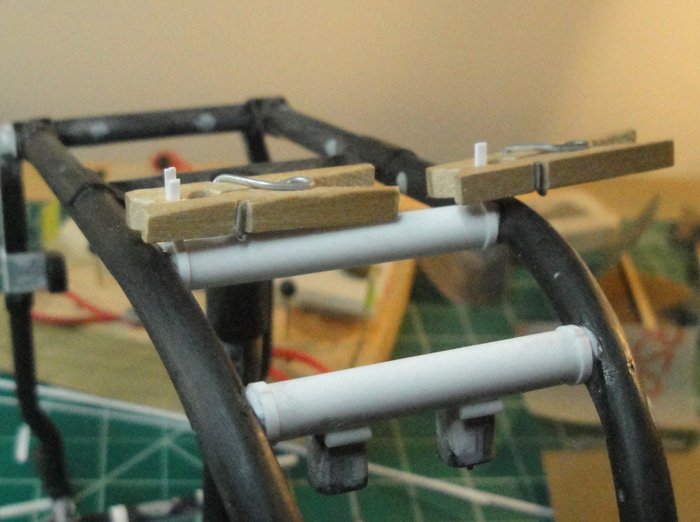
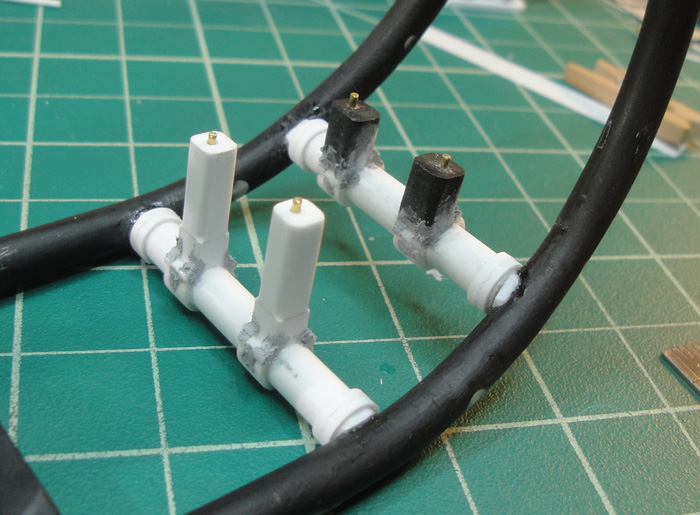
Adding clamp bands to the front engine mount posts.
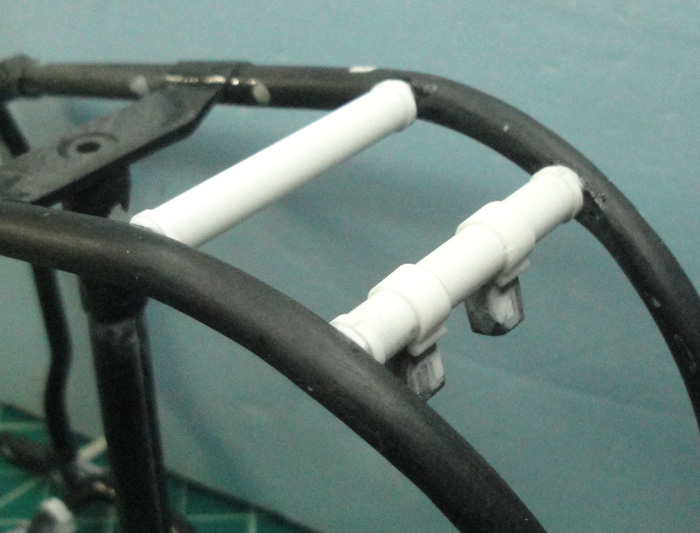
More detailing.
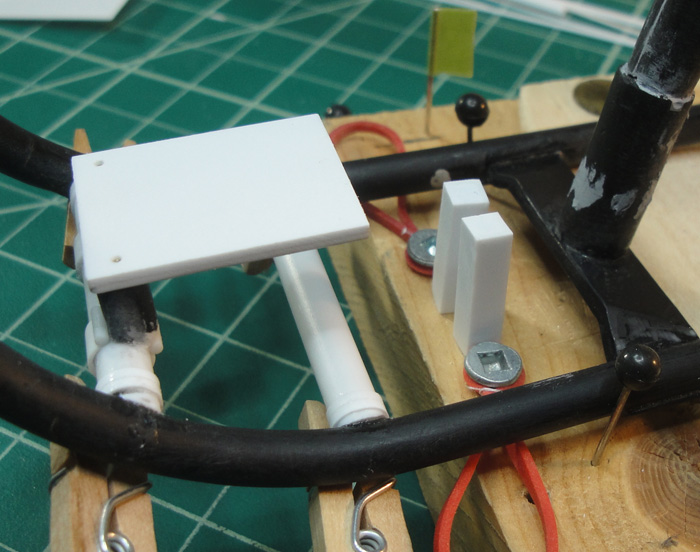
And the plate for the engine mount and rear posts arrive on the scene.
And it's with a hearty WOO HOO that I can close the eScale archive folder and now all I have to do is Photoshop the work photos I've taken in the interim. Damn this feels good ... and again I apologize for making everyone do so much scrolling.
KatsZenJammer- Resident member
- Posts : 2600
Join date : 2016-05-20
Age : 57
Location : Vancouver, BC
Re: Steampunk Harley - Tamiya 1/6 HD FLH Classic 'extreme' kit bash (Very Photo Heavy)
![]() by KatsZenJammer Wed 01 Jun 2016, 1:50 am
by KatsZenJammer Wed 01 Jun 2016, 1:50 am
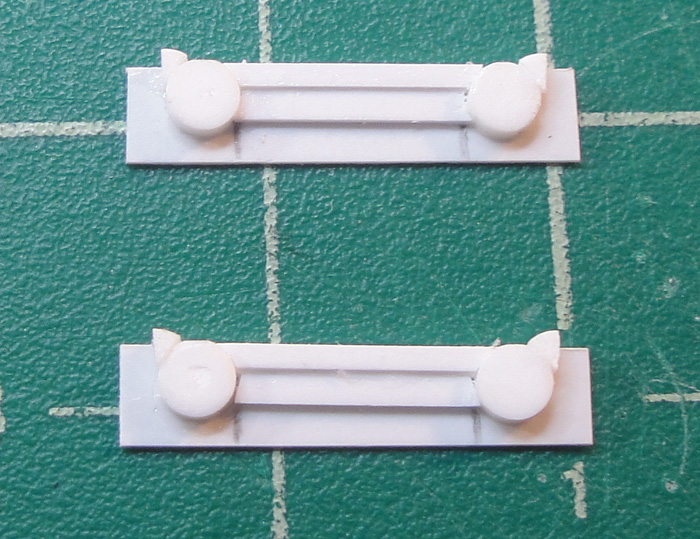
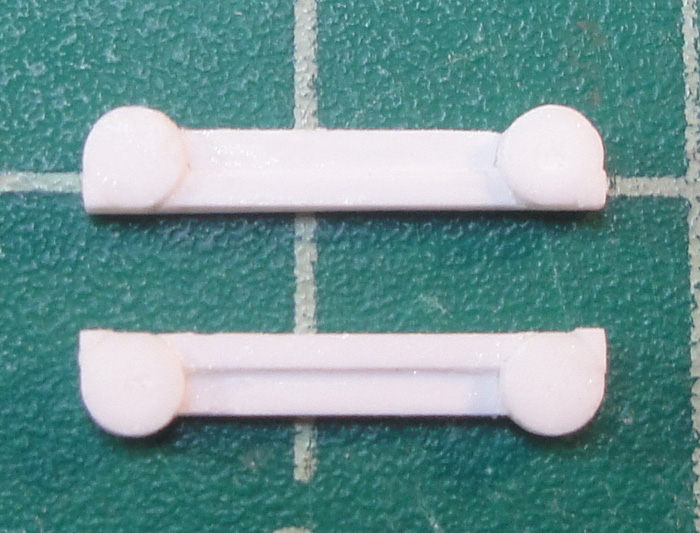
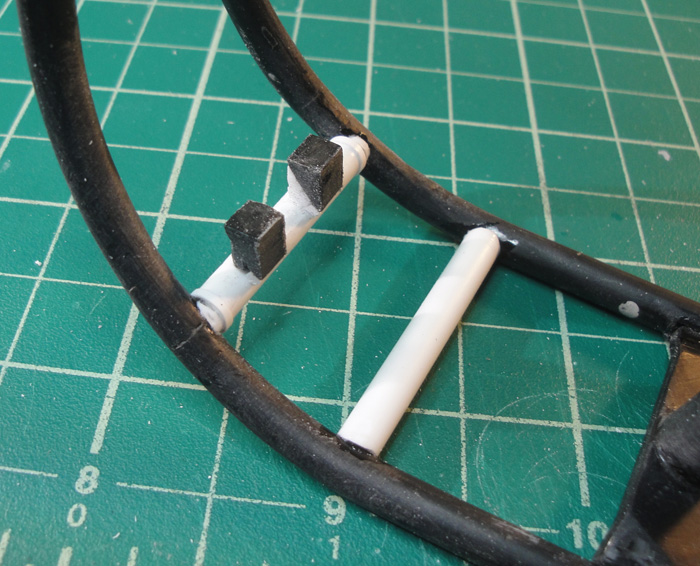
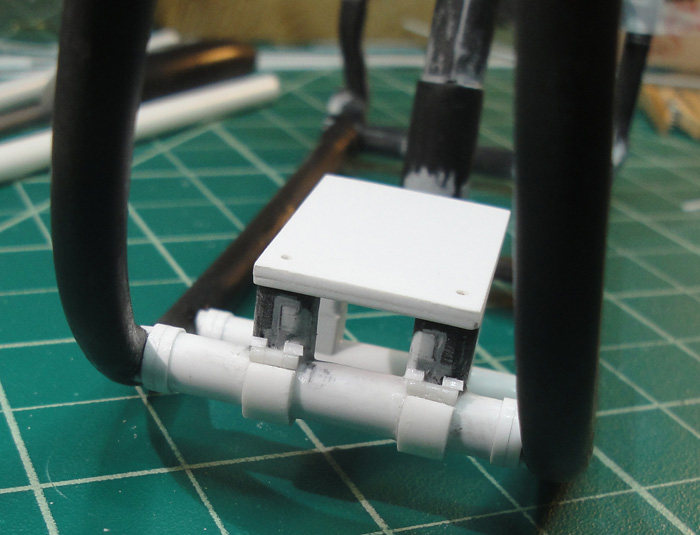
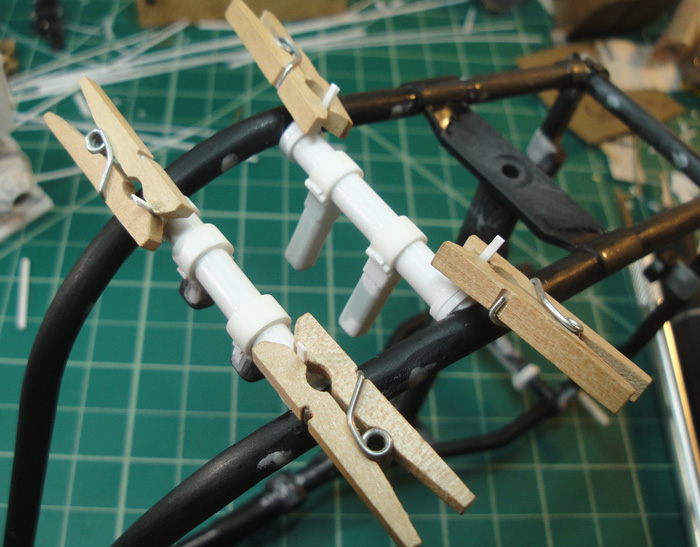
The rear posts for the crankcase/engine mount plate get worked on. First was carving out the curve then bevelling the corners.

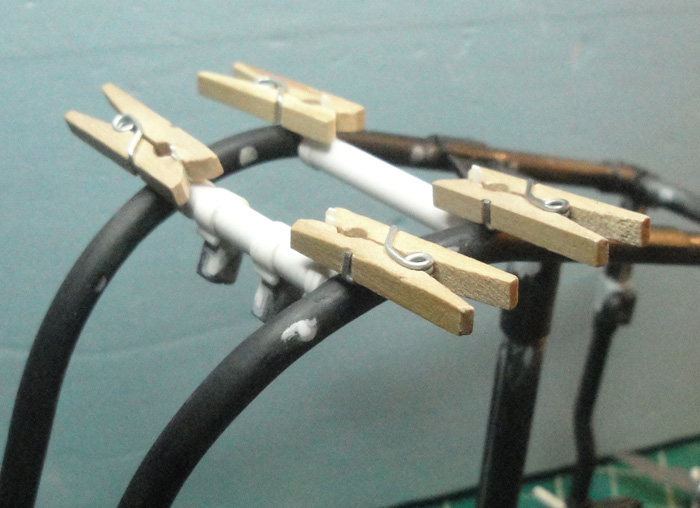
The idea was that the support posts would be clamped onto the crossmember instead of being welded or inset. The hinges are rod with lines cut into it to simulate the hinge sections. The little wedges are fill ins to connect hinge sections with their respective anchor points.
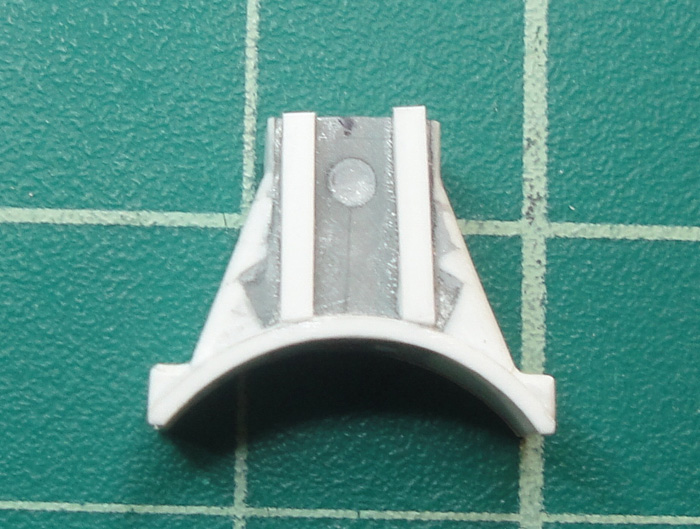
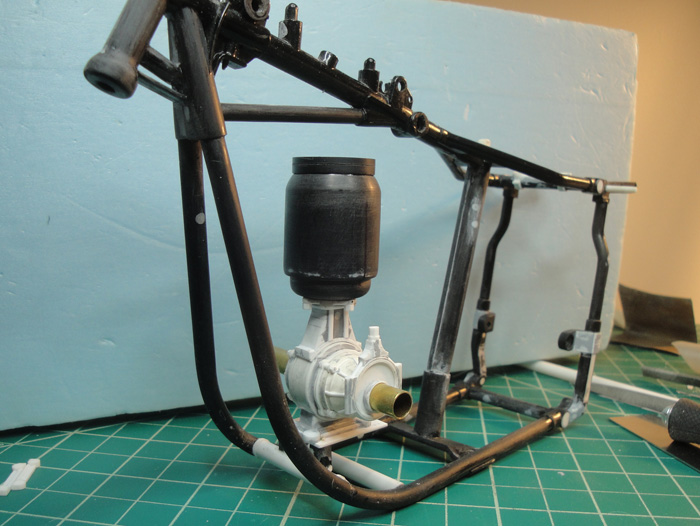
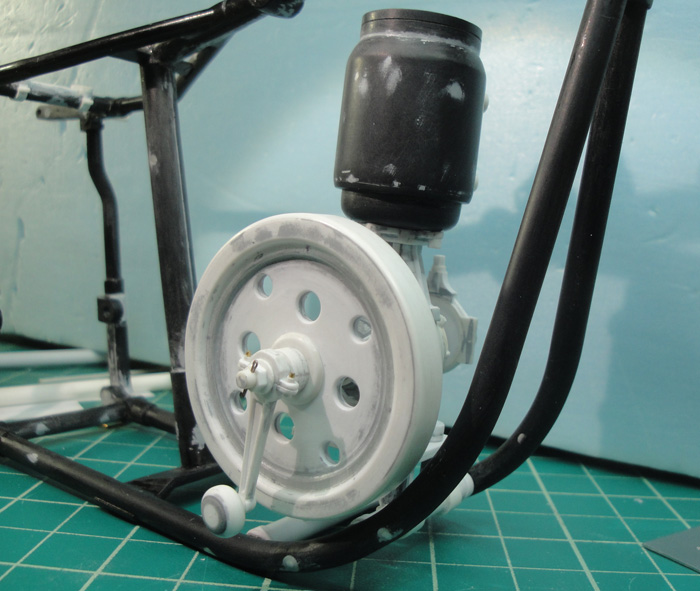
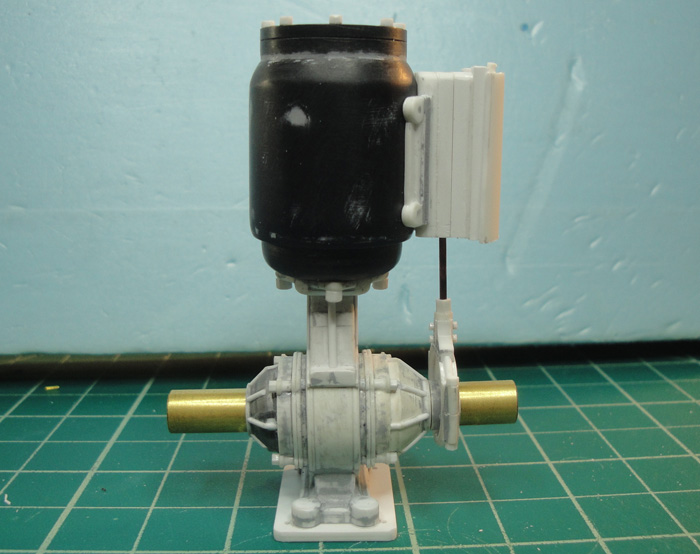
Time to assess. Please note how close to the frame the flywheel sits.
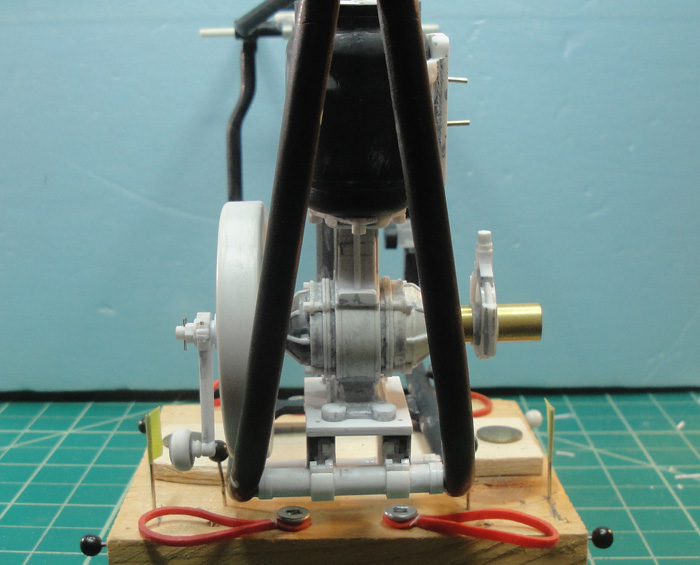
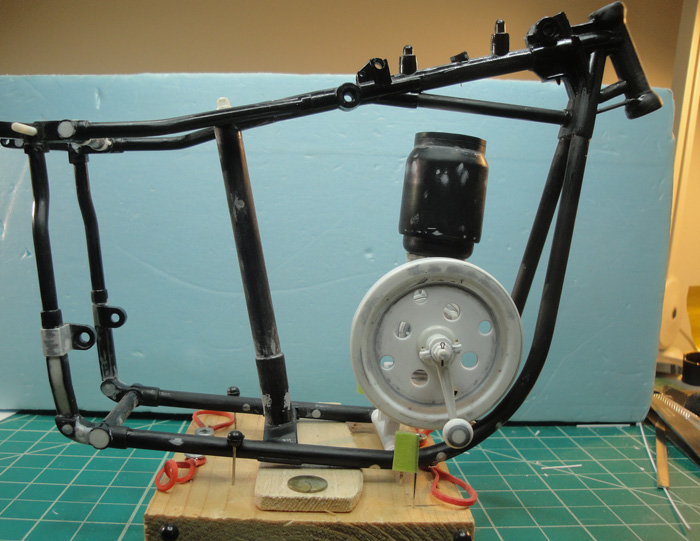

To raise the flywheel just a bit I added a layer of thickness to the crankcase support base.
Another assessment and personal approval, I can live with that gap.

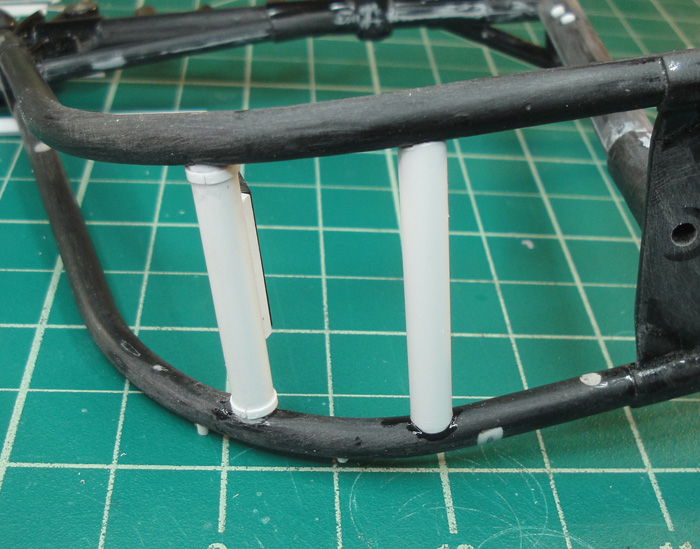
Anchor pegs in place.

KatsZenJammer- Resident member
- Posts : 2600
Join date : 2016-05-20
Age : 57
Location : Vancouver, BC
Re: Steampunk Harley - Tamiya 1/6 HD FLH Classic 'extreme' kit bash (Very Photo Heavy)
![]() by KatsZenJammer Wed 01 Jun 2016, 2:04 am
by KatsZenJammer Wed 01 Jun 2016, 2:04 am

This build began on May 29, 2014, so it's two now. A bit belated but I managed to flood the thread with photos in order to get here and keep things in sequence. There is an actual, pragmatic, logical reason for these big test fits but I like doing them for morale boosting. Let's hope it doesn't develop a 'terrible two's' phase. Hope you enjoy.


I left out the head and tail light lenses because they're both glass ones and as a consequence they're too heavy for test fits.

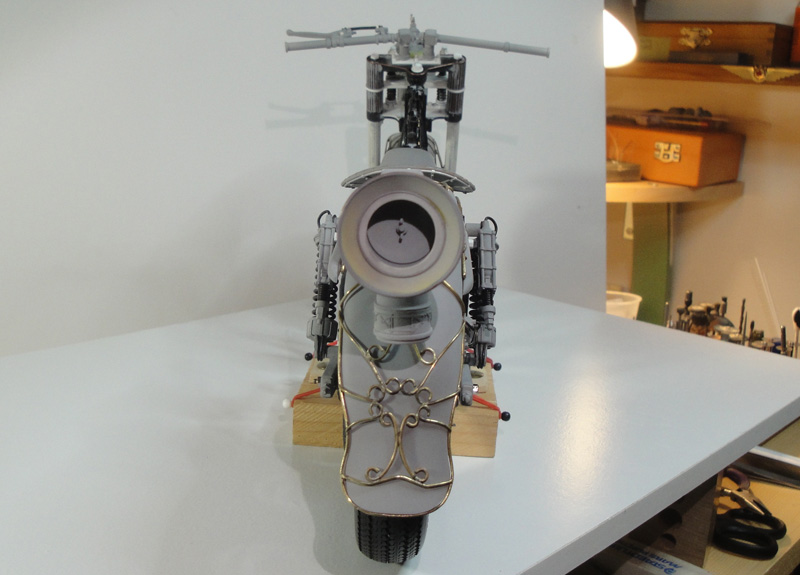
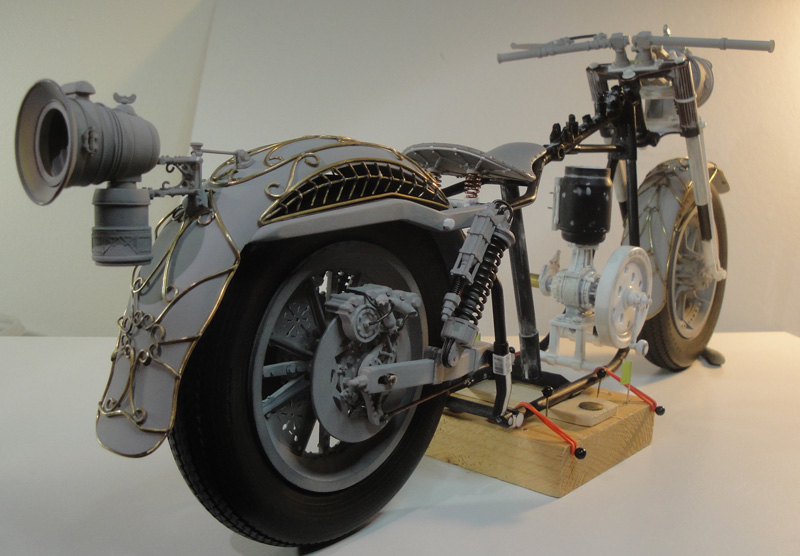
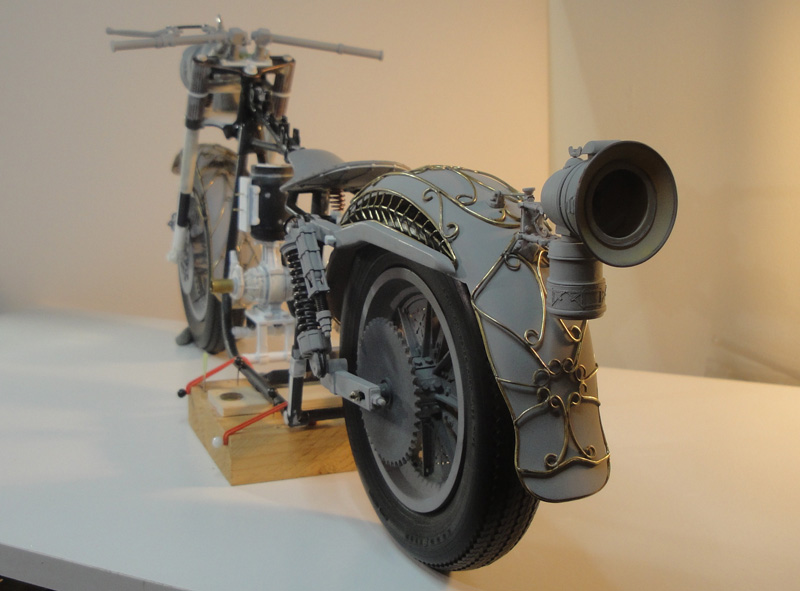
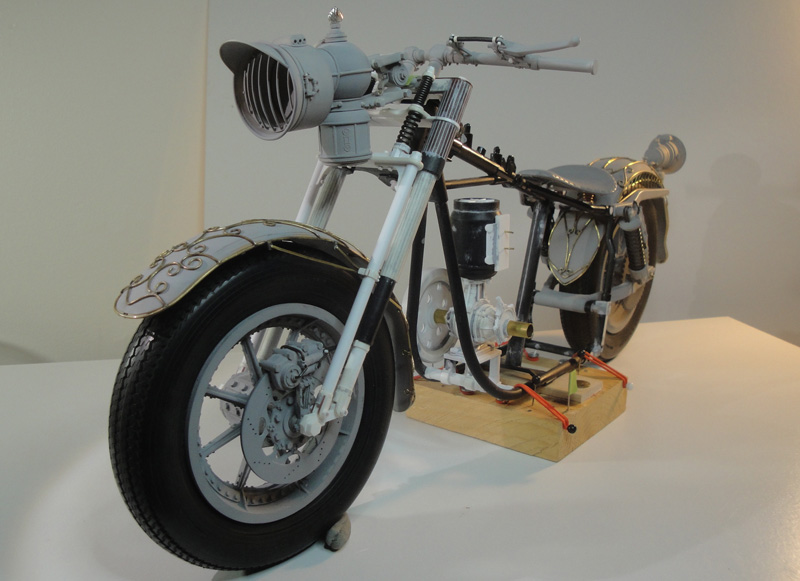
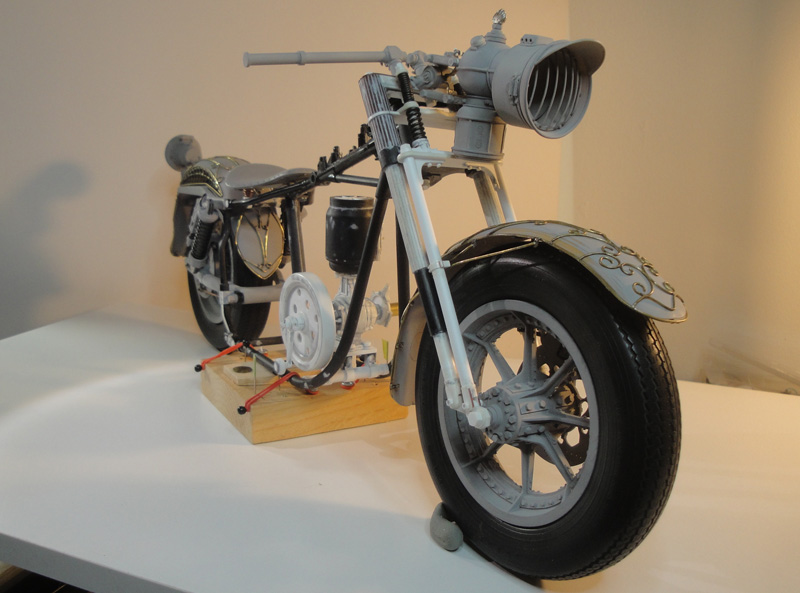
There's a little bit of green masking tape in front of the handlebar posts. That was to secure the headlight mount so it didn't just fall off.
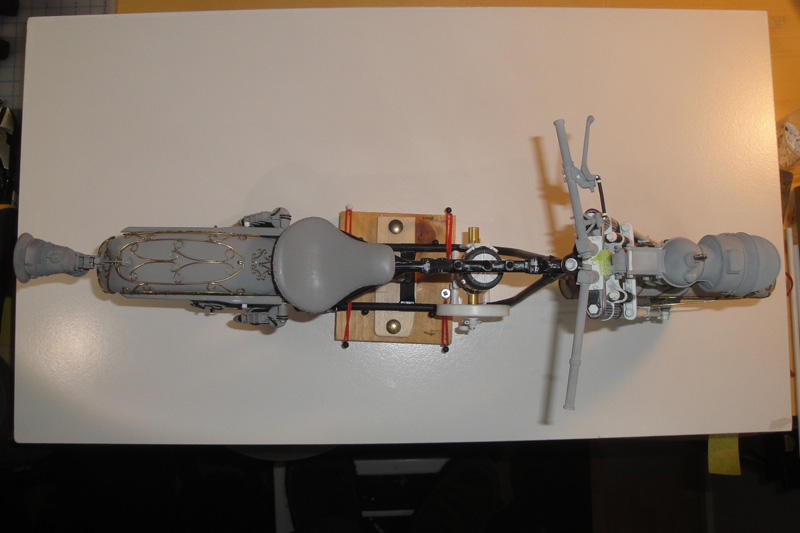
For those who noticed the front forks haven't been primed yet, that's because I have some more plans for them, decoration wise.
And from here on my posts will revert to their usual weekly occurrence. Thanks for putting up with this barrage, I promise I won't do it again

KatsZenJammer- Resident member
- Posts : 2600
Join date : 2016-05-20
Age : 57
Location : Vancouver, BC
Re: Steampunk Harley - Tamiya 1/6 HD FLH Classic 'extreme' kit bash (Very Photo Heavy)
![]() by GaryDainton Wed 01 Jun 2016, 8:31 am
by GaryDainton Wed 01 Jun 2016, 8:31 am
Been a pleasure to see it all again Kats, the lamps look stunning in primer and now the engine is coming together its really 'filling out'.
I look forward to future posts and progress. Thanks for an inspiration and educational build.
G

GaryDainton- Advanced Member
- Posts : 4433
Join date : 2014-03-06
Age : 56
Location : Bolton UK
Re: Steampunk Harley - Tamiya 1/6 HD FLH Classic 'extreme' kit bash (Very Photo Heavy)
![]() by Guest Wed 01 Jun 2016, 12:56 pm
by Guest Wed 01 Jun 2016, 12:56 pm

Guest- Guest
Re: Steampunk Harley - Tamiya 1/6 HD FLH Classic 'extreme' kit bash (Very Photo Heavy)
![]() by Skid Thu 02 Jun 2016, 8:56 am
by Skid Thu 02 Jun 2016, 8:56 am
This is simply and amazing build.
I like your alternative use for the callipers!!
_________________
Al.
Constructive criticism is always welcome.
“Success always demands a greater effort.” Winston Churchill
"Success is failure turned inside out" Unknown

Skid- Admin
- Posts : 7129
Join date : 2013-02-15
Age : 75
Location : Newcastle. Good Old Blighty. -

Re: Steampunk Harley - Tamiya 1/6 HD FLH Classic 'extreme' kit bash (Very Photo Heavy)
![]() by Geezerman Thu 02 Jun 2016, 11:14 am
by Geezerman Thu 02 Jun 2016, 11:14 am

Now, to go back and watch the engine construction !
What a trip !!!


Geezerman- Advanced Member
- Posts : 3651
Join date : 2013-02-24
Age : 88
Location : Gulf coast of central Florids
Re: Steampunk Harley - Tamiya 1/6 HD FLH Classic 'extreme' kit bash (Very Photo Heavy)
![]() by Geezerman Thu 02 Jun 2016, 11:48 am
by Geezerman Thu 02 Jun 2016, 11:48 am
Geezerman- Advanced Member
- Posts : 3651
Join date : 2013-02-24
Age : 88
Location : Gulf coast of central Florids
Re: Steampunk Harley - Tamiya 1/6 HD FLH Classic 'extreme' kit bash (Very Photo Heavy)
![]() by Guest Thu 02 Jun 2016, 2:00 pm
by Guest Thu 02 Jun 2016, 2:00 pm
The water capacity would need to be quite large...

Guest- Guest
Re: Steampunk Harley - Tamiya 1/6 HD FLH Classic 'extreme' kit bash (Very Photo Heavy)
![]() by Speed Racer 65 Thu 02 Jun 2016, 3:18 pm
by Speed Racer 65 Thu 02 Jun 2016, 3:18 pm
Looking forward to "the rest of the story"

Speed Racer 65- Intermediate Member

- Posts : 865
Join date : 2015-08-06
Location : Louisville KY
Re: Steampunk Harley - Tamiya 1/6 HD FLH Classic 'extreme' kit bash (Very Photo Heavy)
![]() by KatsZenJammer Sun 05 Jun 2016, 10:50 pm
by KatsZenJammer Sun 05 Jun 2016, 10:50 pm
Nigel - That thought has been hanging around my cranium since the start of this becoming an actual steam powered cycle. The boiler was going to either fuel oil or alcohol burning as well. The plan was an asymmetrical large water tank and smaller 'fuel' tank located roughly where the original gas tanks were - still mulling over that part.
The water requirements can be mitigated by a recirculating system with condensers and a pump to recover much of the exhaust. This sounds a lot more complex than it is - after viewing much stuff on the Net some of these systems look like 'home garage' add-ons even though they were manufactured that way. And of course I will be simplifying my tasks by hiding all the working detail under housings where possible. I do want to have the condenser exposed though, simple coiled tubing lends a sort of 'moonshiner's still' feeling to it, hee hee.
The cylinder gets some hex nuts.
Test fit. The 'top cap' of the cylinder is in place now as is the eccentric rod.
Details, details ... crossbar seat rings in this case.
Putty work to develop the hinges.
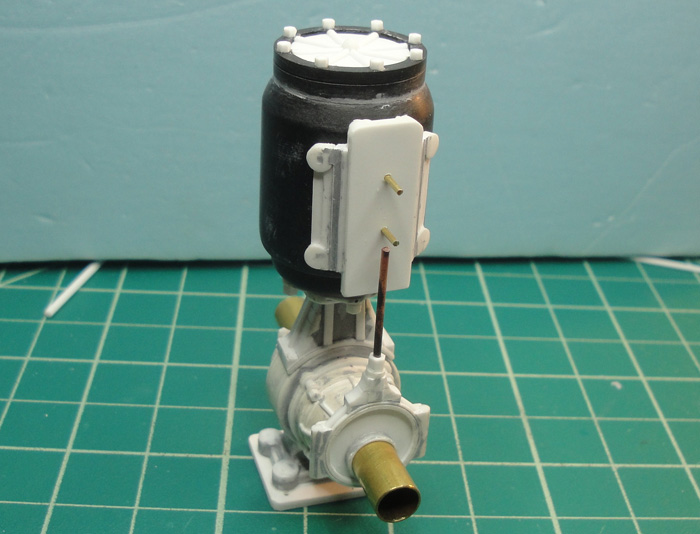
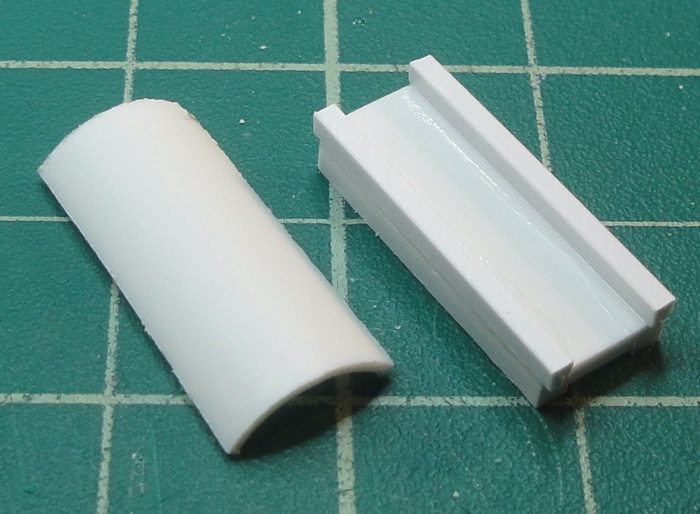
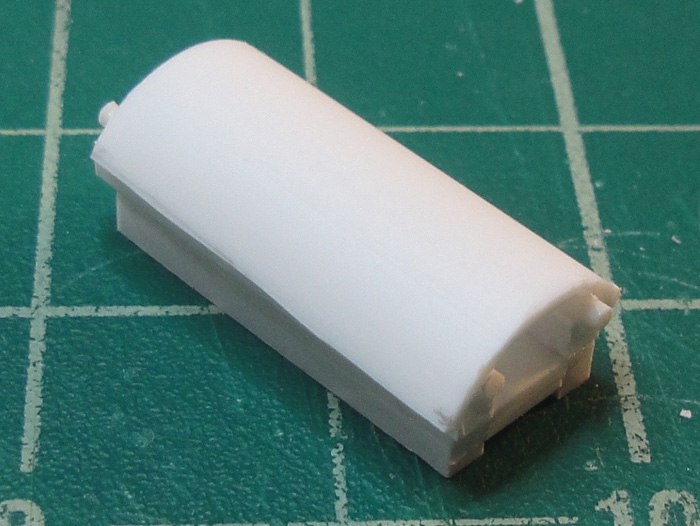
The steambox portion of the housing starts to take form. The base of the housing will be set onto the cylinder wall in such a way as to make it seem part of the casting, with scribed in seams added to give the rest of it that bolted on look.

For this part I chose to use 2 sided tape to attach the square rods portions together then used MEK on the outside plate. This will allow me to form the piece to 'mate' as exactly as possible but I can also remove the outer piece for detailing. Holes will be drilled for alignment, of course.

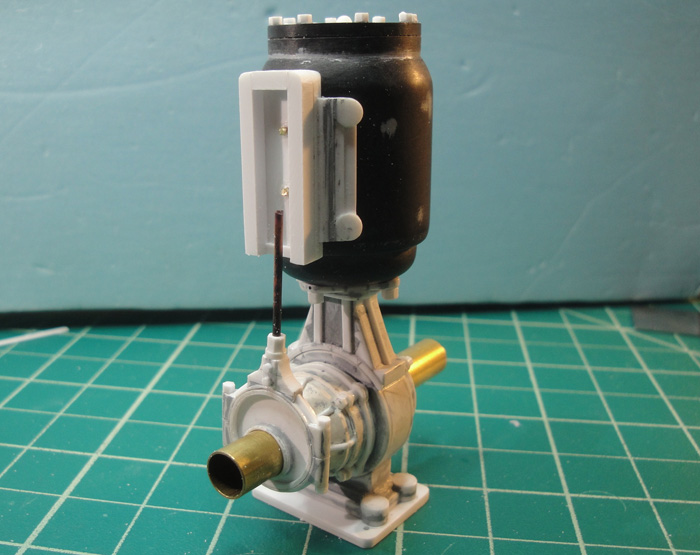
Test fit. How this works is that the valves are actuated by the rod which connects on a hinge to the valve connecting rod. On the outside of the assembly is the steam box which is where the steam is fed from the boiler. There will be more depth added to the steam box to make room for steam feed and exhaust couplings. As well the cylinder will definitely be braced to the frame in some way so there will be some form of detail to accommodate that being added.
And the increments keep adding up slowly but surely. I hadn't really thought through any specifics for this portion of the build, just general ideas. Applying them step by step is helping me form a clearer idea of the direction which will be taken. And of course most of what I'm ending up with doesn't really resemble the initial thought ...
KatsZenJammer- Resident member
- Posts : 2600
Join date : 2016-05-20
Age : 57
Location : Vancouver, BC
Re: Steampunk Harley - Tamiya 1/6 HD FLH Classic 'extreme' kit bash (Very Photo Heavy)
![]() by Guest Mon 06 Jun 2016, 1:53 am
by Guest Mon 06 Jun 2016, 1:53 am
good stuff Kats!
Guest- Guest
Re: Steampunk Harley - Tamiya 1/6 HD FLH Classic 'extreme' kit bash (Very Photo Heavy)
![]() by Guest Mon 06 Jun 2016, 2:04 am
by Guest Mon 06 Jun 2016, 2:04 am
------- AMAZING!!!!!!!
You really need to consider making the trip to Salt Lake City next April for GSL. I honestly think we could be looking at a Best of Class or even Best of Show here. The only suggestion I can make is you might want to consider some hex nuts.
Guest- Guest
Re: Steampunk Harley - Tamiya 1/6 HD FLH Classic 'extreme' kit bash (Very Photo Heavy)
![]() by GaryDainton Mon 06 Jun 2016, 8:17 am
by GaryDainton Mon 06 Jun 2016, 8:17 am
When the inlet and outlet are added together with your usual fantastic detailing
its going to be extremely impressive.
GaryDainton- Advanced Member
- Posts : 4433
Join date : 2014-03-06
Age : 56
Location : Bolton UK
Re: Steampunk Harley - Tamiya 1/6 HD FLH Classic 'extreme' kit bash (Very Photo Heavy)
![]() by harron68 Mon 06 Jun 2016, 1:03 pm
by harron68 Mon 06 Jun 2016, 1:03 pm
harron68- Advanced Member
- Posts : 3616
Join date : 2013-02-28
Age : 73
Location : MIDWEST
Re: Steampunk Harley - Tamiya 1/6 HD FLH Classic 'extreme' kit bash (Very Photo Heavy)
![]() by disabled modeler Mon 06 Jun 2016, 1:10 pm
by disabled modeler Mon 06 Jun 2016, 1:10 pm
harron68 wrote:We're looking at "museum quality" or Hollywood film studio quality work. It is weird, certainly, and like good art, stunning. Thank you for sharing your creative process!
Xs 2....real work of art...!....
disabled modeler- Intermediate Member
- Posts : 979
Join date : 2016-05-22
Age : 60
Location : Quincy,IL. USA
Re: Steampunk Harley - Tamiya 1/6 HD FLH Classic 'extreme' kit bash (Very Photo Heavy)
![]() by Geezerman Tue 07 Jun 2016, 11:32 am
by Geezerman Tue 07 Jun 2016, 11:32 am
Geezerman- Advanced Member
- Posts : 3651
Join date : 2013-02-24
Age : 88
Location : Gulf coast of central Florids
Re: Steampunk Harley - Tamiya 1/6 HD FLH Classic 'extreme' kit bash (Very Photo Heavy)
![]() by harron68 Tue 07 Jun 2016, 1:47 pm
by harron68 Tue 07 Jun 2016, 1:47 pm
harron68- Advanced Member
- Posts : 3616
Join date : 2013-02-28
Age : 73
Location : MIDWEST
Re: Steampunk Harley - Tamiya 1/6 HD FLH Classic 'extreme' kit bash (Very Photo Heavy)
![]() by Guest Tue 07 Jun 2016, 7:05 pm
by Guest Tue 07 Jun 2016, 7:05 pm

Guest- Guest
Re: Steampunk Harley - Tamiya 1/6 HD FLH Classic 'extreme' kit bash (Very Photo Heavy)
![]() by KatsZenJammer Sun 12 Jun 2016, 6:31 pm
by KatsZenJammer Sun 12 Jun 2016, 6:31 pm
Been a busy week both at work and on the home front (Milady's choir group has a concert this weekend, today in fact) so my time in the workshop has been somewhat curtailed. However, I did manage to do a little work so I thought I'd post what I have. After the 'Two Years in less than two weeks' blitz I recently inflicted on the forum this might seem a bit sparse but it's a shift back to a more 'normal' posting rhythm for me.
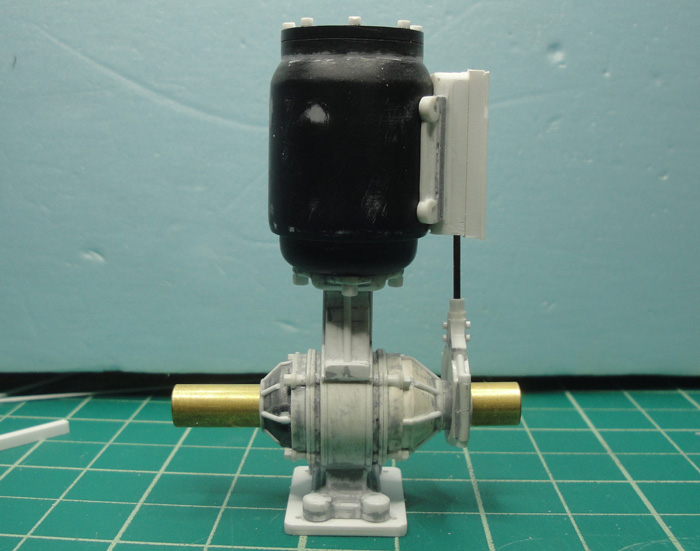
I've been incorrectly calling this part a steam box when in fact it seems to be called a steam chest. Also, my initial add ons to it seemed a bit shallow so in the second photo you'll notice some of the bits have been changed. Regardless, here it is with a bit more body added to it. This is just the first step, there will be much shaping to come, followed by the inevitable details.
A test fit and I am satisfied with the size of the steam chest. In fact I am deeply gratified that this portion of the build is coming together the way it is, I was expecting a lot more adjusting and rethinking.
It's been a while since I worked on the crankcase. Here it is with the connecting rod housing affixed and the start of the 'bolt downs' on the sides.

I have a feeling this is one of those build portions where I slow things down a tad in order to keep the little detailing tasks in order. I've also been grabbing images of old pressure gauge dials from the Net in order to Photoshop them for future use. And I've been mentally working out things like the proportionate size of the boiler and the arrangement of all the other stuff. And as John suggested there will be more Hex Nuts ...

KatsZenJammer- Resident member
- Posts : 2600
Join date : 2016-05-20
Age : 57
Location : Vancouver, BC
Re: Steampunk Harley - Tamiya 1/6 HD FLH Classic 'extreme' kit bash (Very Photo Heavy)
![]() by dublin boy Sun 12 Jun 2016, 7:52 pm
by dublin boy Sun 12 Jun 2016, 7:52 pm
I rarely looked in the Bike section on escale, but my eyes are peeled on this one.

dublin boy- Moderator

- Posts : 3862
Join date : 2013-02-27
Re: Steampunk Harley - Tamiya 1/6 HD FLH Classic 'extreme' kit bash (Very Photo Heavy)
![]() by Guest Sun 12 Jun 2016, 10:38 pm
by Guest Sun 12 Jun 2016, 10:38 pm
Guest- Guest
Re: Steampunk Harley - Tamiya 1/6 HD FLH Classic 'extreme' kit bash (Very Photo Heavy)
![]() by Skid Sun 12 Jun 2016, 11:07 pm
by Skid Sun 12 Jun 2016, 11:07 pm
This is the finest scratch building I have ever seen!!!
_________________
Al.
Constructive criticism is always welcome.
“Success always demands a greater effort.” Winston Churchill
"Success is failure turned inside out" Unknown
Skid- Admin
- Posts : 7129
Join date : 2013-02-15
Age : 75
Location : Newcastle. Good Old Blighty. -
Re: Steampunk Harley - Tamiya 1/6 HD FLH Classic 'extreme' kit bash (Very Photo Heavy)
![]() by Guest Mon 13 Jun 2016, 12:59 am
by Guest Mon 13 Jun 2016, 12:59 am
Guest- Guest
Re: Steampunk Harley - Tamiya 1/6 HD FLH Classic 'extreme' kit bash (Very Photo Heavy)
![]() by Sponsored content
by Sponsored content
Sponsored content
Page 5 of 25 • 1, 2, 3, 4, 5, 6 ... 15 ... 25 ![]()
» Tamiya 1/6 Harley Davidson Fat Boy Lo
» Tamiya 1/6 Harley Davidson FLH1200
» Steampunk Ducati
» '57 Salvage bash-up
|
|
|