
Steampunk Harley - Tamiya 1/6 HD FLH Classic 'extreme' kit bash (Very Photo Heavy)
Page 12 of 25 •  1 ... 7 ... 11, 12, 13 ... 18 ... 25
 ![]()
Re: Steampunk Harley - Tamiya 1/6 HD FLH Classic 'extreme' kit bash (Very Photo Heavy)
![]() by Skid Sun 12 Mar 2017, 10:41 pm
by Skid Sun 12 Mar 2017, 10:41 pm
_________________
Al.
Constructive criticism is always welcome.
“Success always demands a greater effort.” Winston Churchill
"Success is failure turned inside out" Unknown

Skid- Admin
- Posts : 7129
Join date : 2013-02-15
Age : 75
Location : Newcastle. Good Old Blighty. -

Re: Steampunk Harley - Tamiya 1/6 HD FLH Classic 'extreme' kit bash (Very Photo Heavy)
![]() by KatsZenJammer Sun 12 Mar 2017, 11:13 pm
by KatsZenJammer Sun 12 Mar 2017, 11:13 pm

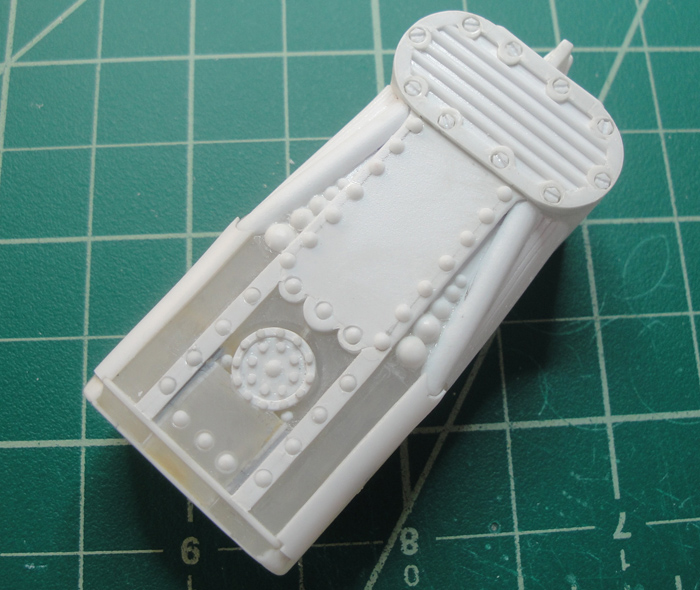
We begin this week's post with adding detail to the rear of the boiler. First come the 'side bars' followed by rivet heads inset slightly for effect. The plan is to fill in around the rivets ever so slightly with 'gunk' when the weathering and stuff happens.

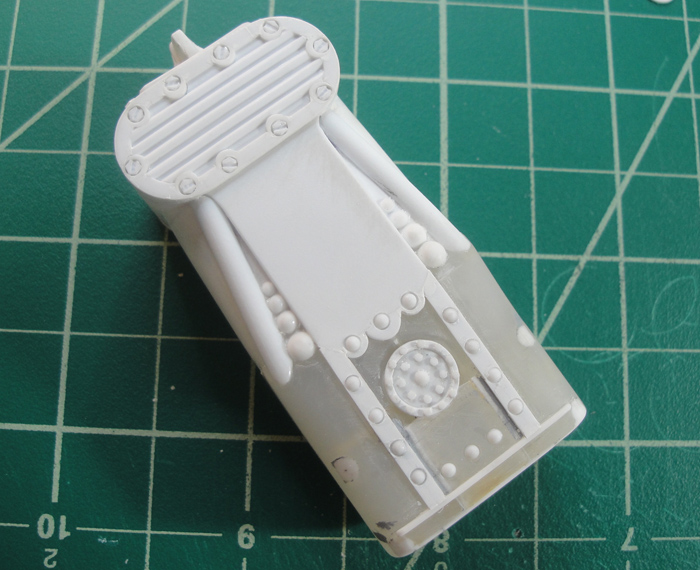
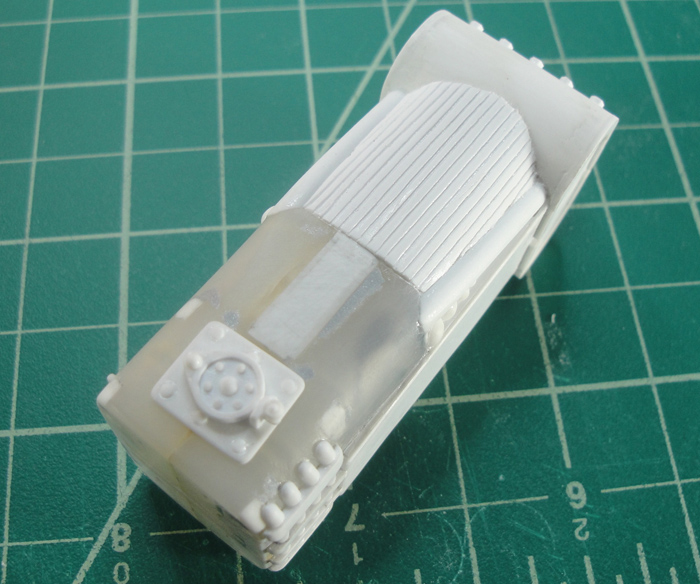
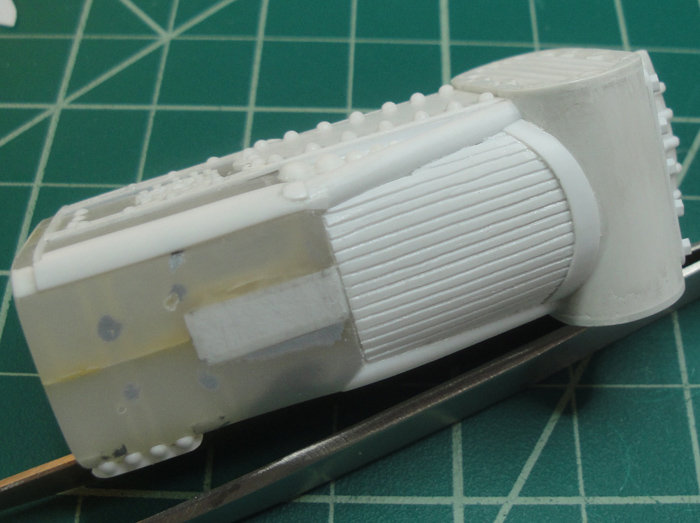
The upper sides of the boiler get a layer of 1 mm strips. This was inspired by wooden siding on some old boilers, though I'm not sure if I'll go with wood once the work is done.
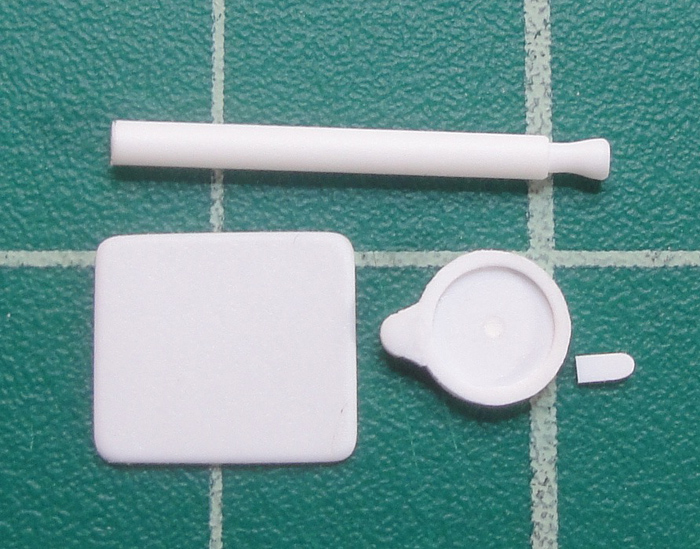
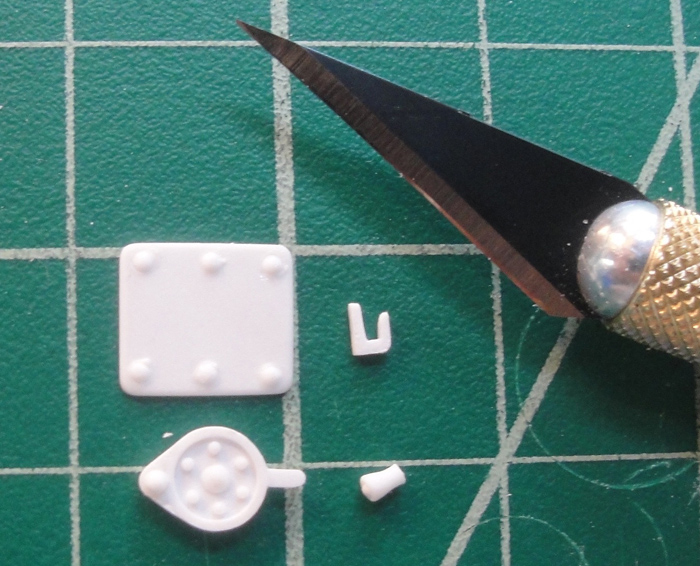
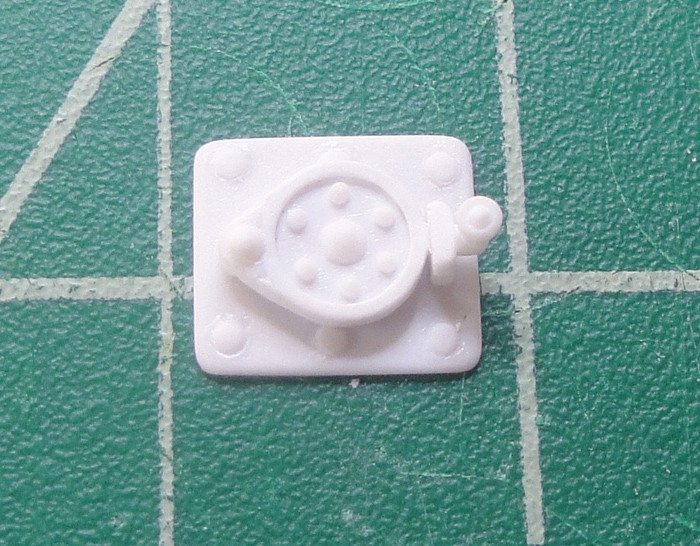
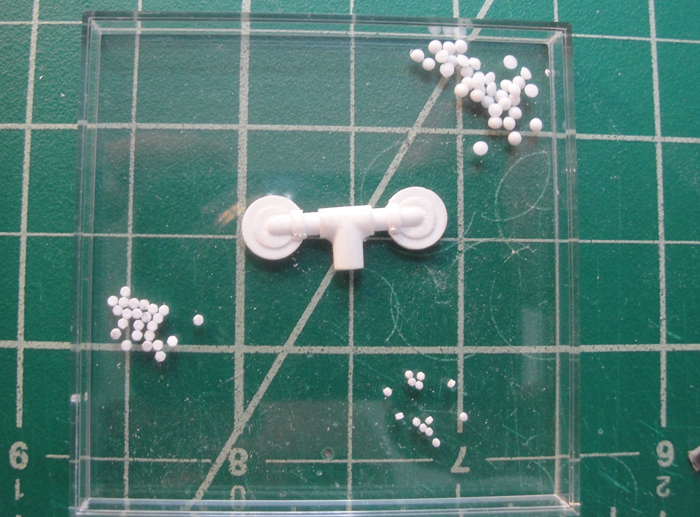
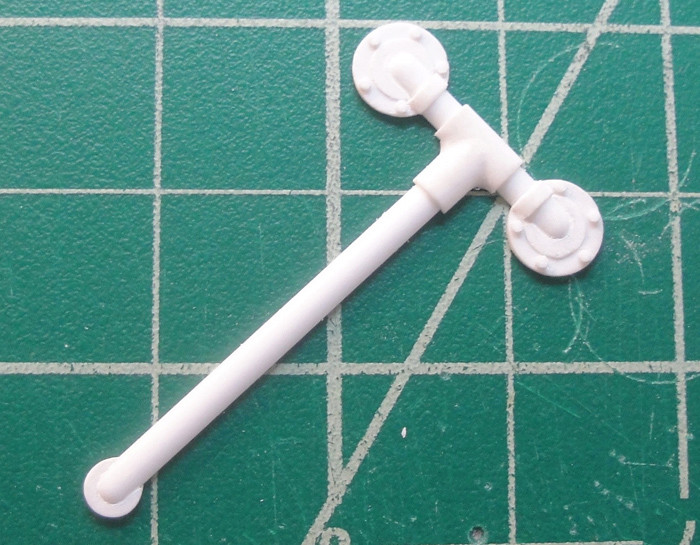
The ignition port/cover piece starts to develop. Much of this was derived from 'offcuts' and the post was 'lathed' using a Dremel to make the lifting handle. The second photo includes a scale reference in the form of the ubiquitous #11 X-Acto blade.
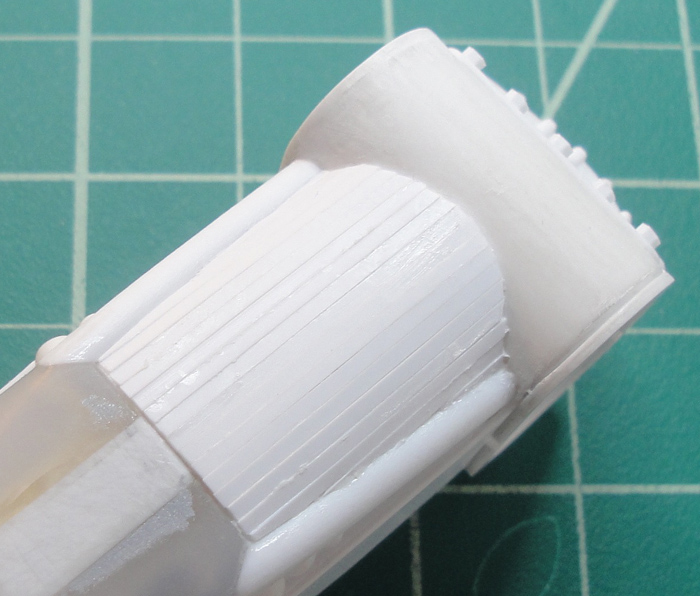
The strip layer on the sides of the boiler get some grooves. I suppose I could have rounded the edges of the strips before I laid them down to achieve a similar effect, something I only thought of after the fact, lol.

The ignition port/cover piece more or less done and test fit approximately where it will be affixed to the boiler.
Still lots more stuff to come on the boiler - my research into the topic is far ranging which results in a lot of time wasted chasing down idle distractions, lol. Plus the fact that this is supposed to be somewhat fantastical helps add to the mire of confusion and deliberation ... at least that's how it feels this week. And there's also the beginnings of the condenser to pull my focus off track ...
Just keep swimming ...

KatsZenJammer- Resident member

- Posts : 2600
Join date : 2016-05-20
Age : 57
Location : Vancouver, BC
Re: Steampunk Harley - Tamiya 1/6 HD FLH Classic 'extreme' kit bash (Very Photo Heavy)
![]() by GaryDainton Mon 13 Mar 2017, 8:28 am
by GaryDainton Mon 13 Mar 2017, 8:28 am
Last edited by GaryDainton on Mon 13 Mar 2017, 12:22 pm; edited 1 time in total

GaryDainton- Advanced Member
- Posts : 4433
Join date : 2014-03-06
Age : 56
Location : Bolton UK
Re: Steampunk Harley - Tamiya 1/6 HD FLH Classic 'extreme' kit bash (Very Photo Heavy)
![]() by Geezerman Mon 13 Mar 2017, 10:13 am
by Geezerman Mon 13 Mar 2017, 10:13 am


Geezerman- Advanced Member
- Posts : 3651
Join date : 2013-02-24
Age : 88
Location : Gulf coast of central Florids
Re: Steampunk Harley - Tamiya 1/6 HD FLH Classic 'extreme' kit bash (Very Photo Heavy)
![]() by disabled modeler Mon 13 Mar 2017, 11:10 am
by disabled modeler Mon 13 Mar 2017, 11:10 am
disabled modeler- Intermediate Member

- Posts : 979
Join date : 2016-05-22
Age : 60
Location : Quincy,IL. USA
Re: Steampunk Harley - Tamiya 1/6 HD FLH Classic 'extreme' kit bash (Very Photo Heavy)
![]() by Speed Racer 65 Fri 17 Mar 2017, 1:12 am
by Speed Racer 65 Fri 17 Mar 2017, 1:12 am

Speed Racer 65- Intermediate Member
- Posts : 865
Join date : 2015-08-06
Location : Louisville KY
Re: Steampunk Harley - Tamiya 1/6 HD FLH Classic 'extreme' kit bash (Very Photo Heavy)
![]() by KatsZenJammer Sun 26 Mar 2017, 11:34 pm
by KatsZenJammer Sun 26 Mar 2017, 11:34 pm
Well, I didn't post last week because, frankly, it slipped my mind ... damn this getting older schtick anyway ...
The rear side of the boiler/burner with even more rivets added as well as a 'carry-down' of the angled post-things. I've decided that the blank space between the rivet lines in the middle portion is going to be decorated, though I am not about to delve into carving complex curves into 1/10 mm sheet as that would break my already strained brain. Once upon a time I remember seeing some 'decorative motif' PE at a LHS which dealt with railroad/diorama supplies exclusively - the curvy vines and leaves sort of thing. Though this was years ago I plan to make an excursion in the near future to go hunting and even if the stuff I remember isn't there there will be Something I can utilize. There always is, lol.
'Framing' the slats on the sides. I chose to do the curved part first as it was the most difficult. After that the other sides of the 'frame' just fell into place.
Before I started on the front side detail a test fit was needed to confirm the amount of room I had to work with. To be honest I hadn't planned on things being so tight so I threw out a few undeveloped notions and chose a path of 'low profile' doohickeys.
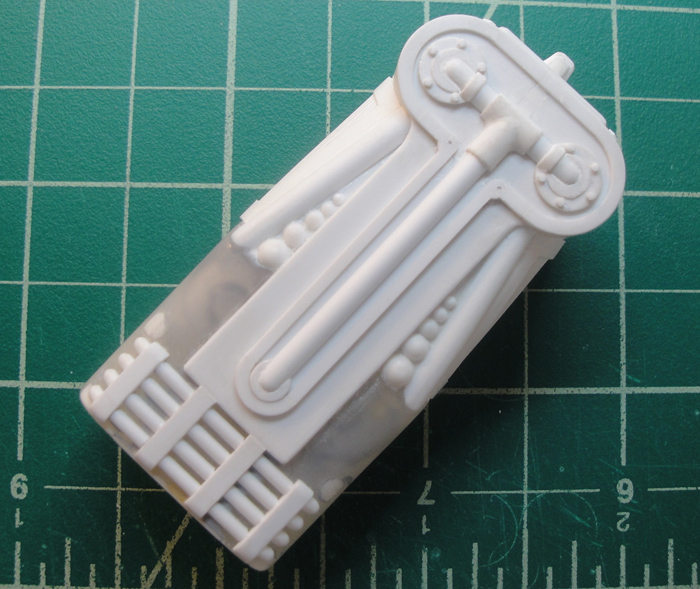
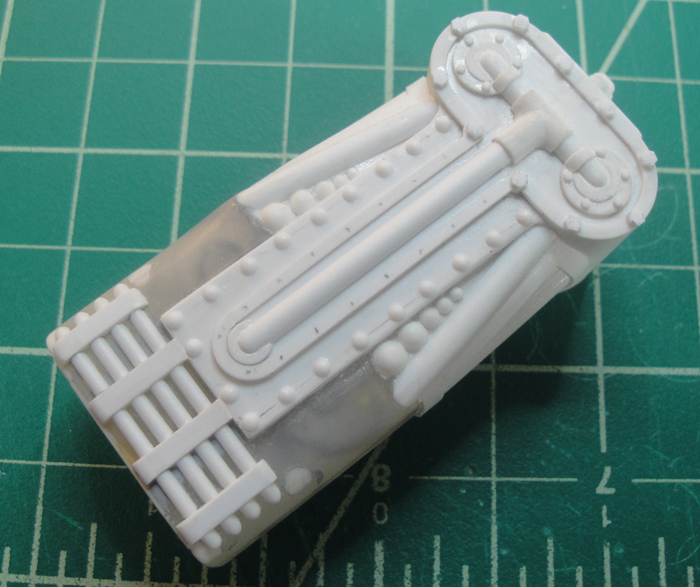
The main detail was always going to be plumbing-related but the need to keep it close in to the boiler sent me on the path of 'inset pipes' instead of ones that stuck out. Here is the mostly blank front side and in the bottom right corner the beginnings of the plumbing detail, the pipe is cut from 2.5 mm half-round.
A shot of the developing concept. Another case of not having a detailed plan and making it up as I went long.
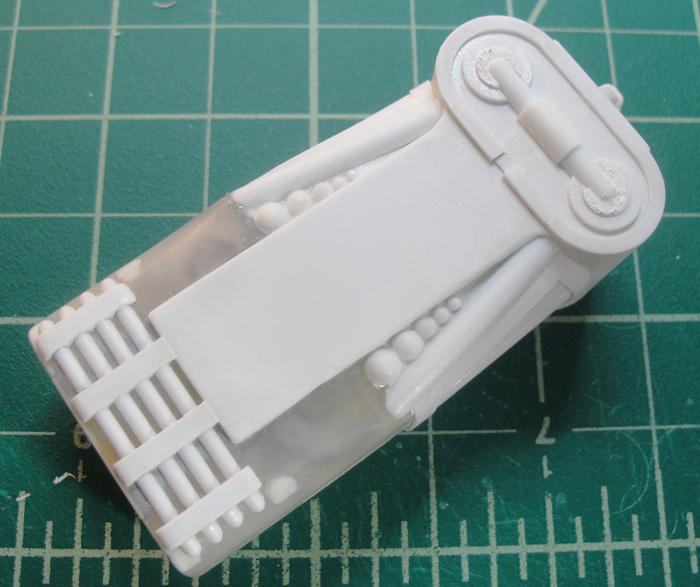
Originally I planned on multiple, thinner down pipes but after a bit of test fitting I decided to go with the same size half-round. You can also see the 'base' for the 'frame' for this portion.
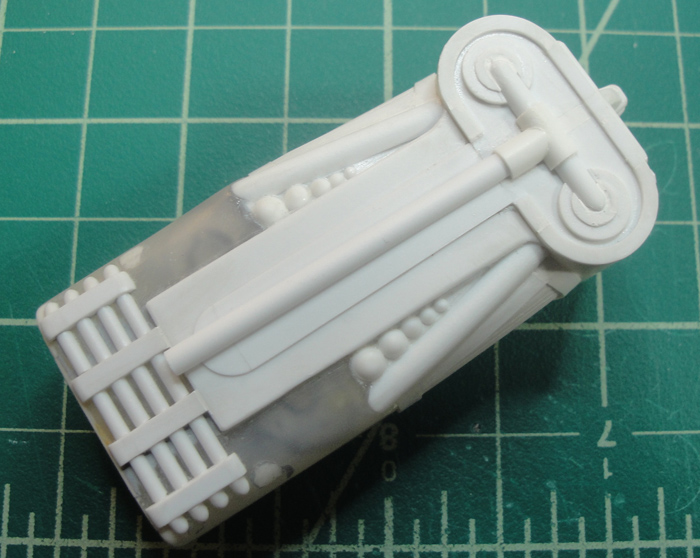
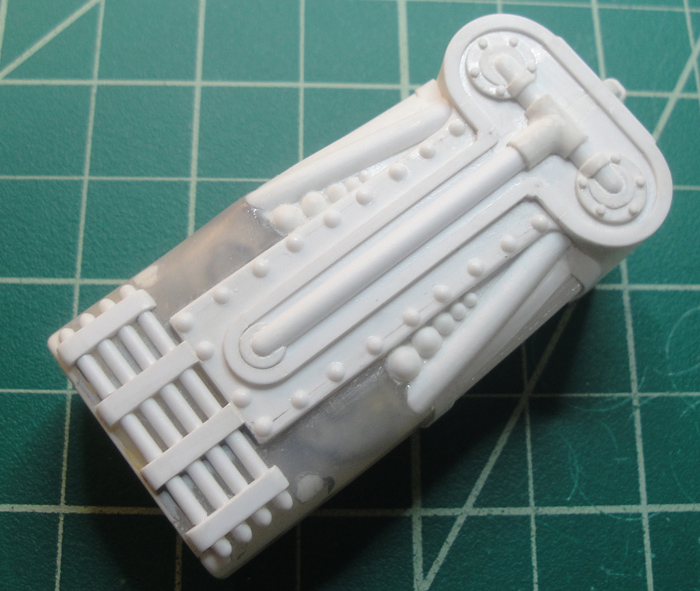
The 'frame' in place and the down pipe cut to length.
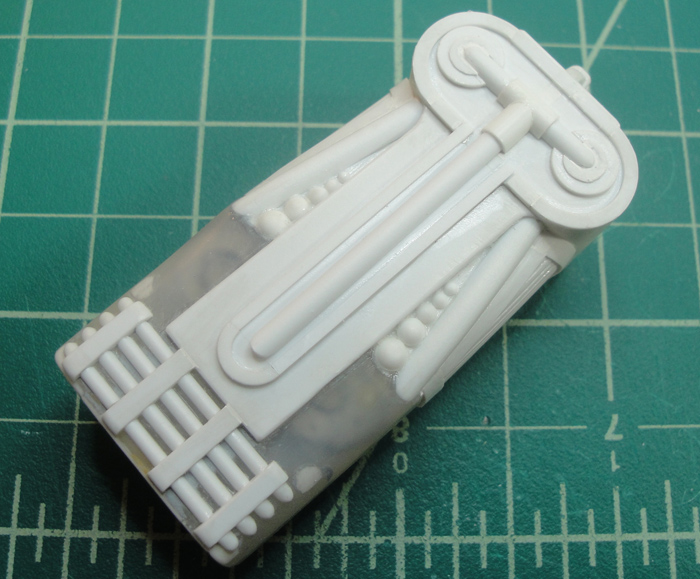
The 'cap' for the down pipe made to match the top pipe ends. The angles at the top have been rounded, the time honoured method of nipping off a bit of the corner and filling in on the other side with the cut off bit.
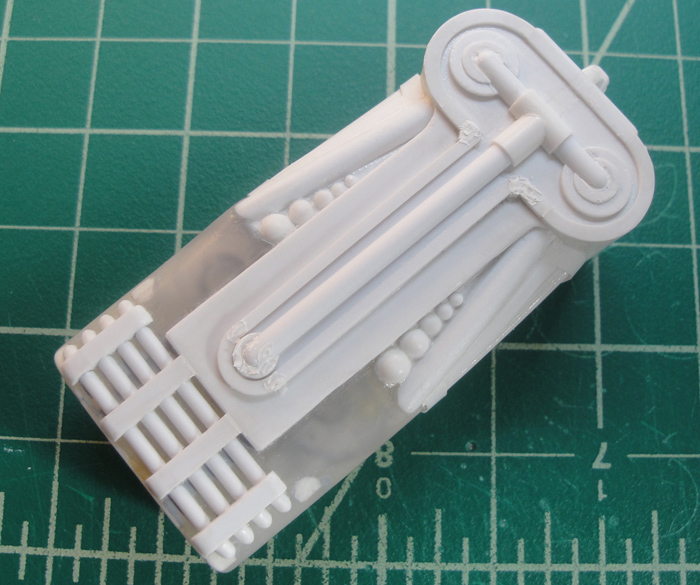
So far things are going smoothly, it seems. Next come the inevitable hex nuts and rivets as well as an extension of the angled posts which will not be exactly the same as the rear side. Throughout all this I've been having to keep in mind the need for additional plumbing in the form of water and steam lines. And I'm still thinking about the condenser/return thingy ..
Just keep swimming ...
KatsZenJammer- Resident member
- Posts : 2600
Join date : 2016-05-20
Age : 57
Location : Vancouver, BC
Re: Steampunk Harley - Tamiya 1/6 HD FLH Classic 'extreme' kit bash (Very Photo Heavy)
![]() by GaryDainton Mon 27 Mar 2017, 9:02 am
by GaryDainton Mon 27 Mar 2017, 9:02 am
GaryDainton- Advanced Member
- Posts : 4433
Join date : 2014-03-06
Age : 56
Location : Bolton UK
Re: Steampunk Harley - Tamiya 1/6 HD FLH Classic 'extreme' kit bash (Very Photo Heavy)
![]() by disabled modeler Mon 27 Mar 2017, 12:10 pm
by disabled modeler Mon 27 Mar 2017, 12:10 pm
disabled modeler- Intermediate Member
- Posts : 979
Join date : 2016-05-22
Age : 60
Location : Quincy,IL. USA
Re: Steampunk Harley - Tamiya 1/6 HD FLH Classic 'extreme' kit bash (Very Photo Heavy)
![]() by Geezerman Mon 27 Mar 2017, 1:06 pm
by Geezerman Mon 27 Mar 2017, 1:06 pm
Geezerman- Advanced Member
- Posts : 3651
Join date : 2013-02-24
Age : 88
Location : Gulf coast of central Florids
Re: Steampunk Harley - Tamiya 1/6 HD FLH Classic 'extreme' kit bash (Very Photo Heavy)
![]() by KatsZenJammer Mon 03 Apr 2017, 12:01 am
by KatsZenJammer Mon 03 Apr 2017, 12:01 am
Here's a pic of some added detail to the 'plumbing' bits as well as the collection of rivet heads and hex bolt heads for the next steps (I still hadn't cut all the bits at this point, lol).
Add hex bolt heads and then affix the plumbing.
Rivet heads in place.
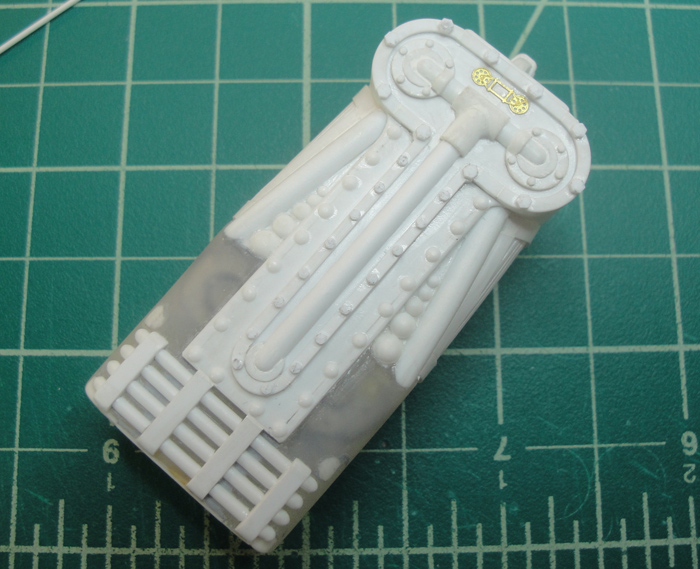
Followed by some hex bolt heads.

And finally a small PE accent - the same bit I used as accenting on the headlight lamp.
Hopefully the boiler/burner won't take too much longer ... though the plumbing attachment points are going to require some mulling over because of the issue of not knowing what else might wind up crammed in here and there. I suppose I should try to think things through a bit more but I have to admit that my capacity in that regard hasn't been the best due to the improvisational nature of this project. Oh well, lol.
Just keep swimming ...
KatsZenJammer- Resident member
- Posts : 2600
Join date : 2016-05-20
Age : 57
Location : Vancouver, BC
Re: Steampunk Harley - Tamiya 1/6 HD FLH Classic 'extreme' kit bash (Very Photo Heavy)
![]() by GaryDainton Mon 03 Apr 2017, 8:15 am
by GaryDainton Mon 03 Apr 2017, 8:15 am
GaryDainton- Advanced Member
- Posts : 4433
Join date : 2014-03-06
Age : 56
Location : Bolton UK
Re: Steampunk Harley - Tamiya 1/6 HD FLH Classic 'extreme' kit bash (Very Photo Heavy)
![]() by Guest Mon 03 Apr 2017, 12:59 pm
by Guest Mon 03 Apr 2017, 12:59 pm
Guest- Guest
Re: Steampunk Harley - Tamiya 1/6 HD FLH Classic 'extreme' kit bash (Very Photo Heavy)
![]() by Geezerman Mon 03 Apr 2017, 2:18 pm
by Geezerman Mon 03 Apr 2017, 2:18 pm
Geezerman- Advanced Member
- Posts : 3651
Join date : 2013-02-24
Age : 88
Location : Gulf coast of central Florids
Re: Steampunk Harley - Tamiya 1/6 HD FLH Classic 'extreme' kit bash (Very Photo Heavy)
![]() by KatsZenJammer Mon 10 Apr 2017, 1:48 am
by KatsZenJammer Mon 10 Apr 2017, 1:48 am
So - the boiler/burner has reached the stage where a lot of the on going work isn't really photo-worthy in a documentarian sense, repetitive monotony and all that. But here's a shot of the front side with some added 'braces' or something.
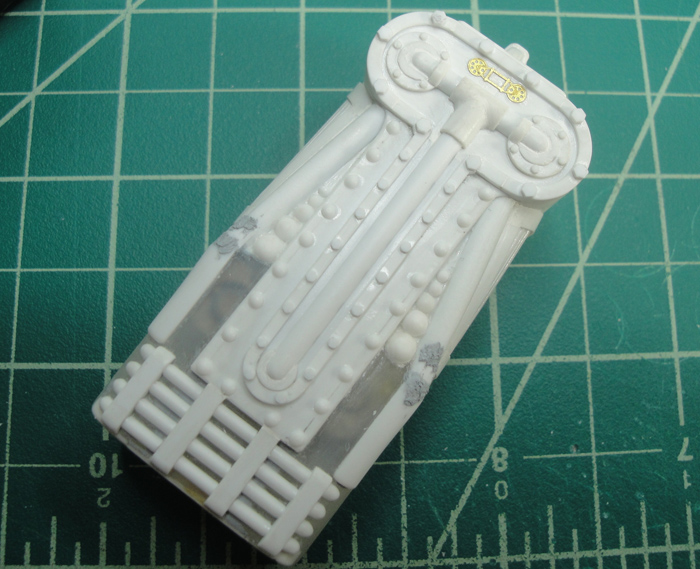
Rivet heads added to the sides framing the slatted portion.
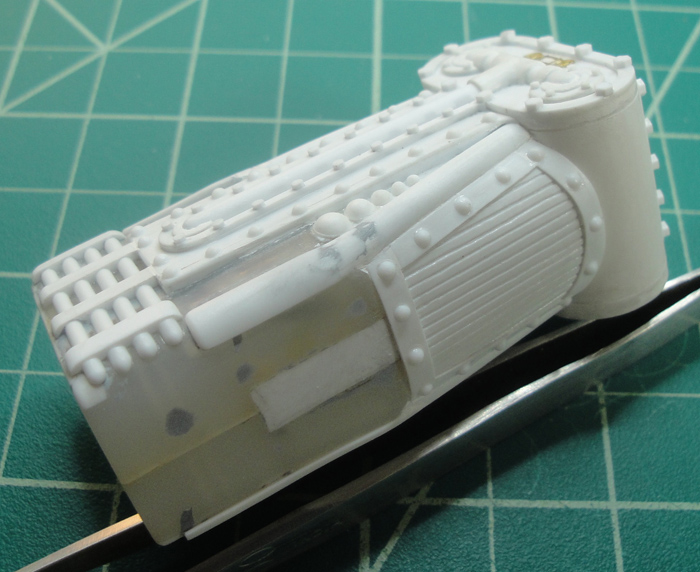
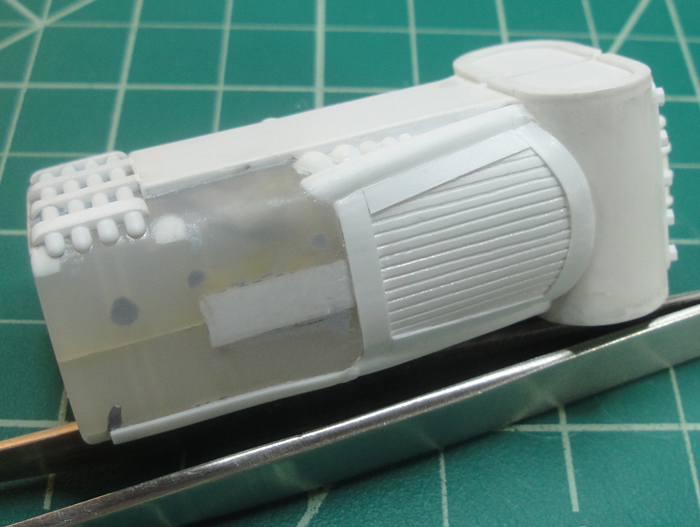
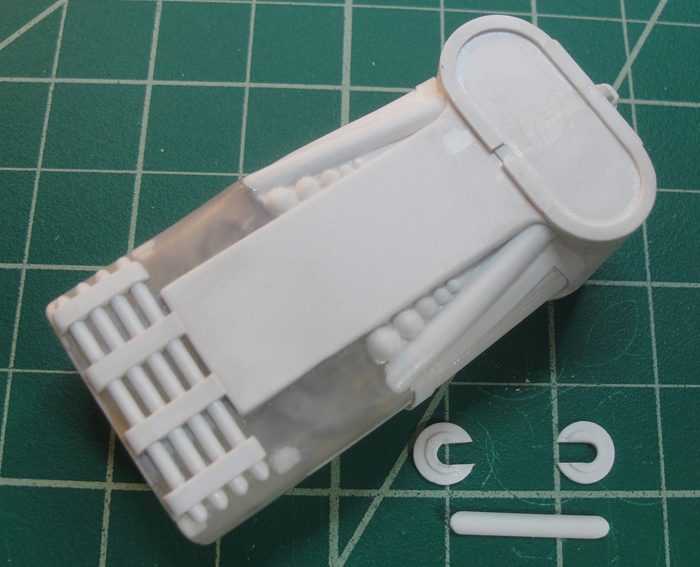
While working on the boiler details I started thinking more about the condenser, played around with the already begun parts and decided on a design change. Here you see the result, it was originally going to be wider but I've cut it down. This is the bottom view, by the way, the topside is going to be flat and boring as it will sit under the saddle ... at least that's the current plan, lol.
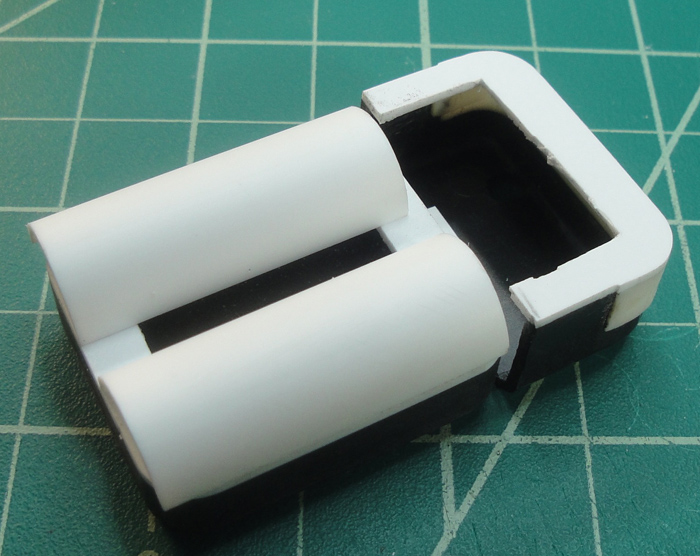
The top side of the condenser being filled in and the receiver for the steam exhaust from the engine takes shape. Not sure why I wanted an end cap for the receiver ... I'm sure I'll remember at some point.
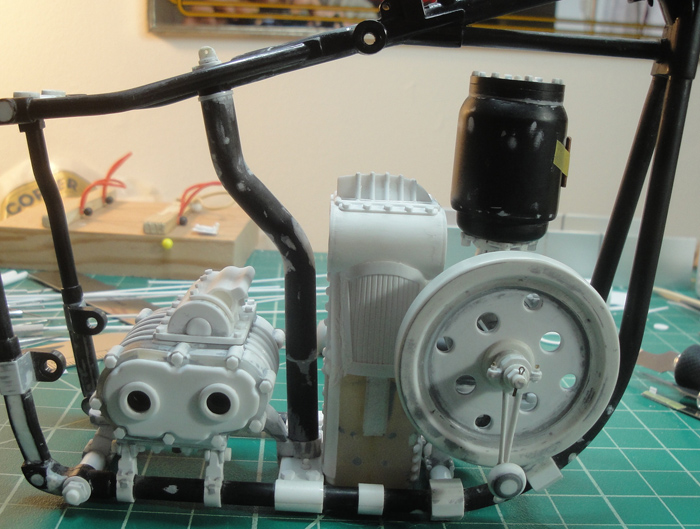
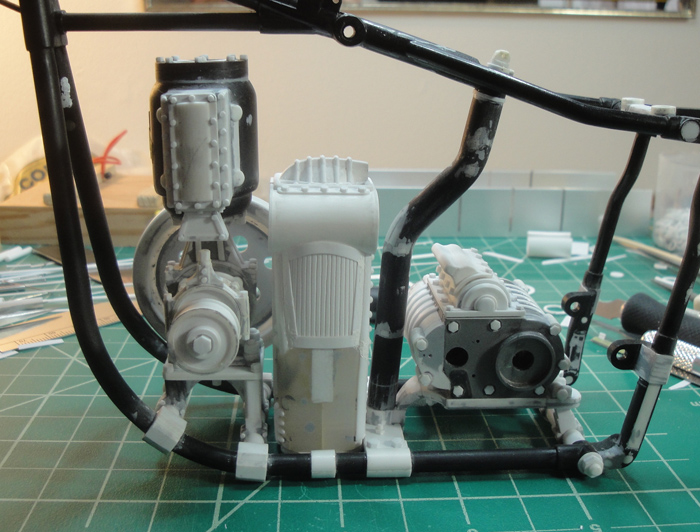
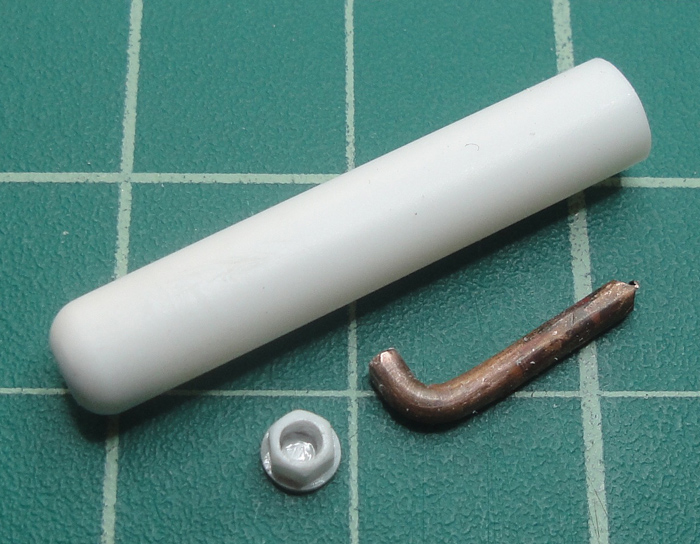
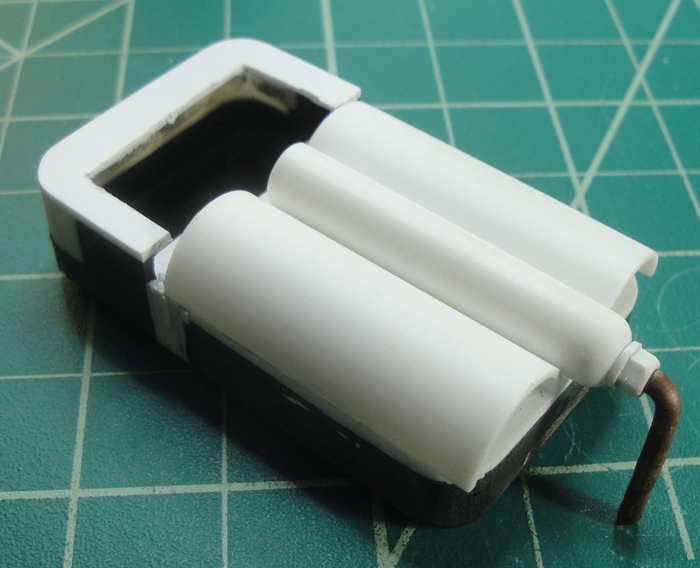
As things develop the looming spectre of the plumbing for this contraption finally starts to coalesce out of the chaotic cloud of ideas. This is 2mm copper wire (annealed to make it easier to work with) which scales up to just under 1/2 inch - call it 15/32. I figure that's a good size for the steam and return system. Hex rod drilled out and backed to a slice of round rod for the attachment point.
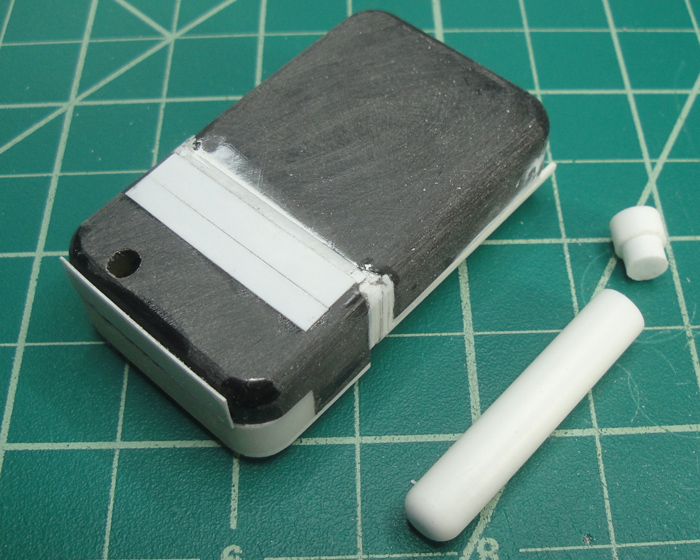
The bottom of the condenser and an idea of the concept, the exhaust goes in and gets mixed with incoming fresh water to heat it up to near boiling before it goes to the boiler. Lots of work yet to come so this arrangement may or may not change as time goes on.
Now that I've started 'quantifying' aspects of the plumbing it's time to bring out the still incomplete cylinder and begin working on that some more, not just the addition of feed/exhaust ports but also the braces to the frame which I've been putting off. And there's the braces for the condenser to consider as well.
Just keep swimming ...
KatsZenJammer- Resident member
- Posts : 2600
Join date : 2016-05-20
Age : 57
Location : Vancouver, BC
Re: Steampunk Harley - Tamiya 1/6 HD FLH Classic 'extreme' kit bash (Very Photo Heavy)
![]() by GaryDainton Mon 10 Apr 2017, 8:15 am
by GaryDainton Mon 10 Apr 2017, 8:15 am
GaryDainton- Advanced Member
- Posts : 4433
Join date : 2014-03-06
Age : 56
Location : Bolton UK
Re: Steampunk Harley - Tamiya 1/6 HD FLH Classic 'extreme' kit bash (Very Photo Heavy)
![]() by Geezerman Mon 10 Apr 2017, 11:48 am
by Geezerman Mon 10 Apr 2017, 11:48 am
Geezerman- Advanced Member
- Posts : 3651
Join date : 2013-02-24
Age : 88
Location : Gulf coast of central Florids
Re: Steampunk Harley - Tamiya 1/6 HD FLH Classic 'extreme' kit bash (Very Photo Heavy)
![]() by disabled modeler Mon 10 Apr 2017, 11:51 am
by disabled modeler Mon 10 Apr 2017, 11:51 am
disabled modeler- Intermediate Member
- Posts : 979
Join date : 2016-05-22
Age : 60
Location : Quincy,IL. USA
Re: Steampunk Harley - Tamiya 1/6 HD FLH Classic 'extreme' kit bash (Very Photo Heavy)
![]() by KatsZenJammer Tue 18 Apr 2017, 3:30 am
by KatsZenJammer Tue 18 Apr 2017, 3:30 am
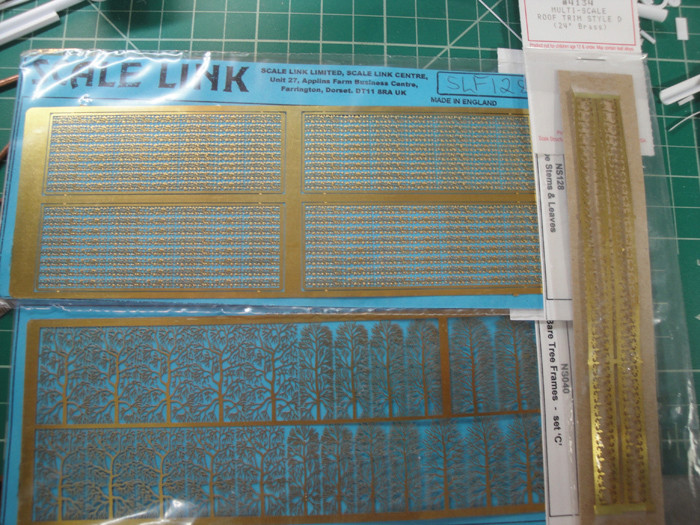
Well I finally got around to the Locomotive/Dio LHS and happened to find some PE detail sheets - though I'm not sure if it's correct to call these PE or Laser Cut or what have you. Unlike the really thin and fragile PE for ships and planes this stuff is thicker and thus slightly easier to deal with. The sheet on top is all ivy leaves and vines, the one below is leaf-less trees and the bit on the right is labelled as roof trim.
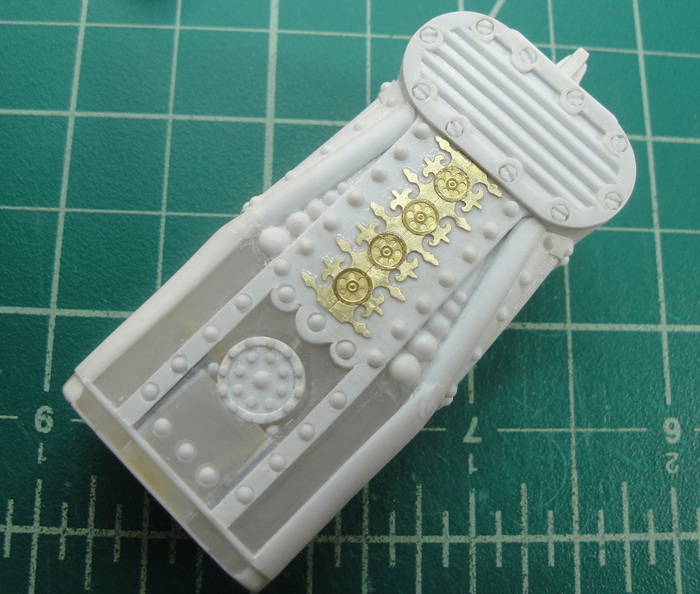
Here's some sections of the roof trim after some trimming, placed back to back on the boiler/burner rear side.
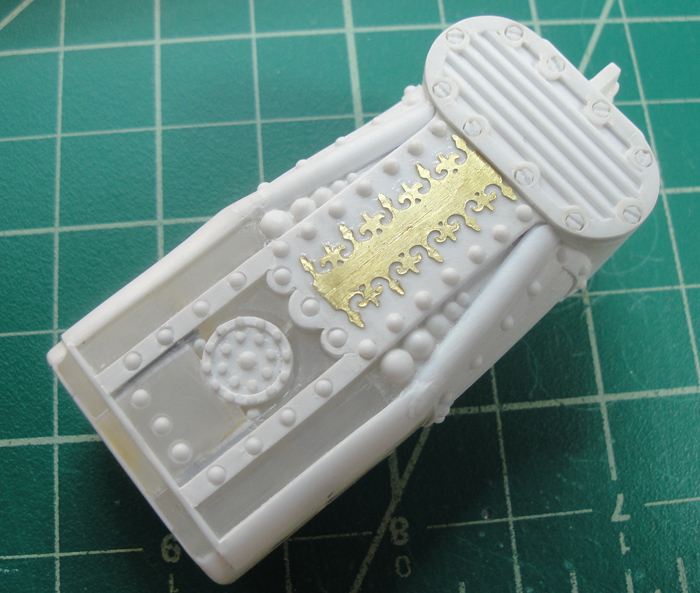
And some of the really thin and fragile PE (from a set for a 1/350 ship) adds that little extra pop.
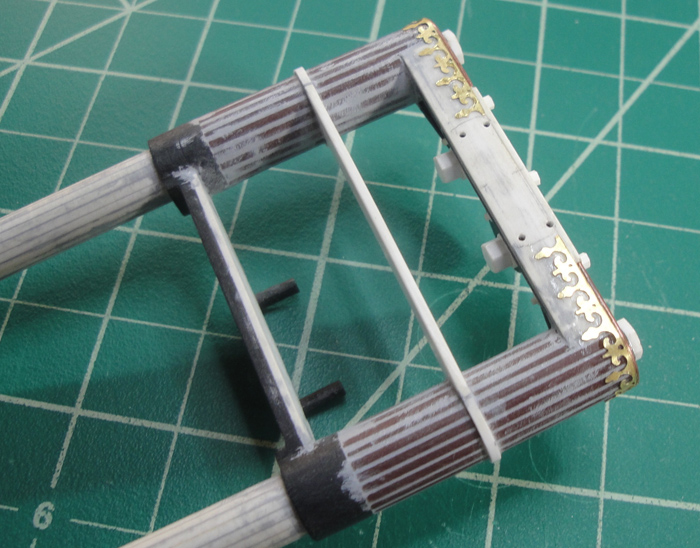
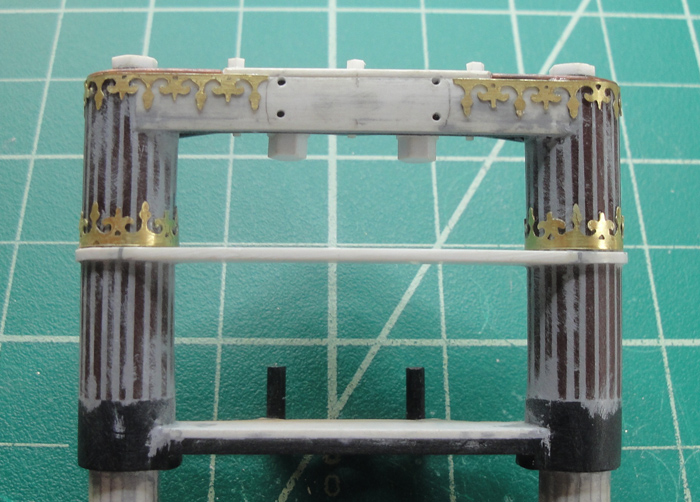
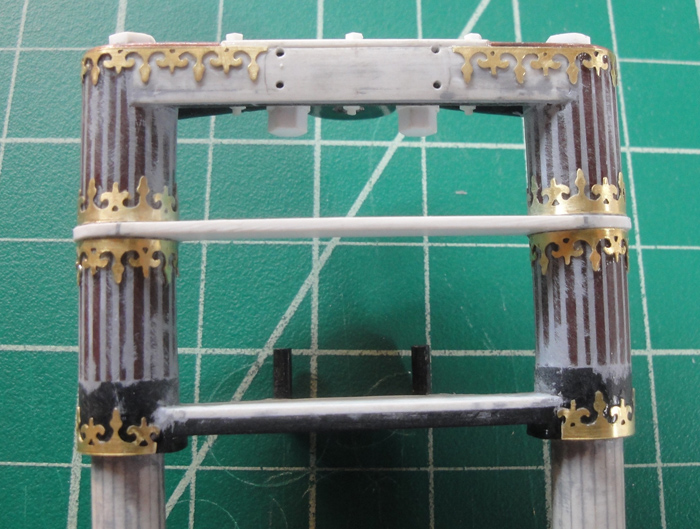
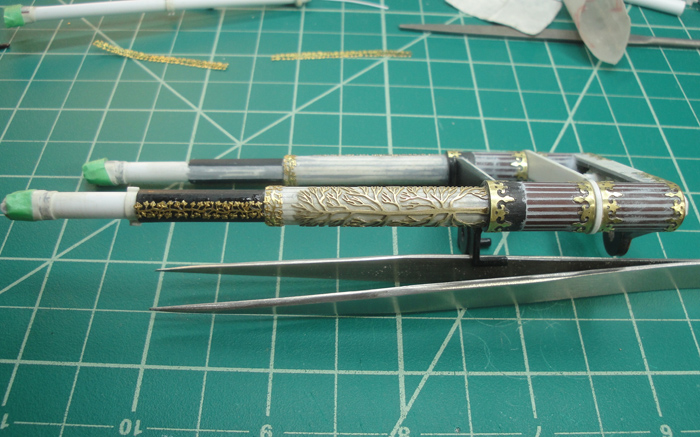
After a long dormancy awaiting further work the front forks get brought back into the light. I had always intended to make the front forks somewhat 'fancy' but in the course of the build I just kind of forgot about them. It was when I found the detail sheets that the forks suddenly demanded my attention once more. The detailing starts with the roof trim used to add 'crowning' to the posts.
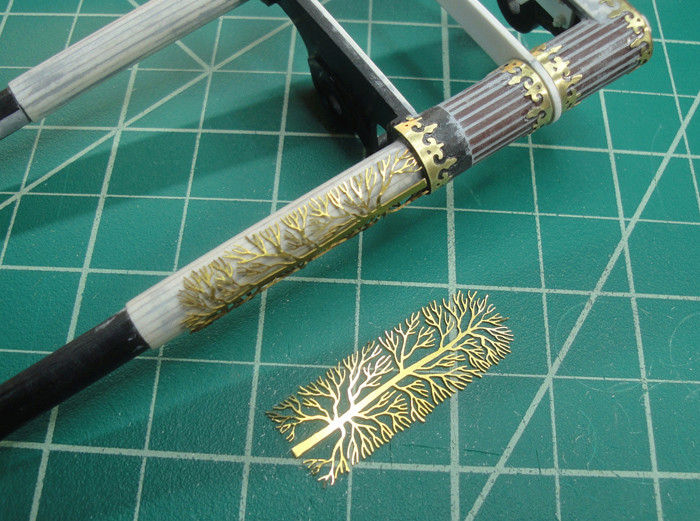
Here I used 'tree skeletons' to add some weird-ish detail, it could look like a dead tree ... or veins ... or cracks. Putting the curve into them wasn't difficult but gluing them in place was an exercise in monotonous precision CA application.
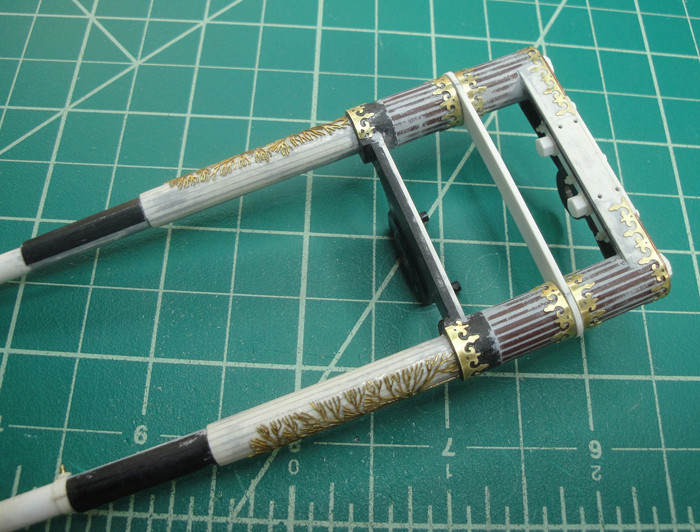
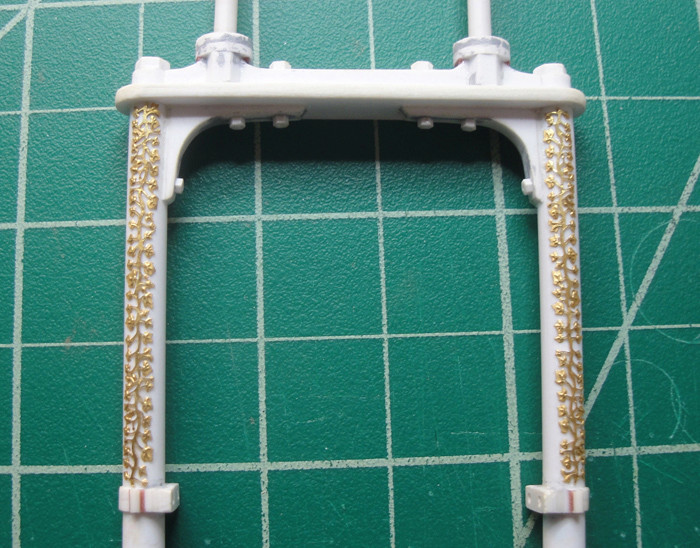
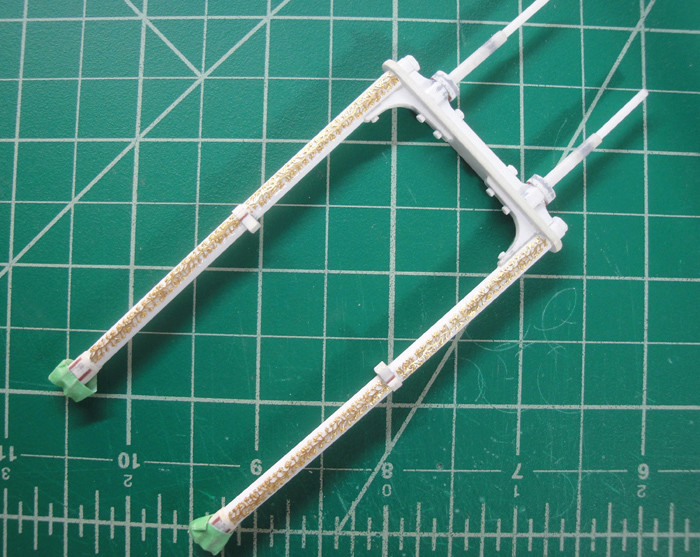
Now the Ivy comes into play, though I hadn't originally planned on using it on the main forks - a band on the post below the tree skeleton and a strip along the next post portion but not all the way to the end.
The secondary forks get their Ivy, which was my idea when I first saw it. I had to think a bit about placement of the details both for the main and secondary forks. Thus the mains are decorated primarily on their sides while the secondary forks will get Ivy on the front and sides.
Reassembly just to make sure it wasn't too garishly wrong. I don't think I'm going to get much heavier than this on the forks as far as detail goes. There's still stuff like cable brace points and the like to worry about so this would be a good place to pause before I add something I'll need to remove later.
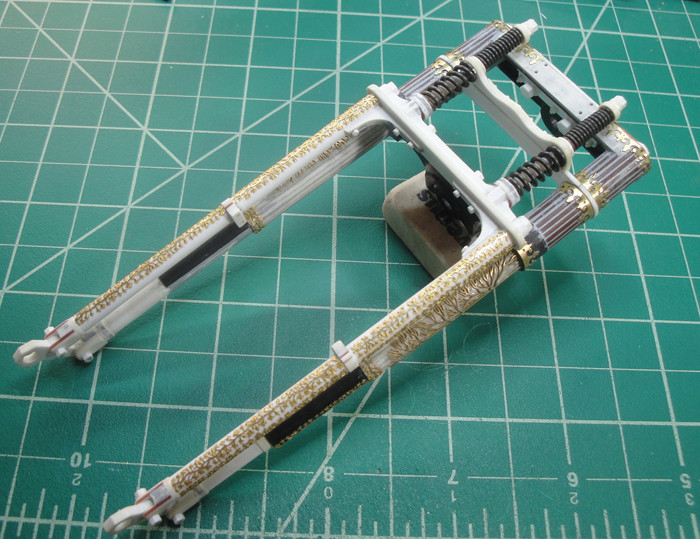
Of course it's going to be hard to visualize the effect until I've hit it with a coat of primer but I'm hoping this will work well. Plus there's quite a bit of surplus, especially tree skeletons, which makes adding detail to other parts easier and it'll all be unified to boot.
On a cool note, the choice of Ivy detailing was a matter of what was available but I did a little research and found that Ivy as a symbol has denoted community, strength, resilience, balance and the power of men, women and nature as a whole.
And finally I should mention that my shopping list when I went to the LHS did not have PE detail sheets on it, I was looking for tube benders and tube, lol. So the condenser and the plumbing is still very much an active concern ...
Just keep swimming ...
KatsZenJammer- Resident member
- Posts : 2600
Join date : 2016-05-20
Age : 57
Location : Vancouver, BC
Re: Steampunk Harley - Tamiya 1/6 HD FLH Classic 'extreme' kit bash (Very Photo Heavy)
![]() by Nipponrookie Tue 18 Apr 2017, 7:26 am
by Nipponrookie Tue 18 Apr 2017, 7:26 am

Nipponrookie- Intermediate Member
- Posts : 568
Join date : 2015-08-29
Age : 63
Location : Kyushu, Japan
Re: Steampunk Harley - Tamiya 1/6 HD FLH Classic 'extreme' kit bash (Very Photo Heavy)
![]() by GaryDainton Tue 18 Apr 2017, 9:21 am
by GaryDainton Tue 18 Apr 2017, 9:21 am
GaryDainton- Advanced Member
- Posts : 4433
Join date : 2014-03-06
Age : 56
Location : Bolton UK
Re: Steampunk Harley - Tamiya 1/6 HD FLH Classic 'extreme' kit bash (Very Photo Heavy)
![]() by Geezerman Tue 18 Apr 2017, 12:56 pm
by Geezerman Tue 18 Apr 2017, 12:56 pm
Geezerman- Advanced Member
- Posts : 3651
Join date : 2013-02-24
Age : 88
Location : Gulf coast of central Florids
Re: Steampunk Harley - Tamiya 1/6 HD FLH Classic 'extreme' kit bash (Very Photo Heavy)
![]() by KatsZenJammer Mon 24 Apr 2017, 2:49 am
by KatsZenJammer Mon 24 Apr 2017, 2:49 am
Some work on the condenser in the form of 'pressure caps.' The initial form takes shape.
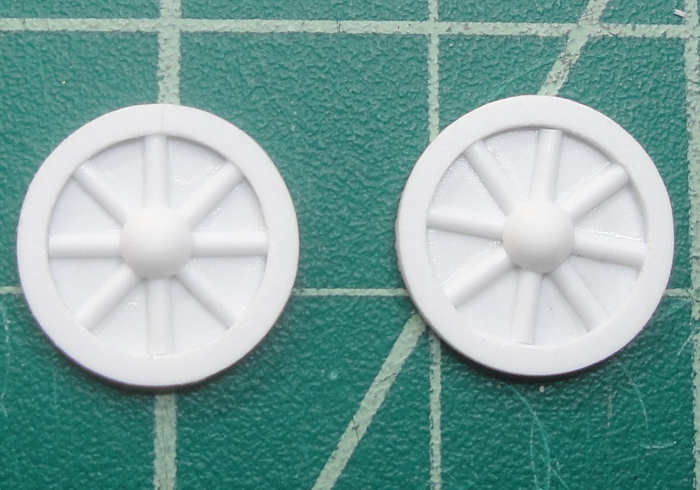
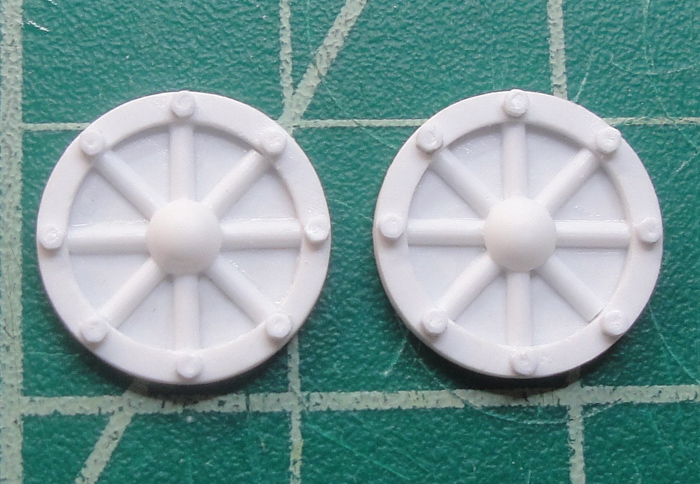
Hex nut detail added. I plan to do something with the centre part, just not sure what form that will take at this moment, perhaps some redundant plumbing.
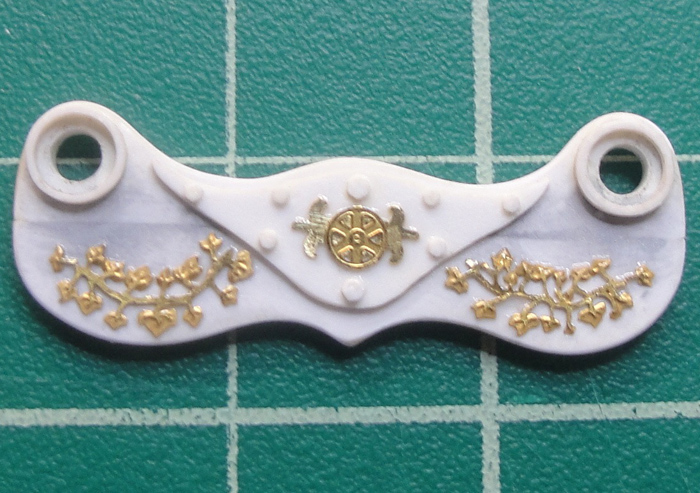
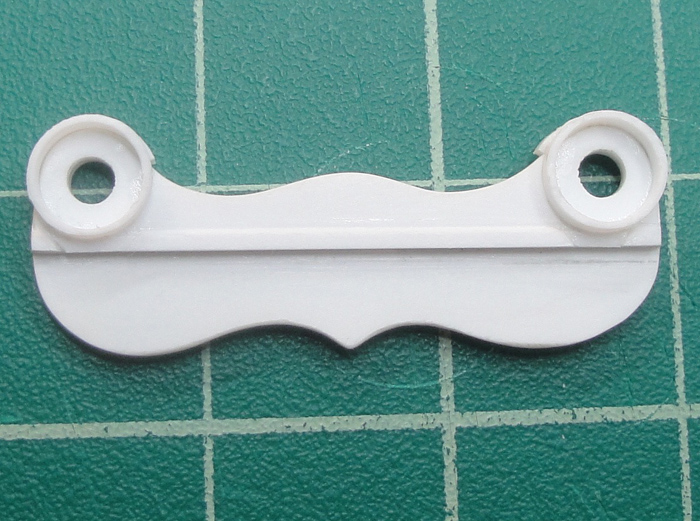
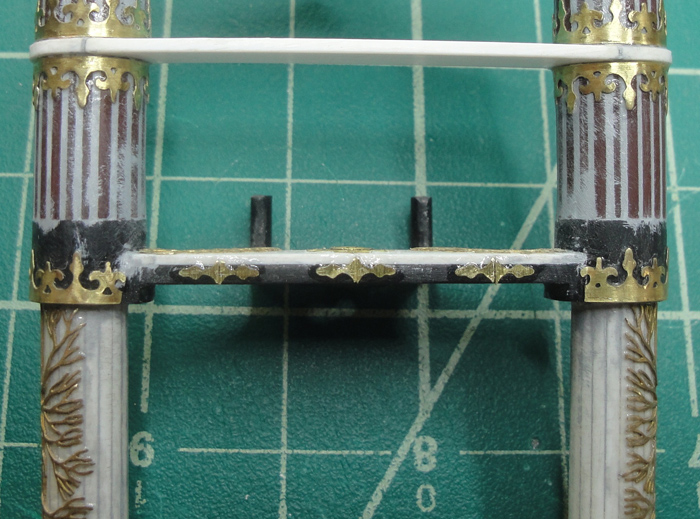
Though the forks have 'enough' stuff on them already (or so I thought) the support shock brace for the secondary forks seemed woefully blank so I added ivy bits and a little 'crest' in the middle made from 2 of the fleur de lys bits and a gear looking bit from the ship PE.
And while I was working on the brace I realized that I had never gotten around to making the seats for the lower springs, lol. Maybe I had thought to omit them at some point, I can't remember. Anyway, they're here now.
So, I had thought that there was enough stuff on the forks, then I noticed this blank crossmember. Inspired by the work on the support brace, I carried through with a similar scheme of ivy and central crest.
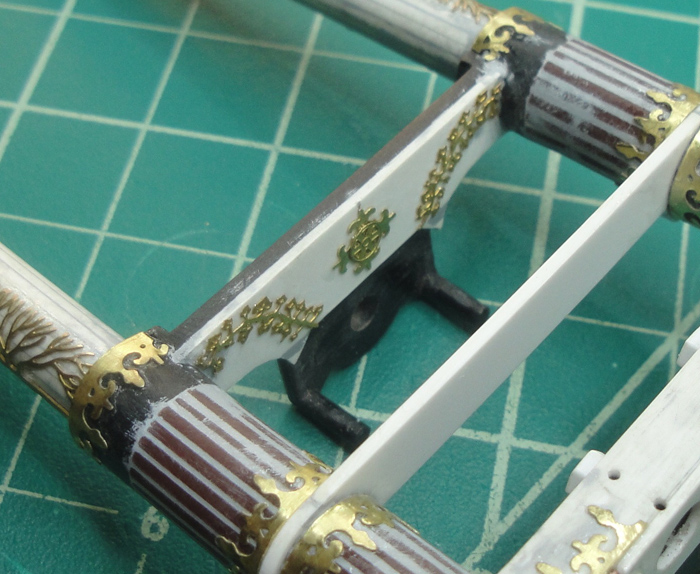
The front of the crossmember was thick enough that there was room to add some bits cut from the roof trim PE, just because.
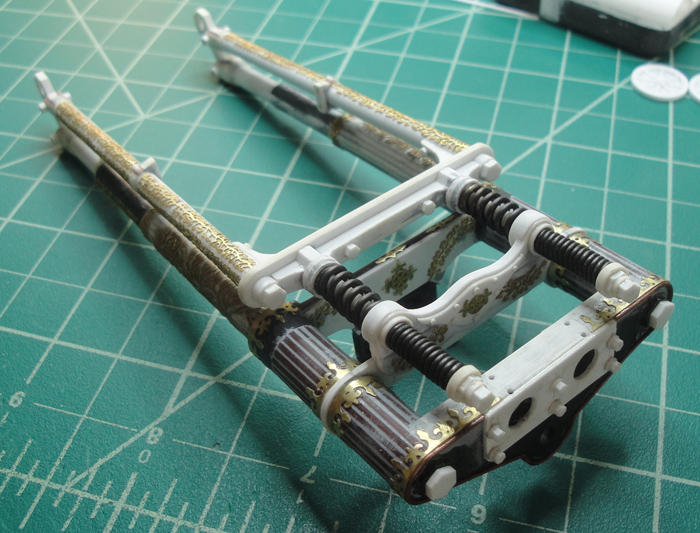
After the filling, shaping and sanding was done I decided to affix the support brace. I am pleased with the effect of the added details, though it is a tad busy, lol.

Checking the overall look.
There's still some 'underside' work to do on the support brace which had to wait until it was affixed to the forks. Otherwise the forks are that much closer to being done - all I can think of that's left to do is set the cable stays for the brake line and those will have to wait for a bit yet. I might even hit them with some primer with the next batch of parts I have lined up, something I won't do if there's still construction to be done on the part, for obvious reasons.
And there's the condenser parts staring at me ... maybe I'll distract myself with something else

Just keep swimming ...
KatsZenJammer- Resident member
- Posts : 2600
Join date : 2016-05-20
Age : 57
Location : Vancouver, BC
Re: Steampunk Harley - Tamiya 1/6 HD FLH Classic 'extreme' kit bash (Very Photo Heavy)
![]() by Guest Mon 24 Apr 2017, 3:45 am
by Guest Mon 24 Apr 2017, 3:45 am
Guest- Guest
Re: Steampunk Harley - Tamiya 1/6 HD FLH Classic 'extreme' kit bash (Very Photo Heavy)
![]() by GaryDainton Mon 24 Apr 2017, 9:07 am
by GaryDainton Mon 24 Apr 2017, 9:07 am
GaryDainton- Advanced Member
- Posts : 4433
Join date : 2014-03-06
Age : 56
Location : Bolton UK
Re: Steampunk Harley - Tamiya 1/6 HD FLH Classic 'extreme' kit bash (Very Photo Heavy)
![]() by Sponsored content
by Sponsored content
Sponsored content
Page 12 of 25 • 1 ... 7 ... 11, 12, 13 ... 18 ... 25 ![]()
» Tamiya 1/6 Harley Davidson Fat Boy Lo
» Tamiya 1/6 Harley Davidson FLH1200
» Steampunk Ducati
» '57 Salvage bash-up
|
|
|