Hot Rod....it's an Olds
+8
webby
Skid
dogfish7
itsonlyakit
MotoScale87
VirusX
Geezerman
Shelby
12 posters
Skid's :: Works In Progress :: Trucks
Page 1 of 3
Page 1 of 3 • 1, 2, 3 
 Hot Rod....it's an Olds
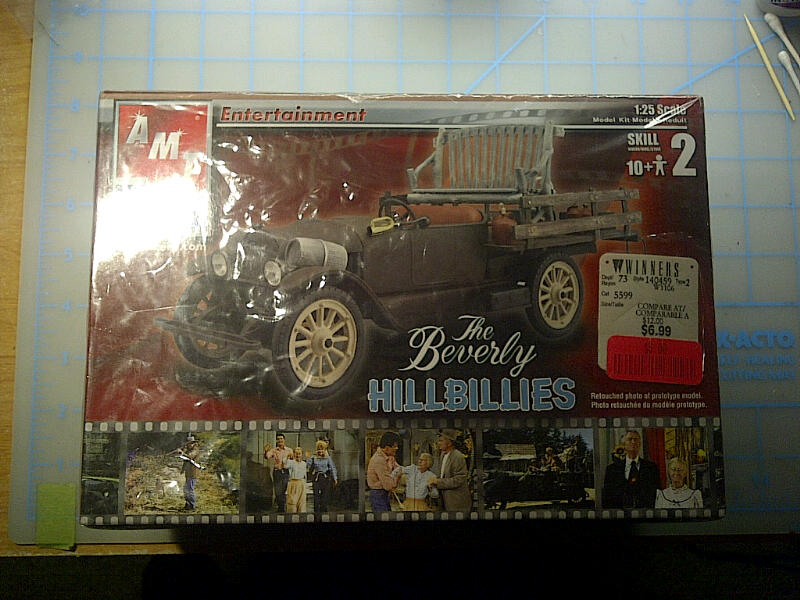
This is a kit I started awhile ago now and will likely keep going for awhile yet. I've taken the Beverlyhillbillies kit and decided to make something out of it, how often do we see an Olds used as the base of a cool hot rod, right?? I probably way over my head on this one but sometimes you have to run before you learn to walk and I've been getting help from a couple of friends from another forum too. I will try to keep this as a shortened version of the WIP so no one is bored from the circles I've been running around in. :lol:
The kit...
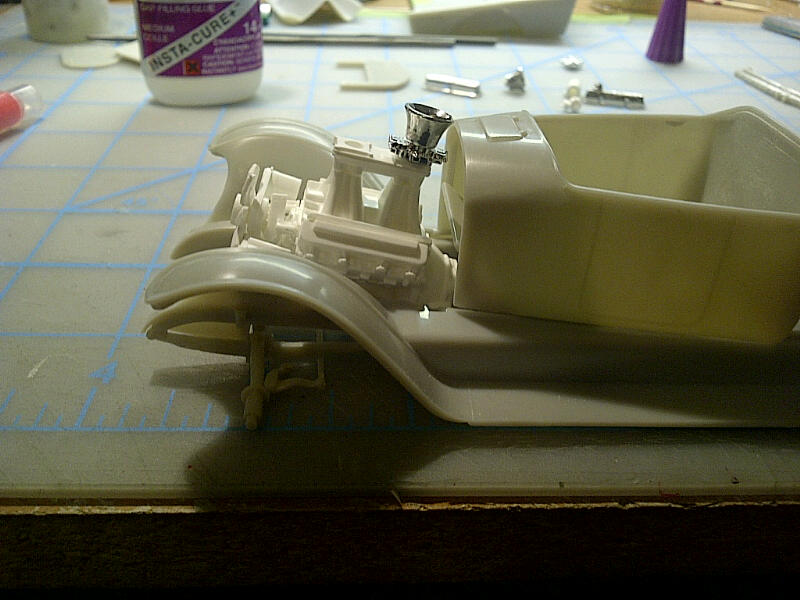
The engine I'm shoehorning in this bay...

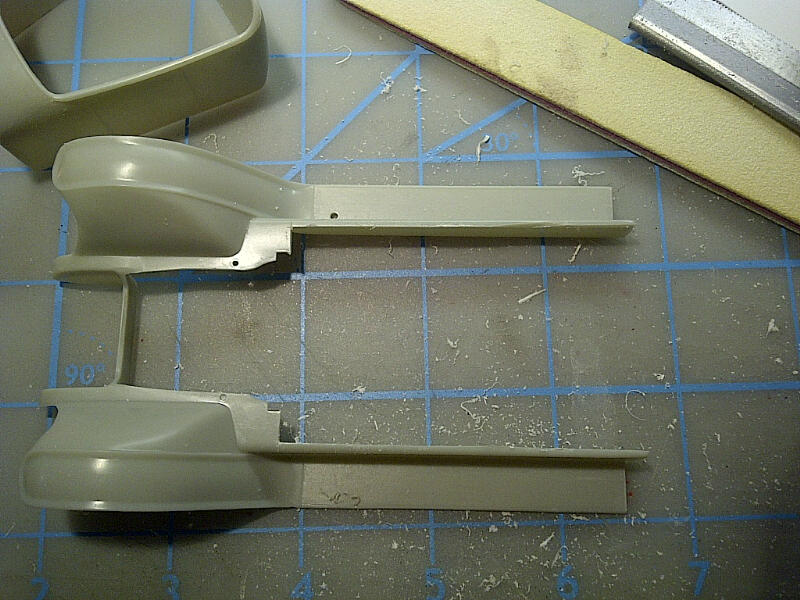
Cut up the existing floor...
The engine will run pretty deep under the floor....

I will post more next time on this one.
The kit...

The engine I'm shoehorning in this bay...


Cut up the existing floor...

The engine will run pretty deep under the floor....

I will post more next time on this one.

Shelby- Intermediate Member

- Posts : 947
Join date : 2013-03-02
Location : Alberta, Canada
 Re: Hot Rod....it's an Olds
Good Start and an excellent subject. I have been thinking of building an "O Rod" but haven't found a kit yet. I am on board to the end with this one.
Guest- Guest
 Re: Hot Rod....it's an Olds
Sweet !!!
My kind of hotrodding !!!
Bring it on home !!!
My kind of hotrodding !!!
Bring it on home !!!

Geezerman- Advanced Member

- Posts : 3651
Join date : 2013-02-24
Age : 89
Location : Gulf coast of central Florids
 Re: Hot Rod....it's an Olds
I like where you are going Denis. Looking forward to following along.
Guest- Guest
 Re: Hot Rod....it's an Olds
I vaguely remember this one, I am anxious to see that engine settled in! Ol' Jed is gonna have a rocket on his hands!

VirusX- New Member

- Posts : 73
Join date : 2013-03-01
Age : 38
Location : Cold Lake, Alberta, Canada
 Re: Hot Rod....it's an Olds
Looking good I'm liking the way of it so far.

MotoScale87- New Member

- Posts : 208
Join date : 2013-03-04
Age : 37
Location : santa ana. ca
 Re: Hot Rod....it's an Olds
Thanks for the kind words guys!
I'm gonna see what else I can update this go around.
That long bed for this truck simply had to go and I had to shorten a few things.

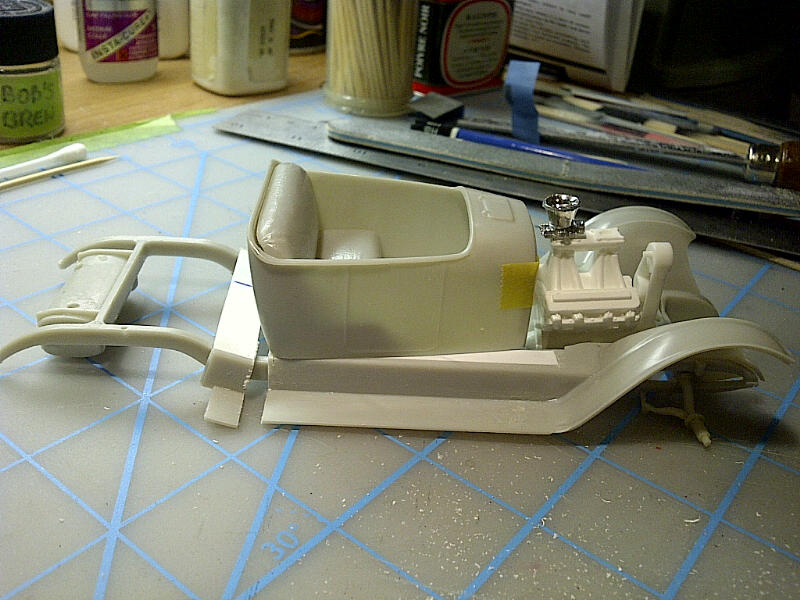
The frame was next.
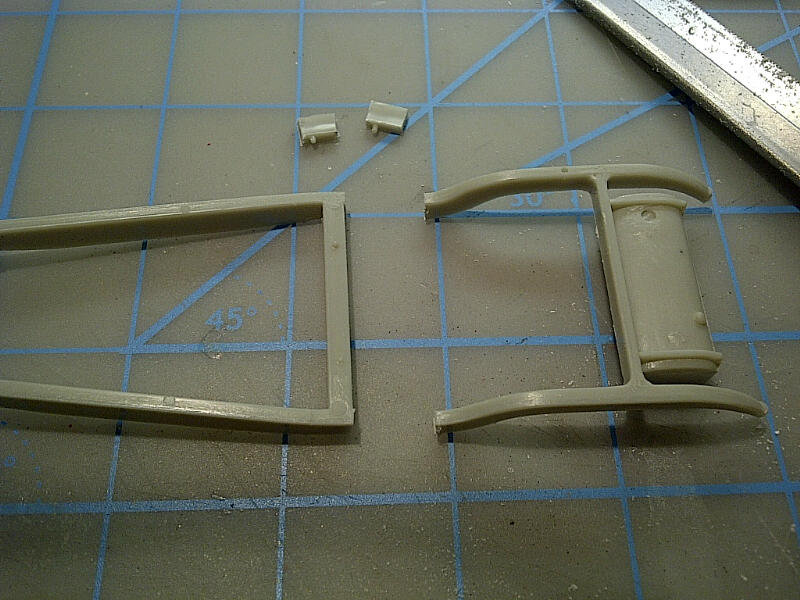
Glued back and added some of Bob's brew for reinforcement.

Next was a console that I built using parts of headrests from a Camaro

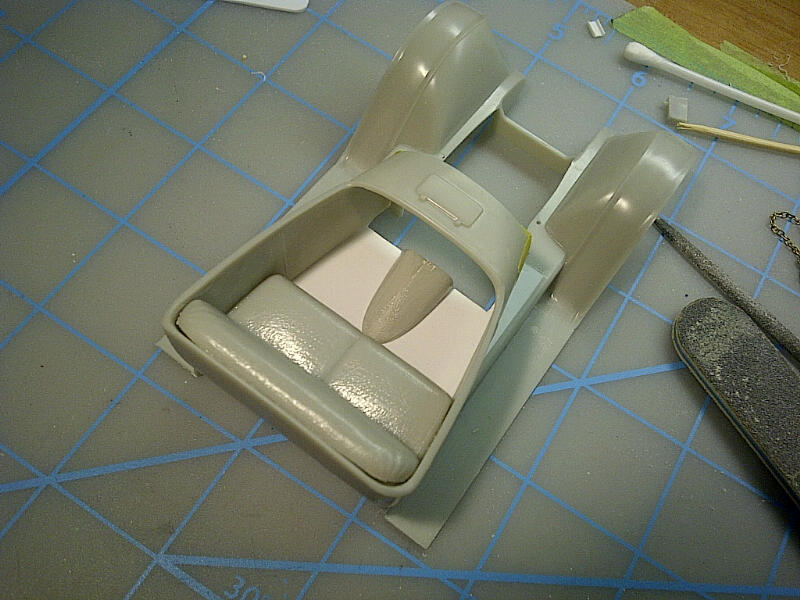
I will add more to this later on. Thanks for checking it out guys!
I'm gonna see what else I can update this go around.
That long bed for this truck simply had to go and I had to shorten a few things.


The frame was next.

Glued back and added some of Bob's brew for reinforcement.

Next was a console that I built using parts of headrests from a Camaro


I will add more to this later on. Thanks for checking it out guys!

Shelby- Intermediate Member

- Posts : 947
Join date : 2013-03-02
Location : Alberta, Canada
 Re: Hot Rod....it's an Olds
Love to watch a good kit bash !!!!!
:twisted:

Geezerman- Advanced Member

- Posts : 3651
Join date : 2013-02-24
Age : 89
Location : Gulf coast of central Florids
 Re: Hot Rod....it's an Olds
Looking good, I have one of these kits too, also from Winners, LOL. Question ? where is that motor from ?
Cheers Eh!
Cheers Eh!

itsonlyakit- New Member

- Posts : 114
Join date : 2013-02-28
Age : 76
Location : Victoria B.C. Canada
dogfish7- Intermediate Member

- Posts : 668
Join date : 2013-02-27
Age : 78
Location : Hoodsport, WA
 Re: Hot Rod....it's an Olds
Nice work with the Camaro head rests. What is this Bob's Brew that you used?

VirusX- New Member

- Posts : 73
Join date : 2013-03-01
Age : 38
Location : Cold Lake, Alberta, Canada
 Re: Hot Rod....it's an Olds
It still looks good Denis.
_________________
Al.
Constructive criticism is always welcome.
“Success always demands a greater effort.” Winston Churchill
"Success is failure turned inside out" Unknown
 Re: Hot Rod....it's an Olds
Thanks guys!
Buck - in the end I think I shortened it about 3 scale feet but I really haven't measured.
Only - The engine came from the Revell '68 Shelby GT 500.
Dan - it's simply MEK mixed with styrene to melt it and make a liquid styrene that once dry hardens like your kit.
Buck - in the end I think I shortened it about 3 scale feet but I really haven't measured.
Only - The engine came from the Revell '68 Shelby GT 500.
Dan - it's simply MEK mixed with styrene to melt it and make a liquid styrene that once dry hardens like your kit.

Shelby- Intermediate Member

- Posts : 947
Join date : 2013-03-02
Location : Alberta, Canada
 Re: Hot Rod....it's an Olds
Shelby, I have been using that MEK+Cutup Styrene since Bob Paeth turned me on to it. I still buy MEK at Ace Hardware 12 bucks a quart. I use more of it than I do glue. Glad to know I am not the only one addicted to the fumes. :drunken:
Guest- Guest
 Re: Hot Rod....it's an Olds
Flying start, & since it's an Olds, I'll have to look at buying the kit. Thanks for the tip with the MEK & styrene too.
Cheers,
Chris
Cheers,
Chris

webby- Moderator

- Posts : 2218
Join date : 2013-02-27
Age : 65
Location : Strathpine Australia. Built over WW2 airstrip
 Re: Hot Rod....it's an Olds
Zbuckster wrote:Shelby, I have been using that MEK+Cutup Styrene since Bob Paeth turned me on to it. I still buy MEK at Ace Hardware 12 bucks a quart. I use more of it than I do glue. Glad to know I am not the only one addicted to the fumes. :drunken:
Our good friend Al told me about it and I've been using it regularly since.
Sorry I haven't been updating this. I'm going on a business trip and will update when I get back.

Shelby- Intermediate Member

- Posts : 947
Join date : 2013-03-02
Location : Alberta, Canada
 Re: Hot Rod....it's an Olds
I'm back from my trip but I don't have pictures on this demonic portable device so I still can't update but it will come guys. In the meantime I can catch up on some feedback I have to give. :D

Shelby- Intermediate Member

- Posts : 947
Join date : 2013-03-02
Location : Alberta, Canada
 Re: Hot Rod....it's an Olds
It might be time that I actually update this one as I have done some work on this previously and since the Hornet is hold I got back to it a bit.
I cut the springs short and removed the gas tank. I will see if I can make it work under the seat and not just remove it completely, maybe even hinge the seat so it can flip to show the tank. I'll see how that goes.

I proceeeded with cutting the frame again, third time so far and it snapped where I cut before so it got a little trickier.

I drilled some holes in the frame and added brass rods and secured everything with epoxy. Of course I didn't take pictures of the holes and pins but this is what it looked like after, a little shady but I have it covered up now with Bob's brew and will smoothen everything out.

So now the front to back wheel span is the same as a '68 Shelby 500 much more better suited for a hot rod. The only thing now is once the body is over the frame I don't have the room for the leaf springs on the outside. I will see if I can shave a bit of the body and frame to squeeze it in between on each side without compromising the structural integrity of the build.

I carved me some braces for the leaf springs using some sprue scraps and the rotary tool

Then moved on to the floor and firewall which I chopped part of to make it easier on the floor. I know some people are not too crazy about using tape during test fitting but it's been working well for me as I am constantly checking and making changes.
This one is the floor which I need to flip inside the body before lowering it down.

Looking from the inside there was a bit of a gap still.

Finally got it right and it will be easy to assemble.

More to come very soon! Thanks for checking it out guys!
I cut the springs short and removed the gas tank. I will see if I can make it work under the seat and not just remove it completely, maybe even hinge the seat so it can flip to show the tank. I'll see how that goes.

I proceeeded with cutting the frame again, third time so far and it snapped where I cut before so it got a little trickier.

I drilled some holes in the frame and added brass rods and secured everything with epoxy. Of course I didn't take pictures of the holes and pins but this is what it looked like after, a little shady but I have it covered up now with Bob's brew and will smoothen everything out.

So now the front to back wheel span is the same as a '68 Shelby 500 much more better suited for a hot rod. The only thing now is once the body is over the frame I don't have the room for the leaf springs on the outside. I will see if I can shave a bit of the body and frame to squeeze it in between on each side without compromising the structural integrity of the build.

I carved me some braces for the leaf springs using some sprue scraps and the rotary tool

Then moved on to the floor and firewall which I chopped part of to make it easier on the floor. I know some people are not too crazy about using tape during test fitting but it's been working well for me as I am constantly checking and making changes.
This one is the floor which I need to flip inside the body before lowering it down.

Looking from the inside there was a bit of a gap still.

Finally got it right and it will be easy to assemble.

More to come very soon! Thanks for checking it out guys!

Shelby- Intermediate Member

- Posts : 947
Join date : 2013-03-02
Location : Alberta, Canada
 Re: Hot Rod....it's an Olds
This is a great demonstration of how one modifies a kit. Challenges to overcome, decisions to make, and usually a bit of "smoothing over" as the saying goes. Lookin' great so far !!
harron68- Advanced Member

- Posts : 3621
Join date : 2013-02-28
Age : 74
Location : MIDWEST
 Re: Hot Rod....it's an Olds
Great work as usual Denis.
Hmmmm..... famous last words. Final assembly always seems to throw a googlie somehow!!!
it will be easy to assemble.
Hmmmm..... famous last words. Final assembly always seems to throw a googlie somehow!!!
_________________
Al.
Constructive criticism is always welcome.
“Success always demands a greater effort.” Winston Churchill
"Success is failure turned inside out" Unknown

Geezerman- Advanced Member

- Posts : 3651
Join date : 2013-02-24
Age : 89
Location : Gulf coast of central Florids
 Re: Hot Rod....it's an Olds
Thanks for the compliments guys. 
Well I wasn't completely satisfied with the gap between the floor board and tranny cover from the inside and I did not find a solution to it so I changed the floor board.
I used a thinner styrene sheet that is more pliable so that it would bend in.
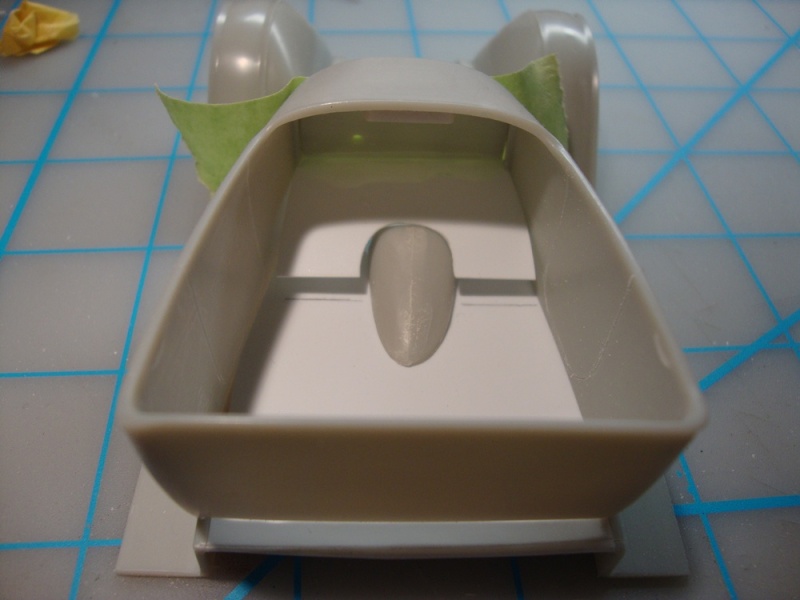
There is a bit of a gap but I'm still working on it.

I have yet to decide whether I will have a box or a wood chest at the back but I knew I would need a bit more support than a single cross member so using epoxy I added another one.

There isn't much room in between but it's more than what I started with and every little bit will help.
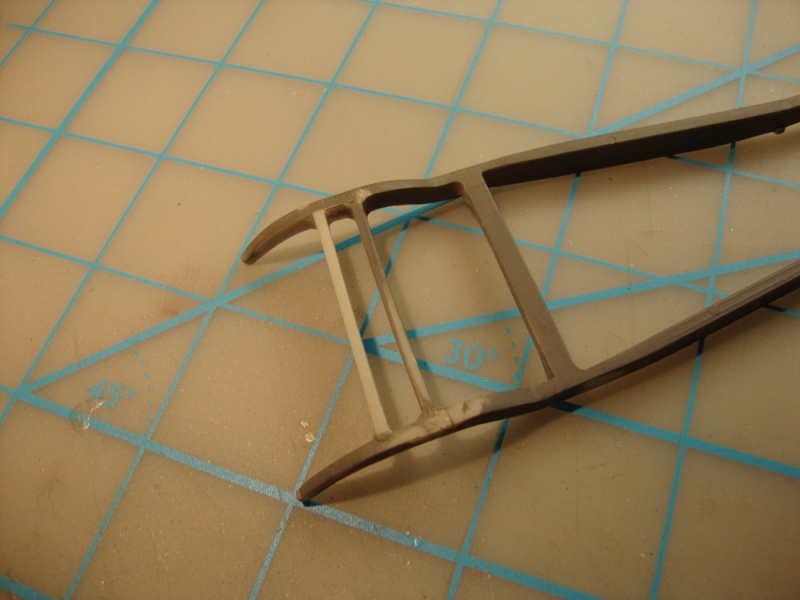
Next was the rear axle which is too small at the end to accept the wheels I'll be using. I tried adding some MEK and shaping it to fit but that proved to be a big waste of time and after conderation I need the axle to be a tiny bit wider.
I cut off a piece of sprue and went to work on it.
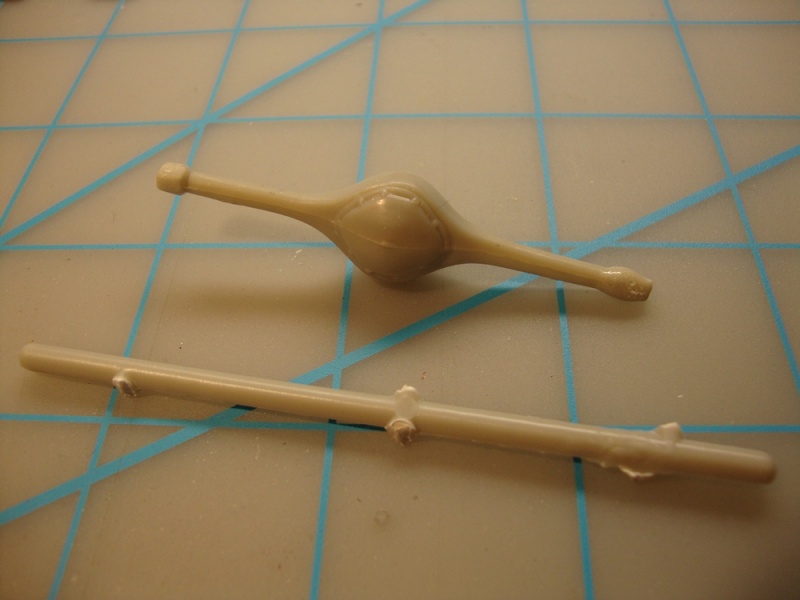
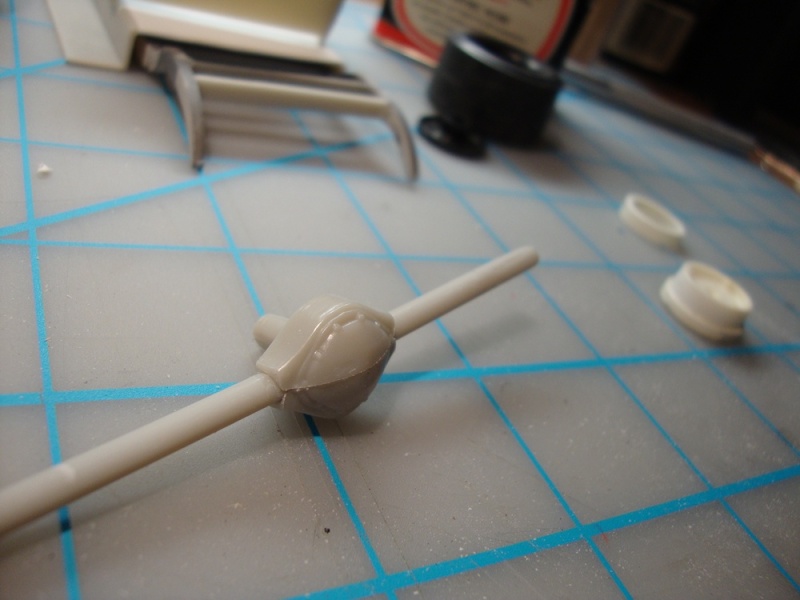
I cut off the axle and all I wanted was drill a hole right through but it split on me so I had to work with that too.

All in and just a little filling to do and sanding.
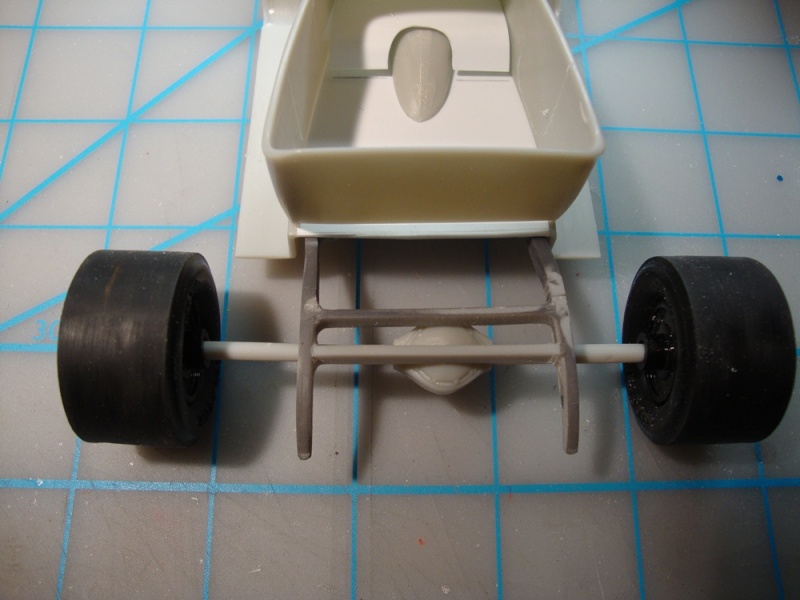
Just for kicks a look at the rear. No it's not staying that wide. lol
Lastly I tried making a frame for the winshield since the one in the kit will not work with what I'm doing and there was no glass for the front windshield.
I tried cutting a 1/8" C channel in 2 and using 45 angles but that didn't work neither did bending it in 2 places for the bottom and then adding a top. They all looked terrible. Anyone has an easy way to make a winshield frame? I might go with just the small seperate windshield for each the driver and passenger.
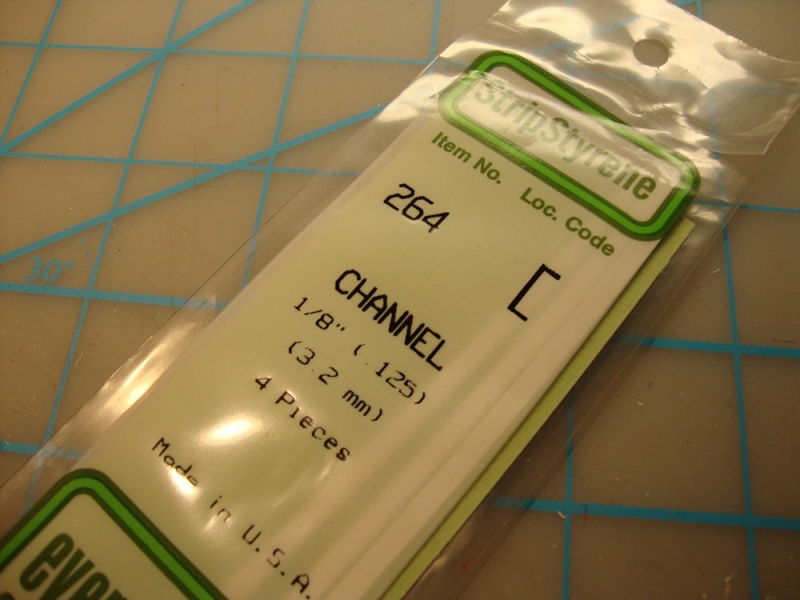

Thanks for you input and checking in guys!

Well I wasn't completely satisfied with the gap between the floor board and tranny cover from the inside and I did not find a solution to it so I changed the floor board.
I used a thinner styrene sheet that is more pliable so that it would bend in.

There is a bit of a gap but I'm still working on it.

I have yet to decide whether I will have a box or a wood chest at the back but I knew I would need a bit more support than a single cross member so using epoxy I added another one.

There isn't much room in between but it's more than what I started with and every little bit will help.

Next was the rear axle which is too small at the end to accept the wheels I'll be using. I tried adding some MEK and shaping it to fit but that proved to be a big waste of time and after conderation I need the axle to be a tiny bit wider.
I cut off a piece of sprue and went to work on it.

I cut off the axle and all I wanted was drill a hole right through but it split on me so I had to work with that too.

All in and just a little filling to do and sanding.

Just for kicks a look at the rear. No it's not staying that wide. lol

Lastly I tried making a frame for the winshield since the one in the kit will not work with what I'm doing and there was no glass for the front windshield.
I tried cutting a 1/8" C channel in 2 and using 45 angles but that didn't work neither did bending it in 2 places for the bottom and then adding a top. They all looked terrible. Anyone has an easy way to make a winshield frame? I might go with just the small seperate windshield for each the driver and passenger.


Thanks for you input and checking in guys!

Shelby- Intermediate Member

- Posts : 947
Join date : 2013-03-02
Location : Alberta, Canada
 Re: Hot Rod....it's an Olds
Looking good. No idea on the Windshield frame. The cowl is very round on that Olds Body. I would just have to start working with the styrene and see what happened.
Guest- Guest
Page 1 of 3 • 1, 2, 3 
Skid's :: Works In Progress :: Trucks
Page 1 of 3
Permissions in this forum:
You cannot reply to topics in this forum