
1953 Hudson Hornet
Skid's :: Works In Progress :: Road cars
Page 1 of 1

1953 Hudson Hornet
![]() by Guest Mon 25 Mar 2013, 2:05 am
by Guest Mon 25 Mar 2013, 2:05 am
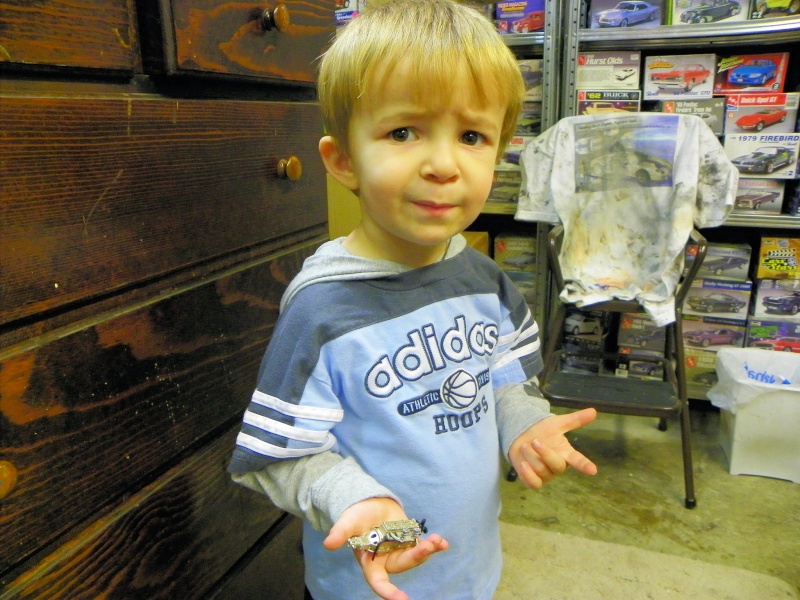
I know I have a Challenger to finish but still have to figure out the front wheel covers on that one. I am looking for a machinist to make a couple. Also I am getting some pressure from my Grandson to BUILD "Doc Hudson". Cars is his favorite movie. He is only 2 but can name every car in it and Doc Hudson is one of his favorites.
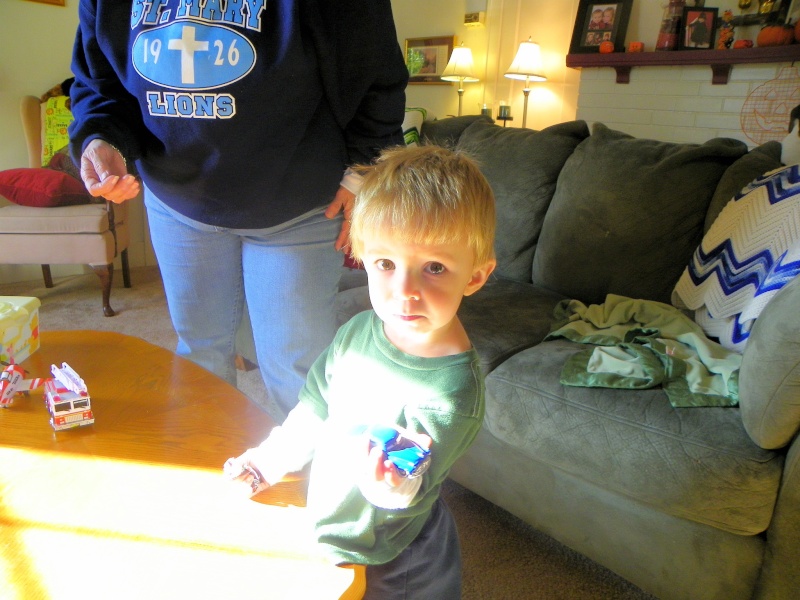

When I took these pictures he was eating M&M's and watching Cars on DVD. He watches it once or twice a day.
So that's my motivation this one. Plus I am wanting to build this kit a lot.
Here is the new Moebius Hudson kit.
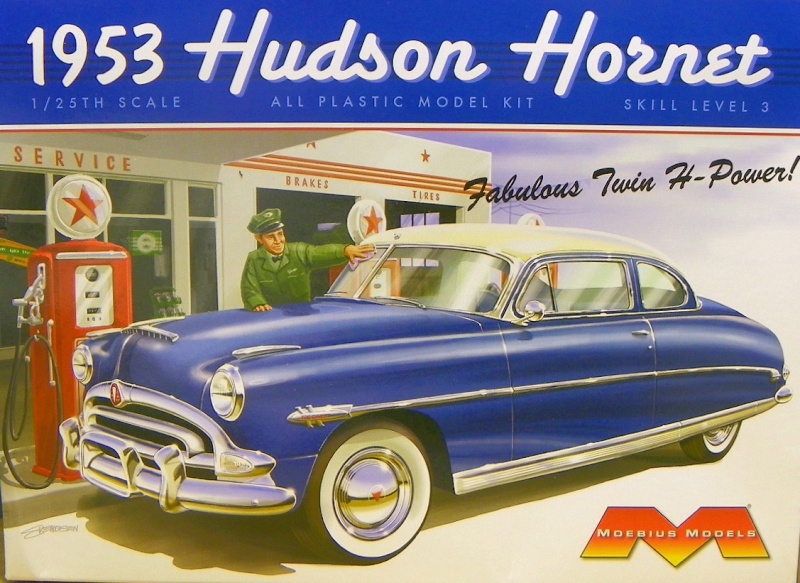
They say the Nascar version of this kit will be out in a month or so. That's cool also. Since Doc Hudson is kind of a Generic Hudson Hornet I am going to build this one close but not perfect. The paint will be HOK Candy Cobalt Blue over a Gold under base. The interior will be done in Gray's Light, medium and dark. So box stock with some wires will probably be it. Well some BMF also.
I started with the body, First thing out the bag the Hood doesn't fit. So it had to be sanded and filed down on the edges to get it to fit right.

Also there are some casting lines that need to be sanded out. They are on the front and rear fenders and the roof. Like normal I guess. When it is all done and in primer it looks pretty good.

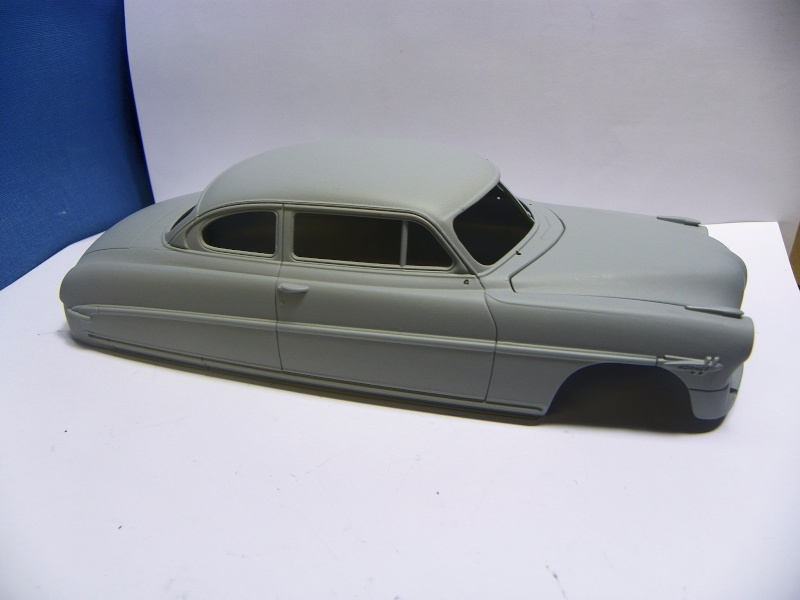
That's about it for now. I am going to let the primer set for a bit and work on the engine and chassis before I paint the body. So that will be up next.
Thanks for looking in all questions and comments are welcome.
When I took these pictures he was eating M&M's and watching Cars on DVD. He watches it once or twice a day.
So that's my motivation this one. Plus I am wanting to build this kit a lot.
Here is the new Moebius Hudson kit.
They say the Nascar version of this kit will be out in a month or so. That's cool also. Since Doc Hudson is kind of a Generic Hudson Hornet I am going to build this one close but not perfect. The paint will be HOK Candy Cobalt Blue over a Gold under base. The interior will be done in Gray's Light, medium and dark. So box stock with some wires will probably be it. Well some BMF also.
I started with the body, First thing out the bag the Hood doesn't fit. So it had to be sanded and filed down on the edges to get it to fit right.
Also there are some casting lines that need to be sanded out. They are on the front and rear fenders and the roof. Like normal I guess. When it is all done and in primer it looks pretty good.
That's about it for now. I am going to let the primer set for a bit and work on the engine and chassis before I paint the body. So that will be up next.
Thanks for looking in all questions and comments are welcome.
Guest- Guest
Re: 1953 Hudson Hornet
![]() by Guest Mon 25 Mar 2013, 2:16 am
by Guest Mon 25 Mar 2013, 2:16 am
Hey everyone, thanks for the comments.
Well we are off again. I have been fooling around with colors and metalizers trying to get things close on the engine part of the build. This year at the Billetproof there was a 53 Hudson Hornet that was supposed to be a survivor. I took about 10 pictures of the engine bay area. So the engine bay looks like this.

Before I forget the inner fender wells are black, but on this car they were very faded and look gray.
So I got it to the point that things looked like this.

Now for the air cleaners. They are wet type or oil bath air cleaners. And have a fine brass wire screen over the inlet. The ones in the kit looked a little lame. So I decided to open them up and put a screen in them.
Here's a before and after.

Then after sanding and such they were primered and painted what looks to be a close Red.

Now time to install the decal that so proudly proclaims "Twin H Power" . The decal is so transparent that it disappears when you put it on.

Here is a mock up that shows it even better.

But I will say other than the decals are very transparent and the hood needed sand to fit, about 10 minutes work. The rest of the kit is pretty nice. A little flash here and there but not much.
The frame looks Flat Black but is really Gunmetal. So now on to spark plug wires and figuring out if I will run fuel lines to the carbs. I am thinking about doing the fuel system from the fuel pump to the carbs. The kit has so pretty good looking linkage with it so why not.
See ya next update. All comments and questions are welcome.
Well we are off again. I have been fooling around with colors and metalizers trying to get things close on the engine part of the build. This year at the Billetproof there was a 53 Hudson Hornet that was supposed to be a survivor. I took about 10 pictures of the engine bay area. So the engine bay looks like this.
Before I forget the inner fender wells are black, but on this car they were very faded and look gray.
So I got it to the point that things looked like this.
Now for the air cleaners. They are wet type or oil bath air cleaners. And have a fine brass wire screen over the inlet. The ones in the kit looked a little lame. So I decided to open them up and put a screen in them.
Here's a before and after.
Then after sanding and such they were primered and painted what looks to be a close Red.
Now time to install the decal that so proudly proclaims "Twin H Power" . The decal is so transparent that it disappears when you put it on.
Here is a mock up that shows it even better.
But I will say other than the decals are very transparent and the hood needed sand to fit, about 10 minutes work. The rest of the kit is pretty nice. A little flash here and there but not much.
The frame looks Flat Black but is really Gunmetal. So now on to spark plug wires and figuring out if I will run fuel lines to the carbs. I am thinking about doing the fuel system from the fuel pump to the carbs. The kit has so pretty good looking linkage with it so why not.
See ya next update. All comments and questions are welcome.
Guest- Guest
Re: 1953 Hudson Hornet
![]() by Guest Mon 25 Mar 2013, 2:30 am
by Guest Mon 25 Mar 2013, 2:30 am
Thanks guys. I have done anything with the air cleaner decals yet. I spent today painting the body and thought I would share that with ya. I wanted the HOK Candy Cobalt Blue paint to be able to sit awhile before I wet sand and clear it. Plus the BMF needs to be done between those two steps. So it can sit now and I can go back to the engine.
Here it is right out of the booth with the Gold Underbase on it.


Here is the body hanging out of the booth with 3 coats of candy on it.

By this point I could see I was a long way from where I wanted to be. I know about hind sight , but I wish now I would have used a White Peal base coat. This was one of the most transparent candy colors I have worked with. Any way lesson learned. After about 2 hours and 3 ounces of paint through the airbrush I got what I was after, or at least as close I am going to get.


Anyway I am not crying the blues just did it wrong and I am not going to strip and repaint it. It was a painter error and not a HOK problem.
So now I am off to drill the coil and distributor for plug wires. and figure out what I will do with the fuel system. See it a bit and thanks for following along. All comments and questions are welcome.
Here it is right out of the booth with the Gold Underbase on it.
Here is the body hanging out of the booth with 3 coats of candy on it.
By this point I could see I was a long way from where I wanted to be. I know about hind sight , but I wish now I would have used a White Peal base coat. This was one of the most transparent candy colors I have worked with. Any way lesson learned. After about 2 hours and 3 ounces of paint through the airbrush I got what I was after, or at least as close I am going to get.
Anyway I am not crying the blues just did it wrong and I am not going to strip and repaint it. It was a painter error and not a HOK problem.
So now I am off to drill the coil and distributor for plug wires. and figure out what I will do with the fuel system. See it a bit and thanks for following along. All comments and questions are welcome.
Guest- Guest
Re: 1953 Hudson Hornet
![]() by Guest Mon 25 Mar 2013, 2:37 am
by Guest Mon 25 Mar 2013, 2:37 am
Not much of an update but an update none the less. ;D
Thanks to those that are following along. Your comments and questions just make it better.
It doesn't seem like much but there is a lot of work tied up in this.
I got the distributor and coil drilled and wired. I will add spark plug boots next and start assembly on the engine.


The rest of the time has been spent on the body. I got it all sanded and buffed ready to put the clear on. before I put clear on it I will do the foil work. That will be quite a job. This big beast had a ton of chrome on it. The only place that I am not sure of is on the trunk. It says "Twin H Power", I guess that refers to the twin carburetors, anyway not sure if this will be foiled or I will try ti paint it. Pretty small script either way.

As you can see I was careful not to sand and polish around the script. I didn't want to doink it up. But the rest of the body came out way better than I thought it would. It is blue but when you get the light just right you can see the gold underneath it. Here are a couple pics.


So now I will go to the do 2 things at once. I will start the foil work and when it gets to be to much go to the engine assembly. Next update should be better.
Thanks for looking in all comments and questions are welcome.
Thanks to those that are following along. Your comments and questions just make it better.
It doesn't seem like much but there is a lot of work tied up in this.
I got the distributor and coil drilled and wired. I will add spark plug boots next and start assembly on the engine.
The rest of the time has been spent on the body. I got it all sanded and buffed ready to put the clear on. before I put clear on it I will do the foil work. That will be quite a job. This big beast had a ton of chrome on it. The only place that I am not sure of is on the trunk. It says "Twin H Power", I guess that refers to the twin carburetors, anyway not sure if this will be foiled or I will try ti paint it. Pretty small script either way.
As you can see I was careful not to sand and polish around the script. I didn't want to doink it up. But the rest of the body came out way better than I thought it would. It is blue but when you get the light just right you can see the gold underneath it. Here are a couple pics.
So now I will go to the do 2 things at once. I will start the foil work and when it gets to be to much go to the engine assembly. Next update should be better.
Thanks for looking in all comments and questions are welcome.
Guest- Guest
Re: 1953 Hudson Hornet
![]() by Guest Mon 25 Mar 2013, 2:47 am
by Guest Mon 25 Mar 2013, 2:47 am
OK I am back on this one.
Thanks to everyone that has been following along. I am sorry for the long delay since the last update. Just one of those slumps.
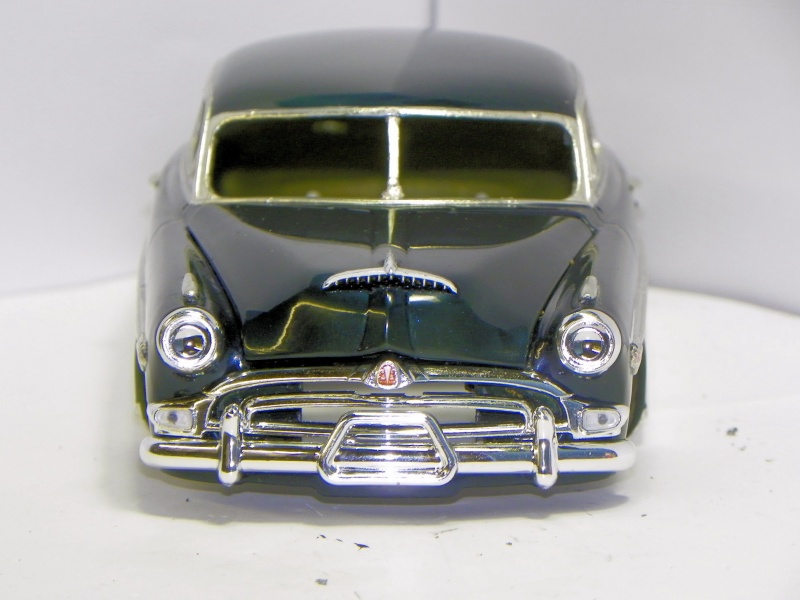
So I have been working on getting the body foiled before I clear coat the paint. After much fooling around and about half a sheet of BMF this is what we have.


I got the Hudson in the front emblem filled in with Red paint. The rest of the script work is decals.

So it looks like this with 2 coats of clear. Now I will let it sit awhile and move to the engine and interior.

Along the way I tried what I thought would be a great idea. I found some Silver touch up paint that has a nib on it like a Ball Point Pen. I though it would be easy to "roll on" the trim. Small emblem and such. It didn't work like I wanted it to. The paint is to thin, almost transparent. Has anyone else tried this?

Here is what the nib looks like.

Thanks to everyone that has been following along. I am sorry for the long delay since the last update. Just one of those slumps.
So I have been working on getting the body foiled before I clear coat the paint. After much fooling around and about half a sheet of BMF this is what we have.
I got the Hudson in the front emblem filled in with Red paint. The rest of the script work is decals.
So it looks like this with 2 coats of clear. Now I will let it sit awhile and move to the engine and interior.
Along the way I tried what I thought would be a great idea. I found some Silver touch up paint that has a nib on it like a Ball Point Pen. I though it would be easy to "roll on" the trim. Small emblem and such. It didn't work like I wanted it to. The paint is to thin, almost transparent. Has anyone else tried this?
Here is what the nib looks like.
Guest- Guest
Re: 1953 Hudson Hornet
![]() by Guest Mon 25 Mar 2013, 2:48 am
by Guest Mon 25 Mar 2013, 2:48 am
Al the pens are real Automotive touch up paint. So you don't have the never dry problems you get with gel pens. I haven't given up on the idea yet.
Guest- Guest
Re: 1953 Hudson Hornet
![]() by Guest Mon 25 Mar 2013, 3:03 am
by Guest Mon 25 Mar 2013, 3:03 am
Well I knew I was moving kinda slow on this one, but didn't except the quality control inspector showed up. Check my body work and progress on the engine.
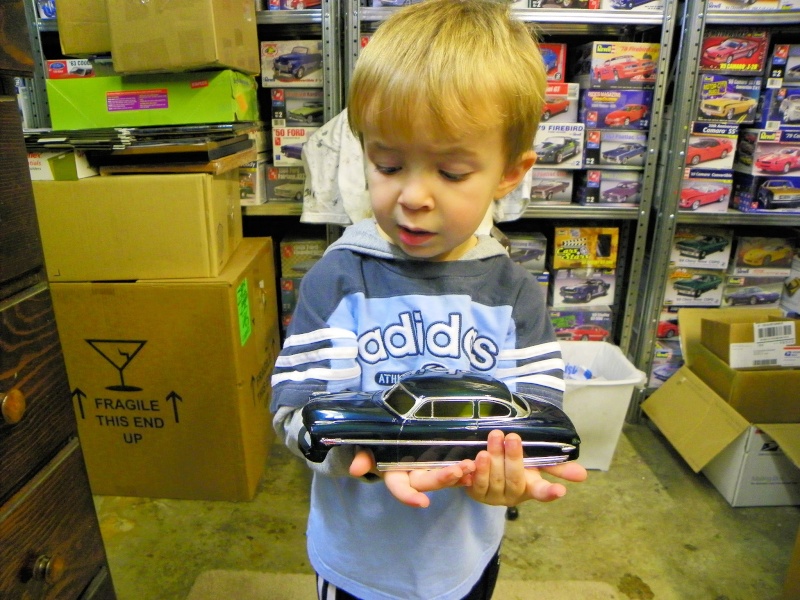
He left me with a stern warning to pick up the pace. I have quite a bit done on the engine and have decided to add a couple details I wasn't going to do at first. I have added fuel lines from the fuel pump to the carburetors. The kit has some throttle linkage so I will work on making it look right. Will also add the vacuum line from the intake plenum to the vacuum advance.

Got the distributor ready to go on the engine. Wiring looms and spark plug boots are on the wires. I will get in on the engine then finish the length on each wire.

More to come soon. Thanks for looking in. All comments and questions are welcome.
He left me with a stern warning to pick up the pace. I have quite a bit done on the engine and have decided to add a couple details I wasn't going to do at first. I have added fuel lines from the fuel pump to the carburetors. The kit has some throttle linkage so I will work on making it look right. Will also add the vacuum line from the intake plenum to the vacuum advance.
Got the distributor ready to go on the engine. Wiring looms and spark plug boots are on the wires. I will get in on the engine then finish the length on each wire.
More to come soon. Thanks for looking in. All comments and questions are welcome.
Guest- Guest
Re: 1953 Hudson Hornet
![]() by Guest Mon 25 Mar 2013, 3:04 am
by Guest Mon 25 Mar 2013, 3:04 am
AL the fuel line is .018" craft wire. It's a little large but not much. In the day a fuel line would have been 5/16" inside diameter or 3/8 inch outside diameter. That scales out to .015" so I had .012 and .018 I went with the .018 it looked closer. The vacuum line will be either .007" or .012". Those old vacuum lines were 1/4 inch. in scale that is .010". I don't have any that size so will have to come close and call it good. I will play it by eye so to speak.
Guest- Guest
Re: 1953 Hudson Hornet
![]() by Guest Mon 25 Mar 2013, 3:19 am
by Guest Mon 25 Mar 2013, 3:19 am
Thanks for the comments guys.
Well I am back to working on this one full time. The Holidays are behind us and it's a new year time to finish up old projects. I got the engine finished.For detail I added spark plug wires and boots, fuel line from the fuel pump to the carbs, and the vacuum line from the plenum to the vacuum advance. There is a spot where the kit supplied throttle linkage doesn't hookup. I might do something to hook them together. That will depend on "Is it visible in the engine bay?". If it is I will fix it. Maybe I will fix it anyway and then I will always know it's there. I took 75 pictures of the engine assembly. I am not going to over load you with them here. So here is how it all ended up looking.


Here are a couple shots of he engine in the chassis.


So that brings us to here. The engine is done and the body is ready to be sanded with 2000 wet and polished and waxed. I will let it sit a little longer before doing that and focus on the chassis and picking out my final interior colors. I know it will be shades of Grey and silver but I am not sure how dark or light they will be yet.

All comments and questions are welcome. Thanks for looking in. I'll be back soon.
Well I am back to working on this one full time. The Holidays are behind us and it's a new year time to finish up old projects. I got the engine finished.For detail I added spark plug wires and boots, fuel line from the fuel pump to the carbs, and the vacuum line from the plenum to the vacuum advance. There is a spot where the kit supplied throttle linkage doesn't hookup. I might do something to hook them together. That will depend on "Is it visible in the engine bay?". If it is I will fix it. Maybe I will fix it anyway and then I will always know it's there. I took 75 pictures of the engine assembly. I am not going to over load you with them here. So here is how it all ended up looking.
Here are a couple shots of he engine in the chassis.
So that brings us to here. The engine is done and the body is ready to be sanded with 2000 wet and polished and waxed. I will let it sit a little longer before doing that and focus on the chassis and picking out my final interior colors. I know it will be shades of Grey and silver but I am not sure how dark or light they will be yet.
All comments and questions are welcome. Thanks for looking in. I'll be back soon.
Guest- Guest
Re: 1953 Hudson Hornet
![]() by Guest Mon 25 Mar 2013, 3:39 am
by Guest Mon 25 Mar 2013, 3:39 am
Thanks for the comments, guys. It really does make it more interesting and fun.
Since The last update I have quite a bit done to Old Doc. I'll start at the firewall. It is all done. 2 horns, 1 wiper motor, 2 wiper transmissions (or pivots) and a serial # decal. When it is all done it looks like this.

The instruction sheet lists all the stock interior color options. It shows Dark Gray, Medium Gray and Light Gray as one option. I thought that would look good with the Candy Cobalt Blue exterior so away we went. Used Dark Gray Flock for the carpet and did the seats and door panels in the three Grays. Ended up looking like this.

I didn't think there was a big enough difference between the Medium and Light Gray colors. So instead of trying to mix something and putting on more paint I decided to BMF the two strips where the Light Gray is. They ended up looking like this.

Before BMF

After BMF

The dash has decals for everything. Along the top of the dash is a molding. I painted from the molding forward body color and from the molding back the Dark Gray interior color. Then I foiled the molding on top and the instrument cluster, heater controls, vent controls, ash tray, radio and glove box. Then applied the decals. The heater box is semi gloss black. The steering wheel and steering column were chrome. I painted them the Medium Gray. When the dust had settled it looked like this.

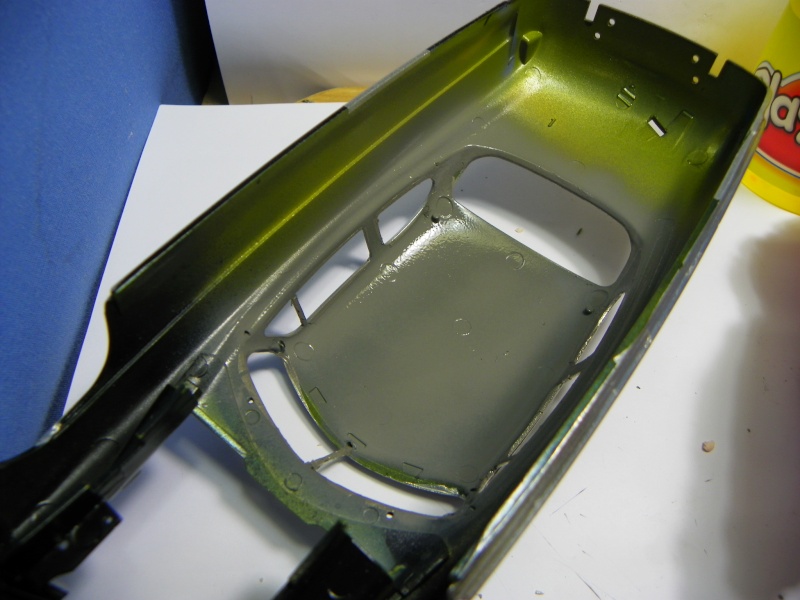
With the interior done it was time to paint in the headliner with the Dark Gray color. I used Play Dough as a mask and painted it with the airbrush.


So that's were we are at. What's left now is to wet sand the body with 2000 wet paper, polish and wax it. Then do the final assembly. I should have some complete chassis shot soon.
All comments and questions are welcome. Thanks for looking in.
Since The last update I have quite a bit done to Old Doc. I'll start at the firewall. It is all done. 2 horns, 1 wiper motor, 2 wiper transmissions (or pivots) and a serial # decal. When it is all done it looks like this.
The instruction sheet lists all the stock interior color options. It shows Dark Gray, Medium Gray and Light Gray as one option. I thought that would look good with the Candy Cobalt Blue exterior so away we went. Used Dark Gray Flock for the carpet and did the seats and door panels in the three Grays. Ended up looking like this.
I didn't think there was a big enough difference between the Medium and Light Gray colors. So instead of trying to mix something and putting on more paint I decided to BMF the two strips where the Light Gray is. They ended up looking like this.
Before BMF
After BMF
The dash has decals for everything. Along the top of the dash is a molding. I painted from the molding forward body color and from the molding back the Dark Gray interior color. Then I foiled the molding on top and the instrument cluster, heater controls, vent controls, ash tray, radio and glove box. Then applied the decals. The heater box is semi gloss black. The steering wheel and steering column were chrome. I painted them the Medium Gray. When the dust had settled it looked like this.
With the interior done it was time to paint in the headliner with the Dark Gray color. I used Play Dough as a mask and painted it with the airbrush.
So that's were we are at. What's left now is to wet sand the body with 2000 wet paper, polish and wax it. Then do the final assembly. I should have some complete chassis shot soon.
All comments and questions are welcome. Thanks for looking in.
Guest- Guest
Re: 1953 Hudson Hornet
![]() by Guest Mon 25 Mar 2013, 3:49 am
by Guest Mon 25 Mar 2013, 3:49 am
How about a middle on the week update? I know what you are thinking. "Who are you and what did you do with Buck?" To tell you the truth we have had some strange weather here lately. It's either warm and raining or not raining and cold. I took my 2 mile walk today at 11:30 AM and it was 34 degrees. So the bottom line is I am getting quite a bit done on this build.
Thanks for following along. Your comments just make it more fun. About the play dough. That all started as a misunderstanding. I read an article on masking with Silly Putty. For whatever reason I thought it was about Play dough. The Grand kids have about 50 pounds of the stuff so I went and bagged a can of it. I really does work good for some things and not well at all for others. It doesn't really want to stick to anything. I like it for doing the headliners because you can protect the BMF and only airbrush the roof. When done just wad it up and put it back in the can. When it gets to dirty throw it away and get another. Cheap stuff.
I worked on the chassis of the Hudson and got her done.

I know it says the rear shocks are supposed to be Yellow. I always remember the Koni Shocks from the 50's and 60's. They were the best money could buy. They were flat red in color. So this baby has the Koni's. ;D
Time to put the engine and transmission the chassis. Here are a couple of shots.


With that done it was time to put the body on, check the stance, and see if she sits level.


I am happy with how that turned out. Now to finish putting the trim on the body and doing the assembly on the interior. I'll be back in a couple days with probably the last update.
Thanks for following along. All questions and comments are welcome.
Thanks for following along. Your comments just make it more fun. About the play dough. That all started as a misunderstanding. I read an article on masking with Silly Putty. For whatever reason I thought it was about Play dough. The Grand kids have about 50 pounds of the stuff so I went and bagged a can of it. I really does work good for some things and not well at all for others. It doesn't really want to stick to anything. I like it for doing the headliners because you can protect the BMF and only airbrush the roof. When done just wad it up and put it back in the can. When it gets to dirty throw it away and get another. Cheap stuff.
I worked on the chassis of the Hudson and got her done.
I know it says the rear shocks are supposed to be Yellow. I always remember the Koni Shocks from the 50's and 60's. They were the best money could buy. They were flat red in color. So this baby has the Koni's. ;D
Time to put the engine and transmission the chassis. Here are a couple of shots.
With that done it was time to put the body on, check the stance, and see if she sits level.
I am happy with how that turned out. Now to finish putting the trim on the body and doing the assembly on the interior. I'll be back in a couple days with probably the last update.
Thanks for following along. All questions and comments are welcome.
Guest- Guest
Re: 1953 Hudson Hornet
![]() by Guest Mon 25 Mar 2013, 3:54 am
by Guest Mon 25 Mar 2013, 3:54 am
Hey everyone. Thanks for all the kind words and for following along on this build. This will be the last update before it goes to the NMA. I know I have kinda drug my feet on this a little but it is almost done now. The Holidays get you busy and then you kind of loose your enthusiasm for the build next thing you know you aren't working on it. ;D
So here is what the interior looks like all put together for the last time and on the chassis.


Starting to put the glass in the body and all the trim on it (bumpers and the such) Now it starts to show a little personality.

So now it is off to see if the glue has set on this yet so I can add more. Should be done in the next day or so. Thanks for following along. It has been fun.
So here is what the interior looks like all put together for the last time and on the chassis.
Starting to put the glass in the body and all the trim on it (bumpers and the such) Now it starts to show a little personality.
So now it is off to see if the glue has set on this yet so I can add more. Should be done in the next day or so. Thanks for following along. It has been fun.
Guest- Guest

Tumbler75- Intermediate Member

- Posts : 854
Join date : 2013-02-25
Age : 49
Location : Prosperity, SC
Skid's :: Works In Progress :: Road cars
Page 1 of 1
Permissions in this forum:
You cannot reply to topics in this forum|
|
|