1984 Corvette
Skid's :: Works In Progress :: Road cars
Page 1 of 1
 1984 Corvette
This is our 1984 Corvette. I have wanted to replicate it for some time but couldn't kind a kit. The 1984 is the only year Chevrolet used the Cross Fire Injection. Also know as misfire injection. We have had no trouble out of the car. Really has been great. We use it for Rod runs, Car shows and Drag Racing. I have qualified the car for the NHRA Division 6 Bracket Finals 4 times. That's one step away from Pomona to run for the National Championship. Didn't win but I was in the hunt. 8-) The only thing I did was install a Hyper-Tech chip in the computer. Other than that it's bone stock. Runs 14.20's at 98 MPH and gets over 20 MPG on the road. I love it.

So I finally found this kit at Model Express.

It has the correct engine. 1985 and later had a Tune Port Injection system. Sue aid I had to build it "perfect" that's the on;y part that has me worried. I have gone 62 years without being perfect. Why do I have to change now? ;D
Anyway follow along if you'd like. This will be my first OTB at the new forum.
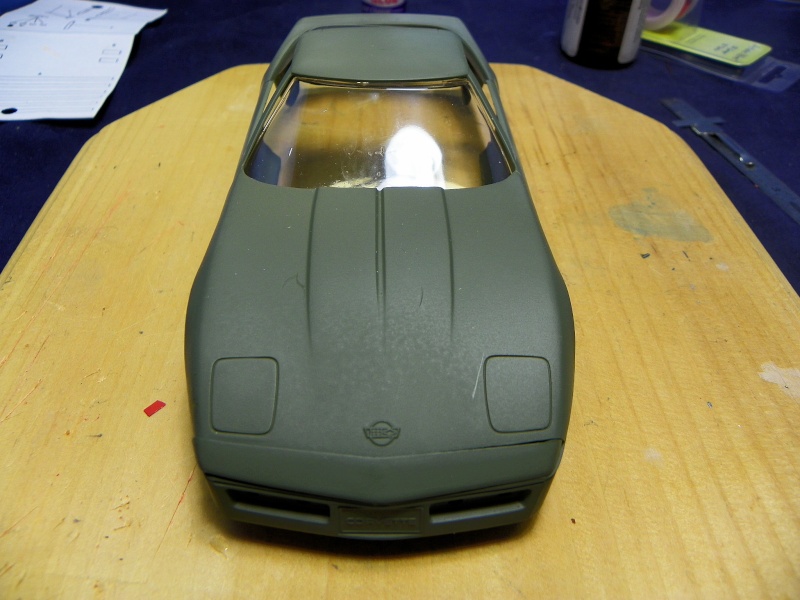
So far the body is cleaned up and in primer.

Be back soon for an update. All comments and input is welcome. Thanks for looking in.

So I finally found this kit at Model Express.

It has the correct engine. 1985 and later had a Tune Port Injection system. Sue aid I had to build it "perfect" that's the on;y part that has me worried. I have gone 62 years without being perfect. Why do I have to change now? ;D
Anyway follow along if you'd like. This will be my first OTB at the new forum.
So far the body is cleaned up and in primer.


Be back soon for an update. All comments and input is welcome. Thanks for looking in.
Guest- Guest
 Re: 1984 Corvette
I got a little bit more done. I started with the wheels and tires. I don't know why. Usually start with the engine. The stock wheels didn't look right being chrome and having the holes cast closed. So I started by opening up the Slots with a .030 drill bit. Also put them in the Bleach tank to remove the chrome.
kit wheels:

Stripped wheels opened up.
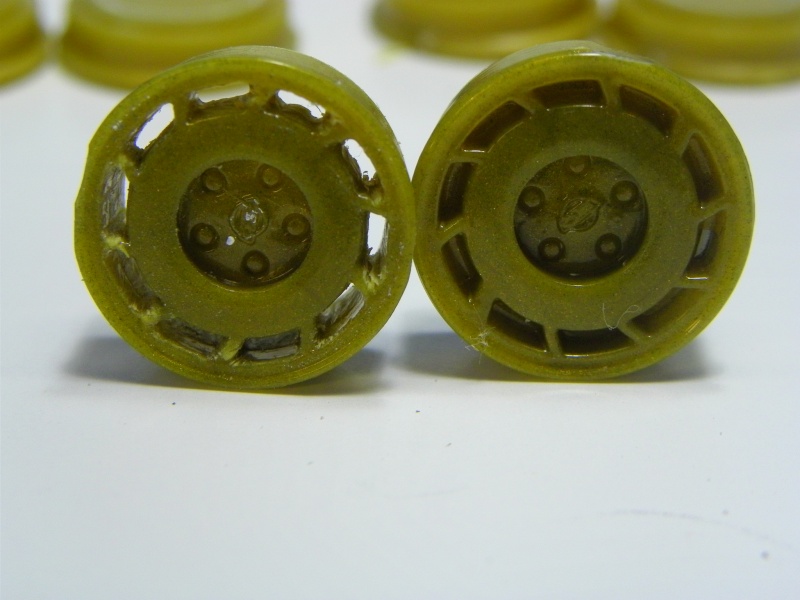
After i got them all opened up I gave them a light coat of Krylon Chrome, over a gloss Black base. It isn't really chrome paint but gives a good semi-polished aluminum look. Then the insides of all the holes were painted Gloss Black.
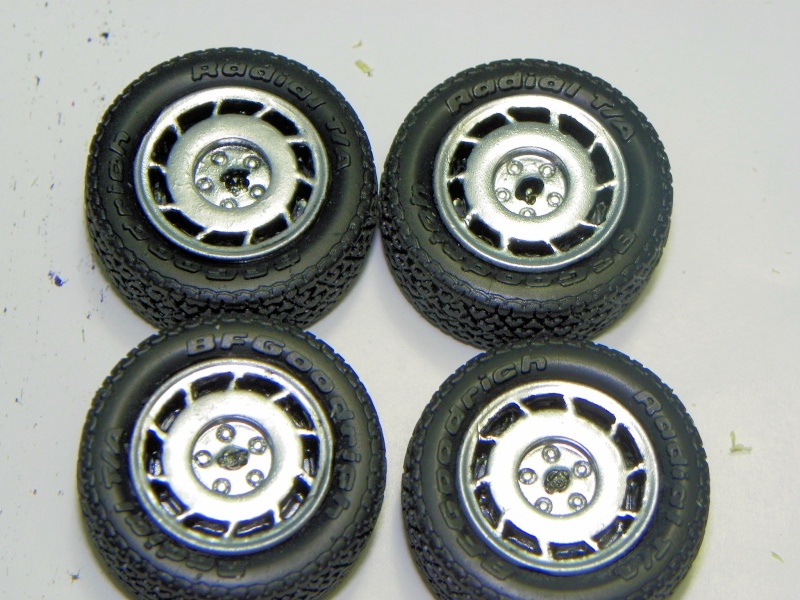
So that's where I am at right now. Don't know why I started with the wheels. Usually start with the engine. Oh well we all have to start somewhere.
All comments and input is welcome. More to come real soon.
kit wheels:

Stripped wheels opened up.

After i got them all opened up I gave them a light coat of Krylon Chrome, over a gloss Black base. It isn't really chrome paint but gives a good semi-polished aluminum look. Then the insides of all the holes were painted Gloss Black.

So that's where I am at right now. Don't know why I started with the wheels. Usually start with the engine. Oh well we all have to start somewhere.
All comments and input is welcome. More to come real soon.
Guest- Guest
 Re: 1984 Corvette
Thanks for the comments guys they are always welcome.
I went out to the garage and took some more reference photos. I have some more work to do on the wheels. I didn't remember the whole center piece being black. Painting the Vette Logo will be a treat.

I had some chrome pieces in the bleach soaking so I was doing little things until they were cleaned.
I took the front parking lights and put a drop of Elmer's Glue on each one. When the glue dries it takes away the chrome look and gives the appearance of a clear lens.

Painted the floor pan, front suspension and exhaust. The Exhaust is Testor's Stainless Steel. The front suspension is Orr-Lac Dull Aluminum.

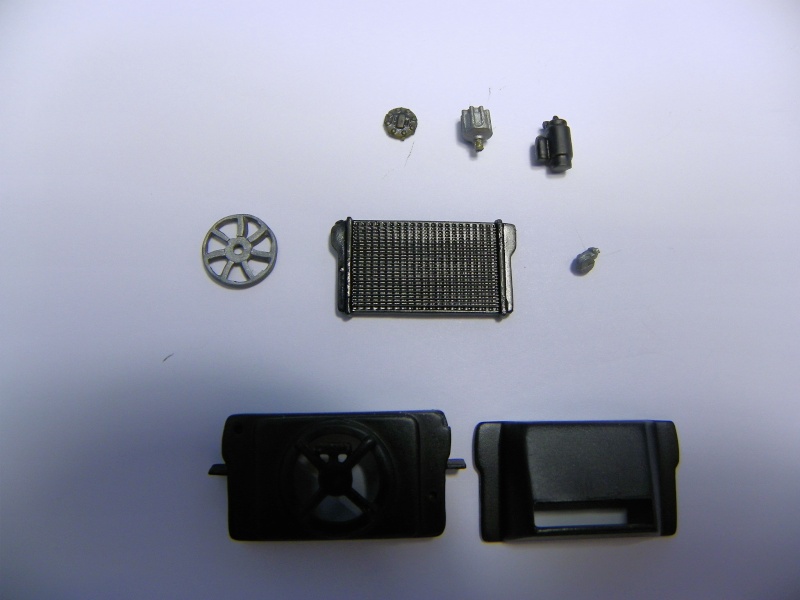
One of the problems I have with this build is everything is Black. I have been using different Blacks to try to add contrast. Here is the Radiator. The radiator is Gloss Black and the air box is Semi flat Black. I did the fan in Magnesium. I know it's cheating but to much black. needed to break it up.

So now it's time to start on the engine. Again it is a black block with some aluminum and gray plastic parts. Here it is.

Here is the real motor.

The other thing is that doing my dunking around I lost one of the throttle bodies. I think it went down the drain when I was rinsing the bleach off. So I used Play Dough as a mold and 3 minute expoy to cast up a replacement.


I think with some paint you won't know the difference. Or I should say I hope with some paint you won't know the difference.
So that's were we are for now. I will have another update on this build in a couple days. Thanks for looking in. All comments and suggestions are welcome.
I went out to the garage and took some more reference photos. I have some more work to do on the wheels. I didn't remember the whole center piece being black. Painting the Vette Logo will be a treat.

I had some chrome pieces in the bleach soaking so I was doing little things until they were cleaned.
I took the front parking lights and put a drop of Elmer's Glue on each one. When the glue dries it takes away the chrome look and gives the appearance of a clear lens.

Painted the floor pan, front suspension and exhaust. The Exhaust is Testor's Stainless Steel. The front suspension is Orr-Lac Dull Aluminum.

One of the problems I have with this build is everything is Black. I have been using different Blacks to try to add contrast. Here is the Radiator. The radiator is Gloss Black and the air box is Semi flat Black. I did the fan in Magnesium. I know it's cheating but to much black. needed to break it up.


So now it's time to start on the engine. Again it is a black block with some aluminum and gray plastic parts. Here it is.

Here is the real motor.

The other thing is that doing my dunking around I lost one of the throttle bodies. I think it went down the drain when I was rinsing the bleach off. So I used Play Dough as a mold and 3 minute expoy to cast up a replacement.


I think with some paint you won't know the difference. Or I should say I hope with some paint you won't know the difference.
So that's were we are for now. I will have another update on this build in a couple days. Thanks for looking in. All comments and suggestions are welcome.
Guest- Guest
 Re: 1984 Corvette
Hey everyone. Thanks for looking in.
Well the Model Car Garage PE set got here from Model Express. man was I disappointed. Not in Model Express but in the PE set. So out of the whole set it looks like the only thing I can use are the keys. I don't think I'll bother.
So now the old guy needs to get the magnifier out and get his hands steady to try to hand paint the emblems on this baby. More on that later.
While I was waiting I got the body into color. Dulpi-Color by paint code. It's GM Gunmetal Metallic # DSGM 344

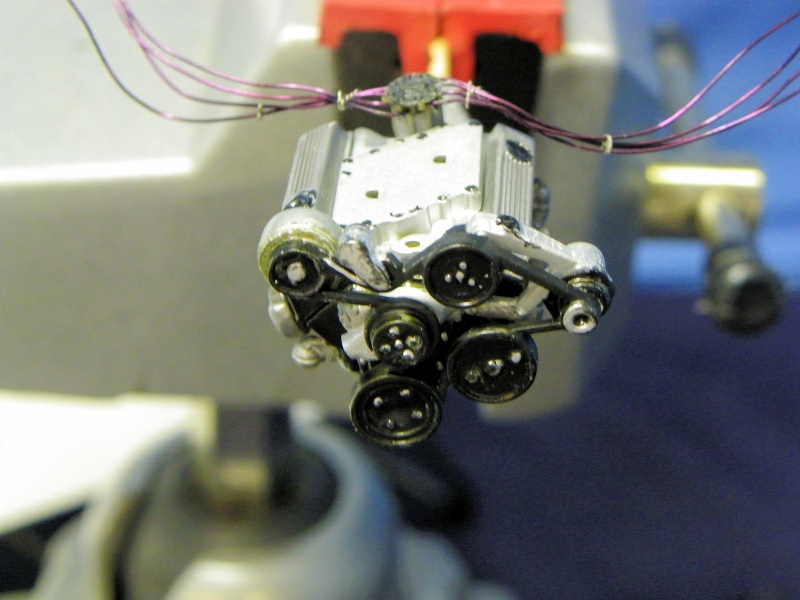
While the paint was curing I worked on the engine a little more. Still have to finish the wiring and then touch up the paint, but this will give you the idea.

Also started on the interior. As you can see from these pictures again it is mostly black.


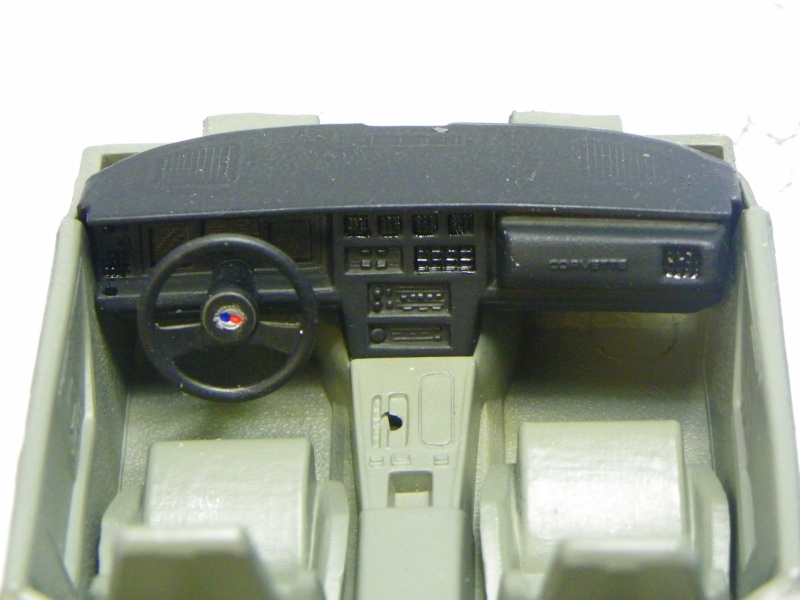
So that's where we are now. I am going to do something to fix the Corvette logo in the middle of the steering wheel and work on the dash with some gel pens to see what can be done to make it look better. In the mean time thanks for looking in. All comments and questions are welcome.
Well the Model Car Garage PE set got here from Model Express. man was I disappointed. Not in Model Express but in the PE set. So out of the whole set it looks like the only thing I can use are the keys. I don't think I'll bother.
So now the old guy needs to get the magnifier out and get his hands steady to try to hand paint the emblems on this baby. More on that later.
While I was waiting I got the body into color. Dulpi-Color by paint code. It's GM Gunmetal Metallic # DSGM 344

While the paint was curing I worked on the engine a little more. Still have to finish the wiring and then touch up the paint, but this will give you the idea.


Also started on the interior. As you can see from these pictures again it is mostly black.


So that's where we are now. I am going to do something to fix the Corvette logo in the middle of the steering wheel and work on the dash with some gel pens to see what can be done to make it look better. In the mean time thanks for looking in. All comments and questions are welcome.
Guest- Guest
 Re: 1984 Corvette
OK time for an update on tis one. Thanks for the comments guys.
I didn't realize it had been so long since my last update on this build.
I got the body in color, then sanded and then polished. Here a a few pictures so you get the idea.


Then put the rear suspension together. 4 different metasiler's and of course that Black Fiberglass spring. Did the shocks in flat red like the older Koni Shocks.
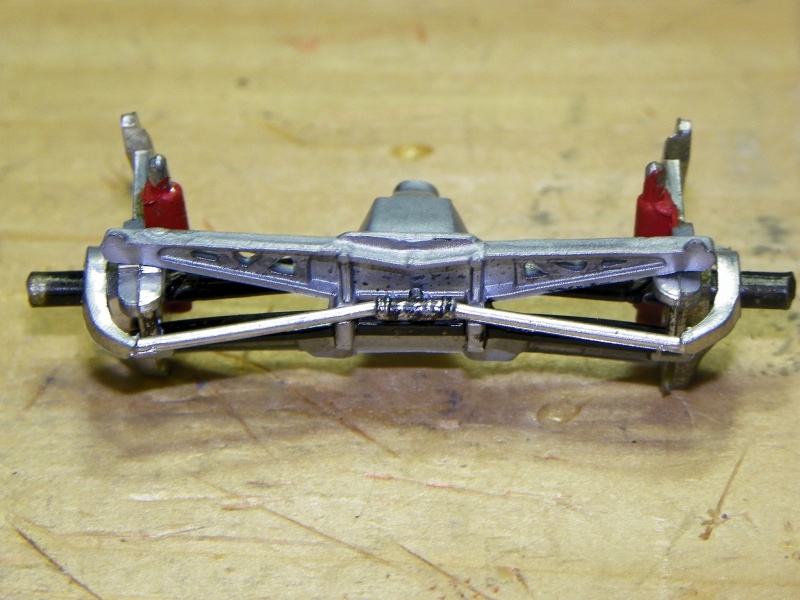
That done I could do another mock up to see how much had changed since the last one.


Since it looked close enough for government work I moved on to the interior tub.
Final mock up.

And then it was time for the fuzz. The carpet is light gray flock.

That all done a trial fit into the body.
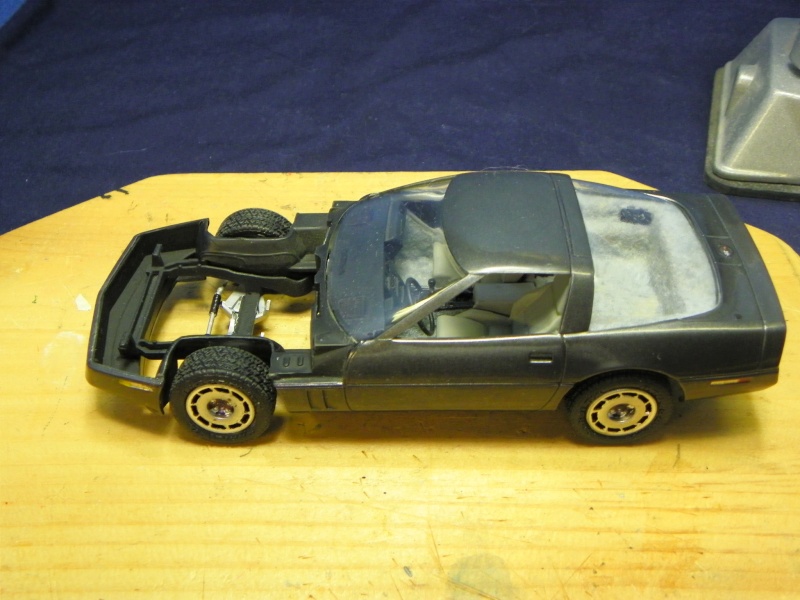
Man that fuzz gets on everything. LOL


So that's about it for this time. probably one more update to go. All that's really left is the clean up, finish the spark plug wires and assembly.
Thanks for looking in and all questions and comments are welcome.
I didn't realize it had been so long since my last update on this build.
I got the body in color, then sanded and then polished. Here a a few pictures so you get the idea.


Then put the rear suspension together. 4 different metasiler's and of course that Black Fiberglass spring. Did the shocks in flat red like the older Koni Shocks.

That done I could do another mock up to see how much had changed since the last one.


Since it looked close enough for government work I moved on to the interior tub.
Final mock up.

And then it was time for the fuzz. The carpet is light gray flock.

That all done a trial fit into the body.

Man that fuzz gets on everything. LOL


So that's about it for this time. probably one more update to go. All that's really left is the clean up, finish the spark plug wires and assembly.
Thanks for looking in and all questions and comments are welcome.
Guest- Guest
 Re: 1984 Corvette
This will be the last update on this build. I want to thank everyone that has followed along. You guys make it more fun for sure.
Thanks John, The dash is one of the highlights on this build.
After getting to that point in the build I went to Acme License Plate Maker and made some correct plates for it.

Engine, Radiator, etc went into the chassis.

Then the body was glued down to the chassis and the little doda things were added under the hood. Master cylinder, air conditioner, and control box were added.


That was the extent of it. All I have to do now is clean it up and do that little bit of touch painting that goes with everyone of them. I will do all that and then make a NMA.
Thanks to of you that followed along. Your comments and questions really do make the build more fun. It feels like we are all together in the dungeon working on them.
See ya in a couple days with something totally new for me.
Thanks John, The dash is one of the highlights on this build.
After getting to that point in the build I went to Acme License Plate Maker and made some correct plates for it.

Engine, Radiator, etc went into the chassis.

Then the body was glued down to the chassis and the little doda things were added under the hood. Master cylinder, air conditioner, and control box were added.


That was the extent of it. All I have to do now is clean it up and do that little bit of touch painting that goes with everyone of them. I will do all that and then make a NMA.
Thanks to of you that followed along. Your comments and questions really do make the build more fun. It feels like we are all together in the dungeon working on them.
See ya in a couple days with something totally new for me.
Guest- Guest
Skid's :: Works In Progress :: Road cars
Page 1 of 1
Permissions in this forum:
You cannot reply to topics in this forum