Ferrari 312B, Clay Regazzoni. 1970 Italian GP, Monza. MFH, 1/12.
+2
Skid
Johnag
6 posters
Skid's :: Works In Progress :: Race cars
Page 1 of 1
 Ferrari 312B, Clay Regazzoni. 1970 Italian GP, Monza. MFH, 1/12.
Hello,
With the Dino 256F1 now complete, another victorious Ferrari at Monza shows the tip of its nose: The Ferrari 312B.
Bye bye V12 and hello flat 12.
The hull is prepared, which required a little work, then it is drilled in order to be riveted.
The two elements of the under tray are welded, the cockpit walls are assembled blank to validate the assembly in the hull.
The engine is also assembled , as is the gear box. Some modifications are planned on the engine.
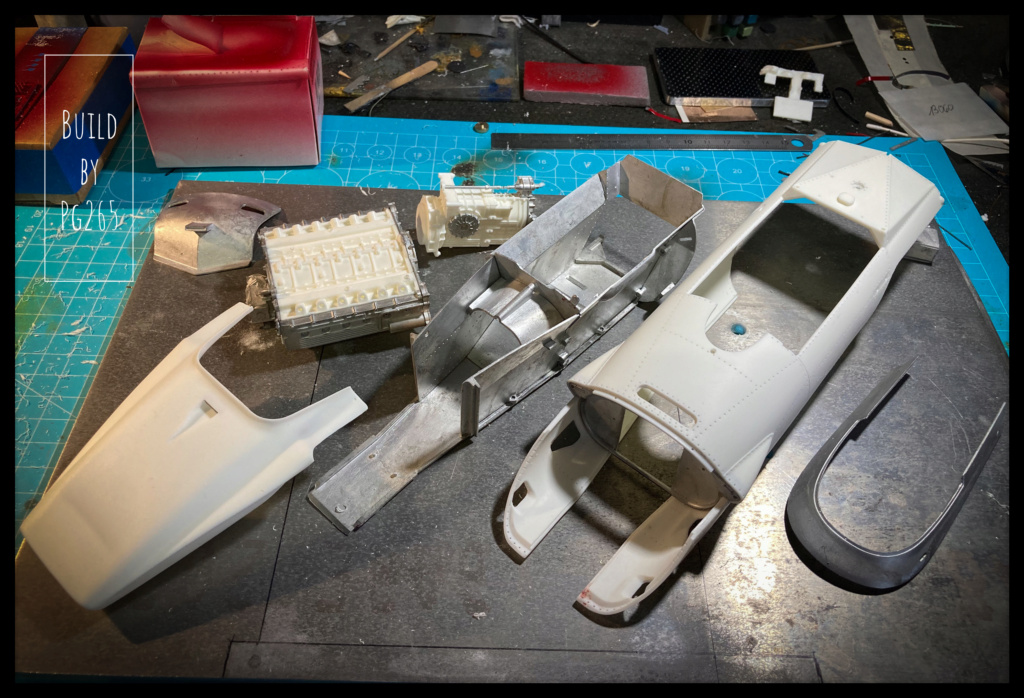


Some panels are riveted because they will remain (slightly…) visible.

Then the whole is assembled and welded quite roughly (strong and invisible) on the chassis.


A test validated the positioning of the parts of the bucket, the engine and its upper plate.
The welded frame/bathtub unit fits well into the body.
The front part, in particular the box of the nose gear is being prepared with all its elements.
It is mounted here blank in order to validate the positioning:
- the oblique partition,
- hot air extractor,
- the sharp nose of the beautiful red monster.


These preparation and adjustment phases are long, time-consuming and laborious, but nevertheless necessary.
A lot of drilling, preparation, tests... are carried out on the engine and the accessories.
The injection pump is mounted, the “banjos” oriented in the right direction for the order of injection.

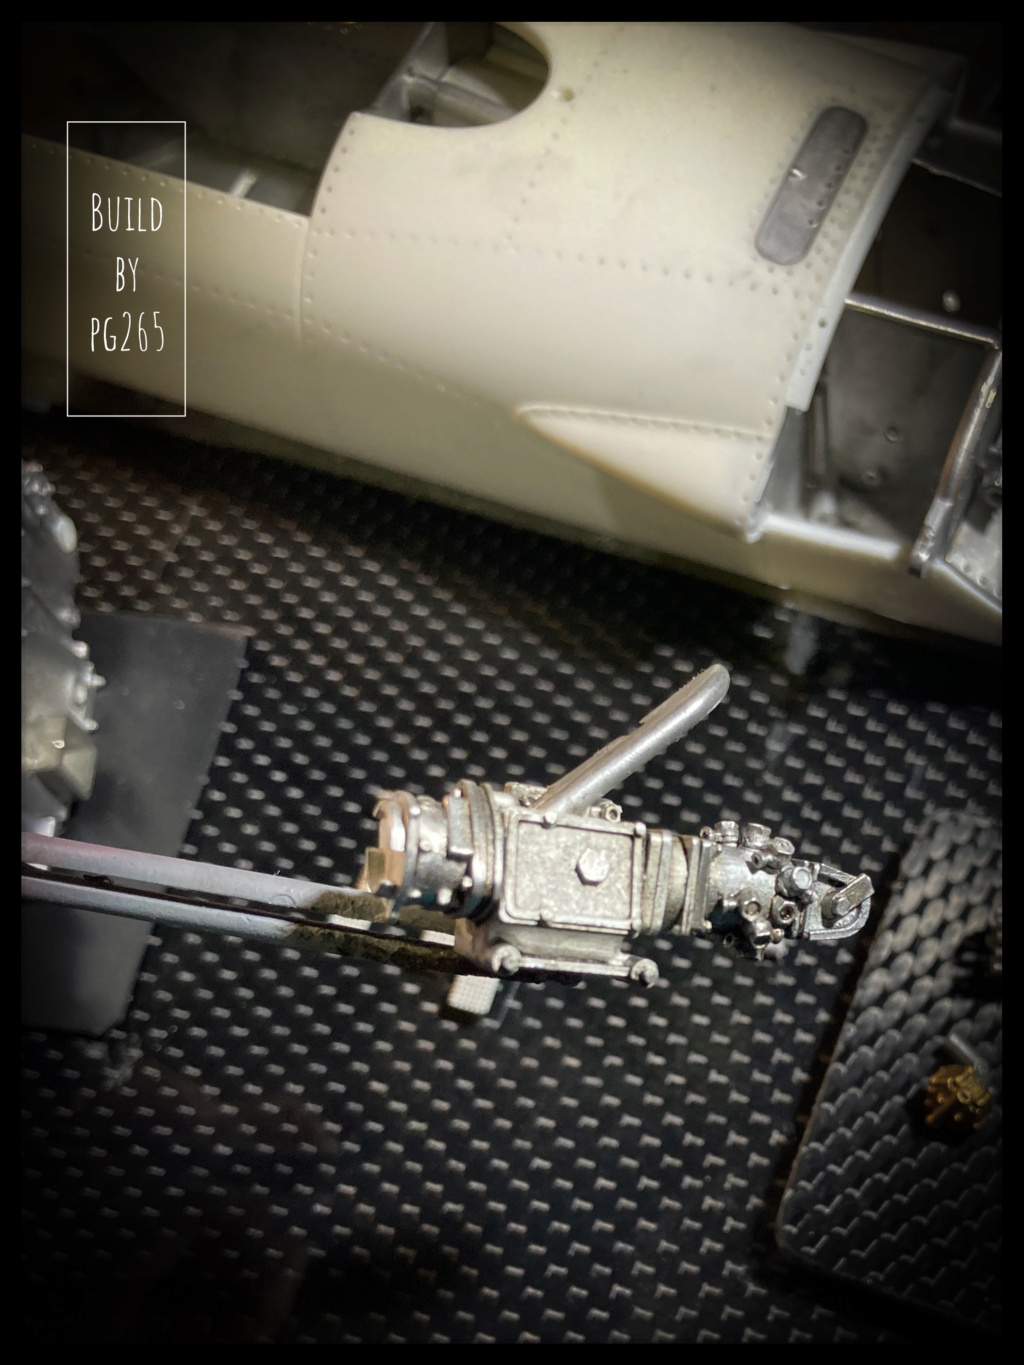


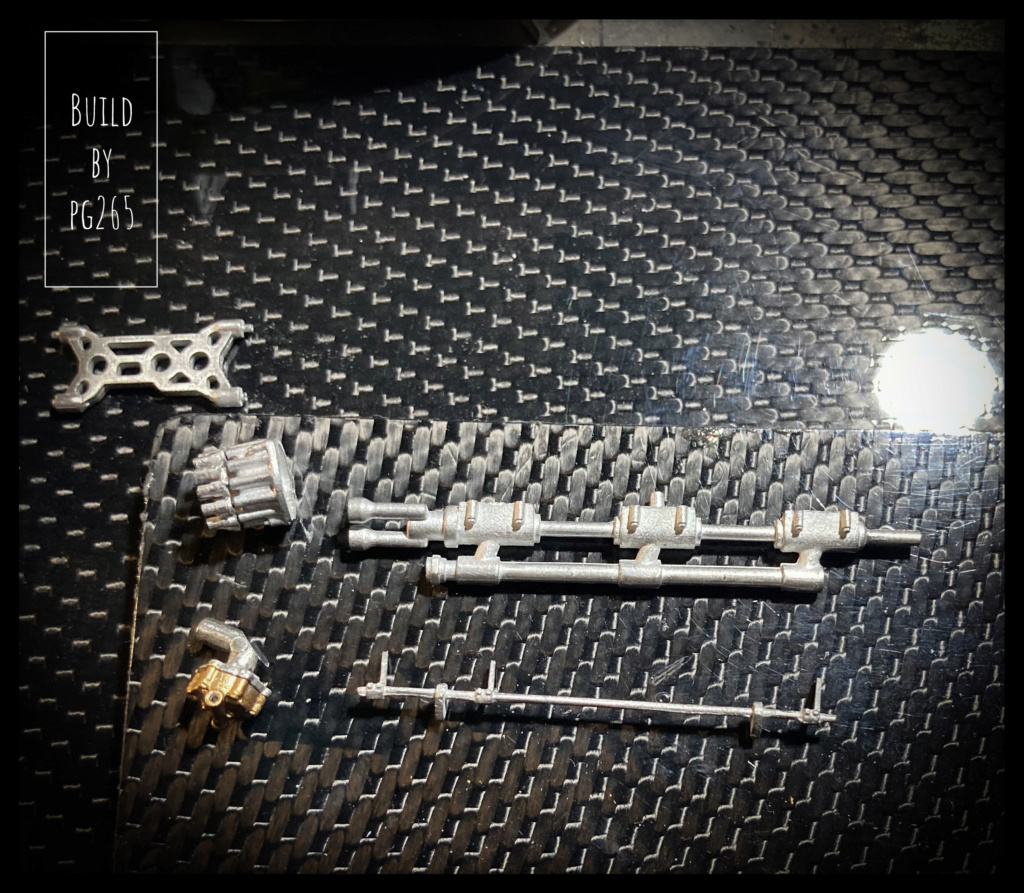
The main elements of the box are assembled.


The pedal box and the master cylinder support await installation in the front box.

Drilling the duct that directs the air from the Naca muzzle intake was no small feat…

The assembly of the elements of the front of the car seem promising.

Let’s take out the masking tape, the “Maskol” for a little masking session.

The parts are then primed.


To finally receive a first coat of Alclad.


The parts are ready for finishing and assembly of the main elements.
I didn't go into too much detail as almost everything is hidden.
Only the mechanical pump that I added will be detailed.
The shading and highlights are mostly done, except on the top of the block for the reason mentioned above.
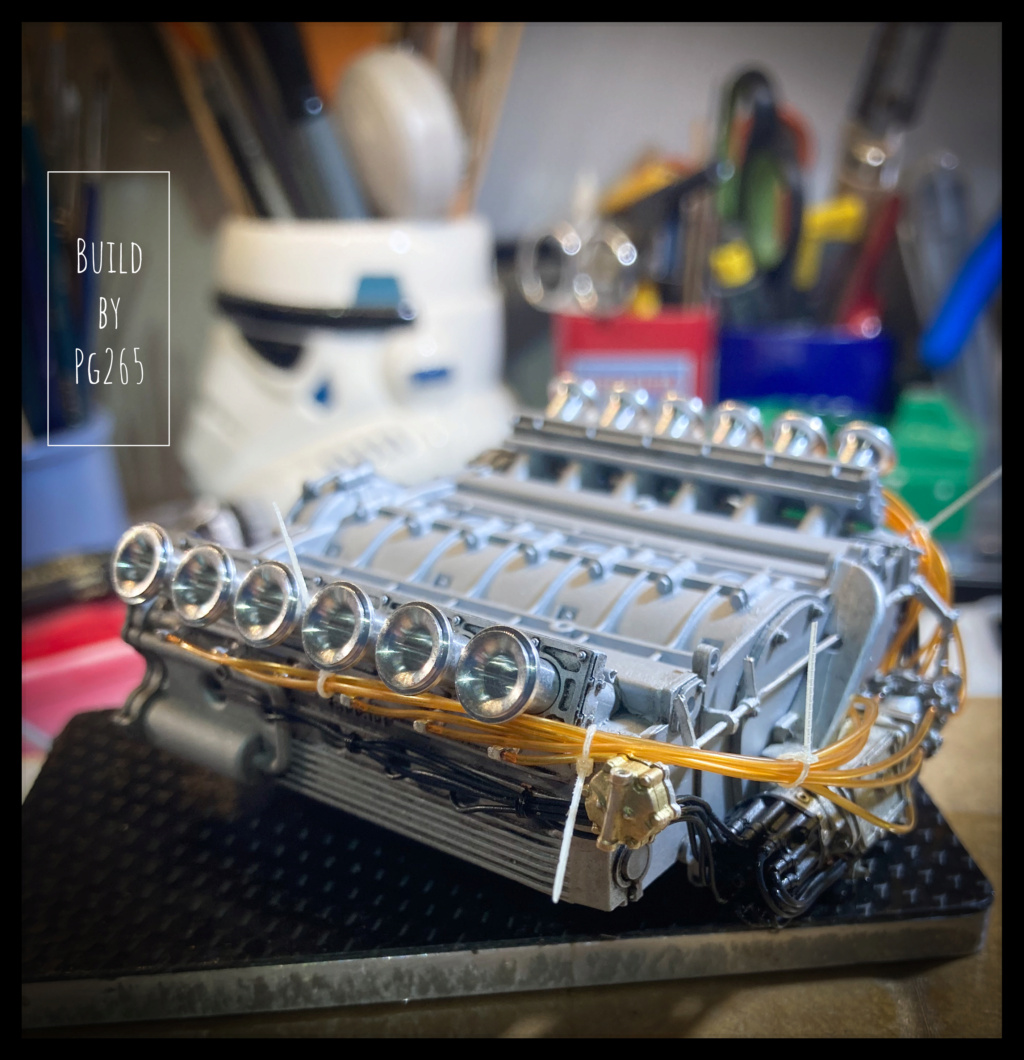


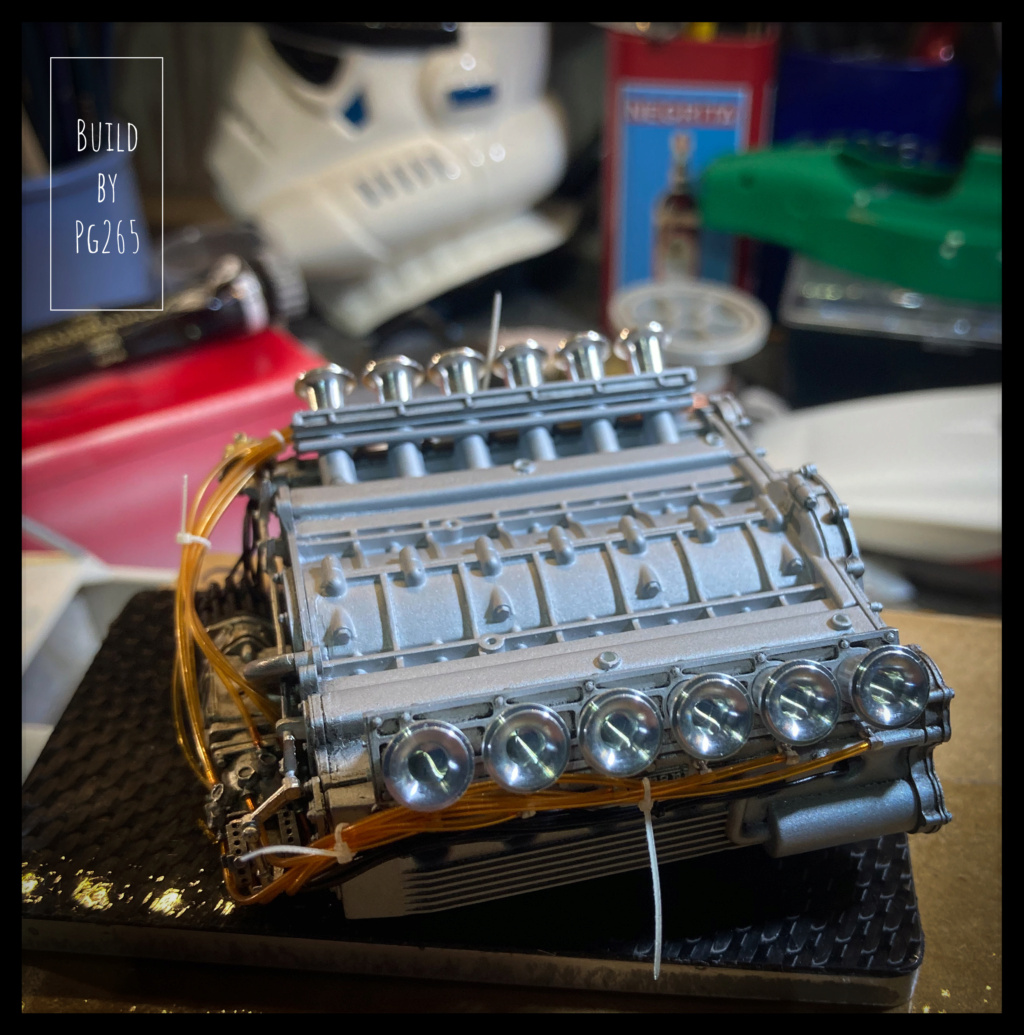
It remains only to cut the tail of the “Tyraps”.
Same thing for the gearbox.
Maybe I'll make the master clutch control cylinder...

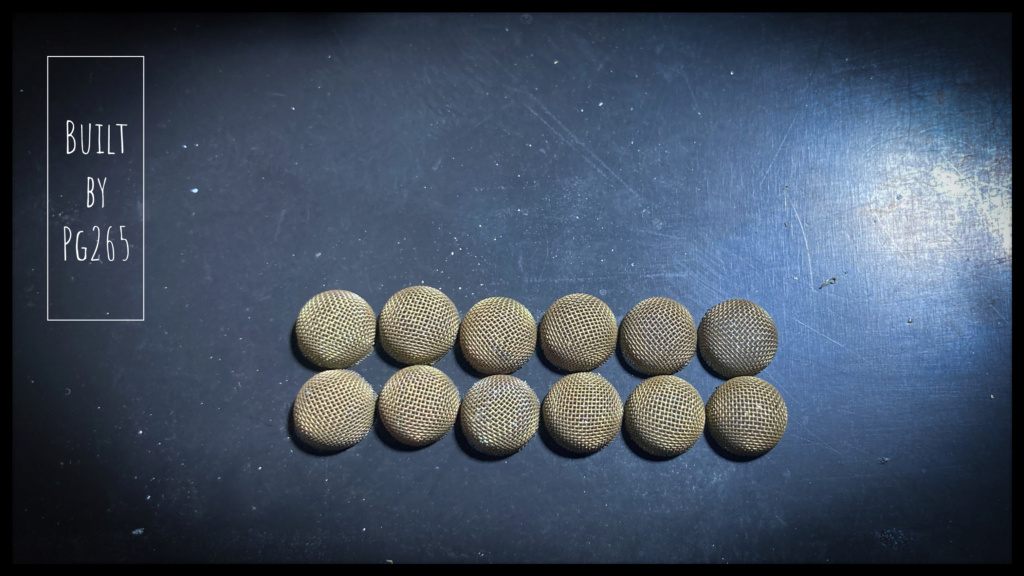
The assembly continues with the intake funnel mesh.
To do this, MFH offers a tool for mesh shaping.
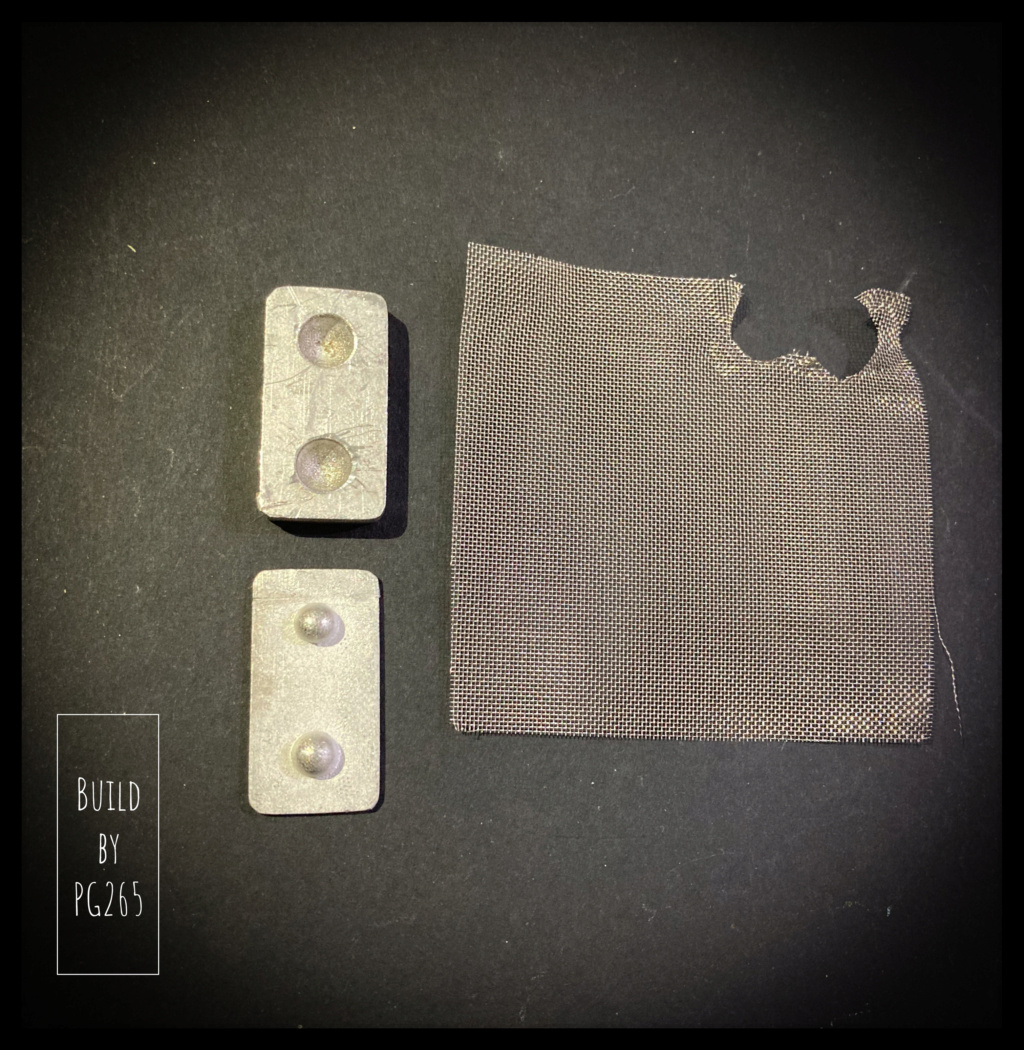
Thanks to which we obtain… NOTHING! Nada! Niente!
So I quickly turned a small tool to achieve the result that suits me.

I didn’t enjoy the provided mesh more than that: the mesh is too wide and the material does not hold the shape as much as it should in my opinion.
So I did some tests with tighter mesh steel and 100 mesh brass too.
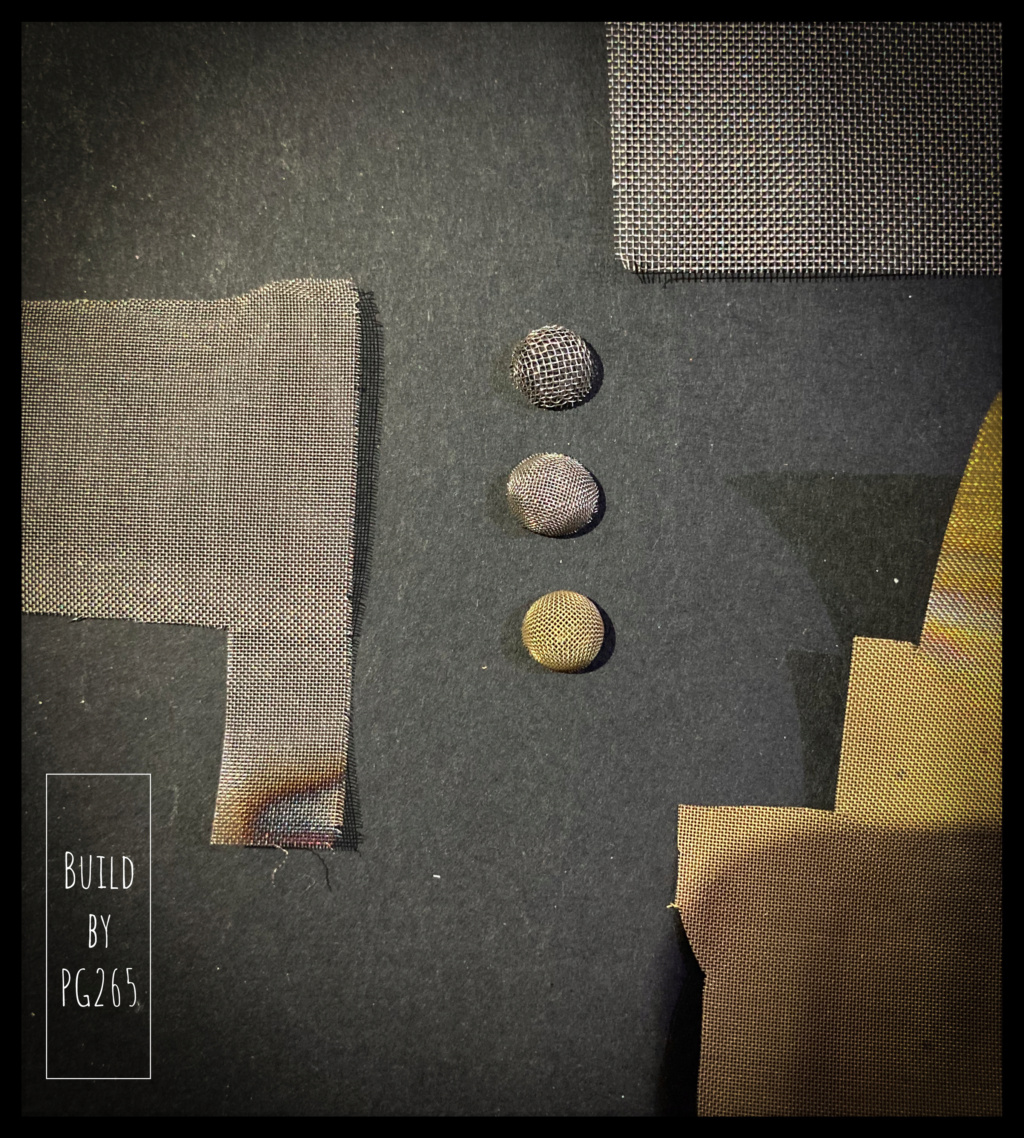
The best result is, without a doubt, the one obtained with brass.
For ease of forming and holding, the grid is annealed.
Test on stacks:

I have currently made the set for a cylinder bank.


The shape is much better, a coat of Alclad will give the expected shade.
Well, that's it, we now have 12 intake mesh!
The engine is almost finished, it is necessary to take care of the front.
The parts are prepared and test fitted to make sure that there are no anomalies.
Masks are made and identified: the chassis frame was painted black and the aluminum sheets riveted on it.


Then we weld the front partition for more solidity and a better visual aspect in the continuity/junction of the tubes.

The assembly is again tested in its location to validate a final installation without problem.


The seat, the dashboard, the arch and the support of the rear fins do not seem to be a problem either.

The structure is painted and the assembly of the elements continues.


I made the connector that supplies the rear brake and clutch master cylinders by soldering copper wire.
It's easier for the front brakes.


Shock absorbers are installed.
The springs are painted black, but they are a bit short…and very stiff to stretch them!
So I quickly turned shims 6.2mm in diameter for 0.5 in thickness: impeccable! (Perfect)

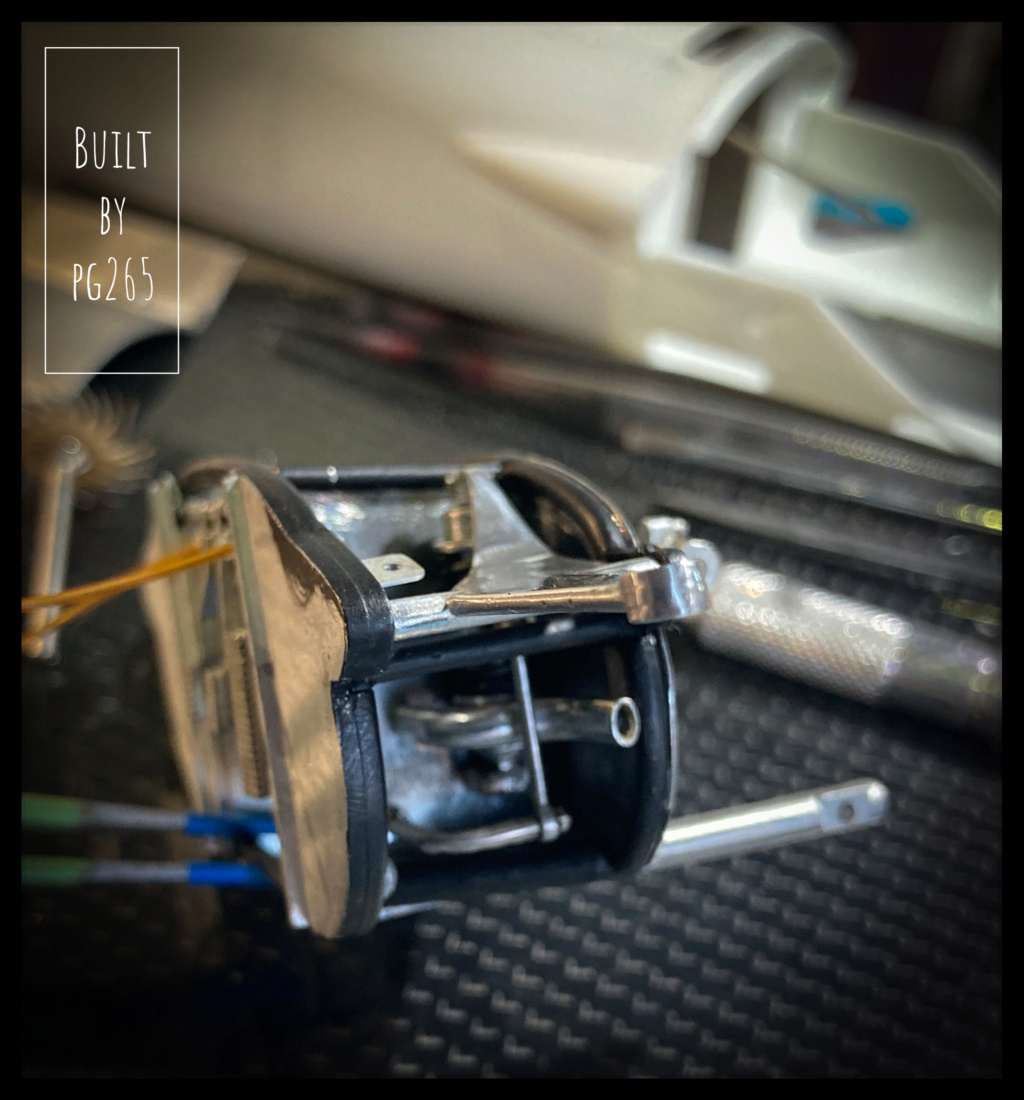
The front box is gradually being completed.
First, the small tank that comes in the kit needed a bit of work.
I started to take care of him, but was not satisfied with what I would obtain… I made a new one.
It is turned in a log of 2024 (…) detailed with strips of Speed tape and equipped with a brass tenon also taken out of the lathe.
The front bulkhead is riveted.


More soon.
Pascal
With the Dino 256F1 now complete, another victorious Ferrari at Monza shows the tip of its nose: The Ferrari 312B.
Bye bye V12 and hello flat 12.
The hull is prepared, which required a little work, then it is drilled in order to be riveted.
The two elements of the under tray are welded, the cockpit walls are assembled blank to validate the assembly in the hull.
The engine is also assembled , as is the gear box. Some modifications are planned on the engine.


Some panels are riveted because they will remain (slightly…) visible.

Then the whole is assembled and welded quite roughly (strong and invisible) on the chassis.


A test validated the positioning of the parts of the bucket, the engine and its upper plate.
The welded frame/bathtub unit fits well into the body.
The front part, in particular the box of the nose gear is being prepared with all its elements.
It is mounted here blank in order to validate the positioning:
- the oblique partition,
- hot air extractor,
- the sharp nose of the beautiful red monster.


These preparation and adjustment phases are long, time-consuming and laborious, but nevertheless necessary.
A lot of drilling, preparation, tests... are carried out on the engine and the accessories.
The injection pump is mounted, the “banjos” oriented in the right direction for the order of injection.


The main elements of the box are assembled.


The pedal box and the master cylinder support await installation in the front box.

Drilling the duct that directs the air from the Naca muzzle intake was no small feat…

The assembly of the elements of the front of the car seem promising.

Let’s take out the masking tape, the “Maskol” for a little masking session.

The parts are then primed.


To finally receive a first coat of Alclad.


The parts are ready for finishing and assembly of the main elements.
I didn't go into too much detail as almost everything is hidden.
Only the mechanical pump that I added will be detailed.
The shading and highlights are mostly done, except on the top of the block for the reason mentioned above.


It remains only to cut the tail of the “Tyraps”.
Same thing for the gearbox.
Maybe I'll make the master clutch control cylinder...

The assembly continues with the intake funnel mesh.
To do this, MFH offers a tool for mesh shaping.

Thanks to which we obtain… NOTHING! Nada! Niente!
So I quickly turned a small tool to achieve the result that suits me.

I didn’t enjoy the provided mesh more than that: the mesh is too wide and the material does not hold the shape as much as it should in my opinion.
So I did some tests with tighter mesh steel and 100 mesh brass too.

The best result is, without a doubt, the one obtained with brass.
For ease of forming and holding, the grid is annealed.
Test on stacks:

I have currently made the set for a cylinder bank.


The shape is much better, a coat of Alclad will give the expected shade.
Well, that's it, we now have 12 intake mesh!

The engine is almost finished, it is necessary to take care of the front.
The parts are prepared and test fitted to make sure that there are no anomalies.
Masks are made and identified: the chassis frame was painted black and the aluminum sheets riveted on it.


Then we weld the front partition for more solidity and a better visual aspect in the continuity/junction of the tubes.

The assembly is again tested in its location to validate a final installation without problem.


The seat, the dashboard, the arch and the support of the rear fins do not seem to be a problem either.

The structure is painted and the assembly of the elements continues.


I made the connector that supplies the rear brake and clutch master cylinders by soldering copper wire.
It's easier for the front brakes.


Shock absorbers are installed.
The springs are painted black, but they are a bit short…and very stiff to stretch them!
So I quickly turned shims 6.2mm in diameter for 0.5 in thickness: impeccable! (Perfect)

The front box is gradually being completed.
First, the small tank that comes in the kit needed a bit of work.
I started to take care of him, but was not satisfied with what I would obtain… I made a new one.
It is turned in a log of 2024 (…) detailed with strips of Speed tape and equipped with a brass tenon also taken out of the lathe.
The front bulkhead is riveted.


More soon.
Pascal
Pg265- New Member

- Posts : 51
Join date : 2021-08-08
Mr Hirakawa and Mike C like this post
 Re: Ferrari 312B, Clay Regazzoni. 1970 Italian GP, Monza. MFH, 1/12.
Hi Pascal,
Simply stunning Sir...

Andy...
Simply stunning Sir...


Andy...
_________________
Andy...
Life isn't about how to survive the storm, but how to dance in the rain...
Pg265 likes this post
 Re: Ferrari 312B, Clay Regazzoni. 1970 Italian GP, Monza. MFH, 1/12.
That is just absolutely amazing!

Mike C- Rookie Member

- Posts : 464
Join date : 2016-06-09
Age : 69
Location : Roswell, GA USA
Pg265 likes this post
 Re: Ferrari 312B, Clay Regazzoni. 1970 Italian GP, Monza. MFH, 1/12.
Beautiful work Pascal and the new trumpet mesh in brass is spot on. 

_________________
Al.
Constructive criticism is always welcome.
“Success always demands a greater effort.” Winston Churchill
"Success is failure turned inside out" Unknown
Pg265 likes this post
 Re: Ferrari 312B, Clay Regazzoni. 1970 Italian GP, Monza. MFH, 1/12.
Fantastic work Pascal.

dublin boy- Moderator

- Posts : 3920
Join date : 2013-02-27
Pg265 likes this post
 Re: Ferrari 312B, Clay Regazzoni. 1970 Italian GP, Monza. MFH, 1/12.
Good evening,
Thank you very much Gentlemen!
Still testing rivets…
Those are the ones that I'm going to use.

That suits me.
I prepare the material and mix a little paint for my undercoat: pink this time.


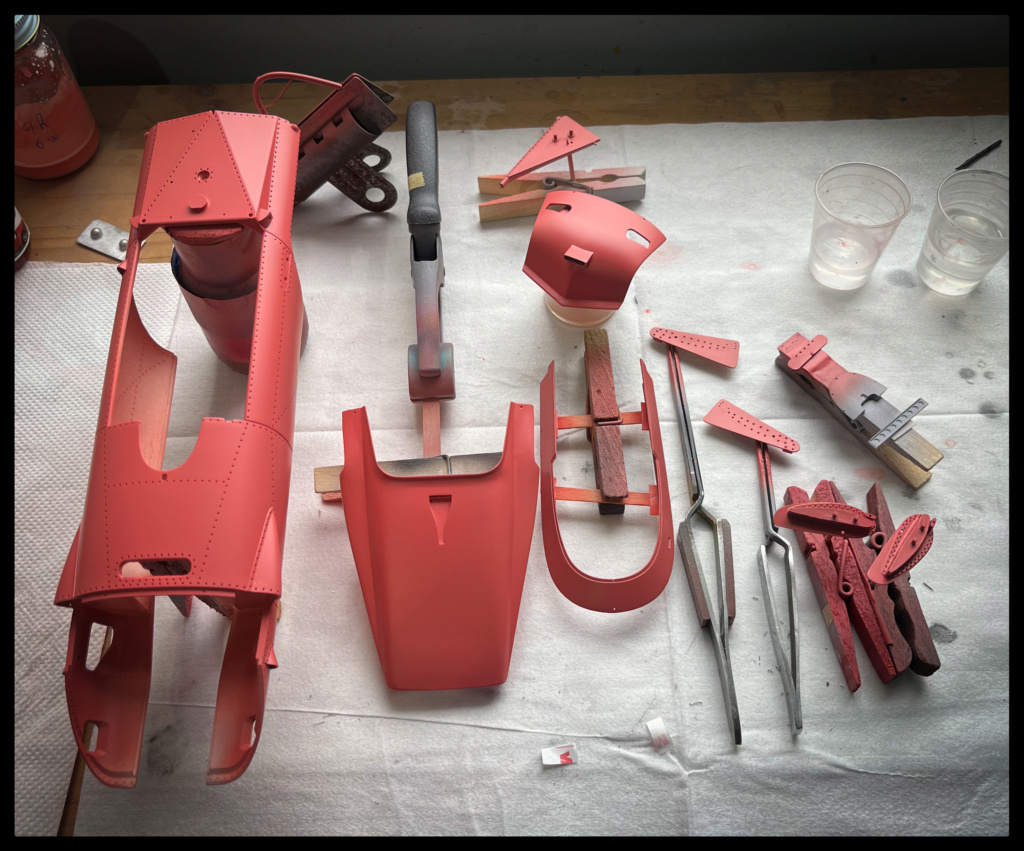
…and finally, the Rosso Corsa an hour later.

In order to prepare the installation of the race numbers, I decided to paint the white circles... as a preamble to the decals... or not.
So we wait a little over an hour after the red coat, make masks and camouflage.


…And spray the white.

Then unmask quickly, the time to clean the gun.
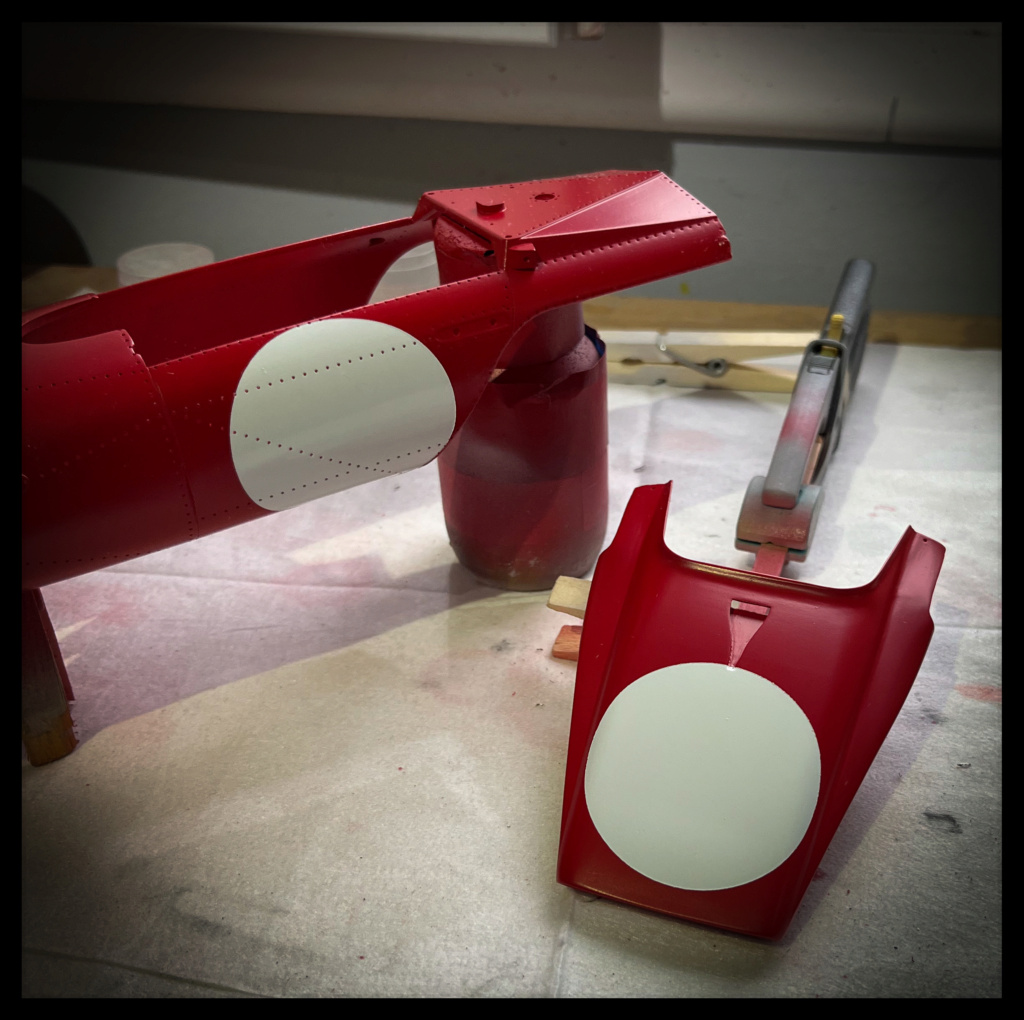
It will be easier to count the number of white rivets needed.
But…
I didn't like that much to have the white circles clear coated: too shiny for them.
It was fun to do though...
… and to undo!


Once again pink undercoat over the sanded areas.


Then Rosso Corsa.


Do and undo…
Although used to Gravity products since their creation, I am always amazed by the grip and the solidity of the paint and the primer, not to mention how so thin they are: a joy!
The clear coat should be on soon…
…clear coat is done: it dries quietly in the boxes.

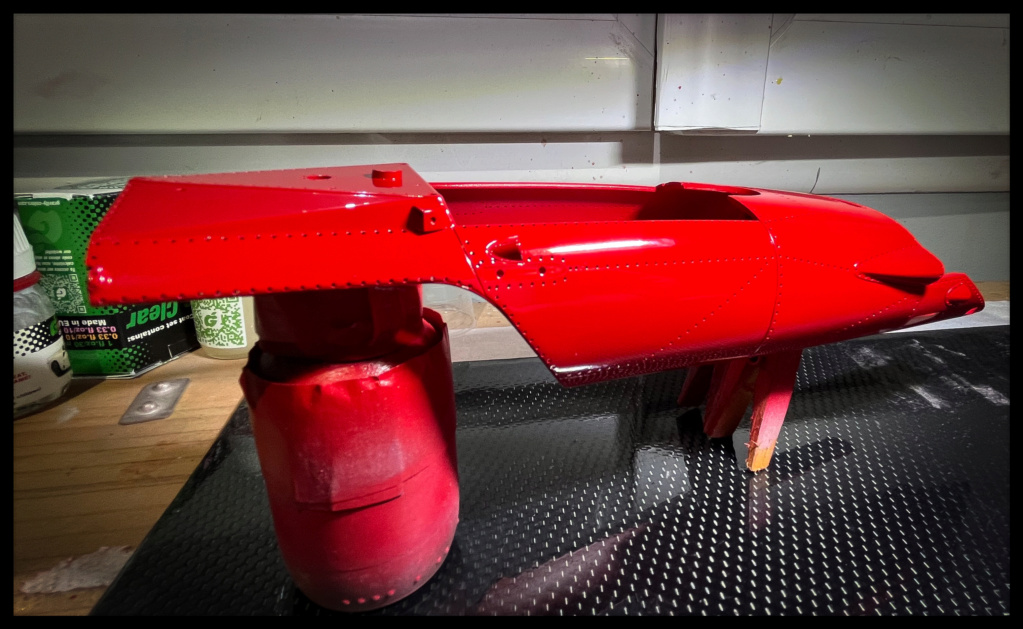

And it’s now fully dry.
As expected, the holes for the rivets to be set are « re-opened » due to the several coats of primer, paint and clear coat and a soft cloth is passed over to erase fingerprints.
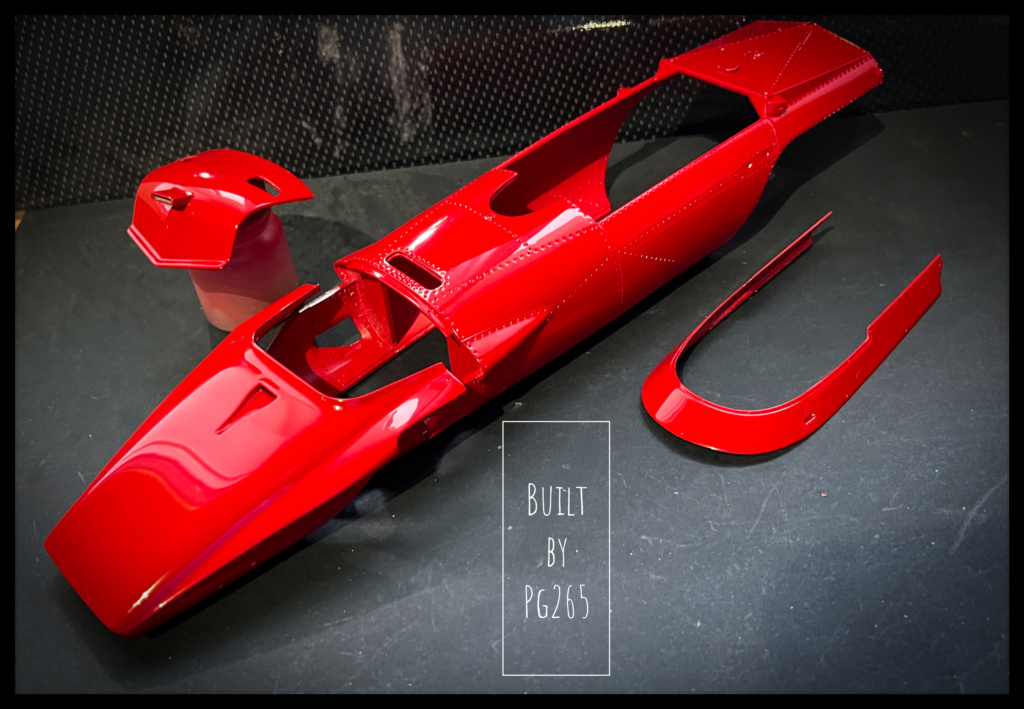
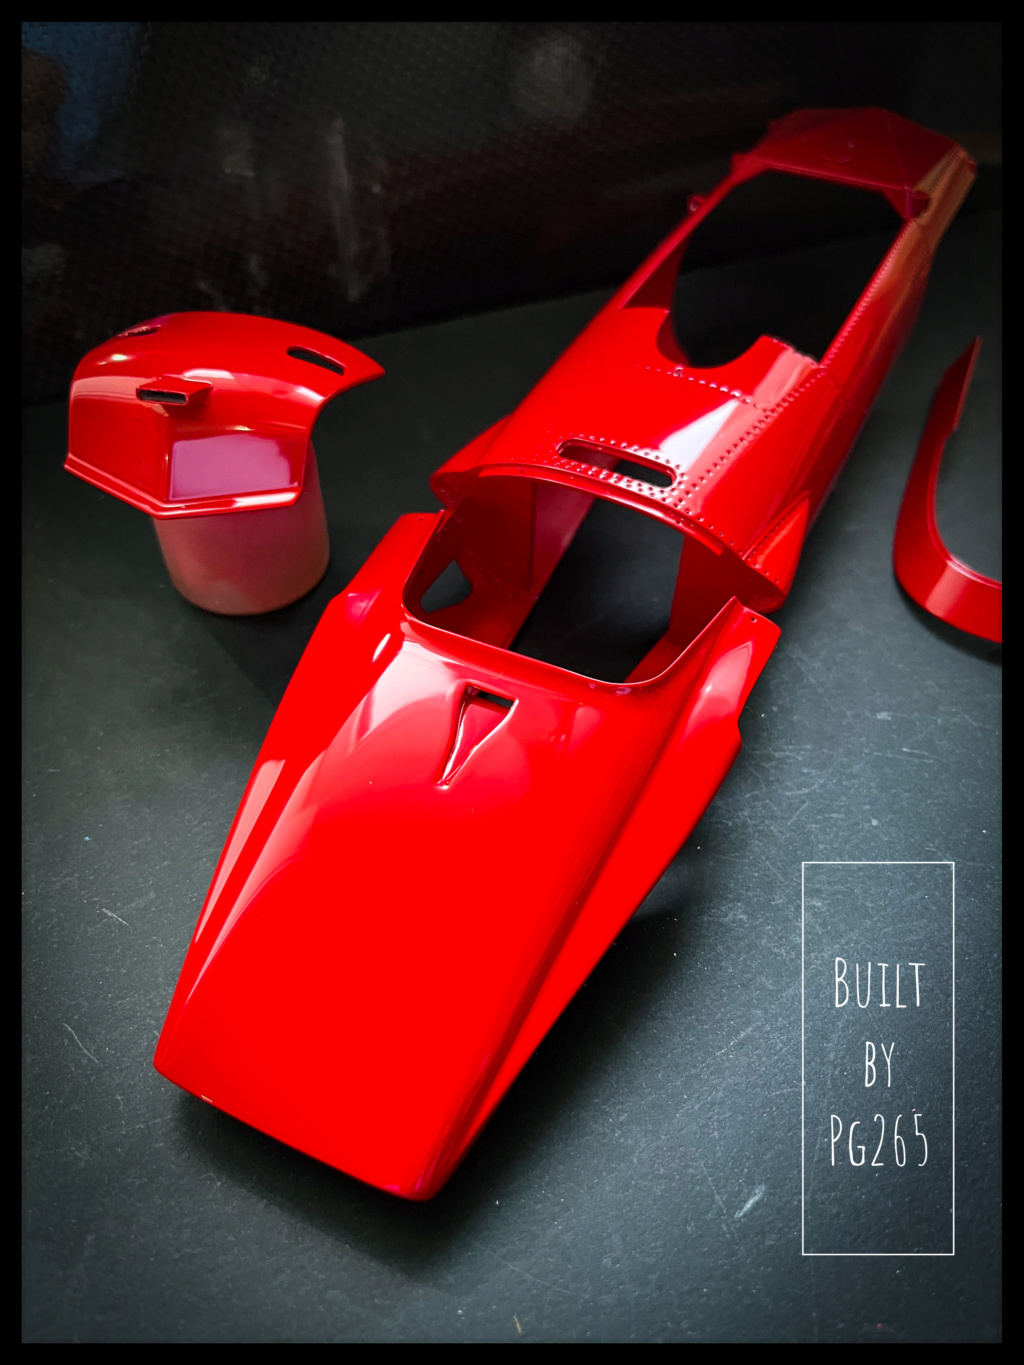
I'll maybe start the decals of the "Bombinette" soon.
Pascal
Thank you very much Gentlemen!
Still testing rivets…
Those are the ones that I'm going to use.

That suits me.
I prepare the material and mix a little paint for my undercoat: pink this time.


…and finally, the Rosso Corsa an hour later.

In order to prepare the installation of the race numbers, I decided to paint the white circles... as a preamble to the decals... or not.
So we wait a little over an hour after the red coat, make masks and camouflage.


…And spray the white.

Then unmask quickly, the time to clean the gun.

It will be easier to count the number of white rivets needed.
But…
I didn't like that much to have the white circles clear coated: too shiny for them.
It was fun to do though...
… and to undo!


Once again pink undercoat over the sanded areas.


Then Rosso Corsa.


Do and undo…
Although used to Gravity products since their creation, I am always amazed by the grip and the solidity of the paint and the primer, not to mention how so thin they are: a joy!
The clear coat should be on soon…
…clear coat is done: it dries quietly in the boxes.


And it’s now fully dry.
As expected, the holes for the rivets to be set are « re-opened » due to the several coats of primer, paint and clear coat and a soft cloth is passed over to erase fingerprints.


I'll maybe start the decals of the "Bombinette" soon.
Pascal
Pg265- New Member

- Posts : 51
Join date : 2021-08-08
Johnag, Mr Hirakawa and Mike C like this post

dublin boy- Moderator

- Posts : 3920
Join date : 2013-02-27
Pg265 likes this post
 Re: Ferrari 312B, Clay Regazzoni. 1970 Italian GP, Monza. MFH, 1/12.
Buongiorno a tutti,
It’s the return for the 312B…
You still have to get back to it one day!
Deco day: decals are applied to the hull and muzzle.


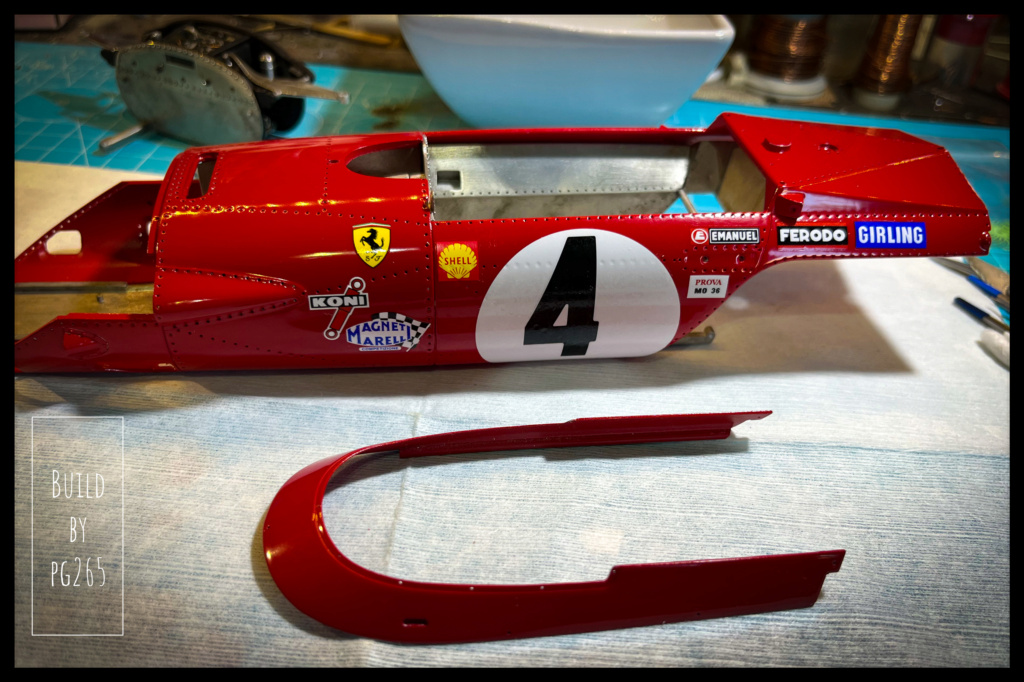
The upper part will be decorated after cutting the windshield which will require some tests and manipulations.
The hull will also be extensively handled, but the delicate adjustments have already been made.
It will also be very heavy once the main elements are installed; decorating it at the end would not have been wise or comfortable.
More soon!
Pascal
It’s the return for the 312B…
You still have to get back to it one day!
Deco day: decals are applied to the hull and muzzle.


The upper part will be decorated after cutting the windshield which will require some tests and manipulations.
The hull will also be extensively handled, but the delicate adjustments have already been made.
It will also be very heavy once the main elements are installed; decorating it at the end would not have been wise or comfortable.
More soon!
Pascal
Pg265- New Member

- Posts : 51
Join date : 2021-08-08
Ron234 likes this post
Sam- Resident member

- Posts : 2012
Join date : 2013-02-23
Age : 57
Location : Back in Toledo, Oregon
Pg265 likes this post
 Re: Ferrari 312B, Clay Regazzoni. 1970 Italian GP, Monza. MFH, 1/12.
WOW! Another awesome build coming along! 


Mike C- Rookie Member

- Posts : 464
Join date : 2016-06-09
Age : 69
Location : Roswell, GA USA
Pg265 likes this post
 Similar topics
» Ferrari 256F1, Phill Hill. 1960 Italy GP, Monza. MFH, 1/12.
» 1970 Ferrari 512
» Was this you Clay?
» Where's Clay?
» '78 Monza S
» 1970 Ferrari 512
» Was this you Clay?
» Where's Clay?
» '78 Monza S
Skid's :: Works In Progress :: Race cars
Page 1 of 1
Permissions in this forum:
You cannot reply to topics in this forum