63 Stepside Chev
+4
GaryDainton
disabled modeler
Promodmerc
Skid
8 posters
Skid's :: Works In Progress :: Trucks
Page 1 of 2
Page 1 of 2 • 1, 2 
 63 Stepside Chev
Son-in-law gave me this kit that he had barely started then abandoned. My first act was to butcher the suspension. So, purists and rivit counters please look away for a bit. Y'know for years I would scratch build frames, Z them or build narrow tubs, But in my old age, I'm gettin lazy and just hack the suspension to get the models down. The underside never shows as I only photograph the finished model in front of my garage backdrop. Several of my favorites go in a showcase and the rest go in boxes, They never go into shows to get judged, or seen elsewhere, so why bother with hidden stuff. It's kinda on the principle that kit manufactures sometimes have no tops on the differential.
OK, my first move was to raise the spindles of the kits already dropped axle and 'C' notch the rear to get that down.
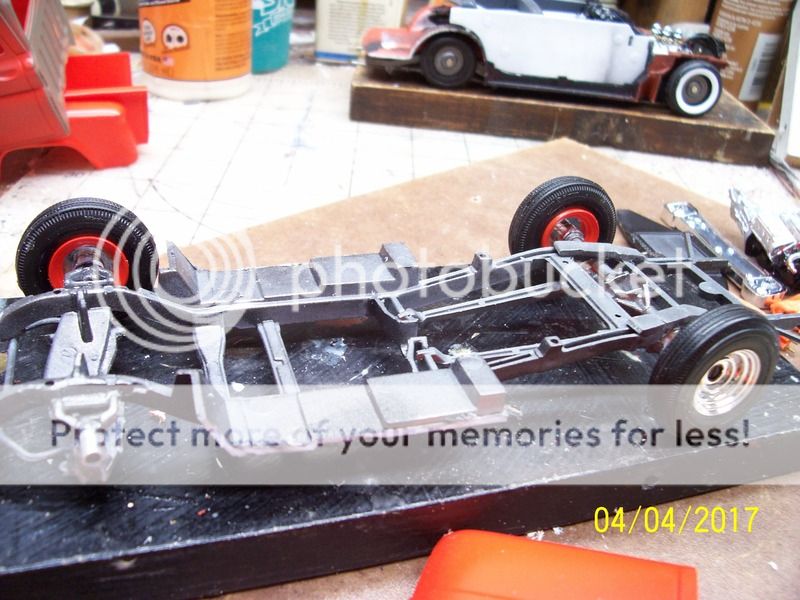

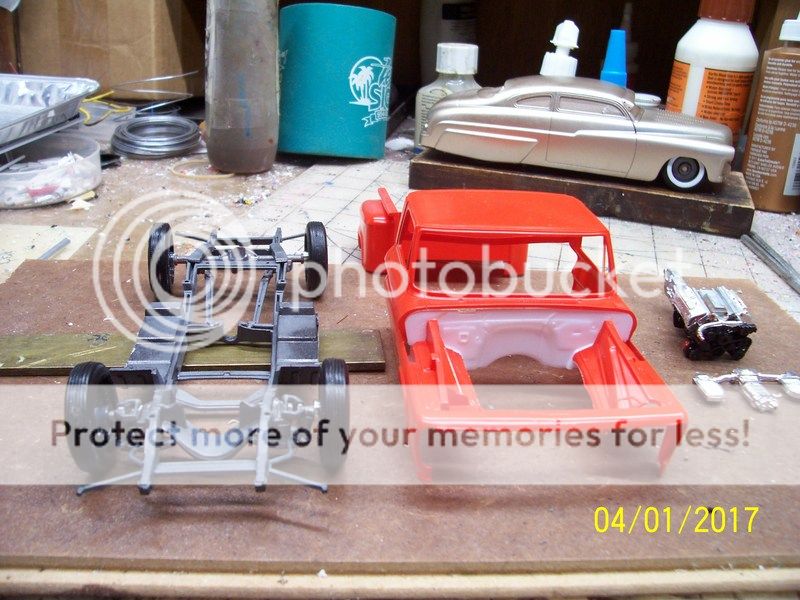
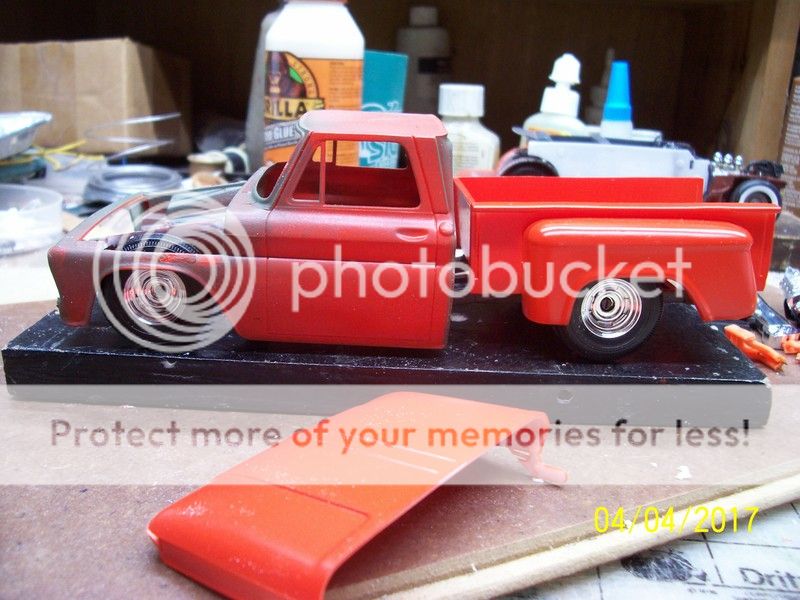
OK, my first move was to raise the spindles of the kits already dropped axle and 'C' notch the rear to get that down.


Geezerman- Advanced Member

- Posts : 3651
Join date : 2013-02-24
Age : 89
Location : Gulf coast of central Florids
 Re: 63 Stepside Chev
You're off to a good start Clay. Looking forward to how it turns out. I've always really liked that body style.
Guest- Guest
 Re: 63 Stepside Chev
Sometimes, you just do what you gotta do to make it work. Nice start, Clay.

RetiredMike- Advanced Member

- Posts : 3525
Join date : 2013-04-27
Age : 73
Location : Valparaiso, Indiana
 Re: 63 Stepside Chev
Looking to be a good start Clay and I agree with the sewer view 100%. Too many other models to build don't ya know.
_________________
Al.
Constructive criticism is always welcome.
“Success always demands a greater effort.” Winston Churchill
"Success is failure turned inside out" Unknown
 Re: 63 Stepside Chev
The simple, whatever works for me, has made building models much more enjoyable.
At one point several years ago, I thought I had to open every trunk (boot for you on the other side of the pond ) on every kit I built. Not anymore , it's not worth the extra work, stress, yelling and swearing
At one point several years ago, I thought I had to open every trunk (boot for you on the other side of the pond
 ) on every kit I built. Not anymore , it's not worth the extra work, stress, yelling and swearing

Promodmerc- Rookie Member

- Posts : 442
Join date : 2016-05-19
Age : 57
Location : Raytown MO
 Re: 63 Stepside Chev
The bed is not installed yet, but I have it where it lookin' pretty good. The stance is where I like it.
Now, to get the big Ford placed in the frame.
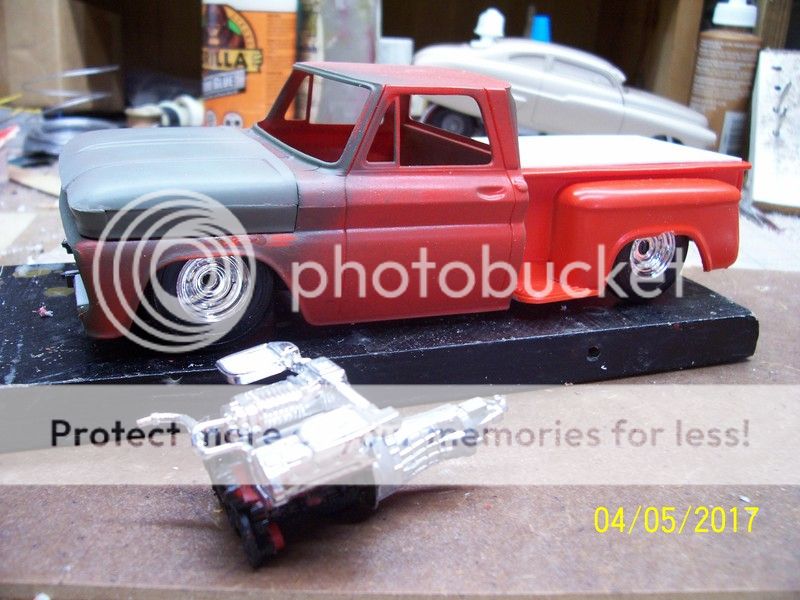
Now, to get the big Ford placed in the frame.


Geezerman- Advanced Member

- Posts : 3651
Join date : 2013-02-24
Age : 89
Location : Gulf coast of central Florids
 Re: 63 Stepside Chev
Nice Clay..! A friend of mine use to own a 64 Step side that was tubbed and narrowed had a 400 automatic with a clutch...fun ride and very fast.
disabled modeler- Intermediate Member

- Posts : 979
Join date : 2016-05-22
Age : 60
Location : Quincy,IL. USA
GaryDainton- Advanced Member

- Posts : 4433
Join date : 2014-03-06
Age : 57
Location : Bolton UK
 Re: 63 Stepside Chev
I love it a FORD in a Chevy.

Promodmerc- Rookie Member

- Posts : 442
Join date : 2016-05-19
Age : 57
Location : Raytown MO
 Re: 63 Stepside Chev
I do like ur work, generally, but a late model pick-em-up?! Our summer weekly Friday nite car shows have pickups on occasion. One I remember was a low rider (with those air bags) that sat so low, it had no floor to speak of in the box. Weirdness!
harron68- Advanced Member

- Posts : 3621
Join date : 2013-02-28
Age : 74
Location : MIDWEST
 Re: 63 Stepside Chev
I don't build many later models than the 60's
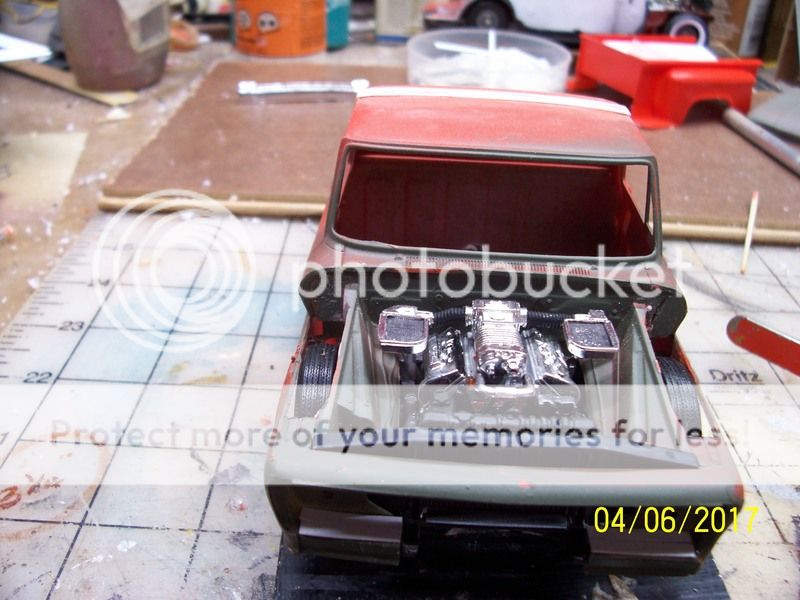
I have the engine installed, The body with inner wheel wells drops down on the chassis, so the blower and intake screens will be about the last things to install.
The kits instructions call for a cap with a raised portion across the back. My S-I-L must have lost that, so I made a kinda hump with some flat stock.


Geezerman- Advanced Member

- Posts : 3651
Join date : 2013-02-24
Age : 89
Location : Gulf coast of central Florids
 Re: 63 Stepside Chev
Great work Clay, looks brilliant. 


GaryDainton- Advanced Member

- Posts : 4433
Join date : 2014-03-06
Age : 57
Location : Bolton UK
 Re: 63 Stepside Chev
Nice fit on the motor.

RetiredMike- Advanced Member

- Posts : 3525
Join date : 2013-04-27
Age : 73
Location : Valparaiso, Indiana
 Re: 63 Stepside Chev
Looking very sleek and growly! Love the body styling and the stance is pure predator 


KatsZenJammer- Resident member

- Posts : 2600
Join date : 2016-05-20
Age : 57
Location : Vancouver, BC
 Re: 63 Stepside Chev
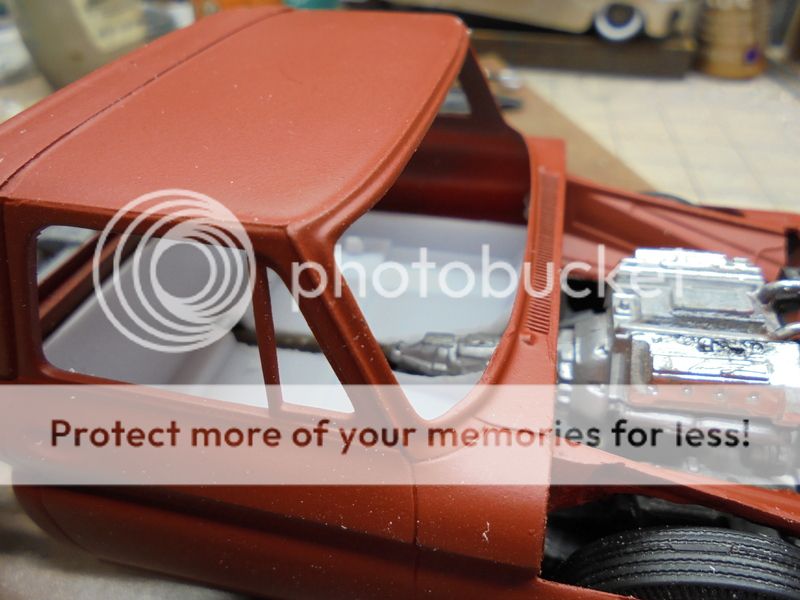
While this has been drastically lowered, it is also channeled some. So I'm having to work over the interior tub.


Geezerman- Advanced Member

- Posts : 3651
Join date : 2013-02-24
Age : 89
Location : Gulf coast of central Florids
 Re: 63 Stepside Chev
Looking very cool Clay!
I have never channeled a body before where is the best place to channel a shell like this, and would you channel the rear or just lower it on the chassis mounts?
I have never channeled a body before where is the best place to channel a shell like this, and would you channel the rear or just lower it on the chassis mounts?
Guest- Guest
 Re: 63 Stepside Chev
Plastic Freak wrote:Looking very cool Clay!
I have never channeled a body before where is the best place to channel a shell like this, and would you channel the rear or just lower it on the chassis mounts?
Channeling merely involves letting the body drop lower than the frame however low you want it to go. Make provision on the frame (stops) for the body to set on. On the pickup I cut out a section of the bed and it sets on the frame. I made a tarp to cover the bed. I won't have to be concerned with the butchery showing. Otherwise there would be a lot of careful scratching and modifying if the bed is left open. Bear in mind that the interior tub will have to be adjusted if you use one, like I am doing here. Most of the time, on car bodies, I just build a new floor out of flat stock and mount seats and stuff on that. Door panels, if any, I mount directly on the inside of the body. There will probably be other adjustments to be made as well. Each model is different and you have to figure out how to deal with what ever arises. I love it !


Geezerman- Advanced Member

- Posts : 3651
Join date : 2013-02-24
Age : 89
Location : Gulf coast of central Florids
 Re: 63 Stepside Chev
Ha, man I am loosing my mind. I was thinking sectioning as I was reading channeling. The yellow short bus keeps getting shorter and shorter for me, it's down to about a four (4) seater now.
Thanks for taking the time to explain all that, it has helped with the process for models.
Thanks for taking the time to explain all that, it has helped with the process for models.
Guest- Guest
 Re: 63 Stepside Chev
Curt, Sectioning is another story. not an authority on this, but I can show you how I tackled a couple.
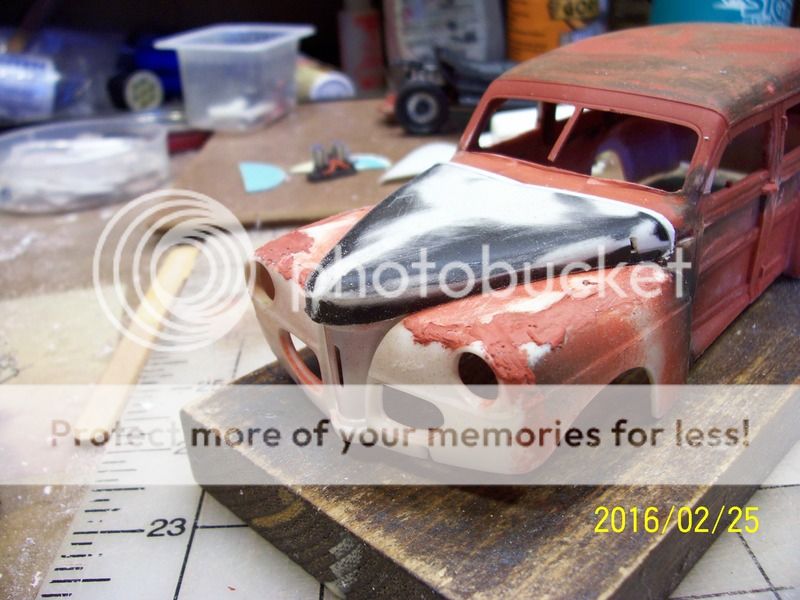
On the 41 woody, I marked out chop and sectioning lines.

After the chop, I tackled the hood.
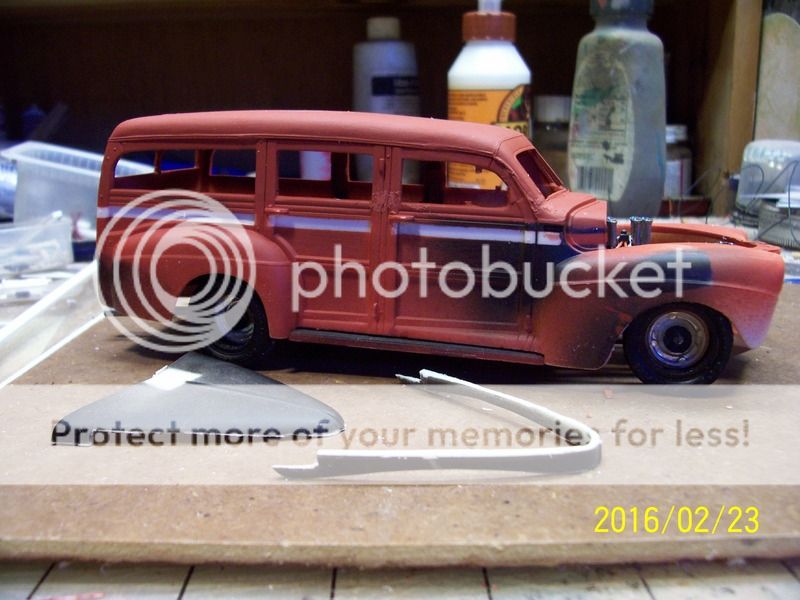
Match the front and fill in the rear edge
Taking out the body section was pretty straight forward.

On the street Challenger, I wanted to keep the integerity of the ends, so, I took out 1/4 inch above the wheel wells and just dropped it down and matched the front and rear bottom edges.
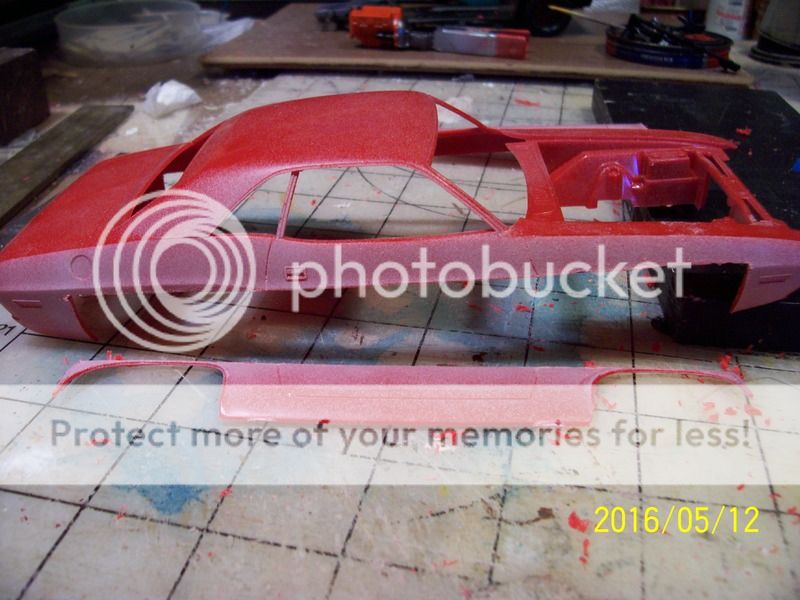
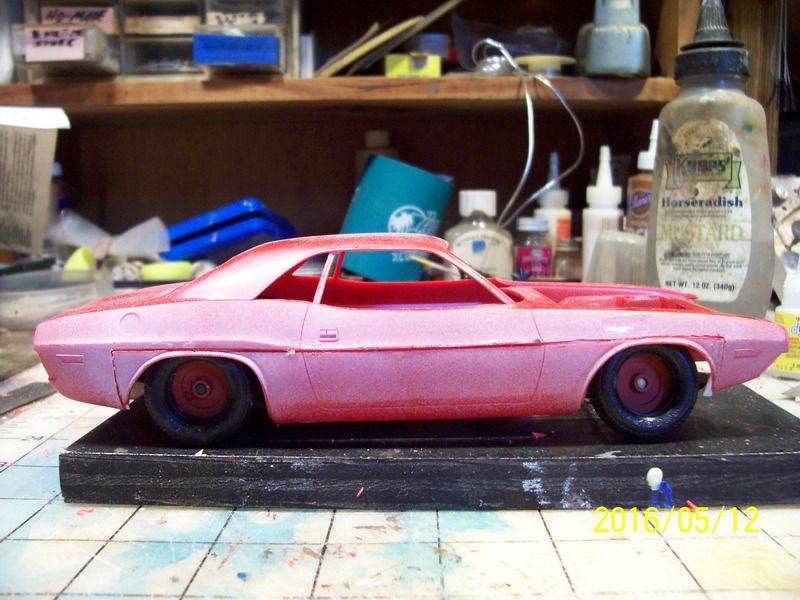
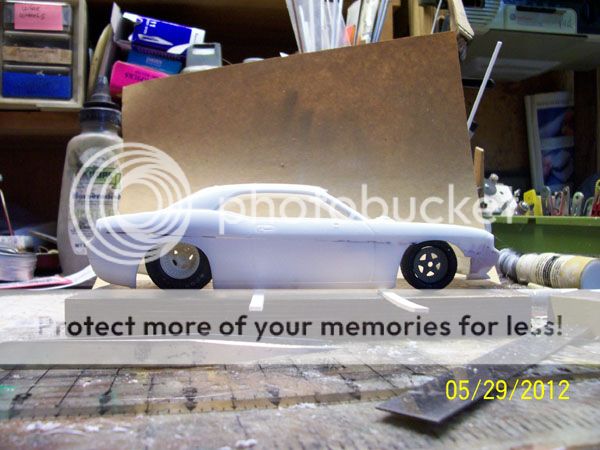
On this later model Challenger, I tool out a pie cut section to give it a rake. 1/4" in the rear to zero in the front.
I suppose one could reverse this to get a tail dragger.
On the 41 woody, I marked out chop and sectioning lines.

After the chop, I tackled the hood.

Match the front and fill in the rear edge

Taking out the body section was pretty straight forward.

On the street Challenger, I wanted to keep the integerity of the ends, so, I took out 1/4 inch above the wheel wells and just dropped it down and matched the front and rear bottom edges.


On this later model Challenger, I tool out a pie cut section to give it a rake. 1/4" in the rear to zero in the front.
I suppose one could reverse this to get a tail dragger.


Geezerman- Advanced Member

- Posts : 3651
Join date : 2013-02-24
Age : 89
Location : Gulf coast of central Florids

Geezerman- Advanced Member

- Posts : 3651
Join date : 2013-02-24
Age : 89
Location : Gulf coast of central Florids
 Re: 63 Stepside Chev
Nice look to the body! Also, I really like the chainsaw body mod imagery though I can imagine you'd need to sharpen the chain quite a lot, lol.

KatsZenJammer- Resident member

- Posts : 2600
Join date : 2016-05-20
Age : 57
Location : Vancouver, BC

Geezerman- Advanced Member

- Posts : 3651
Join date : 2013-02-24
Age : 89
Location : Gulf coast of central Florids
 Re: 63 Stepside Chev
Love the colour, a very nice tone of blue.

KatsZenJammer- Resident member

- Posts : 2600
Join date : 2016-05-20
Age : 57
Location : Vancouver, BC
 Re: 63 Stepside Chev
Cool color. 


RetiredMike- Advanced Member

- Posts : 3525
Join date : 2013-04-27
Age : 73
Location : Valparaiso, Indiana
 Re: 63 Stepside Chev
Just in case anyone is wondering about this project, it has been sanded down and waiting for yet another attempt at painting. Having too much fun on my current 40 Ford art deco project.


Geezerman- Advanced Member

- Posts : 3651
Join date : 2013-02-24
Age : 89
Location : Gulf coast of central Florids
Page 1 of 2 • 1, 2 
 Similar topics
» 65 Chev stepside
» At last..........another Chev van
» 1957 Chevy Stepside Pickup
» Revell 1965 Chevy Stepside pickup.
» Revell 1965 Chevy Stepside pickup.
» At last..........another Chev van
» 1957 Chevy Stepside Pickup
» Revell 1965 Chevy Stepside pickup.
» Revell 1965 Chevy Stepside pickup.
Skid's :: Works In Progress :: Trucks
Page 1 of 2
Permissions in this forum:
You cannot reply to topics in this forum