
200mm WWI British infantry.
Page 1 of 7 • 1, 2, 3, 4, 5, 6, 7 ![]()

200mm WWI British infantry.
![]() by GaryDainton Mon 01 Jun 2015, 6:10 pm
by GaryDainton Mon 01 Jun 2015, 6:10 pm
I have ordered this figure which I intend to convert/use to depict my Great Grandfather who was in the York and Lancaster Regiment and was killed in action on the 1st July 1916 at the Somme.
http://mitchesmilitarymodels.co.uk/?product=200lff-lancashire-fusiliers-1916
The figure should arrive early next week and Ill start the thread when it gets here.
Gary

GaryDainton- Advanced Member

- Posts : 4433
Join date : 2014-03-06
Age : 56
Location : Bolton UK
Re: 200mm WWI British infantry.
![]() by Guest Mon 01 Jun 2015, 6:24 pm
by Guest Mon 01 Jun 2015, 6:24 pm
Guest- Guest
Re: 200mm WWI British infantry.
![]() by Skid Mon 01 Jun 2015, 7:23 pm
by Skid Mon 01 Jun 2015, 7:23 pm
Wiil your techiques translate to 1:35th scale?
_________________
Al.
Constructive criticism is always welcome.
“Success always demands a greater effort.” Winston Churchill
"Success is failure turned inside out" Unknown

Skid- Admin
- Posts : 7129
Join date : 2013-02-15
Age : 75
Location : Newcastle. Good Old Blighty. -

Re: 200mm WWI British infantry.
![]() by GaryDainton Mon 01 Jun 2015, 7:28 pm
by GaryDainton Mon 01 Jun 2015, 7:28 pm
Yes Al I used the same method for the 54mm Nery Diorama, ironically I think its easier on the small figures as I don't find they demand quite as much detail work, such as eyes etc.
You could come along with a smaller figure and see how we get on?.
G
GaryDainton- Advanced Member
- Posts : 4433
Join date : 2014-03-06
Age : 56
Location : Bolton UK
Re: 200mm WWI British infantry.
![]() by A5h Sat 06 Jun 2015, 10:02 pm
by A5h Sat 06 Jun 2015, 10:02 pm

A5h- Resident member
- Posts : 1540
Join date : 2014-08-11
Age : 44
Location : Sheffield UK
Re: 200mm WWI British infantry.
![]() by GaryDainton Sun 07 Jun 2015, 10:09 am
by GaryDainton Sun 07 Jun 2015, 10:09 am
GaryDainton- Advanced Member
- Posts : 4433
Join date : 2014-03-06
Age : 56
Location : Bolton UK
Re: 200mm WWI British infantry.
![]() by itsonlyakit Sat 13 Jun 2015, 4:22 am
by itsonlyakit Sat 13 Jun 2015, 4:22 am
Cheers Eh!
itsonlyakit- New Member

- Posts : 114
Join date : 2013-02-28
Age : 75
Location : Victoria B.C. Canada
Re: 200mm WWI British infantry.
![]() by GaryDainton Sat 13 Jun 2015, 9:24 am
by GaryDainton Sat 13 Jun 2015, 9:24 am
GaryDainton- Advanced Member
- Posts : 4433
Join date : 2014-03-06
Age : 56
Location : Bolton UK
Re: 200mm WWI British infantry.
![]() by Johnag Mon 15 Jun 2015, 12:53 pm
by Johnag Mon 15 Jun 2015, 12:53 pm
I have found my seat and thank you for stocking up the KFC oven...
Andy...

_________________
Andy...
Life isn't about how to survive the storm, but how to dance in the rain...

Johnag- Moderator

- Posts : 1576
Join date : 2013-10-12
Age : 58
Location : North Wales, U.K... -
GaryDainton- Advanced Member
- Posts : 4433
Join date : 2014-03-06
Age : 56
Location : Bolton UK
Re: 200mm WWI British infantry.
![]() by GaryDainton Mon 15 Jun 2015, 2:47 pm
by GaryDainton Mon 15 Jun 2015, 2:47 pm
The first few will be with my iPad but I have a nice compact camera coming which will be here by the time I get to important painting details.
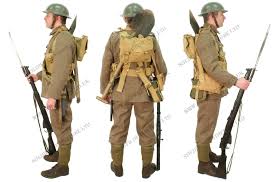
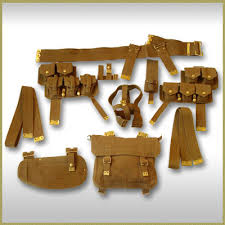
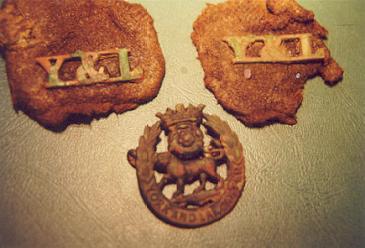
I always start my build by making sure I know what Ill be making and painting and what colour its supposed to be. This is a 200mm Lancashire Fusilier which I will be converting ( by removing the shoulder tiles and scratch making new ones) to a York & Lancs to represent my Great Grandfather who was killed in The Battle of Albert at The Somme, on the very first day of the offensive!!, but he was definitely not alone in this respect. Here are the pice I've found on he internet which ill be using for reference. I print off the image relevant to the stage I'm at and have on my bench for easy reference to save me going on line, or checking my iPad images.
The uniform:


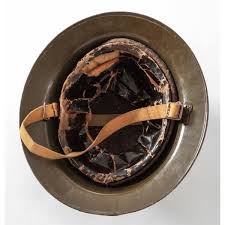
Helmet:

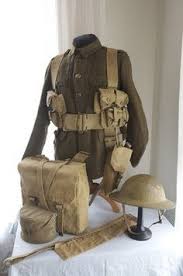
Belts and bags:
Scratch built shoulder tiles and badges:

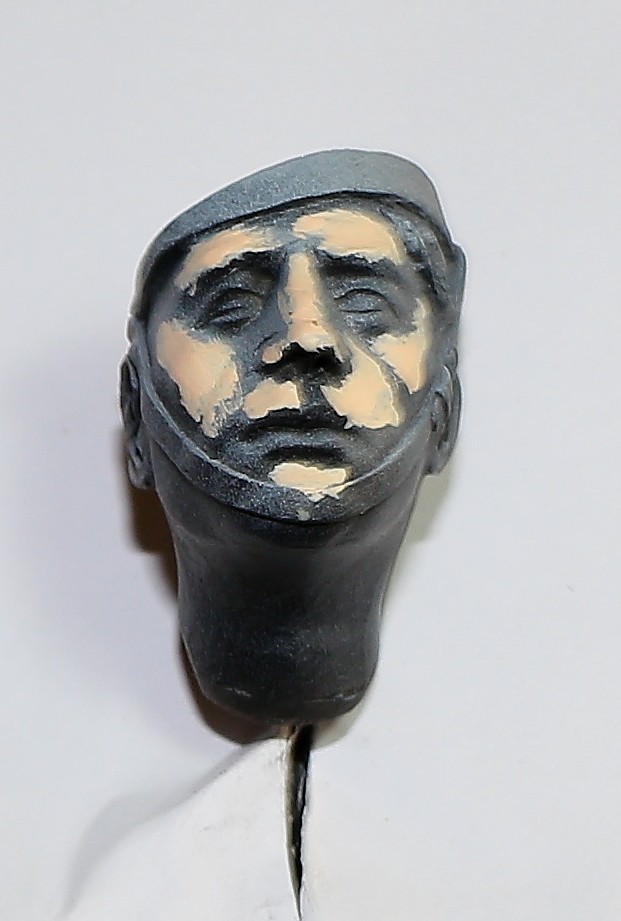
Clean up of parts is something that a lot of people do in one go at the start of the build and resin kits generally have quite a bit of clean up work to do. This is a process which i hate with a passion and so as not to loose patience, and avoid extra work by removing something I shouldn't, I clean up each piece as I'm about to use/assemble/paint it. I tend to clean up and paint the head separately as I find it easier to move around than it would be attached to the figure, then as a rule, unless there are obvious advantages to painting a part before assembly I build and prime the whole figure.
I begin by washing all the parts with a mild dishwashing set up and allow to air dry, I don't usually attach the head to a pin vice for this, but Id done that before remembering to wash it LOL. I even do this with injection molded plastic kits but this could just be out of habit?. I have found this to be critical with resin, although some people say the don't do it, because if I don't wash off the mold release agent I find that:
The paint is repelled and separates on contact with the resin much like water off a waxed cotton jacket. This tends to lead to an uneven splotchy effect which is visible through the paint layers and frankly looks crap and/0r:
The paint needs to applied thickly to adhere properly and apart from the risk of concealing detail which is a schoolboy error Ive done a few times and had to strip a part, my whole painting technique (if you can call it that LOL) depends on applying thin layers often as transparencies or glazes. (more on this later).

Parts check and basic tools for clean up, I also use a multi speed rotary tool. I won't repeat this and please take it as read that if I'm painting to attaching a piece, it has been 'cleaned up'.


Ive cleaned up the head and drilled it onto a pin vice. This allows me to easily move around in the vice and also to remove it and hold it by hand if i feel like it. Mostly though I leave it in a multi position vice which I really like.


Ive got some primer coming tomorrow and we can discuss priming and begin painting the dreaded face. Hope too see you back then guys.
G
Last edited by GaryDainton on Fri 19 Jun 2015, 6:43 pm; edited 1 time in total
GaryDainton- Advanced Member
- Posts : 4433
Join date : 2014-03-06
Age : 56
Location : Bolton UK
Re: 200mm WWI British infantry.
![]() by dogfish7 Mon 15 Jun 2015, 2:52 pm
by dogfish7 Mon 15 Jun 2015, 2:52 pm
dogfish7- Intermediate Member

- Posts : 668
Join date : 2013-02-27
Age : 77
Location : Hoodsport, WA
 LOL
LOL
GaryDainton- Advanced Member
- Posts : 4433
Join date : 2014-03-06
Age : 56
Location : Bolton UK
Re: 200mm WWI British infantry.
![]() by Skid Mon 15 Jun 2015, 3:05 pm
by Skid Mon 15 Jun 2015, 3:05 pm
_________________
Al.
Constructive criticism is always welcome.
“Success always demands a greater effort.” Winston Churchill
"Success is failure turned inside out" Unknown
Skid- Admin
- Posts : 7129
Join date : 2013-02-15
Age : 75
Location : Newcastle. Good Old Blighty. -
Re: 200mm WWI British infantry.
![]() by GaryDainton Mon 15 Jun 2015, 3:15 pm
by GaryDainton Mon 15 Jun 2015, 3:15 pm
GaryDainton- Advanced Member
- Posts : 4433
Join date : 2014-03-06
Age : 56
Location : Bolton UK
Re: 200mm WWI British infantry.
![]() by Guest Mon 15 Jun 2015, 6:03 pm
by Guest Mon 15 Jun 2015, 6:03 pm
Guest- Guest

GaryDainton- Advanced Member
- Posts : 4433
Join date : 2014-03-06
Age : 56
Location : Bolton UK
Re: 200mm WWI British infantry.
![]() by itsonlyakit Mon 15 Jun 2015, 7:28 pm
by itsonlyakit Mon 15 Jun 2015, 7:28 pm
Cheers Eh!
itsonlyakit- New Member
- Posts : 114
Join date : 2013-02-28
Age : 75
Location : Victoria B.C. Canada
Re: 200mm WWI British infantry.
![]() by GaryDainton Mon 15 Jun 2015, 7:50 pm
by GaryDainton Mon 15 Jun 2015, 7:50 pm

GaryDainton- Advanced Member
- Posts : 4433
Join date : 2014-03-06
Age : 56
Location : Bolton UK
Re: 200mm WWI British infantry.
![]() by GaryDainton Tue 16 Jun 2015, 8:12 pm
by GaryDainton Tue 16 Jun 2015, 8:12 pm
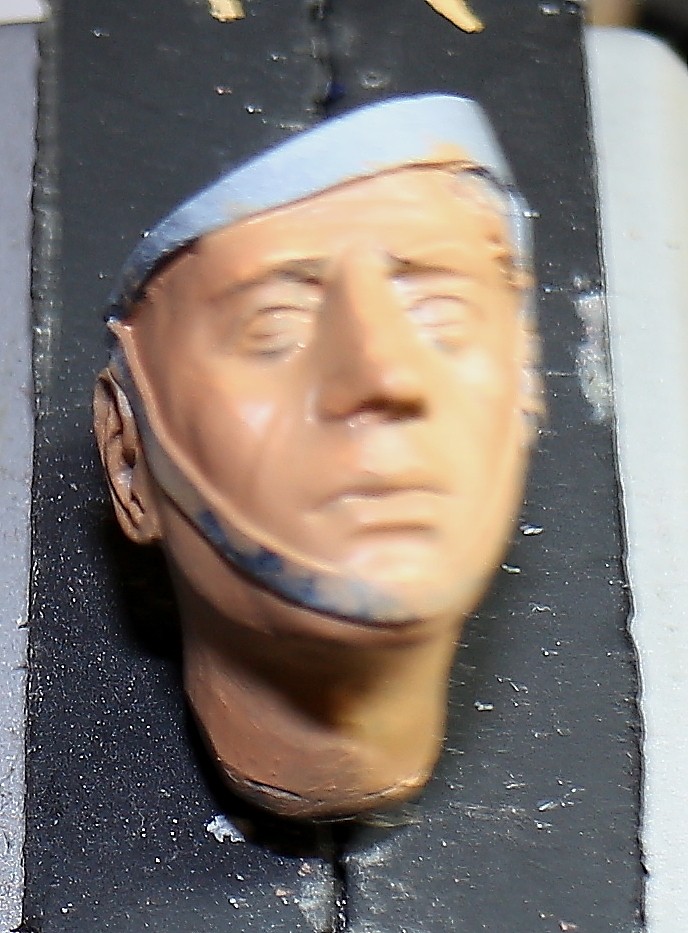
When doing the head I start by priming with Vallejo black primer and block on the colour very roughly before sketching in the eyes. I don't bother trying to keep anything tidy at this stage as I find i often make mistakes and prefer to tidy up later on.


Then I block in with Vallejo MC Basic Skintone where I think the highlights will be as this will show through the basic flesh going on later.
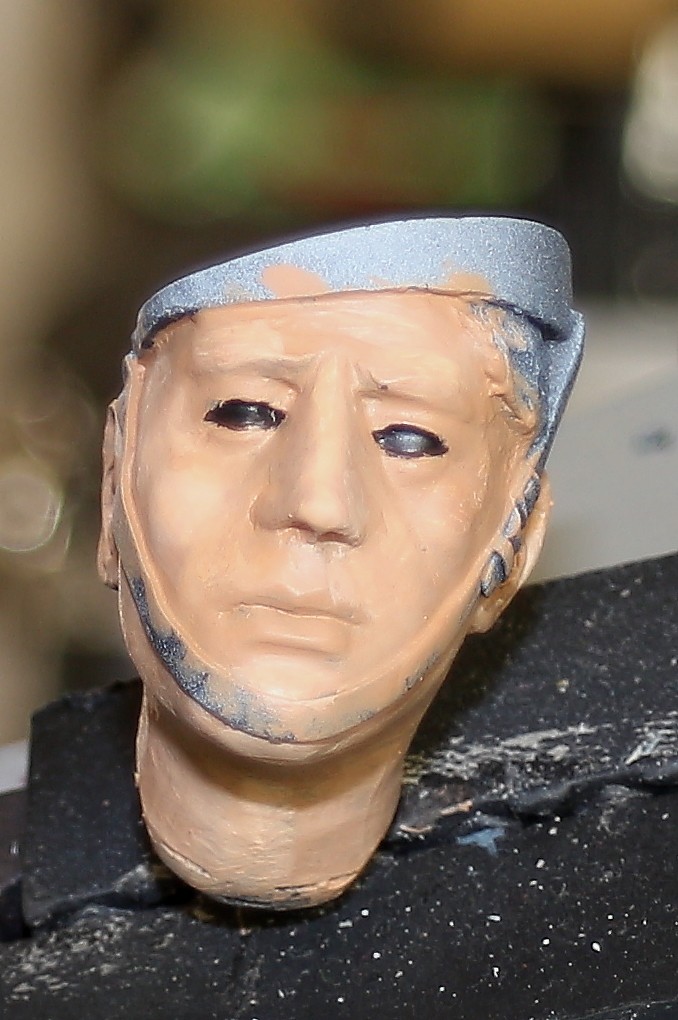
Next I build up a few very thin layers of base flesh with is MC Brown Sand with a little MC Basic Skintone.

Now I block in the eye area with MA black.
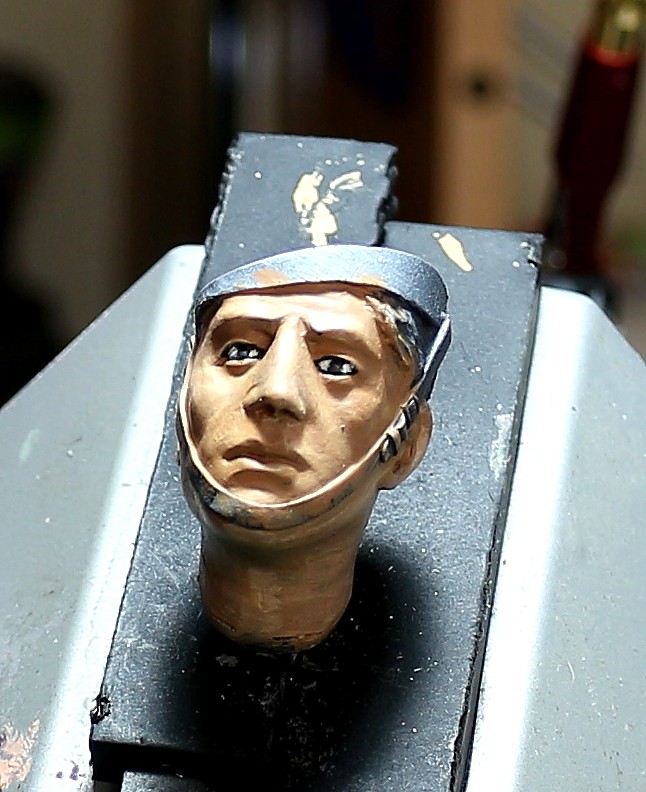
Then fill in the eye with a 50/50 mix of MA aged white and MC Light flesh leaving a thin line of black around the eye and the round (ish LOL) pupil/iris.

Then I fill in the iris with whichever colour i want, in this case MA french blue.
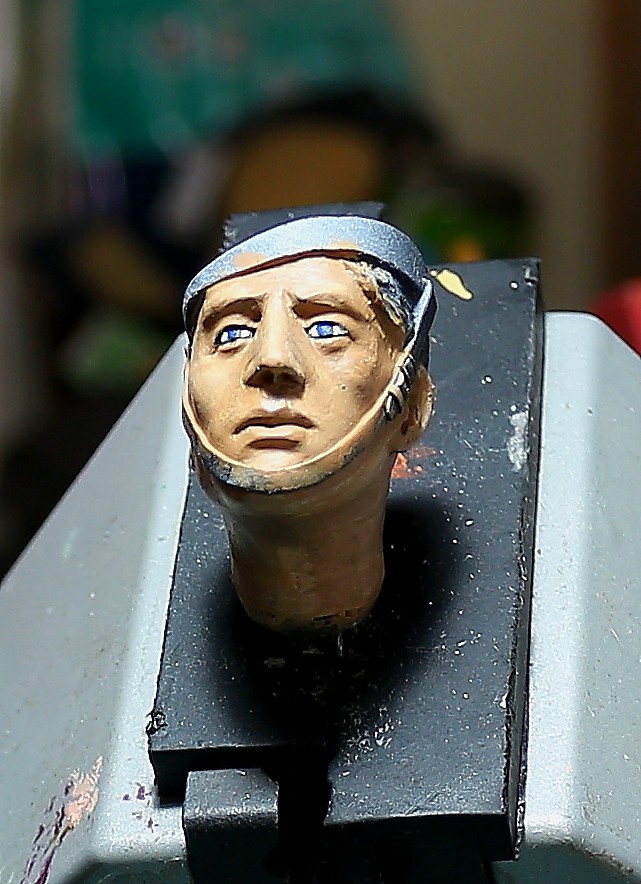
Its very important to remember that were only blocking colour in yet and not to expect any realism, there is a lot of work to do with many thin transparent layers or glazes on the flesh and fine detailing on the eyes. At this stage we are simply laying the basic foundations so he looks a bit 'action man' like.
GaryDainton- Advanced Member
- Posts : 4433
Join date : 2014-03-06
Age : 56
Location : Bolton UK
Re: 200mm WWI British infantry.
![]() by GaryDainton Tue 16 Jun 2015, 8:29 pm
by GaryDainton Tue 16 Jun 2015, 8:29 pm
GaryDainton- Advanced Member
- Posts : 4433
Join date : 2014-03-06
Age : 56
Location : Bolton UK
dogfish7- Intermediate Member
- Posts : 668
Join date : 2013-02-27
Age : 77
Location : Hoodsport, WA
Re: 200mm WWI British infantry.
![]() by GaryDainton Tue 16 Jun 2015, 9:03 pm
by GaryDainton Tue 16 Jun 2015, 9:03 pm
Thanks for looking in.
GaryDainton- Advanced Member
- Posts : 4433
Join date : 2014-03-06
Age : 56
Location : Bolton UK
Re: 200mm WWI British infantry.
![]() by Guest Tue 16 Jun 2015, 9:22 pm
by Guest Tue 16 Jun 2015, 9:22 pm
Guest- Guest

GaryDainton- Advanced Member
- Posts : 4433
Join date : 2014-03-06
Age : 56
Location : Bolton UK
Page 1 of 7 • 1, 2, 3, 4, 5, 6, 7 ![]()
» Airfix "Infantry Tank MkII Matilda" 1/72
» Airfix "Infantry Tank MkII Matilda" 1/72
» SE5 British WWI Fighter
» Proud to be British..............
|
|
|