McLaren Mercedes MP4/12
3 posters
Skid's :: Works In Progress :: Race cars
Page 1 of 1
 McLaren Mercedes MP4/12
While I am waiting on things to fix the 300SLR i decided to go ahead and start this one.This is the other half of the kit that Al sent me so long ago.

This car doesn't have near the history of the 300 SLR. Really it appears to be a F1 car that was raced in 1997. here is what the instructions say about it.
The first race of the 97 Formula 1 Season in Melbourne, Australia ended with an unexpected victory for the Scot David Coulthard. The two MacLaren-Mercedes, regarded by many as the finest Formula 1 racers, ran a patchy World Championship[ overall. In Montreal a boob in the pits cost Coulthard the race; at Silverstone the Finn Mika Hakkinen, who was in the lead, retired from the race shortly before the end with a technical fault, but the double victory of Hakkinen and Coulthard in the European Grand Prix in Jerez (Spain) made up for all that and confirmed the competitiveness of Mercedes in Formula 1.
There are only 53 parts in the kit. Looking it over it appears to be a lot of detail painting and decals. Lot's and lot's of decals.
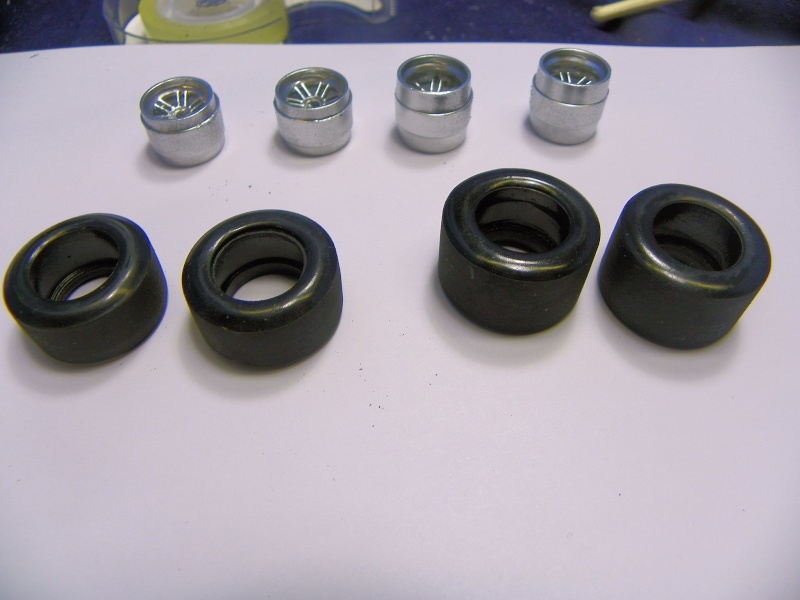
So that's where we will start. The wheels are matt aluminum metallic but look kind like chrome. I started on the wheels and tires because you have to start somewhere. Tires were the first thing I picked up.
Each wheel and tire has 6 decals on them. So that's 24 decals just to do the wheels and tires.
I chucked each tire up in the dremil and knocked the glaze off of them.


The power train in is the paint booth drying now. I will be back with more a little later.
Thanks for looking in. All questions and comments are welcome.

This car doesn't have near the history of the 300 SLR. Really it appears to be a F1 car that was raced in 1997. here is what the instructions say about it.
The first race of the 97 Formula 1 Season in Melbourne, Australia ended with an unexpected victory for the Scot David Coulthard. The two MacLaren-Mercedes, regarded by many as the finest Formula 1 racers, ran a patchy World Championship[ overall. In Montreal a boob in the pits cost Coulthard the race; at Silverstone the Finn Mika Hakkinen, who was in the lead, retired from the race shortly before the end with a technical fault, but the double victory of Hakkinen and Coulthard in the European Grand Prix in Jerez (Spain) made up for all that and confirmed the competitiveness of Mercedes in Formula 1.
There are only 53 parts in the kit. Looking it over it appears to be a lot of detail painting and decals. Lot's and lot's of decals.
So that's where we will start. The wheels are matt aluminum metallic but look kind like chrome. I started on the wheels and tires because you have to start somewhere. Tires were the first thing I picked up.
Each wheel and tire has 6 decals on them. So that's 24 decals just to do the wheels and tires.
I chucked each tire up in the dremil and knocked the glaze off of them.


The power train in is the paint booth drying now. I will be back with more a little later.
Thanks for looking in. All questions and comments are welcome.
Guest- Guest
 Re: McLaren Mercedes MP4/12
nice start Buck

craig betts- New Member

- Posts : 233
Join date : 2013-02-22
Location : New Brunswick,Canada
 Re: McLaren Mercedes MP4/12
Hey everyone, I am back for an update on this one.
Thanks for the comments, we seem to have quite a few "PlanB" supporters. Don't give up it may happen yet. Here are the pictures of what I was thinking.
I was looking at the width of the cockpit and I thought man that looks about the same width as a Model T Ford. So I dug around in the secret drawer and tried these.

Then I thought maybe a chopped coupe.

Then I thought about a Fiat Topolino. I have as couple of he old Revell bodies Bob Paeth gave me.

Then I thought about putting the driver in the back, slingshot fashion, or maybe just a T tub to hold the engine. One of those barely, kinda legal cars.
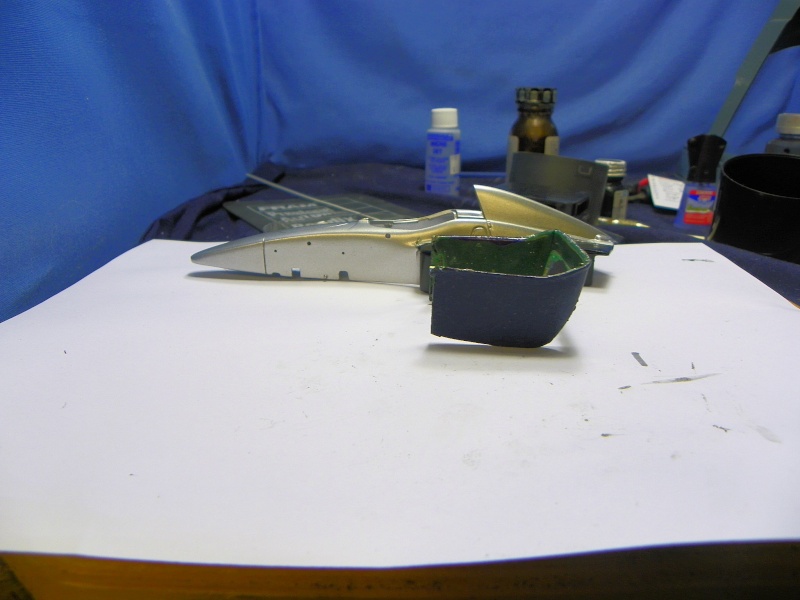

Then one more thought. I still have this 32 Bantam body.

So now you guys know as much about "PlanB" as I do.
On the build I got the engine finished. Rather simple, 6 pieces total and the engine and rear suspension was together. I followed the instruction sheet for colors, then had at it with Gel Pens when it was together.


Nothing fancy there. You can't see any of it anyway.
Got the body in basic colors and ready for the decals.


So then it was on to step 2 on the instruction sheet. The rear wing. 8 pieces total. It was tough to hold it square and tack things, I used MEK to tack it together, get it square and then super glued all the joints.

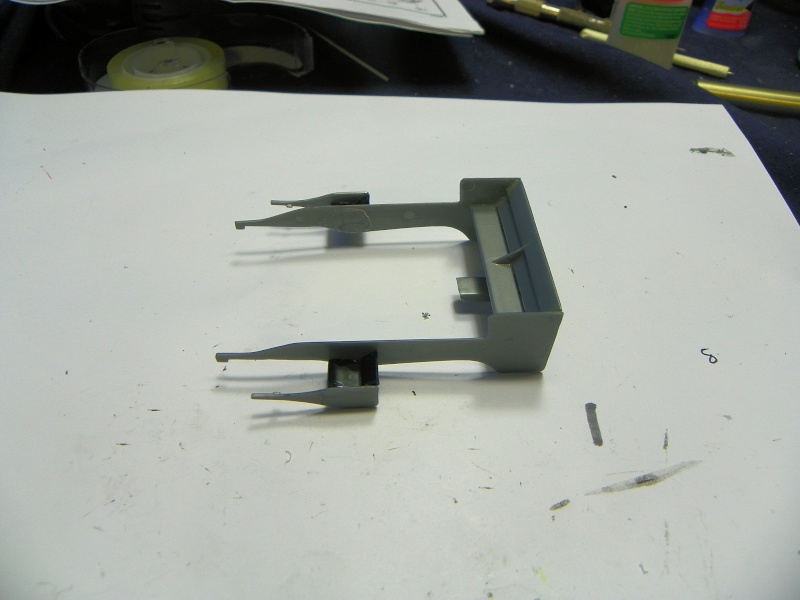

So with that much behind me it back to the paint booth to get the rear wing ready for decals. I'll be back soon with more.
Thanks for looking in. All questions and comments are welcome.
Thanks for the comments, we seem to have quite a few "PlanB" supporters. Don't give up it may happen yet. Here are the pictures of what I was thinking.
I was looking at the width of the cockpit and I thought man that looks about the same width as a Model T Ford. So I dug around in the secret drawer and tried these.

Then I thought maybe a chopped coupe.

Then I thought about a Fiat Topolino. I have as couple of he old Revell bodies Bob Paeth gave me.

Then I thought about putting the driver in the back, slingshot fashion, or maybe just a T tub to hold the engine. One of those barely, kinda legal cars.


Then one more thought. I still have this 32 Bantam body.

So now you guys know as much about "PlanB" as I do.
On the build I got the engine finished. Rather simple, 6 pieces total and the engine and rear suspension was together. I followed the instruction sheet for colors, then had at it with Gel Pens when it was together.


Nothing fancy there. You can't see any of it anyway.
Got the body in basic colors and ready for the decals.


So then it was on to step 2 on the instruction sheet. The rear wing. 8 pieces total. It was tough to hold it square and tack things, I used MEK to tack it together, get it square and then super glued all the joints.


So with that much behind me it back to the paint booth to get the rear wing ready for decals. I'll be back soon with more.
Thanks for looking in. All questions and comments are welcome.
Guest- Guest
 Re: McLaren Mercedes MP4/12
Thanks for looking in. Well I have kept charing ahead with the original build and things are going pretty smooth. I counted the decals on the sheet and there are 98 decals for this build. So that's where I have been.
I did this mock up because I was curious what this thing would look like when done.

Here is the front of the drivers cockpit.

Seat belts installed.

Finished cockpit.


After that it was time to started to apply the decals to the wings.
center wings.

Front wing.


Rear wing
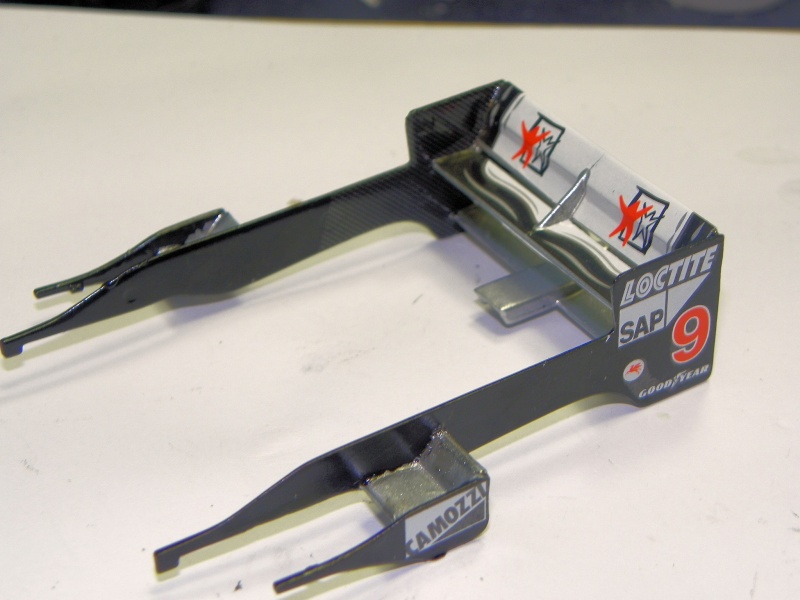


These don't seem to be in a position to apply down force, but they're done.

Got the front spindles all done.

So that's it for now. Time to decal the main body and then put this bad boy together. See ya at the next update.
Thanks for looking in all comments and questions are welcome.
I did this mock up because I was curious what this thing would look like when done.

Here is the front of the drivers cockpit.

Seat belts installed.

Finished cockpit.


After that it was time to started to apply the decals to the wings.
center wings.

Front wing.


Rear wing


These don't seem to be in a position to apply down force, but they're done.

Got the front spindles all done.

So that's it for now. Time to decal the main body and then put this bad boy together. See ya at the next update.
Thanks for looking in all comments and questions are welcome.
Guest- Guest
 Re: McLaren Mercedes MP4/12
All those buttons at your finger tips!!!!!!!!! I would love to drive one of these. I know that this kind of racing is more and more computer controlled. The Indy cars now are controlled from the pits. The crew chief can set the top RPM to regulate fuel consumption. All the driver does is turn left and hold on. Oh and figure out which button to push next.
Guest- Guest
 Re: McLaren Mercedes MP4/12
Hey everyone. Thought I'd do an update on this build. Thanks for looking in and all the comments. I have learned a great deal about F-1 racing from this build and this thread.
When we left off it was decal time. Well that is all behind me now. It really went quite smooth. They decal placement is not perfect but I am happy with it. Originally I had counted 90 something decals for this build but the total is 103. I am good with that. Deal application is probably my weakest skill so the workout was welcome.
Here is the blank canvas we are starting with.

Getting started.

Add a few more.
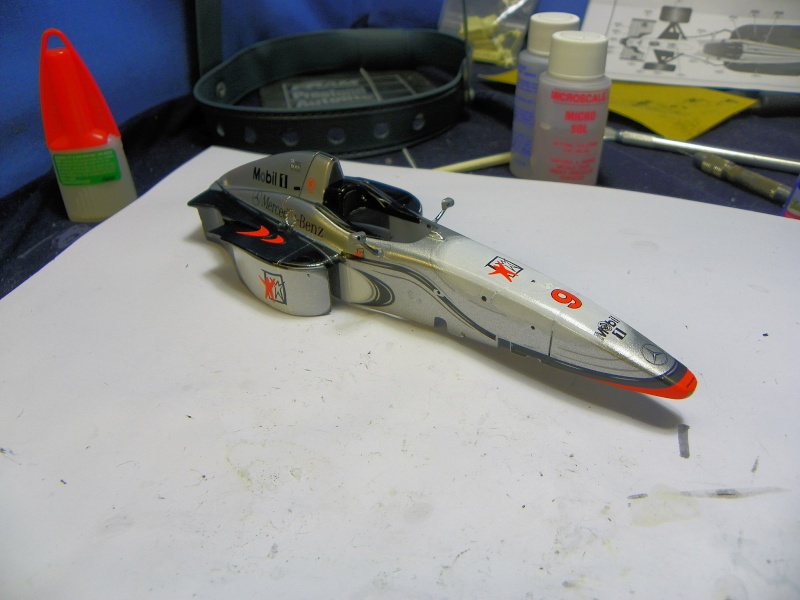
A few more.
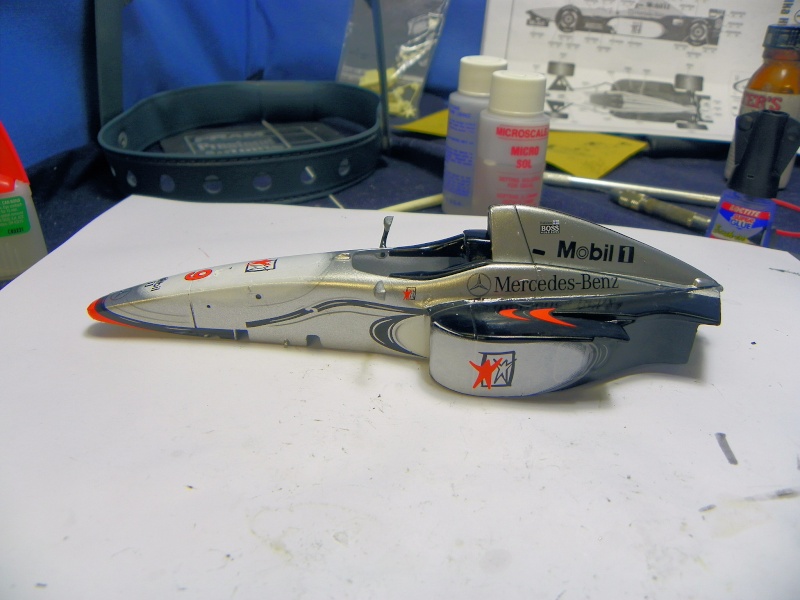
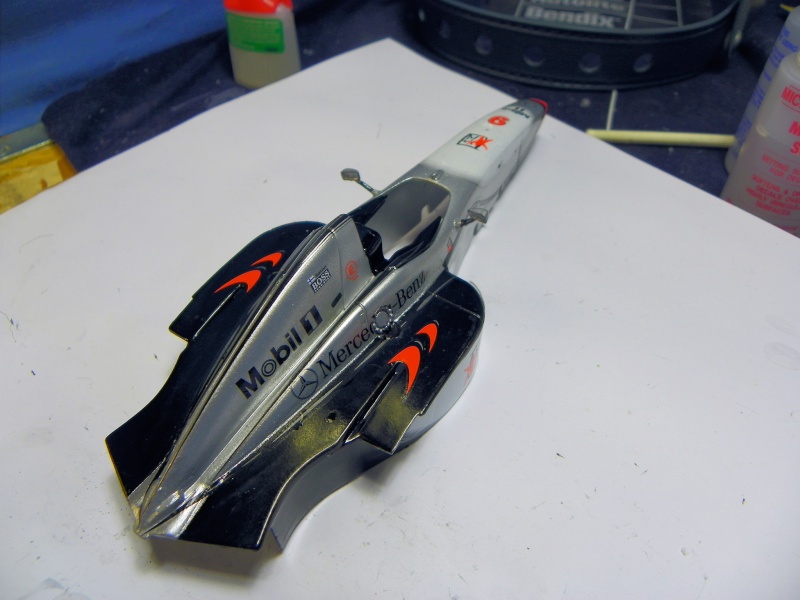
Then I had to put some of it together before I could go any further. So the interior tub, power train and lower front suspension was added.
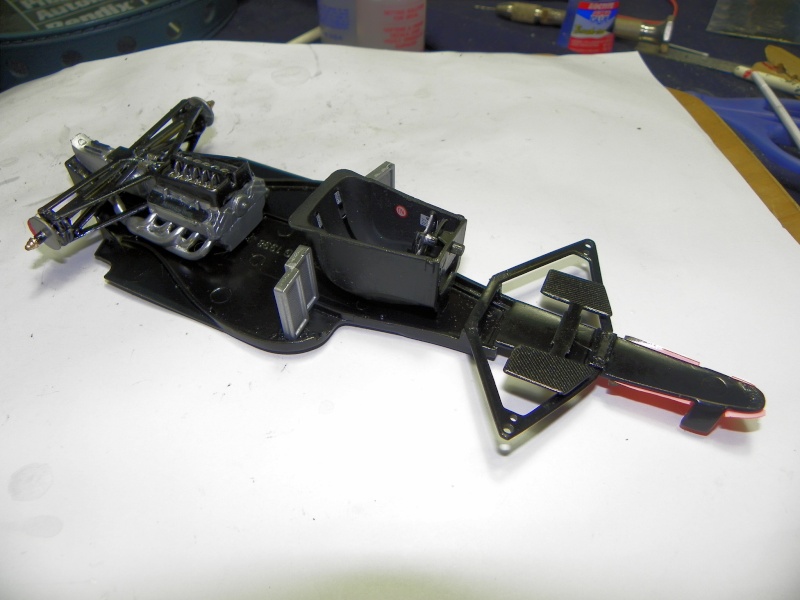

As you can see the engine doesn't have any detail at all. That is because when it is together you can't see it.
At this point I had to join the body to the chassis so that I could finish the decal application. It didn't want to fit real well so out came the clamps and super glue.

After that had setup it was time to finish the decals. Here are a couple shots of the finished body in a mock up with the front and rear wings in place. Nothing permanent yet.


So that's where we are at. Today I hope to get this one to the point I can finish it. I am antsy to get back to the 300SLR. ;)
Thanks for looking in. All comments and questions are welcome.
When we left off it was decal time. Well that is all behind me now. It really went quite smooth. They decal placement is not perfect but I am happy with it. Originally I had counted 90 something decals for this build but the total is 103. I am good with that. Deal application is probably my weakest skill so the workout was welcome.
Here is the blank canvas we are starting with.

Getting started.

Add a few more.

A few more.


Then I had to put some of it together before I could go any further. So the interior tub, power train and lower front suspension was added.


As you can see the engine doesn't have any detail at all. That is because when it is together you can't see it.
At this point I had to join the body to the chassis so that I could finish the decal application. It didn't want to fit real well so out came the clamps and super glue.

After that had setup it was time to finish the decals. Here are a couple shots of the finished body in a mock up with the front and rear wings in place. Nothing permanent yet.


So that's where we are at. Today I hope to get this one to the point I can finish it. I am antsy to get back to the 300SLR. ;)
Thanks for looking in. All comments and questions are welcome.
Guest- Guest
 Re: McLaren Mercedes MP4/12
I do luv the F-1s. Thanks for complete fotos of how the build went. Mucho work on the body and decals, and you did a great job, thanks!
harron68- Advanced Member

- Posts : 3621
Join date : 2013-02-28
Age : 74
Location : MIDWEST
 Re: McLaren Mercedes MP4/12
Stunning F-1! Glad you didn't chop it up! Altho it's a great idea. LoL Keep up the great work Buck! 8)

Tumbler75- Intermediate Member

- Posts : 854
Join date : 2013-02-25
Age : 49
Location : Prosperity, SC
 Similar topics
» McLaren Mercedes MP4/12
» Tamiya 1/24 Mercedes SLR McLaren
» Tamiya 1/24 Mercedes SLR McLaren
» MPC Mclaren M8d 1:20
» Tamiya Mercedes Benz SLR McLaren
» Tamiya 1/24 Mercedes SLR McLaren
» Tamiya 1/24 Mercedes SLR McLaren
» MPC Mclaren M8d 1:20
» Tamiya Mercedes Benz SLR McLaren
Skid's :: Works In Progress :: Race cars
Page 1 of 1
Permissions in this forum:
You cannot reply to topics in this forum