
Testor's Visible Hemi
Page 1 of 1

Testor's Visible Hemi
![]() by Guest Mon 04 Mar 2013, 2:08 am
by Guest Mon 04 Mar 2013, 2:08 am
Finally all my projects are done. I hate it when I have several projects laying around. Seems like nothing ever gets done to any of them. This build will be the Testor's 1/4 scale Visible Hemi.

This is another of those kits that work when you are done. Not a static display piece like the other 1/4 scale Hemi's I built.
Feel free to ask questions or make comments as we go. All are welcome.
This is another of those kits that work when you are done. Not a static display piece like the other 1/4 scale Hemi's I built.
Feel free to ask questions or make comments as we go. All are welcome.
Guest- Guest
Re: Testor's Visible Hemi
![]() by Guest Mon 04 Mar 2013, 2:21 am
by Guest Mon 04 Mar 2013, 2:21 am
OK we are off and running. I got the box emptied to look the kit over man what a pile of parts.

So I sorted through them and found the crankshaft pieces. Then cleaned them up. There was more flash on them than I thought I would find.

Next was as mock up of the crank.
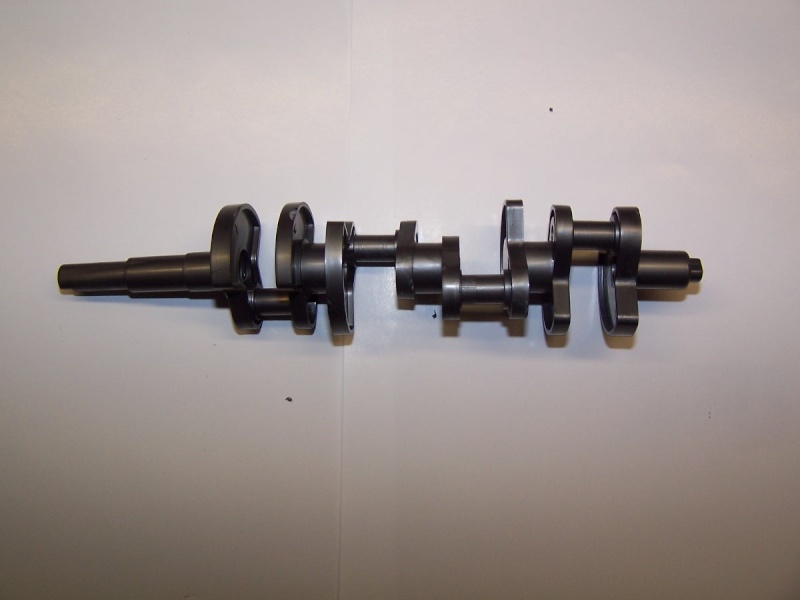
Then the connecting Rods. Got them all cleaned up and mocked them up on the crank shaft to make sure everything would fit and turn freely.


Next I found the main caps, screws, bottom cam gear and retainer. They were cleaned up and made ready for assembly.

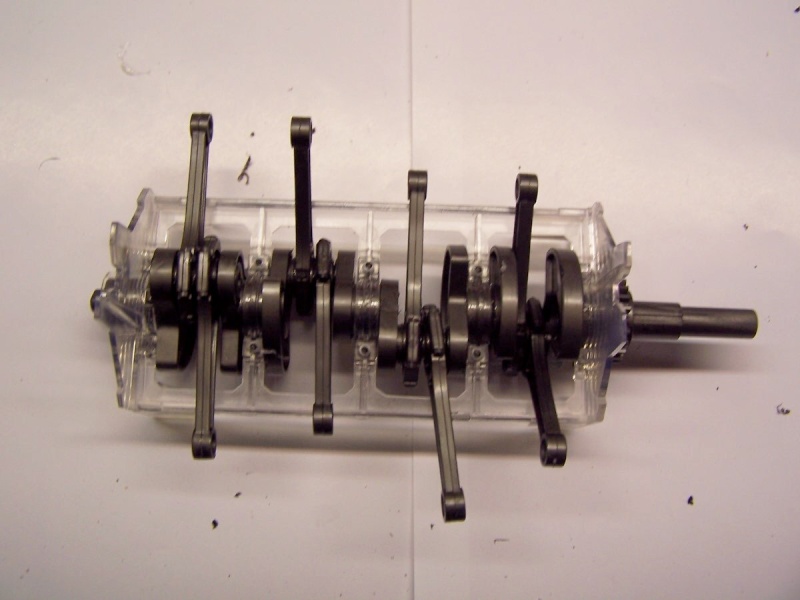
Bottom block was cleaned and made ready.
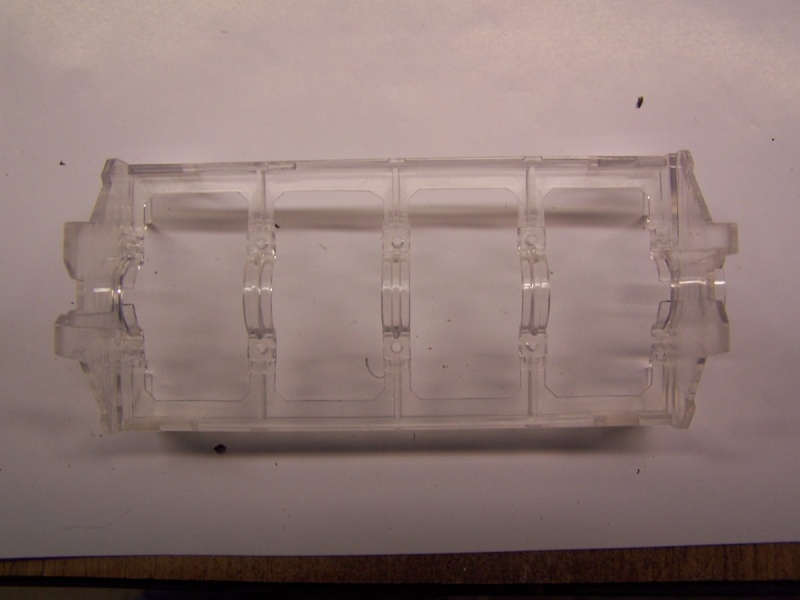
Then everything was test fitted. All the problems were corrected and then it was put together. I used Vaseline for assembly Lube. Seems to have worked out well.

Now on to bigger and better things. I will add more tomorrow.
So I sorted through them and found the crankshaft pieces. Then cleaned them up. There was more flash on them than I thought I would find.
Next was as mock up of the crank.
Then the connecting Rods. Got them all cleaned up and mocked them up on the crank shaft to make sure everything would fit and turn freely.
Next I found the main caps, screws, bottom cam gear and retainer. They were cleaned up and made ready for assembly.
Bottom block was cleaned and made ready.
Then everything was test fitted. All the problems were corrected and then it was put together. I used Vaseline for assembly Lube. Seems to have worked out well.
Now on to bigger and better things. I will add more tomorrow.
Guest- Guest
Re: Testor's Visible Hemi
![]() by Guest Mon 04 Mar 2013, 2:34 am
by Guest Mon 04 Mar 2013, 2:34 am
Got quite a bit done today. Started by getting engine sides ready. They had to be deburred and some flash removed.

Then it was on to the camshaft. Had to press the drive gear on and install a keeper ring. I took a small file to the cam lobes. I removed the casting line from each lobe. It makes the lifter follow better when we get that far.

Then did a test fit on all that. wanted to make sure things would still turn freely.

Got the sides fitted and glued to the crankcase.

Got the pistons,pins and retainer. all cleaned up and installed onto the rods.

Got the cylinders ready fitted and then installed.

Put the cam back in for 2 reasons. I wanted to know what it would look like and find out if everything still turned freely.

Got the heads ready and put together.

Put the valve guides into the heads.
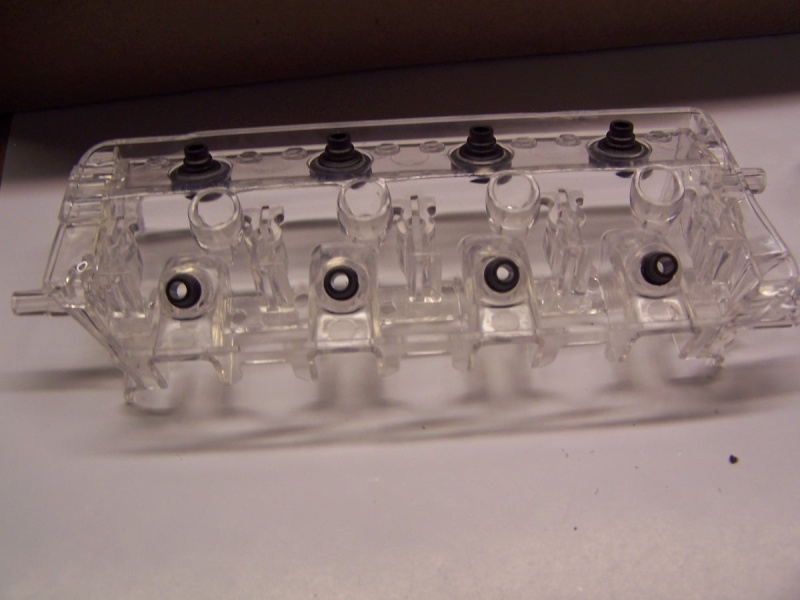
When you get the head all cleaned up and the glue is setting this is how many clamps you need.
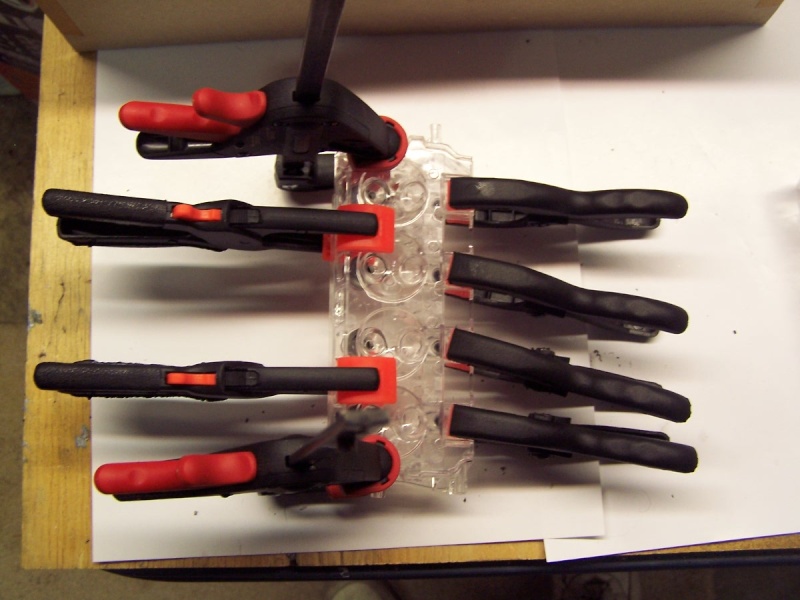
The bottom part of the head was warped. That's why so many clamps. Once the CA sets you are good to go.
Then rocker arm stands and rocker shafts are glued to top of heads. The shafts can still be removed. I just left them in while the glue dried to keep the alignment.

I have to do some part time fill work Thursday,Friday and Monday. So the next update may be a couple days in coming. Thanks for tuning in.
Then it was on to the camshaft. Had to press the drive gear on and install a keeper ring. I took a small file to the cam lobes. I removed the casting line from each lobe. It makes the lifter follow better when we get that far.
Then did a test fit on all that. wanted to make sure things would still turn freely.
Got the sides fitted and glued to the crankcase.
Got the pistons,pins and retainer. all cleaned up and installed onto the rods.
Got the cylinders ready fitted and then installed.
Put the cam back in for 2 reasons. I wanted to know what it would look like and find out if everything still turned freely.
Got the heads ready and put together.
Put the valve guides into the heads.
When you get the head all cleaned up and the glue is setting this is how many clamps you need.
The bottom part of the head was warped. That's why so many clamps. Once the CA sets you are good to go.
Then rocker arm stands and rocker shafts are glued to top of heads. The shafts can still be removed. I just left them in while the glue dried to keep the alignment.
I have to do some part time fill work Thursday,Friday and Monday. So the next update may be a couple days in coming. Thanks for tuning in.
Guest- Guest
Re: Testor's Visible Hemi
![]() by Guest Mon 04 Mar 2013, 2:50 am
by Guest Mon 04 Mar 2013, 2:50 am
Well here it is Saturday morning. Man it is cold here. 22 degrees at 10 AM.
I live pretty close to the Pacific Ocean and this is not normal. Any way it gives me time to build and write on this OTB.
When I quit last time we had the heads together and the valve guides installed. So now it's time to finish the heads and get them onto the block.
The rocker arm stands are glued in using the shafts for alignment. Then the intake and exhaust vales,sprigs and retainers are installed.


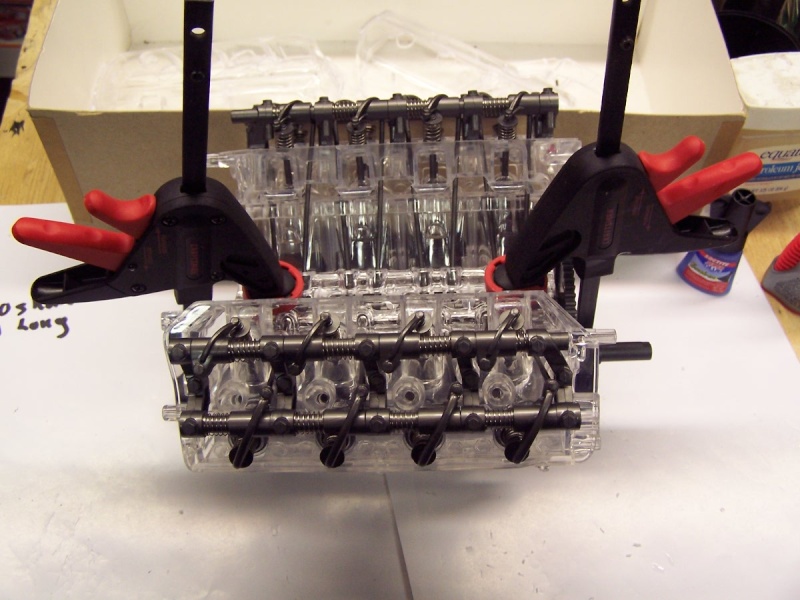
The way this kit is designed. You build the crankcase with the crank,rods,pistons and cylinders Forgot the camshaft. Then you build the top half of the engine. This is everything above the camshaft center line. So you have the combustion chambers, heads, lifters and push rods. Then you glue the two sub assemblies together. The top half looks like this as the glue dries.

Just a quick note here. I used MEK to hold all this together until I could tell where to super glue it. What is nice about the MEK is it doesn't fog the clear plastic. And this thing has a ton of clear plastic. The finished top half looks like this.

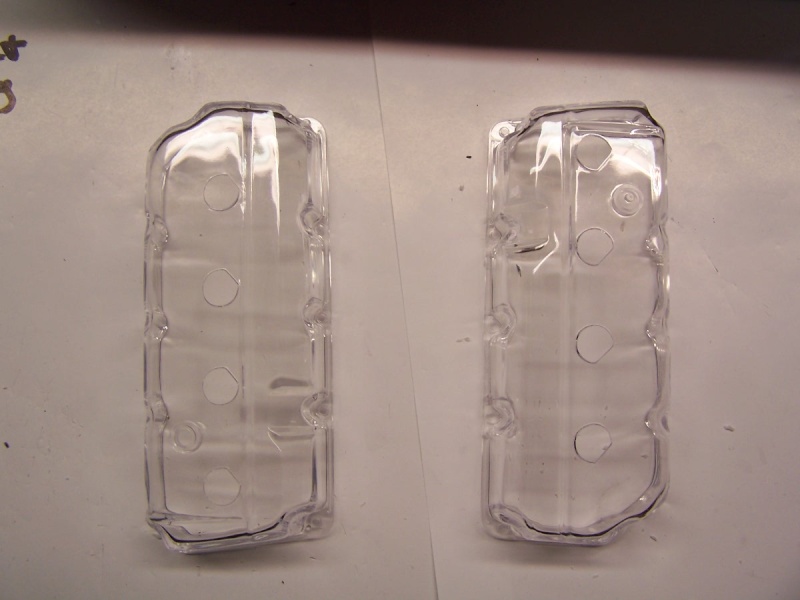
Next you clean the flash away from the front and reatr of the engine. The parts look like this.


And the valve covers.
then you put them together.
you end up with something that looks like this.


Now time to add the front and rear of the block.


That pretty much completes the mechanical part of this kit. I want to tell you that it isn't as easy as it looks here. The different parts of the block and multi-piece crankshaft take some careful alignment and many,many test fits before gluing. You have to be aware of does it still turn and are there any gaps where the different block pieces come together.
Now it's time to start putting on the static stuff. Intake, valve covers, spark plug tubes, etc.


OK Iam going to go work on this beast some more. I will update again tomorrow morning. Before I leave I will say after building the 3 Hawk Hemi's they are the same kit. The only difference is the Hawk kits are static display and the Testor's are visible. The Testor's kit is way more complicated and takes more time to fit everything. But all the rest is the same.
See you later and thanks for looking in. All comments are welcome.
I live pretty close to the Pacific Ocean and this is not normal. Any way it gives me time to build and write on this OTB.
When I quit last time we had the heads together and the valve guides installed. So now it's time to finish the heads and get them onto the block.
The rocker arm stands are glued in using the shafts for alignment. Then the intake and exhaust vales,sprigs and retainers are installed.
The way this kit is designed. You build the crankcase with the crank,rods,pistons and cylinders Forgot the camshaft. Then you build the top half of the engine. This is everything above the camshaft center line. So you have the combustion chambers, heads, lifters and push rods. Then you glue the two sub assemblies together. The top half looks like this as the glue dries.
Just a quick note here. I used MEK to hold all this together until I could tell where to super glue it. What is nice about the MEK is it doesn't fog the clear plastic. And this thing has a ton of clear plastic. The finished top half looks like this.
Next you clean the flash away from the front and reatr of the engine. The parts look like this.
And the valve covers.
then you put them together.
you end up with something that looks like this.
Now time to add the front and rear of the block.
That pretty much completes the mechanical part of this kit. I want to tell you that it isn't as easy as it looks here. The different parts of the block and multi-piece crankshaft take some careful alignment and many,many test fits before gluing. You have to be aware of does it still turn and are there any gaps where the different block pieces come together.
Now it's time to start putting on the static stuff. Intake, valve covers, spark plug tubes, etc.
OK Iam going to go work on this beast some more. I will update again tomorrow morning. Before I leave I will say after building the 3 Hawk Hemi's they are the same kit. The only difference is the Hawk kits are static display and the Testor's are visible. The Testor's kit is way more complicated and takes more time to fit everything. But all the rest is the same.
See you later and thanks for looking in. All comments are welcome.
Guest- Guest
Re: Testor's Visible Hemi
![]() by Guest Mon 04 Mar 2013, 3:02 am
by Guest Mon 04 Mar 2013, 3:02 am
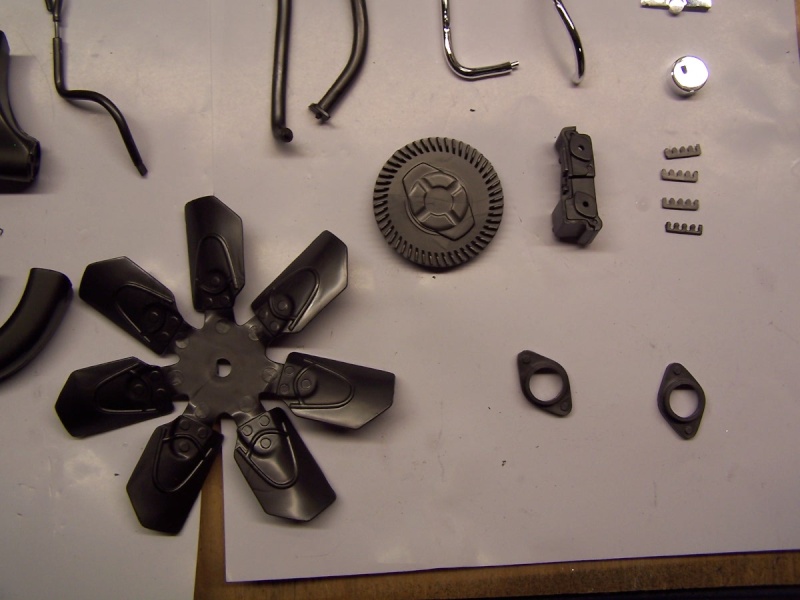
At this point the build is just about done. what happens next is hanging all the goodies on the block. Here are some pictures of the assembled goodies.

Looking at this picture reminded me. I was going to comment about the decals. This kit only has 2. The oil filter and the air cleaner element. The decals were easy to work with and no problem applying them. And this kit is from 2004.

The fuel lines and filters are just like the Hawk kit items. And they don't fit either. At this point you need to heat them with a hair dryer and bend them enough to make them fit right.

The next trouble point is the Power steering pump. You don't know it yet but the fan belts will put such a strain on this item it will try to twist and break off the model.


To resolve this I took a piece of the clear spruce the came in the kit and made a "bracket" that I glued between the pump housing and the block.

It is hard to see because it blends in so well. It is mounted between the back of the housing and the block about center of the dipstick loop but forward a little.
Here are the rest of the bolt on goodies. I am going to post these three pics and then close the OTB. You can see the finished model in the NMA.


Thanks to all those that followed along. Your comments are always welcome. Next one in line is the Visible A-990 Race Hemi. I feel it will be much like this kit, only different. LOL See you there.
Looking at this picture reminded me. I was going to comment about the decals. This kit only has 2. The oil filter and the air cleaner element. The decals were easy to work with and no problem applying them. And this kit is from 2004.
The fuel lines and filters are just like the Hawk kit items. And they don't fit either. At this point you need to heat them with a hair dryer and bend them enough to make them fit right.
The next trouble point is the Power steering pump. You don't know it yet but the fan belts will put such a strain on this item it will try to twist and break off the model.
To resolve this I took a piece of the clear spruce the came in the kit and made a "bracket" that I glued between the pump housing and the block.
It is hard to see because it blends in so well. It is mounted between the back of the housing and the block about center of the dipstick loop but forward a little.
Here are the rest of the bolt on goodies. I am going to post these three pics and then close the OTB. You can see the finished model in the NMA.
Thanks to all those that followed along. Your comments are always welcome. Next one in line is the Visible A-990 Race Hemi. I feel it will be much like this kit, only different. LOL See you there.
Guest- Guest
» Visible A-990 Hemi
» Testor's Visible A-990 Hemi
» Testor's Visible V-8 Hemi
» Testors/Fujimi 1/16 Porsche 959
» Testors/Fujimi EM series 1/16 Porsche 959
» Testor's Visible A-990 Hemi
» Testor's Visible V-8 Hemi
» Testors/Fujimi 1/16 Porsche 959
» Testors/Fujimi EM series 1/16 Porsche 959
Page 1 of 1
Permissions in this forum:
You cannot reply to topics in this forum