Hotwheels Camaro
Skid's :: Works In Progress :: Race cars
Page 1 of 1
 Hotwheels Camaro
This one was a Community Build over at Zbuckster's Model Cars. The theme of the build was to build a race car that had to turn both left and right to race. So No drag cars, No Salt cars and no Nascar. That did leave plenty to choose from. This was my offering.
This is the kit I was thinking of building.

This is the kit I was thinking of building.

Guest- Guest
 Re: Hotwheels Camaro
I don't have near as much to show as Al but wanted to get involved, so here we go.
I am not very familiar with Trans-Am Racing so I spend sometime looking the kit over. Really it doesn't look that much different than a drag car. Full tube frame, coil overs on all 4 corners. Mt guess is they are very close to being the same with different suspension pieces and weight distribution.
So with the whole kit out of the box I grabbed the tires and went to work. They were ugly and took a couple hours of fooling with to get them sanded down and still round.


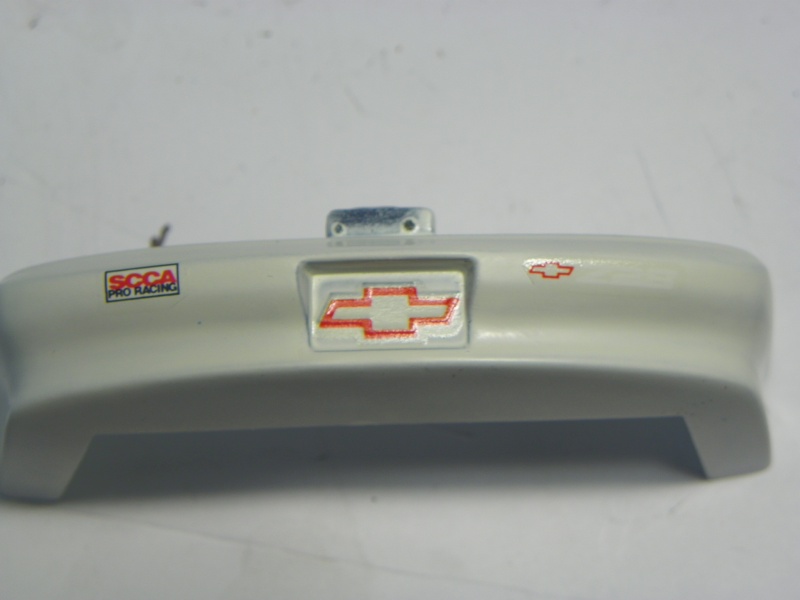
Then I hand painted the Tire Logo's. That didn't turn out so good so I cleaned them off and will use the kit decals and some dull coat.
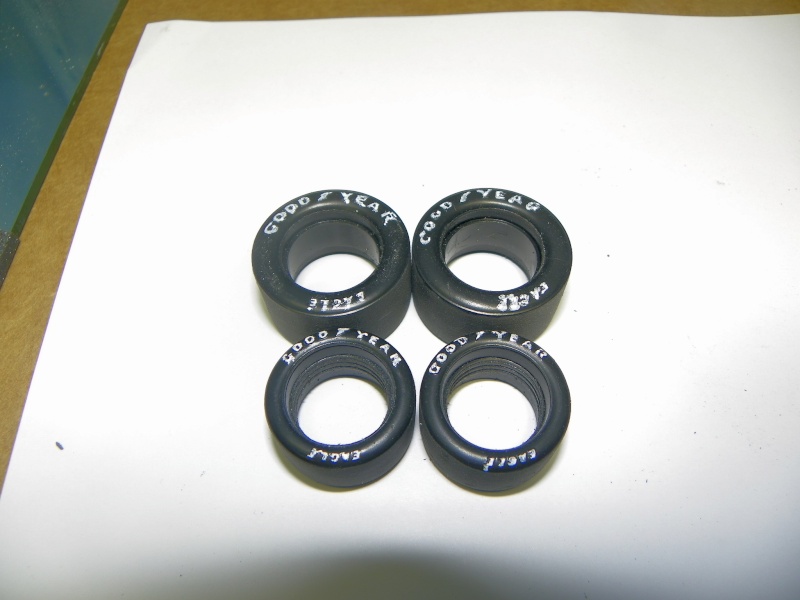
Then looking at the first couple steps in the directions I started cleaning and painting parts.

I got the roll cage halves cleaned of flash and fitted to the chassis.
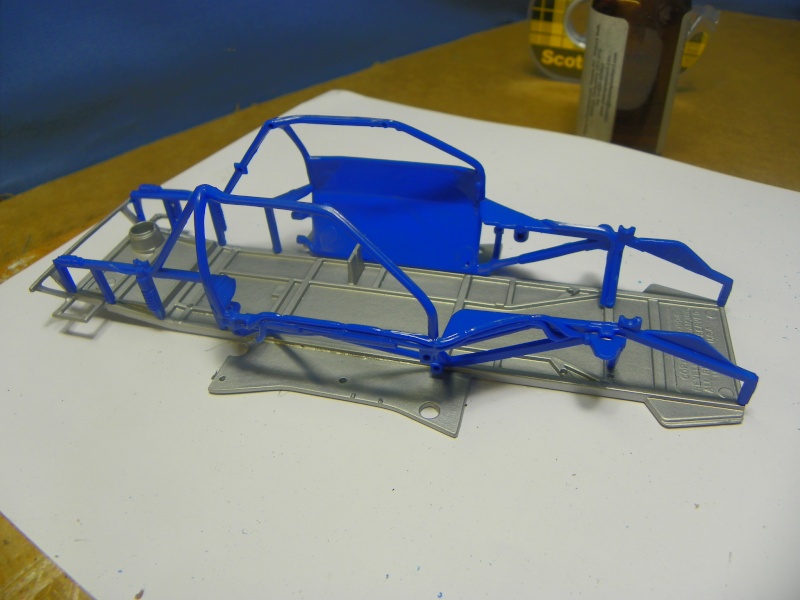
Looking at that where I was at with it. I thought there was to much Aluminum in the floor pan. So I masked it off and painted the part of the frame that is molded into it Light Gray. Now with the cage halves done it looks more like a real car.

Also applied the first of many decals. So now it off to finish the tires and see how the wheels will look.
Thanks for looking in all comments and questions are welcome.
I am not very familiar with Trans-Am Racing so I spend sometime looking the kit over. Really it doesn't look that much different than a drag car. Full tube frame, coil overs on all 4 corners. Mt guess is they are very close to being the same with different suspension pieces and weight distribution.
So with the whole kit out of the box I grabbed the tires and went to work. They were ugly and took a couple hours of fooling with to get them sanded down and still round.


Then I hand painted the Tire Logo's. That didn't turn out so good so I cleaned them off and will use the kit decals and some dull coat.

Then looking at the first couple steps in the directions I started cleaning and painting parts.

I got the roll cage halves cleaned of flash and fitted to the chassis.

Looking at that where I was at with it. I thought there was to much Aluminum in the floor pan. So I masked it off and painted the part of the frame that is molded into it Light Gray. Now with the cage halves done it looks more like a real car.

Also applied the first of many decals. So now it off to finish the tires and see how the wheels will look.
Thanks for looking in all comments and questions are welcome.
Guest- Guest
 Re: Hotwheels Camaro
Thanks for looking in guys. It's time for the second update. It may not look like much has been done but it is quite a bit. I have been busy working on a playhouse I am building for the grandkids and walking 2 miles everyday so my build time is smaller than it used to be. Only about 6 0r 8 weeks of good weather left for the Harbor this year so things will be back to normal soon. ;)
I decided to let this build fill a couple of spots . One it is the Community build. Number 2 I am going to use it next year in a couple contests that have a "Box Stock" category. What it really means is paint only detail. You have to provide thee instruction sheet in both contests. I have been thinking about this class for a couple years so this is it. The kit really is pretty well detailed so it lends its self to the class well. The other thing is with the big air cleaner and such there is much engine detail to be had. So here is where we are.
Steering rack, Rea rend and wheels and tires are done. I gave the wheels a black wash to bring out the detail. The tires were dull coated after decals were applied.


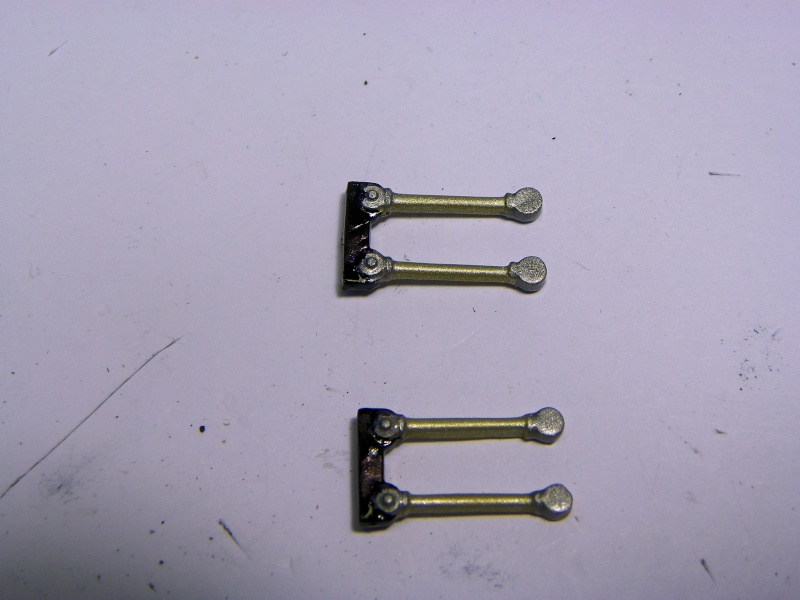
Rear 4 link bars
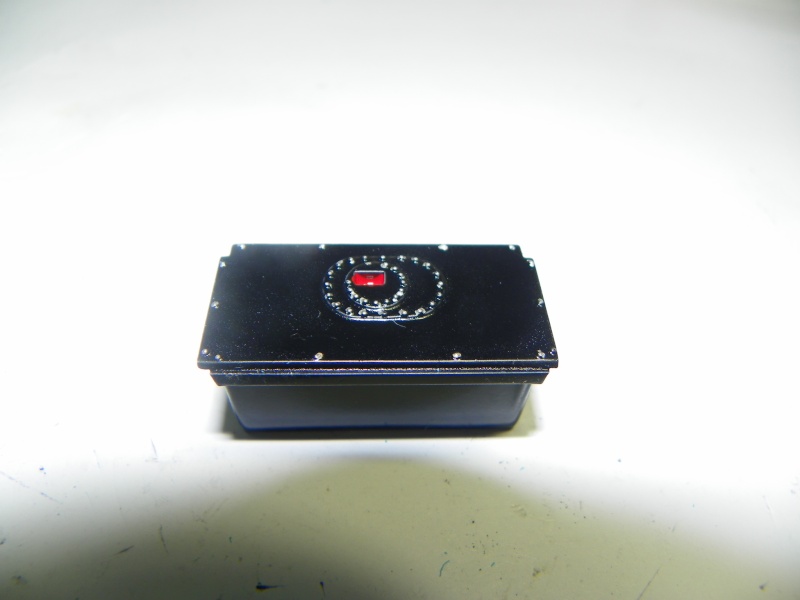
Fuel cell and the rear brace with rear brake cooling tubes and fire extinguisher.

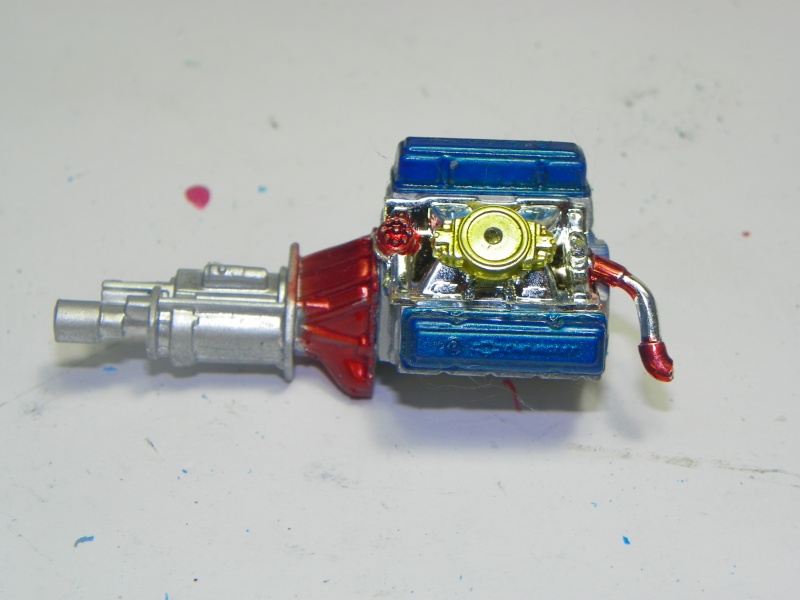
Here is engine and trans.
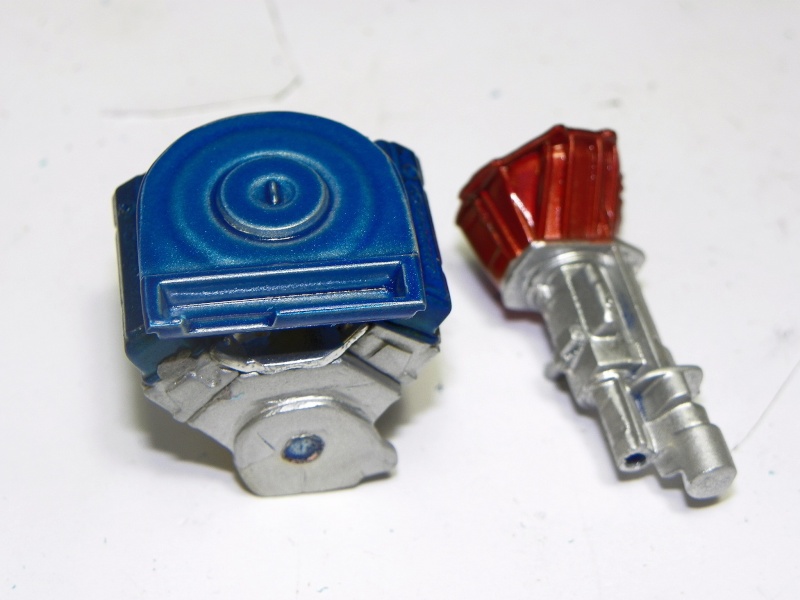
Here it is with the giant air cleaner. You can see what I mean about hiding detail.
Under Pan done in body color.

Body in primer. Max you were right about fitments. The nose was not flat at all were the hood and front valance come together. Got it worked out.

Last for this update is the exhaust system. I air brushed it with a Metalizer called "Burnt Iron". It was an experiment that I kinda like so I will leave it as is.

So that's about it for this week. Thanks for looking in. All comments and questions are welcome.
I decided to let this build fill a couple of spots . One it is the Community build. Number 2 I am going to use it next year in a couple contests that have a "Box Stock" category. What it really means is paint only detail. You have to provide thee instruction sheet in both contests. I have been thinking about this class for a couple years so this is it. The kit really is pretty well detailed so it lends its self to the class well. The other thing is with the big air cleaner and such there is much engine detail to be had. So here is where we are.
Steering rack, Rea rend and wheels and tires are done. I gave the wheels a black wash to bring out the detail. The tires were dull coated after decals were applied.


Rear 4 link bars

Fuel cell and the rear brace with rear brake cooling tubes and fire extinguisher.


Here is engine and trans.

Here it is with the giant air cleaner. You can see what I mean about hiding detail.

Under Pan done in body color.

Body in primer. Max you were right about fitments. The nose was not flat at all were the hood and front valance come together. Got it worked out.

Last for this update is the exhaust system. I air brushed it with a Metalizer called "Burnt Iron". It was an experiment that I kinda like so I will leave it as is.

So that's about it for this week. Thanks for looking in. All comments and questions are welcome.
Guest- Guest
 Re: Hotwheels Camaro
Thanks to everyone that's following along.
It's a rainy day here in the Harbor so I got a little done.I got the body and body panels in color.


Also got the firewall that goes behind the driver done.

And started working on the detail of the rollcage sides.

Now to tidy up the painting a little and on to chassis. I want to have it done and the body fitted before I apply decals. I was thinking I should have done the same with the body, but I wanted to know how it would look. The Blue is a little darker than I thought it would be but it will be ok.
It's a rainy day here in the Harbor so I got a little done.I got the body and body panels in color.


Also got the firewall that goes behind the driver done.

And started working on the detail of the rollcage sides.

Now to tidy up the painting a little and on to chassis. I want to have it done and the body fitted before I apply decals. I was thinking I should have done the same with the body, but I wanted to know how it would look. The Blue is a little darker than I thought it would be but it will be ok.
Guest- Guest
 Re: Hotwheels Camaro
Thanks to everyone following along.
Well since the last update I have been working on it a little. We are still having a nice summer here and I have been trying to get the Grand kids Playhouse finished be fore the rainy season hits.
While looking at the box art car, trying to figure out some on the parts not very good directions with this kit, I found out it is a two tone paint job with decals. I was the most surprised one. So I mask it off and shot the bottom if Dulpi-Color Artic White.

Then I started working on more of the interior stuff. Got the transmission cover all done . It holds two MSD ignition boxes, actually it holds all the electronics for the car. Looks like a primary set of controllers and then a backup for each.

Got the dash done and decaled.

Thanks for following along. I'll be back soon with more. Got the instrument panel about half done.
Well since the last update I have been working on it a little. We are still having a nice summer here and I have been trying to get the Grand kids Playhouse finished be fore the rainy season hits.
While looking at the box art car, trying to figure out some on the parts not very good directions with this kit, I found out it is a two tone paint job with decals. I was the most surprised one. So I mask it off and shot the bottom if Dulpi-Color Artic White.

Then I started working on more of the interior stuff. Got the transmission cover all done . It holds two MSD ignition boxes, actually it holds all the electronics for the car. Looks like a primary set of controllers and then a backup for each.

Got the dash done and decaled.

Thanks for following along. I'll be back soon with more. Got the instrument panel about half done.
Guest- Guest
 Re: Hotwheels Camaro
Well it has been awhile but I am finally ready to make an update.
I got the decals on the body and a couple coats of clear on it. When I was looking at the box art car I realized that I had paint it wrong. So I mask off and repainted the bottom of the body. When I was putting decals on I realized that I had painted it wrong yet again. Too late to change it now so this is how it will be.
here is a mock up of the decaled body.
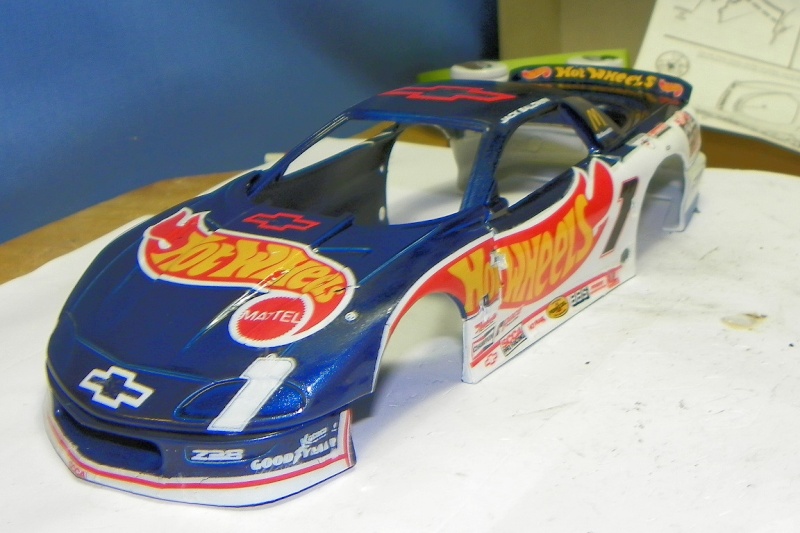

So with that all done and waiting for the clear to gas out a little I started the assembly. Started building from the chassis up.


Didn't take long to get to this point.


With all that done I had to see how it was going to sit so I did a wheel and tire mock up.

Got the engine finished and mocked up.

Then engine, tranny and exhaust into chassis.
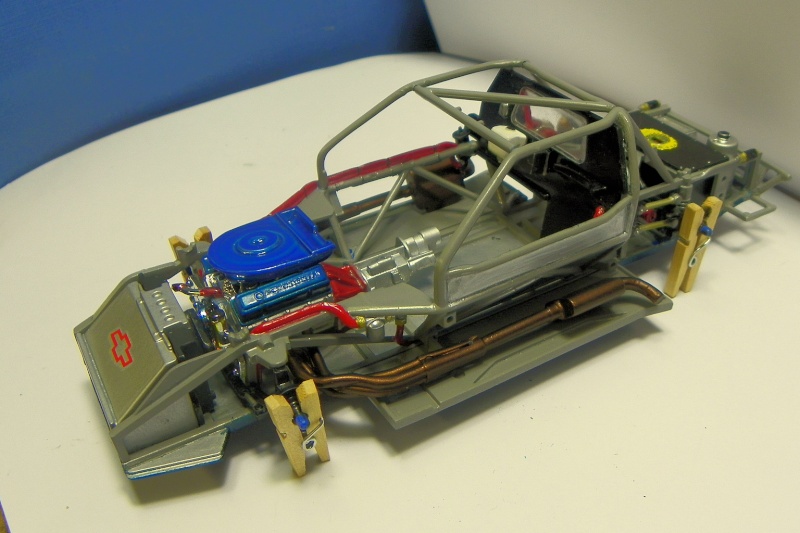
Then I found the first of the fitment issues that Max warned me about. The exhaust on the passenger side of the car hits the fuel pump. If you tip it so the muffler clears the fuel pump then the exhaust pipe doesn't line up with the outlet hole in the body. I will work around this just not sure which way I will go to do it.

So that's where we are at for now. In Washington we have two seasons the warm rain season and the cold rain season, so now that the cold rain season is here I will be able to get back to the bench and set the Honey Do list aside.
Thanks for looking in all comments and questions are welcome.
I got the decals on the body and a couple coats of clear on it. When I was looking at the box art car I realized that I had paint it wrong. So I mask off and repainted the bottom of the body. When I was putting decals on I realized that I had painted it wrong yet again. Too late to change it now so this is how it will be.
here is a mock up of the decaled body.


So with that all done and waiting for the clear to gas out a little I started the assembly. Started building from the chassis up.


Didn't take long to get to this point.


With all that done I had to see how it was going to sit so I did a wheel and tire mock up.

Got the engine finished and mocked up.

Then engine, tranny and exhaust into chassis.

Then I found the first of the fitment issues that Max warned me about. The exhaust on the passenger side of the car hits the fuel pump. If you tip it so the muffler clears the fuel pump then the exhaust pipe doesn't line up with the outlet hole in the body. I will work around this just not sure which way I will go to do it.

So that's where we are at for now. In Washington we have two seasons the warm rain season and the cold rain season, so now that the cold rain season is here I will be able to get back to the bench and set the Honey Do list aside.
Thanks for looking in all comments and questions are welcome.
Guest- Guest
 Re: Hotwheels Camaro
Thanks for following along everyone. This will be the last update before the New Model Announcement. Things went fairly well with this build until the end. So drat the luck here it is anyway.
I kept putting stuff on the chassis until it was a pretty nice looking piece all by it's self.
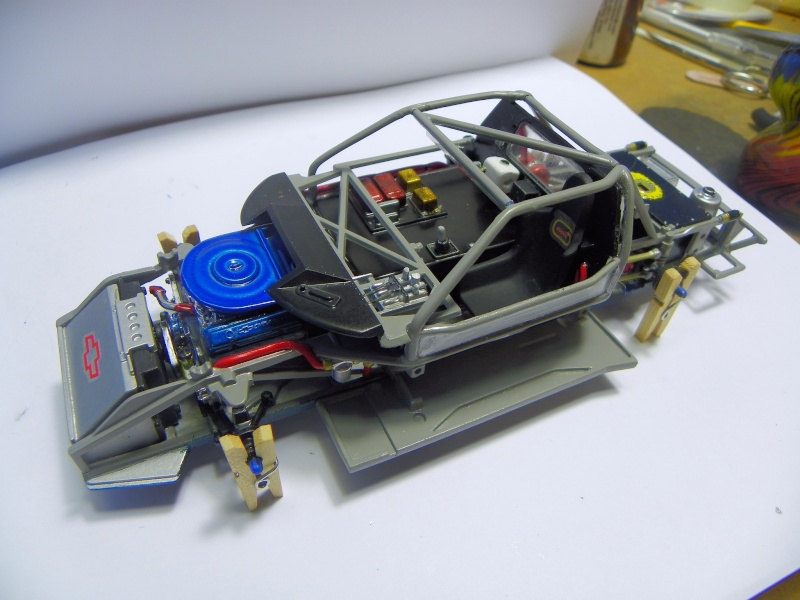

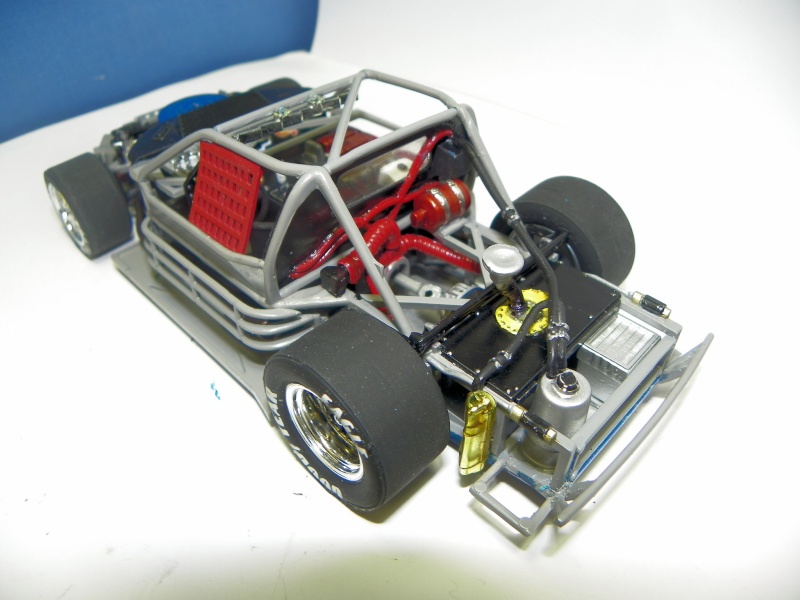

Even got the exhaust fitment problems worked out.


With that behind me I moved on to the body. So I painted the glass with an Elmer's Black Paint Pen and put the last decal on.

Then while putting the glass into the body I dropped the rear glass and then stepped on it and broke it in two.

Man I could not believe my luck. Clumsy old men should be careful where they put their feet. Lesson Learned. I put it together anyhow and will set it on the shelf nose out.
So now I am off to finish mounting the body and then the NMA. Thanks to everyone that followed along. Your comments and questions just make it all that much more fun.
I kept putting stuff on the chassis until it was a pretty nice looking piece all by it's self.


Even got the exhaust fitment problems worked out.


With that behind me I moved on to the body. So I painted the glass with an Elmer's Black Paint Pen and put the last decal on.

Then while putting the glass into the body I dropped the rear glass and then stepped on it and broke it in two.

Man I could not believe my luck. Clumsy old men should be careful where they put their feet. Lesson Learned. I put it together anyhow and will set it on the shelf nose out.
So now I am off to finish mounting the body and then the NMA. Thanks to everyone that followed along. Your comments and questions just make it all that much more fun.
Guest- Guest
 Re: Hotwheels Camaro
Thanks Paul. I enjoyed the build. Just wish the nose would have sit a little better on the finished build.
Guest- Guest
 Similar topics
» Hotwheels Camaro
» AMT 96 Camaro
» At last the Camaro is done
» Camaro is done
» Where's my '68 Camaro ?
» AMT 96 Camaro
» At last the Camaro is done
» Camaro is done
» Where's my '68 Camaro ?
Skid's :: Works In Progress :: Race cars
Page 1 of 1
Permissions in this forum:
You cannot reply to topics in this forum