
Seat modification

Seat modification
![]() by webby Tue 16 Jun 2015, 5:10 am
by webby Tue 16 Jun 2015, 5:10 am
Rocket Science it ain't! Here's how I improve the look of kit seats- especially older kits.
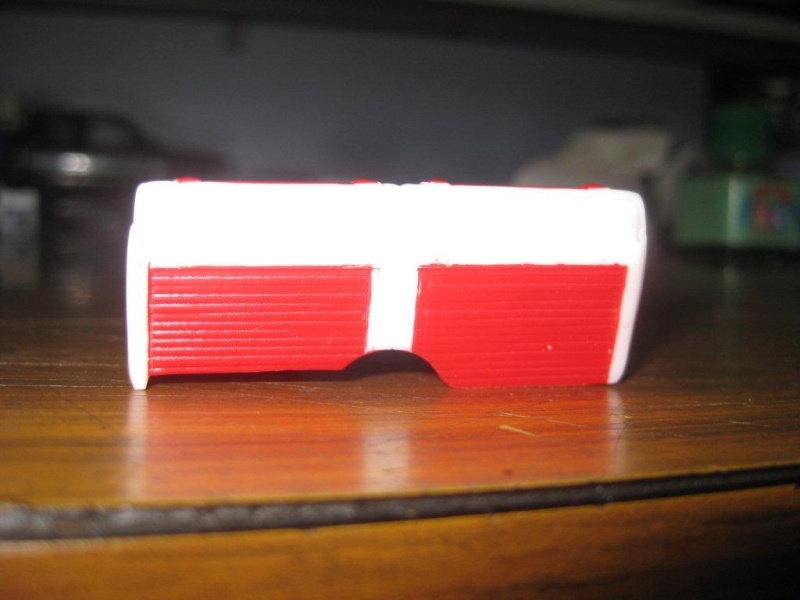
This bench seat is from the Lindberg '61 Impala. On the RHS, the seat back goes all the way to the floor. I've never seen that on the 1:1 cars of the era, where would the back seat passengers feet go?
My cure is to cut a portion away, as on the LHS. I do this on bucket seats too, and since this kit is a convertible we see more of the interior, so its worth doing.
Other modification is to one piece seats- think older AMT kits. The front of the seat cushion on the left has an unnatural angle to it. The seat has
on the right has a more typical profile. No old examples of these seats in the stash, so bear with my cheesy diagrams.

I run 2 vertical cuts upwards at the front of each corner, stopping at the underside of the cushion. We're looking at the front of the seat. Once
you've made the cuts bend the section back to get the correct angle. You may have to run a groove across between the vertical cuts so it will bend back.

Bend it back & secure it in position with a piece of sprue glued behind it. Once cured, trim it so the lower edge is flush with the cushion sides.
Cut reminants of the cushion sides flush with the newly positioned cushion front. Fill & sand with your prefered method.
A much more realistic seat is the result. I sometimes remove a small section of the cushion front away, similar to but smaller to the mod made to the back of the seat.
Cheers,
Chris
This bench seat is from the Lindberg '61 Impala. On the RHS, the seat back goes all the way to the floor. I've never seen that on the 1:1 cars of the era, where would the back seat passengers feet go?
My cure is to cut a portion away, as on the LHS. I do this on bucket seats too, and since this kit is a convertible we see more of the interior, so its worth doing.
Other modification is to one piece seats- think older AMT kits. The front of the seat cushion on the left has an unnatural angle to it. The seat has
on the right has a more typical profile. No old examples of these seats in the stash, so bear with my cheesy diagrams.
I run 2 vertical cuts upwards at the front of each corner, stopping at the underside of the cushion. We're looking at the front of the seat. Once
you've made the cuts bend the section back to get the correct angle. You may have to run a groove across between the vertical cuts so it will bend back.
Bend it back & secure it in position with a piece of sprue glued behind it. Once cured, trim it so the lower edge is flush with the cushion sides.
Cut reminants of the cushion sides flush with the newly positioned cushion front. Fill & sand with your prefered method.
A much more realistic seat is the result. I sometimes remove a small section of the cushion front away, similar to but smaller to the mod made to the back of the seat.
Cheers,
Chris

webby- Moderator

- Posts : 2194
Join date : 2013-02-27
Age : 64
Location : Strathpine Australia. Built over WW2 airstrip
Re: Seat modification
![]() by Guest Tue 16 Jun 2015, 5:54 pm
by Guest Tue 16 Jun 2015, 5:54 pm
Thanks, Chris. It's the little things like this that make for award winning builds.
Guest- Guest
Permissions in this forum:
You cannot reply to topics in this forum|
|
|