
Monogram Panzer IV
+3
harron68
pete s
Sam
7 posters
Skid's :: Works In Progress :: Military
Page 2 of 2
Page 2 of 2 •  1, 2
1, 2
Re: Monogram Panzer IV
![]() by Guest Wed 17 Dec 2014, 12:23 pm
by Guest Wed 17 Dec 2014, 12:23 pm
Skid wrote:That's looking good John. The darkside is taking hold of you!! LOL
Did you do the tracks the way I told you or did you 'stretch' them?
I did them the way you explained Yoda.

Guest- Guest
Re: Monogram Panzer IV
![]() by Skid Wed 17 Dec 2014, 5:15 pm
by Skid Wed 17 Dec 2014, 5:15 pm
The apprentice master from he learn!! 
_________________
Al.
Constructive criticism is always welcome.
“Success always demands a greater effort.” Winston Churchill
"Success is failure turned inside out" Unknown

Skid- Admin
- Posts : 7128
Join date : 2013-02-15
Age : 75
Location : Newcastle. Good Old Blighty. -

Guest- Guest
Re: Monogram Panzer IV
![]() by Guest Mon 22 Dec 2014, 9:06 pm
by Guest Mon 22 Dec 2014, 9:06 pm
Got home from the wedding yesterday afternoon. The plane picked up a tailwind and made the 1-1/2 hour trip in just over an hour. Consequently I was able to get a bit done yesterday and pretty much have finished the model this morning.
Here is the current version of the tank.


There are still a couple of small detail items to be done. The tank actually came out darker than I had intended, but I still like the effect that it has. I guess it is a matter of learning washes.
I have also completed the base. Here are a few photos showing how it went together.

The tiles were snapped and glued to the base one by one.


The tiles were then painted, aged and the gaps filled with a turf mixture.
Here is the finished model.

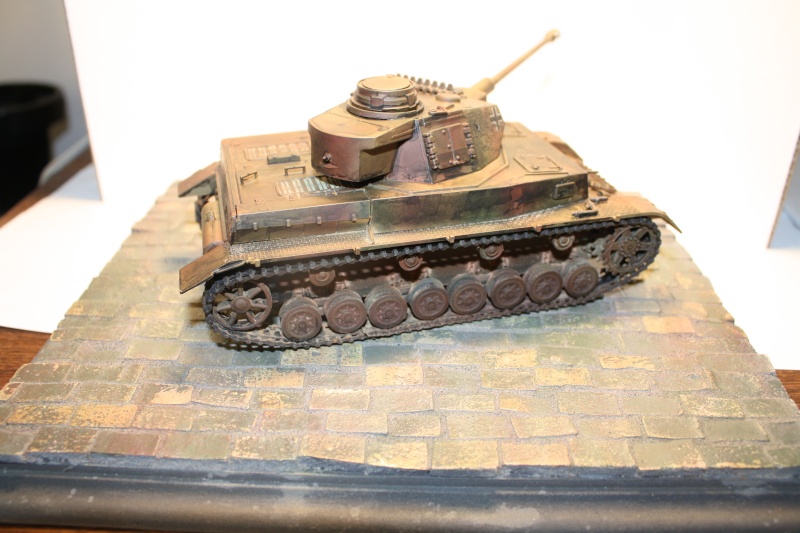
It has a number of corrections needed and a few finish items that I missed, BUT I don't think it's too bad a try for my first trip to the Dark Side in many years. I welcome any suggestions or criticism guys.
Here is the current version of the tank.
There are still a couple of small detail items to be done. The tank actually came out darker than I had intended, but I still like the effect that it has. I guess it is a matter of learning washes.
I have also completed the base. Here are a few photos showing how it went together.
The tiles were snapped and glued to the base one by one.
The tiles were then painted, aged and the gaps filled with a turf mixture.
Here is the finished model.
It has a number of corrections needed and a few finish items that I missed, BUT I don't think it's too bad a try for my first trip to the Dark Side in many years. I welcome any suggestions or criticism guys.
Guest- Guest
Re: Monogram Panzer IV
![]() by beowulf Mon 22 Dec 2014, 9:15 pm
by beowulf Mon 22 Dec 2014, 9:15 pm
looks pretty good to me!................dark side?...you will be adding some figures next! 
i like the base, what did you make it from?.....how did you get the shade variation?
i like the base, what did you make it from?.....how did you get the shade variation?

beowulf- Resident member

- Posts : 2469
Join date : 2013-05-02
Age : 62
Location : Monkey Hanger Town, UK
Re: Monogram Panzer IV
![]() by Guest Mon 22 Dec 2014, 9:37 pm
by Guest Mon 22 Dec 2014, 9:37 pm
That looks great, I like the simple base (even though a lot went into creating it), it gives the main piece the focus.
The weathering is nice and hap-hazard which gives a realistic edge to the model, and is very well done.
I'd be inclined to give the track cover-plates a little dent here and there but I like the battle damaged look.
Dark side has another honorary member by the looks of it.
The weathering is nice and hap-hazard which gives a realistic edge to the model, and is very well done.
I'd be inclined to give the track cover-plates a little dent here and there but I like the battle damaged look.
Dark side has another honorary member by the looks of it.
Guest- Guest
Re: Monogram Panzer IV
![]() by Guest Mon 22 Dec 2014, 10:27 pm
by Guest Mon 22 Dec 2014, 10:27 pm
beowulf wrote:looks pretty good to me!................dark side?...you will be adding some figures next!
i like the base, what did you make it from?.....how did you get the shade variation?
Paul: I use these to make the base.

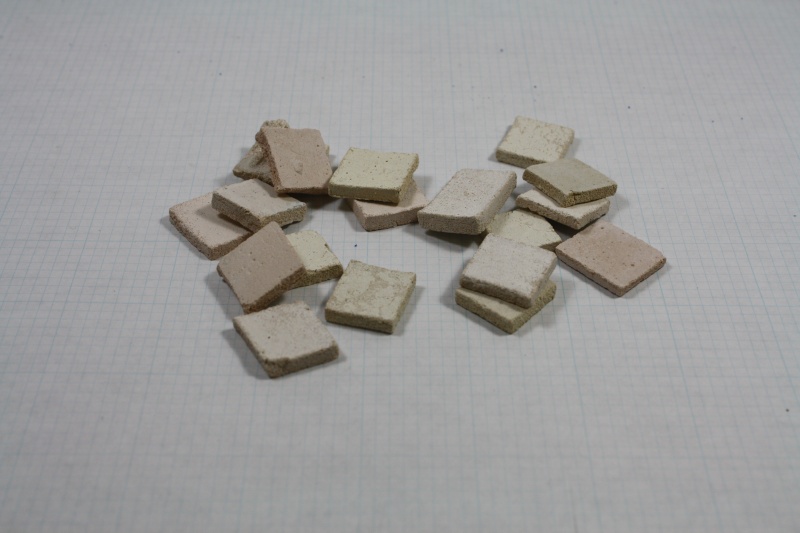
I score the tiles with a razor saw --- use an old one because it will be done for after this. I then snap the tiles using pliers.

I use a precut fiber base and glue the tiles on one by one.


After the tiles have dried I spray them with a flat clear. This is followed by spraying a medium gray Craft Paint which is allowed to dry. I then fill the gaps with a mixture that represents soil. I don't measure the ingredients but here is an approximate receipe.
1. Medium grit sand.
2. Medium gray craft paint.
3. Woodland Senics ground turf.
4. Water.
5. White glue.
I fill the gaps with the mixture and then while it is still damp I rub the excess off with a damp cloth. It is similar to grouting tile. Rubbing the tiles will also result in the craft paint being removed from high points.
After that I again spray the tiles with a flat clear. This is followed by mist coating various colors with an airbrush. Finally, I dry brush various colors until I have the effect I want.

That's it Paul----hope it helps.
Guest- Guest
Re: Monogram Panzer IV
![]() by beowulf Mon 22 Dec 2014, 11:14 pm
by beowulf Mon 22 Dec 2014, 11:14 pm
cheers for that john, will have to hunt down some of those tiles
beowulf- Resident member
- Posts : 2469
Join date : 2013-05-02
Age : 62
Location : Monkey Hanger Town, UK
Re: Monogram Panzer IV
![]() by pete s Mon 22 Dec 2014, 11:58 pm
by pete s Mon 22 Dec 2014, 11:58 pm
Looks great John, both the tank and the base. Master Yoda will be proud!

pete s- Intermediate Member

- Posts : 797
Join date : 2013-02-26
Age : 73
Location : Beaverton, OR

Re: Monogram Panzer IV
![]() by Skid Thu 25 Dec 2014, 9:51 pm
by Skid Thu 25 Dec 2014, 9:51 pm
The tank is looking good John but the base is superb. This small air holes in a few tiles, lend a real air of authenticity IMO. Please make sure they don't get covered up in the dio!
_________________
Al.
Constructive criticism is always welcome.
“Success always demands a greater effort.” Winston Churchill
"Success is failure turned inside out" Unknown
Skid- Admin
- Posts : 7128
Join date : 2013-02-15
Age : 75
Location : Newcastle. Good Old Blighty. -
Page 2 of 2 • 1, 2
» Panzer IV, Revell 1/72
» Panzer IV, Tamiya, 1/35
» Panzer Kampfwagen V (Panther) 1:35
» Panzer Kampfwagen II Ausf. F/G
» Panzer IV, braille scale
» Panzer IV, Tamiya, 1/35
» Panzer Kampfwagen V (Panther) 1:35
» Panzer Kampfwagen II Ausf. F/G
» Panzer IV, braille scale
Skid's :: Works In Progress :: Military
Page 2 of 2
Permissions in this forum:
You cannot reply to topics in this forum|
|
|