Panzer Kampfwagen II Ausf. F/G
5 posters
Skid's :: Works In Progress :: Dioramas
Page 1 of 2
Page 1 of 2 • 1, 2 
 Panzer Kampfwagen II Ausf. F/G
Still have my AFV head on so I'm going to do another 1/35th scale tank dio.
This one will be based in an urban area somewhere in Europe using this kit:...

... and this base:

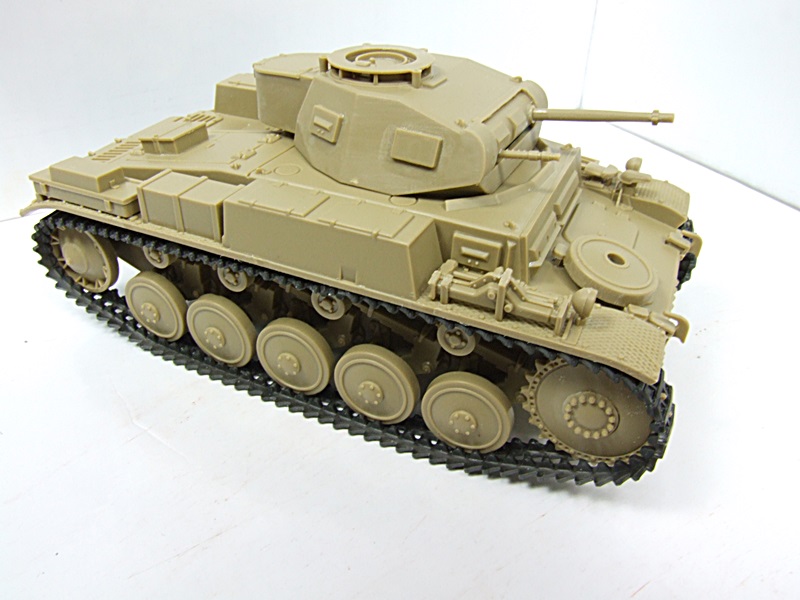
I have the tank complete and ready to start paint and weathering. It's another baby Panzer but it's an early 'motorized. Tamiya kit and not up to the same standard as my recent Tasca Panzer.


This one will be based in an urban area somewhere in Europe using this kit:...

... and this base:

I have the tank complete and ready to start paint and weathering. It's another baby Panzer but it's an early 'motorized. Tamiya kit and not up to the same standard as my recent Tasca Panzer.


_________________
Al.
Constructive criticism is always welcome.
“Success always demands a greater effort.” Winston Churchill
"Success is failure turned inside out" Unknown
 Re: Panzer Kampfwagen II Ausf. F/G
I made a start on the paint/weathering today.
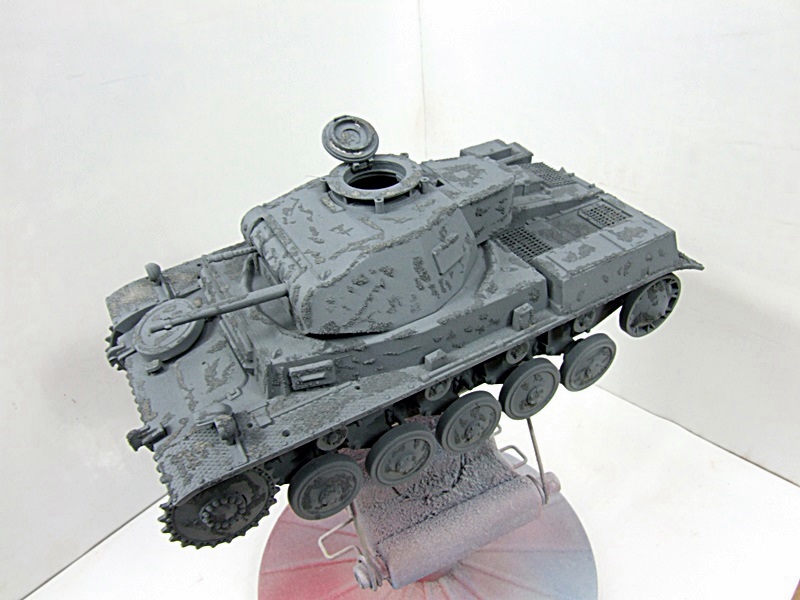
First I sprayed dark grey followed by a coat of hair spray.

Then, using a very fine paint brush, I applied small amounts of water and covered this with Baking Soda.

When all the flaking/chipping masking was done and dry, I sprayed again, this time with a lighter grey.

Now I ran warm water over the tank and washed of the baking sod with a soft brush.

Next up was a couple of light coats of clear gloss followed by the decals.

Finally for tonight, I gave it all a couple of coats of Testor's Dullcote.


Somewhere along the way, I added some mesh over the cooling vents.

Here endeth the first stage of the weathering. (Now for the messy bit.... LOL)
First I sprayed dark grey followed by a coat of hair spray.

Then, using a very fine paint brush, I applied small amounts of water and covered this with Baking Soda.

When all the flaking/chipping masking was done and dry, I sprayed again, this time with a lighter grey.

Now I ran warm water over the tank and washed of the baking sod with a soft brush.

Next up was a couple of light coats of clear gloss followed by the decals.

Finally for tonight, I gave it all a couple of coats of Testor's Dullcote.


Somewhere along the way, I added some mesh over the cooling vents.

Here endeth the first stage of the weathering. (Now for the messy bit.... LOL)
_________________
Al.
Constructive criticism is always welcome.
“Success always demands a greater effort.” Winston Churchill
"Success is failure turned inside out" Unknown
 Re: Panzer Kampfwagen II Ausf. F/G
COOL !
You'll have a job matching the degree of realism you got on that last beauty!
You'll have a job matching the degree of realism you got on that last beauty!

Geezerman- Advanced Member

- Posts : 3651
Join date : 2013-02-24
Age : 89
Location : Gulf coast of central Florids
 Re: Panzer Kampfwagen II Ausf. F/G
_________________
Al.
Constructive criticism is always welcome.
“Success always demands a greater effort.” Winston Churchill
"Success is failure turned inside out" Unknown
 Re: Panzer Kampfwagen II Ausf. F/G
Hi Al,
Looking very good Sir, and many thanks for the weathering tip, is this the same type of effect as the salt method I have heard about...
Andy...
Looking very good Sir, and many thanks for the weathering tip, is this the same type of effect as the salt method I have heard about...
Andy...
_________________
Andy...
Life isn't about how to survive the storm, but how to dance in the rain...
 Re: Panzer Kampfwagen II Ausf. F/G
Andy..... it's exactly the same.
However, salt grains are a bit big to use in 1/35 scale methinks, so I hit on the idea of the same technique but using baking powder instead...... and it worked!!!
In their infinite wisdom, Tamiya failed to include a radio aerial base on this one, so I made one up from scratch. It's not perfect by any means, but it will do. As they say hereabours, "It's near anuf fi pit wark' The aerials on these seem to quite thick, so I might stay with the styrene. If not I'll use some finer wire.

_________________
Al.
Constructive criticism is always welcome.
“Success always demands a greater effort.” Winston Churchill
"Success is failure turned inside out" Unknown
 Re: Panzer Kampfwagen II Ausf. F/G
Hi Al,Skid wrote:Andy..... it's exactly the same.
However, salt grains are a bit big to use in 1/35 scale methinks, so I hit on the idea of the same technique but using baking powder instead...... and it worked!!!
Many thanks for that, I have yet to try weathering, but seeing this and other methods used on this forum really helps with the learning process...
Andy...
_________________
Andy...
Life isn't about how to survive the storm, but how to dance in the rain...
 Re: Panzer Kampfwagen II Ausf. F/G
You have really been into the Dioramas lately. Nothing wrong with that. I am very interested in what you are doing. Learning every step of the way. This one also loks to off to a great start,
Guest- Guest
 Re: Panzer Kampfwagen II Ausf. F/G
Thanks Buck.
Andy.... you should give it a try.
It's so much fun doing this and a huge learning curve too. It's going to stand me in good stead as next year I'm planning to do Revell's 1950 Oldsmobile as an abandoned early Nascar shell dio.
The next stage was to add some 'light' (as in colour) rust. This is to be followed by some 'dark' rust.


_________________
Al.
Constructive criticism is always welcome.
“Success always demands a greater effort.” Winston Churchill
"Success is failure turned inside out" Unknown
 Re: Panzer Kampfwagen II Ausf. F/G
_________________
Al.
Constructive criticism is always welcome.
“Success always demands a greater effort.” Winston Churchill
"Success is failure turned inside out" Unknown
 Re: Panzer Kampfwagen II Ausf. F/G
I can see the rust flying off of it as they fire the gun.

Guest- Guest
 Re: Panzer Kampfwagen II Ausf. F/G
LOL....It might just shake itself to bits, if it's gun was fired in this condition.I can see the rust flying off of it as they fire the gun.Surprised wrote:
The base arrived this morning. It's made from plaster......


...... consequently, it does have some bubble holes. However, in this instance I think they actualy enhance the base.

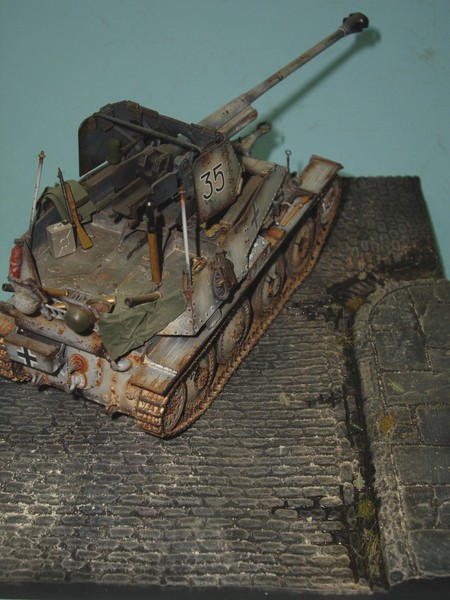
I'm now experimenting with colours for the cobbles. Grey is the easy choice but the tank is basically grey, so I'd like a contrast. I'm trying, not yet very successfully, to replicate granite cobbles such as in this photo.

My so far unsuccessfull attempt!!! LOl.

_________________
Al.
Constructive criticism is always welcome.
“Success always demands a greater effort.” Winston Churchill
"Success is failure turned inside out" Unknown
 Re: Panzer Kampfwagen II Ausf. F/G
_________________
Al.
Constructive criticism is always welcome.
“Success always demands a greater effort.” Winston Churchill
"Success is failure turned inside out" Unknown
 Re: Panzer Kampfwagen II Ausf. F/G
_________________
Al.
Constructive criticism is always welcome.
“Success always demands a greater effort.” Winston Churchill
"Success is failure turned inside out" Unknown
 Re: Panzer Kampfwagen II Ausf. F/G
Hi Al,
Love the cobbles, they look so real, mind if I ask how/what you use to get this effect please...
Andy...
Love the cobbles, they look so real, mind if I ask how/what you use to get this effect please...
Andy...
_________________
Andy...
Life isn't about how to survive the storm, but how to dance in the rain...
 Re: Panzer Kampfwagen II Ausf. F/G
Thanks Andy.
I had two previous failed attempts.
For the third attempt, I sprayed the base with Tamiya Flat Earth (XF-52). followed by several coats of clear gloss until it was nice and glossy.
Finally, I made up a very thin wash with Tamiya Khaki Drab (XF-51) and water. I then gave the base two coats of this and let it dry naturally.
The wash settled in the gaps between the cobbles and on the tops of the cobbles. The result is what you see.
_________________
Al.
Constructive criticism is always welcome.
“Success always demands a greater effort.” Winston Churchill
"Success is failure turned inside out" Unknown
 Re: Panzer Kampfwagen II Ausf. F/G
_________________
Al.
Constructive criticism is always welcome.
“Success always demands a greater effort.” Winston Churchill
"Success is failure turned inside out" Unknown
 Re: Panzer Kampfwagen II Ausf. F/G
I feel the cobbles are about as good as possible! Very good job and the experience you got will add to future dio works.
I haven't seen much of the WWII color tank fotos, but in a year or two of tank life, rusting varied depending on the front it was at. Tank life wasn't more than a few years unless sent back for upgrading to usually bigger gun and more armor. Nice work and getting the paint on the treads adds a lot. Thanx for a pleasurable series on tank painting and cobble works.
I haven't seen much of the WWII color tank fotos, but in a year or two of tank life, rusting varied depending on the front it was at. Tank life wasn't more than a few years unless sent back for upgrading to usually bigger gun and more armor. Nice work and getting the paint on the treads adds a lot. Thanx for a pleasurable series on tank painting and cobble works.
harron68- Advanced Member

- Posts : 3621
Join date : 2013-02-28
Age : 74
Location : MIDWEST
Page 1 of 2 • 1, 2 
 Similar topics
» Panzer Kampfwagen V (Panther) 1:35
» Tasca Panzer Pz.Kpfw.II Ausf.L "Luchs" in winter diorama
» Panther Kampfwagen V
» Sturmgeschutz III Ausf B 'Stug', Italerai, 1/35
» Panzer IV, Tamiya, 1/35
» Tasca Panzer Pz.Kpfw.II Ausf.L "Luchs" in winter diorama
» Panther Kampfwagen V
» Sturmgeschutz III Ausf B 'Stug', Italerai, 1/35
» Panzer IV, Tamiya, 1/35
Skid's :: Works In Progress :: Dioramas
Page 1 of 2
Permissions in this forum:
You cannot reply to topics in this forum


