
1966 Buick Wildcat
Skid's :: Works In Progress :: Road cars
Page 1 of 2 • 1, 2 ![]()

1966 Buick Wildcat
![]() by Guest Thu 28 Nov 2013, 9:38 pm
by Guest Thu 28 Nov 2013, 9:38 pm
I recently got reacquainted with an old friend on mine. Facebook does work. When I went into the Army in 1965 she was my girlfriend. Now many years later we are both happily married with Grandkids. She has 4 different types of cancer and things don't look good for her team. She was telling me about her first car. A 1966 Buick Wildcat 365 Horsepower 401 Nailhead. When she was 9 months pregnant she was winning with the car at the drag strip in Bremerton. 2 weeks after winning the track Sportsman Championship she gave birth to her first son. Sold the car, bought a truck loaded all her stuff up and moved to San Diego to be with her husband. She was telling me that she wished she had never sold the car. So this is her car.
I also wanted to do this build to try out 2 new , to me, foiling techniques. The first is to foil the badges and emblems on the car before you paint it. I have seen models with this done but never tried it. The second is to foil the trim with Aluminum Foil and glue instead of BMF. Again something I have seen done on models but never tried. I talked with Ron Martinovich about it as he does it to all his models. The foil never goes bad. Plus it is very cheap to do. Ron said to go to the dollar store and buy a roll of non- heavy duty foil. What you are after here is thin. The adhesive is from Microscale. it is called metal Foil Adhesive. I already have a bunch of Micro Brushes that I use working with Mek. So all that said here we go.
Starting with this kit.

This is one of the old AMT kits that had a metal axle going through the engine. So I crammed the hole full of styrene and let some MEK seep down through it to fit it in place. Filed and sanded the hole then added some putty to finish it off.

I scuffed up the body and shot some Plastikote T-235 Primer on it. But before I did that I BMF'ed the emblems. Whern the primer was dry I took pencil wrapped a piece of old T shirt around the eraser tightly, dipped in into laquer thinner and blotted away the excess. Then lightly I wiped the primer off the emblems.


Being a rookie at this I noticed two things. One you have to rub a little harder than I thought you would. I wanted to easy into it being my first time. Second I must have used the wrong type of pencil because the lacquer thinner began to dissolve my eraser. So with those lessons leaned I charged ahead. I applied the Blue paint , Dulpi-color Bahama Blue Metallic.
Having learned the pencil eraser wasn't the way to go I took a round toothpick and cut the end square.
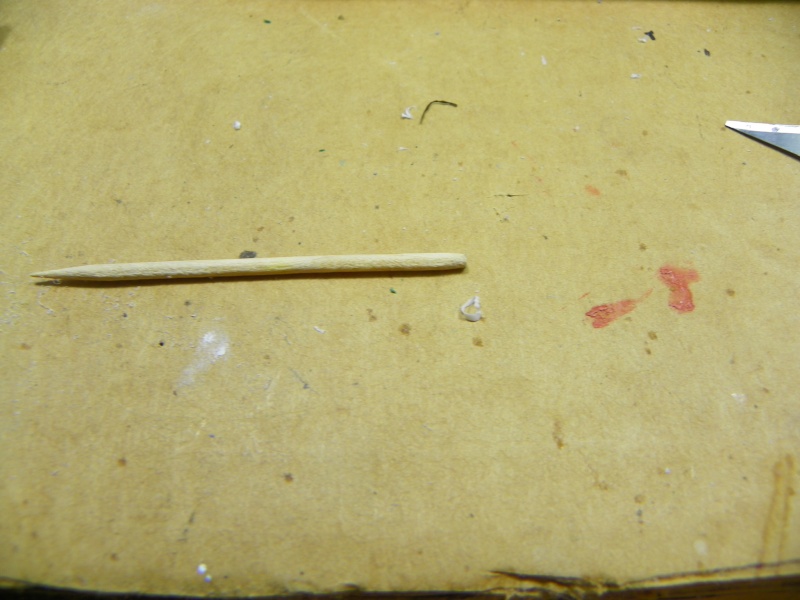
Then using the saw technique I wiped away the paint from the emblems.


The I applied two coats to Dulpi-color Clear coat.
Now it's on to the next step. here is where I am at with that. I bought two types of foil at the dollar store, Not heavy duty. I wasn't sure which was the thinnest and figured I would use it for something.

After doing some measuring with a caliper I went with the top one. It is only a half a thousands thick. .0005"

The bottom box of foil was .oo1" thick just so you will know.
Now using this adhesive I am ready to go to step two.

I have been told that the adhesive is like contact cement you need to put it on and let it tackup before applying the foil. The foil is worked into the trim just like BMF. If you get the adhesive on the paint it can be cleaned with rubbing alcohol. I was warned to use fifty% Isopropyl alcohol and not and not the 90 or 100%. The stronger stuff could harm your paint.
So either this evening or tomorrow I will try my hand at the new foil technique. It is Thanksgiving and family is on it's way here now.
Guest- Guest
Re: 1966 Buick Wildcat
![]() by Johnag Thu 28 Nov 2013, 10:01 pm
by Johnag Thu 28 Nov 2013, 10:01 pm
Whilst I am happy to hear that you have found your old friend Sir, I am so sorry to hear about her having the C, I think she will love this once it is finished...
I've never used the foil stuff, may I ask what it is like and just how hard/easy is it to use please...
Andy...
_________________
Andy...
Life isn't about how to survive the storm, but how to dance in the rain...

Johnag- Moderator

- Posts : 1576
Join date : 2013-10-12
Age : 58
Location : North Wales, U.K... -

Re: 1966 Buick Wildcat
![]() by Skid Thu 28 Nov 2013, 10:59 pm
by Skid Thu 28 Nov 2013, 10:59 pm
On the foil:
Did you have to cut the foil into the letters after applying and before primer??
Looking forward to seeing and hearing about your results with the rest of the foiling.
_________________
Al.
Constructive criticism is always welcome.
“Success always demands a greater effort.” Winston Churchill
"Success is failure turned inside out" Unknown

Skid- Admin
- Posts : 7128
Join date : 2013-02-15
Age : 75
Location : Newcastle. Good Old Blighty. -
Re: 1966 Buick Wildcat
![]() by Guest Fri 29 Nov 2013, 12:02 am
by Guest Fri 29 Nov 2013, 12:02 am
Al, At first I tried to trim around each on the BUICK letters on the hood. That wa not a happening event. So I took one piece of BMF and foiled across all of them. Them with the primer and paint you can't even see the foil. I see in the close up pictures you can see the scratches I put in the body around the rear emblem. In person those are very hard to see.
Now that I have done one and no what to expect I will do this from now on. Then only thing that I think needs improvement is the tool that you wrap the t-shirt piece around to remove the paint. It can't be to soft or it will remove the paint from around the emblem. I am thinking about using the clay sculpting tools I bought to form putty with. I think the metal will work much better. Hope that all makes sense.
Guest- Guest
Re: 1966 Buick Wildcat
![]() by Guest Fri 29 Nov 2013, 1:06 am
by Guest Fri 29 Nov 2013, 1:06 am
Guest- Guest
Re: 1966 Buick Wildcat
![]() by john2308 Fri 29 Nov 2013, 2:44 am
by john2308 Fri 29 Nov 2013, 2:44 am

The foil is bright on one side like chrome and the other side looks dull like unpolished metal.
I think this will make your long lost friend very happy


john2308- Full Member

- Posts : 1142
Join date : 2013-04-10
Age : 79
Location : Phoenix, AZ
Re: 1966 Buick Wildcat
![]() by Geezerman Fri 29 Nov 2013, 3:13 am
by Geezerman Fri 29 Nov 2013, 3:13 am
Good luck with the rest of the build.

Geezerman- Advanced Member

- Posts : 3651
Join date : 2013-02-24
Age : 88
Location : Gulf coast of central Florids
Re: 1966 Buick Wildcat
![]() by harron68 Fri 29 Nov 2013, 3:47 am
by harron68 Fri 29 Nov 2013, 3:47 am
harron68- Advanced Member
- Posts : 3616
Join date : 2013-02-28
Age : 73
Location : MIDWEST
Re: 1966 Buick Wildcat
![]() by Skid Fri 29 Nov 2013, 10:41 am
by Skid Fri 29 Nov 2013, 10:41 am
I thought I'd read about doing it that way, that's why I asked.So I took one piece of BMF and foiled across all of them. Them with the primer and paint you can't even see the foil. wrote:
As a matter of history, IIRC, this is how chrome trim was done before Bare Metal Foil hit the market. We just got lazy is all. LOL
_________________
Al.
Constructive criticism is always welcome.
“Success always demands a greater effort.” Winston Churchill
"Success is failure turned inside out" Unknown
Skid- Admin
- Posts : 7128
Join date : 2013-02-15
Age : 75
Location : Newcastle. Good Old Blighty. -
Re: 1966 Buick Wildcat
![]() by Johnag Fri 29 Nov 2013, 11:06 am
by Johnag Fri 29 Nov 2013, 11:06 am
Hi Mr Z,Zbuckster wrote:Andy, BMF (Bright Metal Foil) is not hard to use at all. It is one of those modelling skills that just takes some time to get working right. With the Cost of BMF going up to close to 8 bucks a sheet. I thought I would try this. Also the bright side of the Aluminium Foil looks more like chrome than the foil does.
Many thanks for explaining this, hope you don't mind, but may I ask, once you apply the BMF do you have to cut around each letter or do you just place a strip over them and then spray on top of the and wipe the bits you want seen...
So sorry for all the questions Sir...
Many thanks...
Andy...
_________________
Andy...
Life isn't about how to survive the storm, but how to dance in the rain...
Johnag- Moderator
- Posts : 1576
Join date : 2013-10-12
Age : 58
Location : North Wales, U.K... -
Re: 1966 Buick Wildcat
![]() by Guest Fri 29 Nov 2013, 5:30 pm
by Guest Fri 29 Nov 2013, 5:30 pm
Guest- Guest
Re: 1966 Buick Wildcat
![]() by Johnag Fri 29 Nov 2013, 8:17 pm
by Johnag Fri 29 Nov 2013, 8:17 pm
Many thanks for the reply Sir...Zbuckster wrote:Andy I had trouble trying to do each letter on their own. So just laid a strip of foil across all the letters and painted it. The foil is not visible when done.
Andy...
_________________
Andy...
Life isn't about how to survive the storm, but how to dance in the rain...
Johnag- Moderator
- Posts : 1576
Join date : 2013-10-12
Age : 58
Location : North Wales, U.K... -
Re: 1966 Buick Wildcat
![]() by stevegt738 Sun 01 Dec 2013, 8:35 pm
by stevegt738 Sun 01 Dec 2013, 8:35 pm
stevegt738- Rookie Member

- Posts : 303
Join date : 2013-05-13
Age : 60
Location : Garfield, Vic, Australia.
Re: 1966 Buick Wildcat
![]() by webby Tue 03 Dec 2013, 5:51 am
by webby Tue 03 Dec 2013, 5:51 am
Cheers,
Chris

webby- Moderator
- Posts : 2194
Join date : 2013-02-27
Age : 64
Location : Strathpine Australia. Built over WW2 airstrip
Re: 1966 Buick Wildcat
![]() by Guest Tue 03 Dec 2013, 3:38 pm
by Guest Tue 03 Dec 2013, 3:38 pm
Nice sentiments related to your build Buck, - hope it goes smoothly.
Guest- Guest
Re: 1966 Buick Wildcat
![]() by Guest Mon 09 Dec 2013, 7:37 pm
by Guest Mon 09 Dec 2013, 7:37 pm
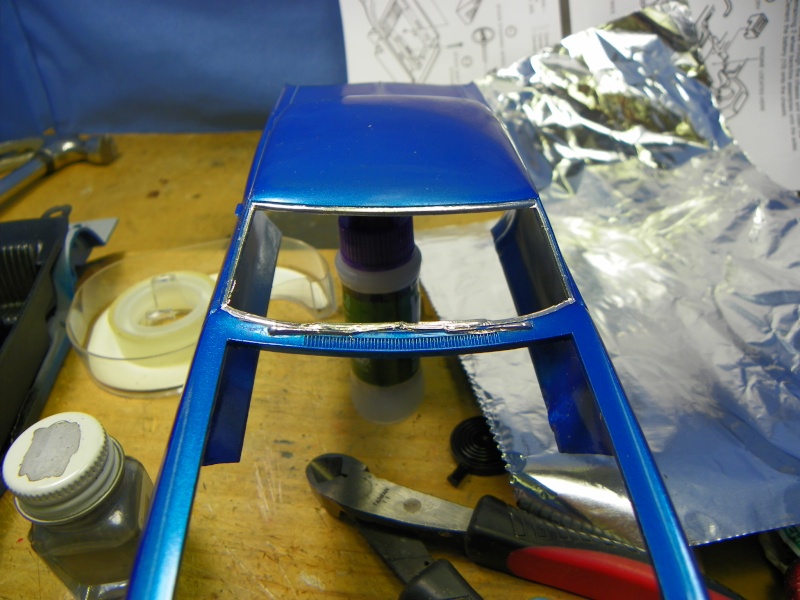
The foiling with the adhesive and Aluminum foil is the main thing so let's talk about that. I can say that so far it is no harder than working with BMF and has a couple pluses. Using a micro brush I applied the adhesive around the front windshield. Then cut a large piece of foil that would cover the windshield trim and the wiper arms. I stuck the foil down. then using a Q-tip I started to burnish the foil down. After I had that done I used an Exacto knife and #11 blade to trim it. I liked being able to do a large area with one piece and not having to worry about the waste of an expensive product. Then did the same with a piece that covered the drip rails and vent windows, again one large piece. Then the rear window.
Here is what it looked like when I was done.

it was at this point that I found a large mistake in the kit. The body side trim is wrong according to the research photos I have found. Had I noticed this at the get go I could have corrected it. Now I would have to sand it off and the start all over with the body. This isn't a contest car and not worth the effort so I have decided to do the trim that is there. I want to see how the foil and adhesive works on a really large area and it will still look ok when done.
I am now a believer in this method, Thank you Ron. I have no hobby shop in my county or the next two counties touching it so BMF and other model supplies have to be shipped in. This is easy, cheap and simple. Plus the roll of Aluminum Foil won't get old and lose it shine and crack into little squares.
I do have a couple other things done like the firewall and most of the engine.

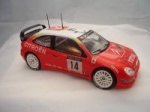
and the wheels and tires. although the center caps appear to be wrong. Instead of a red logo they had a black logo. That will be corrected today.

so today I will finish foiling the body and then post a picture of it for you all to see. Need to drill the distributor and make some plug wires and boots also. So stay tune for another update in the next couple days. All questions and comments are welcome.
Guest- Guest
Re: 1966 Buick Wildcat
![]() by Skid Mon 09 Dec 2013, 7:47 pm
by Skid Mon 09 Dec 2013, 7:47 pm
I like the idea if brushing on the glue first. That means not having to peel back glued foil as in BMF.
_________________
Al.
Constructive criticism is always welcome.
“Success always demands a greater effort.” Winston Churchill
"Success is failure turned inside out" Unknown
Skid- Admin
- Posts : 7128
Join date : 2013-02-15
Age : 75
Location : Newcastle. Good Old Blighty. -
Re: 1966 Buick Wildcat
![]() by Brizio Tue 10 Dec 2013, 3:52 am
by Brizio Tue 10 Dec 2013, 3:52 am
Brizio- Rookie Member
- Posts : 471
Join date : 2013-02-25
dogfish7- Intermediate Member
- Posts : 668
Join date : 2013-02-27
Age : 77
Location : Hoodsport, WA
Geezerman- Advanced Member
- Posts : 3651
Join date : 2013-02-24
Age : 88
Location : Gulf coast of central Florids

Sam- Resident member
- Posts : 1962
Join date : 2013-02-23
Age : 57
Location : Back in Toledo, Oregon
Re: 1966 Buick Wildcat
![]() by Guest Tue 17 Dec 2013, 5:14 pm
by Guest Tue 17 Dec 2013, 5:14 pm
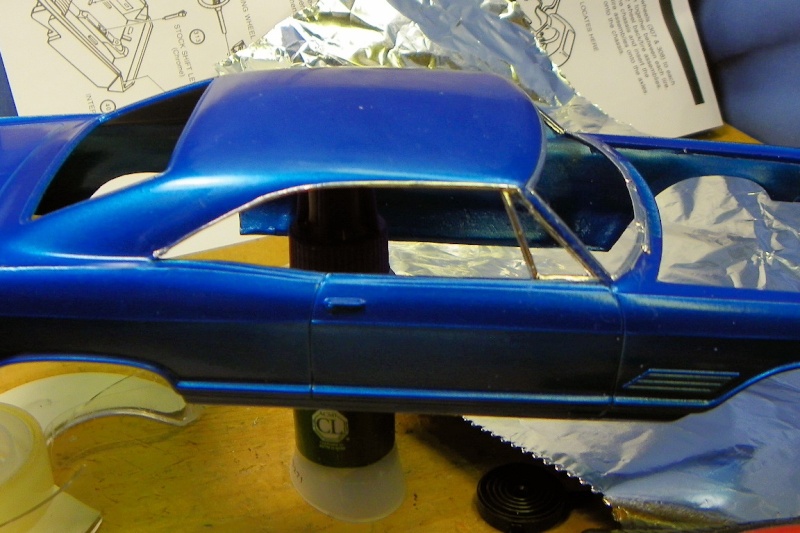
My approach to doing the foil was to apply the Microscale Foil Adhesive to everything that was to be foiled and then put a piece of foil on the body that would cover it.

Then I used normal foiling techniques to smooth the foil into all the little places. I have a set of burnishing tools I use to do that. Then trimmed around everything with a #11 blade. When I was done it looked like this.

Then I used polishing compound to smooth out the paint.

Now that I have that all behind be it is on to the interior. I have some foil work to do in it but will use BMF to do that, I want to use up what I have left.
I should have another update soon on that. Don't be afraid to try the foil and glue it is very simple to do. When I was done there were a couple places where I got adhesive on the paint or it squished out form under the foil. I dipped a Q-tip into 51% Alcohol, squeezed it out a little and wiped the adhesive off with no damage to the paint. Easy pleasy.
Guest- Guest
Re: 1966 Buick Wildcat
![]() by BrentH Wed 18 Dec 2013, 1:28 pm
by BrentH Wed 18 Dec 2013, 1:28 pm
She's going to love it Buck!!!

BrentH- New Member
- Posts : 236
Join date : 2013-05-21
Re: 1966 Buick Wildcat
![]() by Johnag Wed 18 Dec 2013, 1:50 pm
by Johnag Wed 18 Dec 2013, 1:50 pm
This is looking great Sir, love the colour...
Andy...
_________________
Andy...
Life isn't about how to survive the storm, but how to dance in the rain...
Johnag- Moderator
- Posts : 1576
Join date : 2013-10-12
Age : 58
Location : North Wales, U.K... -
Page 1 of 2 • 1, 2 ![]()
» 1966 Buick Wildcat
» 1966 Buick Wildcat dirt tracker.
» 1966 Buick Wildcat dirt tracker.
» 1966 Buick Riveria
Skid's :: Works In Progress :: Road cars
|
|
|