
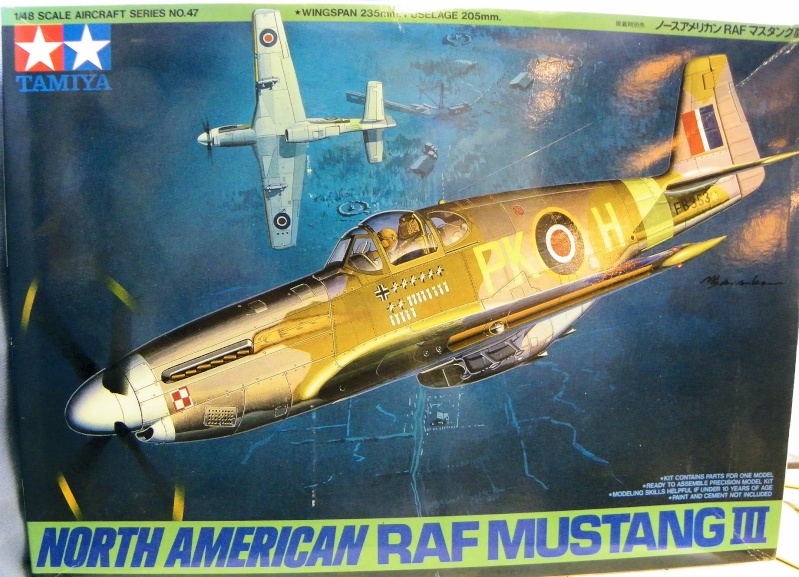
RAF Mustang III
2 posters
Skid's :: Works In Progress :: Aircraft
Page 1 of 1

RAF Mustang III
![]() by Guest Thu 28 Feb 2013, 10:59 pm
by Guest Thu 28 Feb 2013, 10:59 pm
This is the firat Model Plane I have built since I was 10 years old. AL talked me into expanding my horizons (larger Cave so to speak), so here we go. This is the kit.
OK, here we go.This is my first update on this Community Build. I really can't remember the last time I built an airplane. I don't even have to remember it to know it was a glue bomb. This is a well thought out kit that seems to be going together pretty well. No fitment issues that I have found yet.
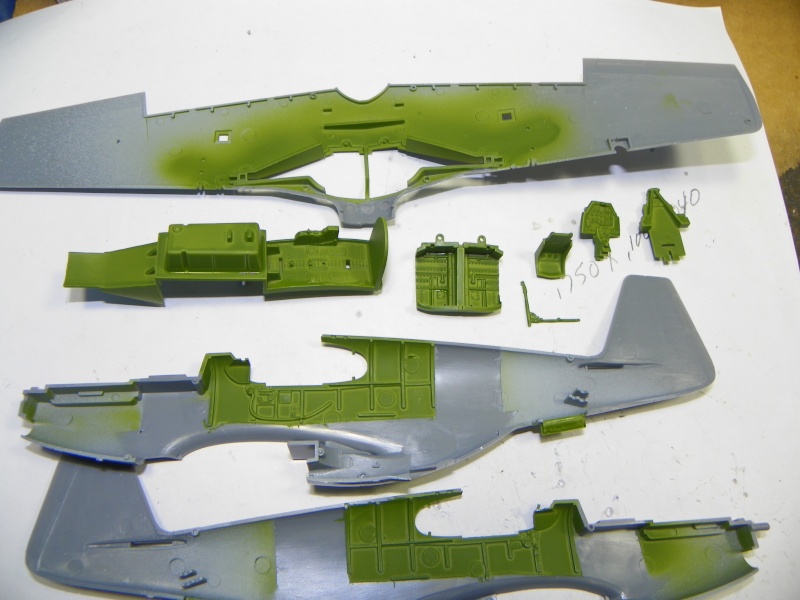
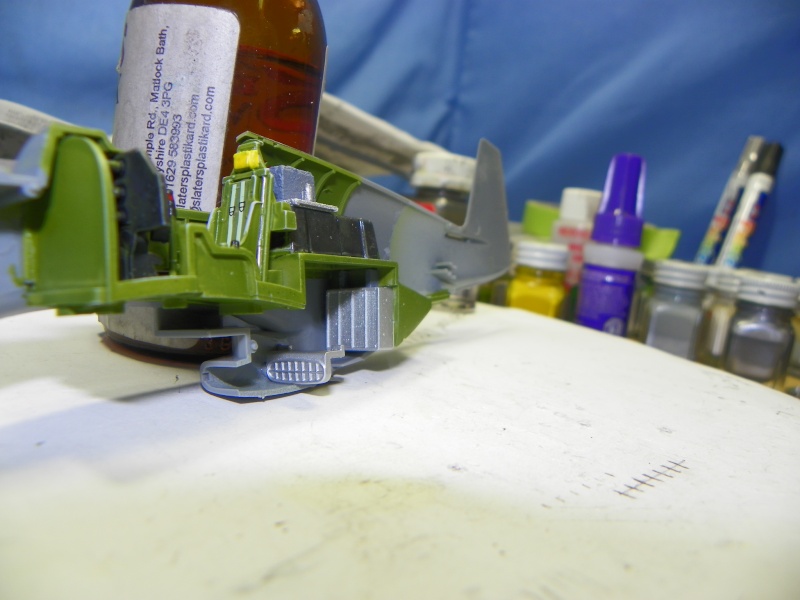
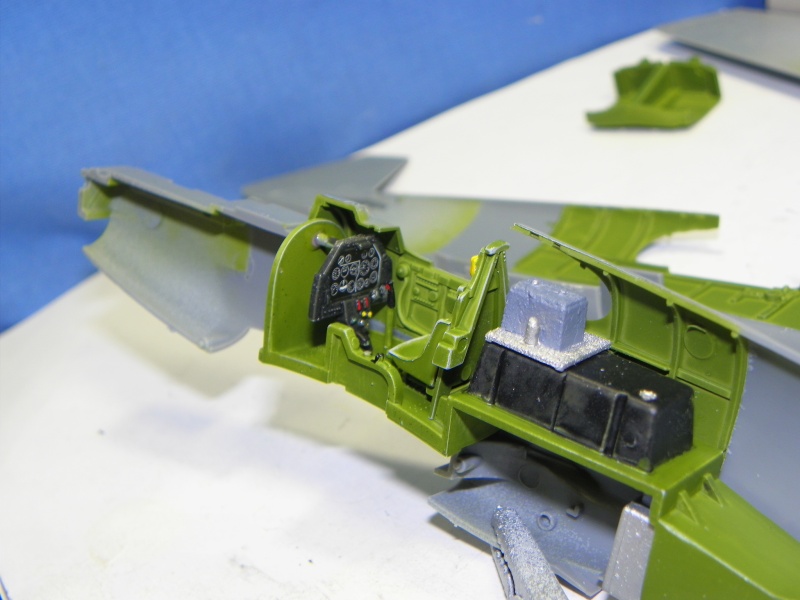
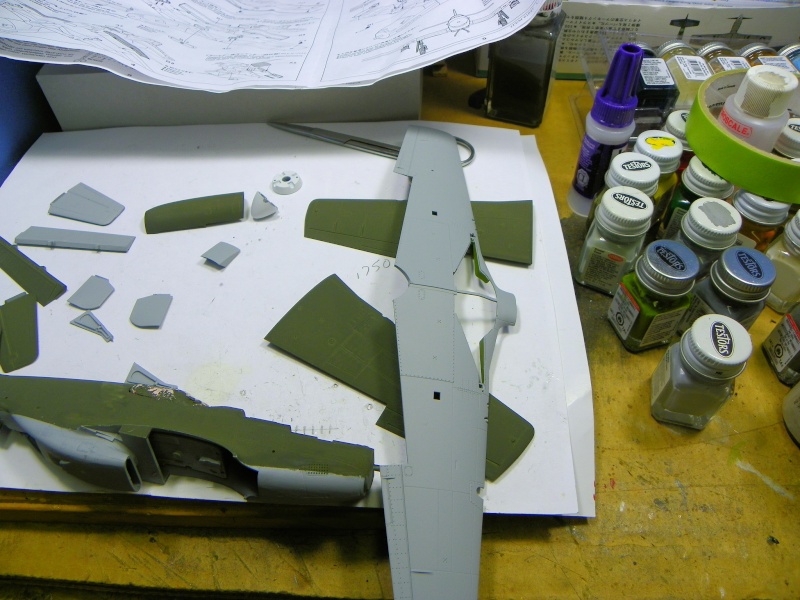
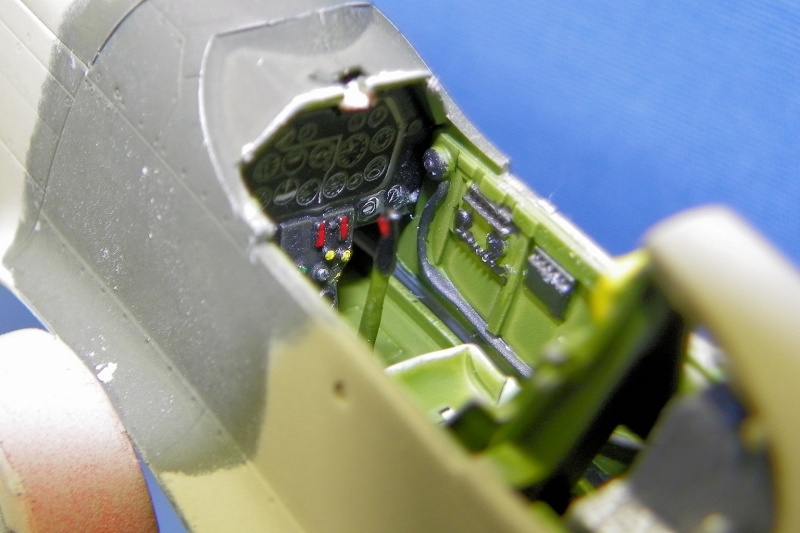
Had to start with step one and work my way through. Normally on a car I just start putting stuff together in a mock up and then go from there. I am not familiar enough with planes to do that. Thanks for the tip on the Interior Green Paint Al. I would have been trying to mix it the way the instructions said and who knows where that would have ended up. So here is all the Interior Green Stuff.
Here are a couple pictures of the interior. The instructions called for all the switches to be black. I didn't like that so did them with Reds,Greens and Silver to show them off more.
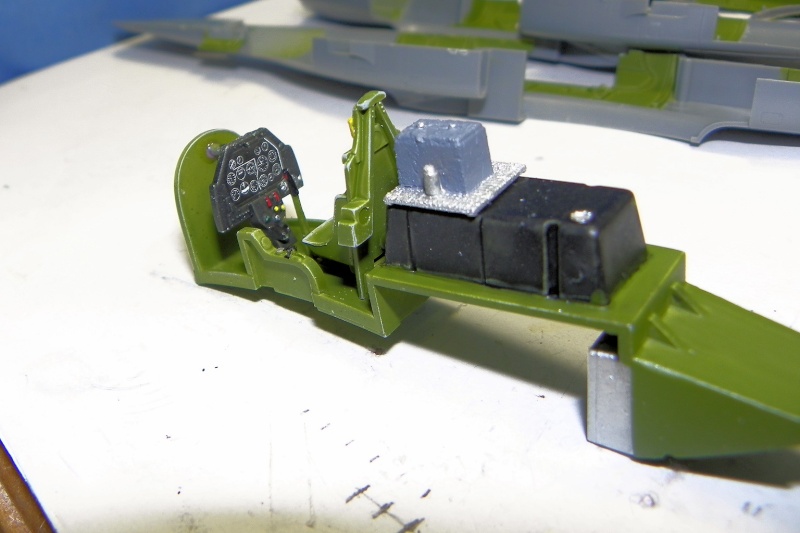
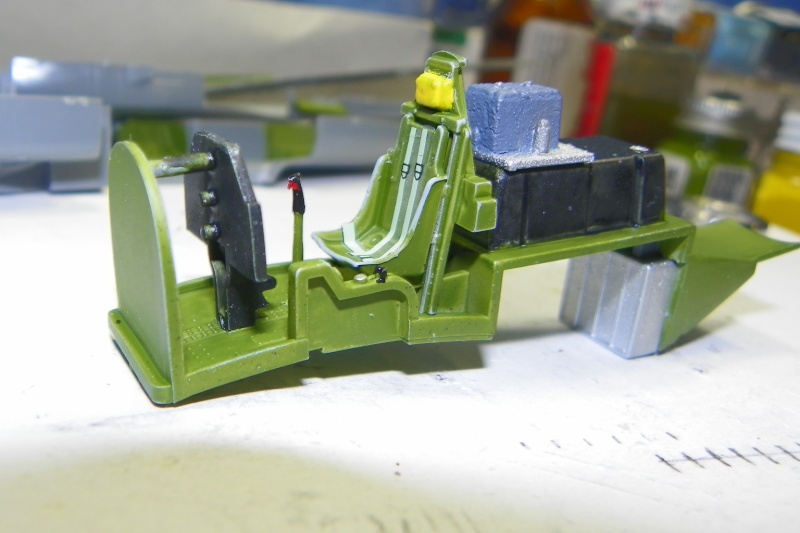
Those that build planes will notice that the pedals are missing. I am not sure where they are. They left the tweezers at Mach 8 headed form hyperspace. I figured that it would not be noticeable once everything was put together.
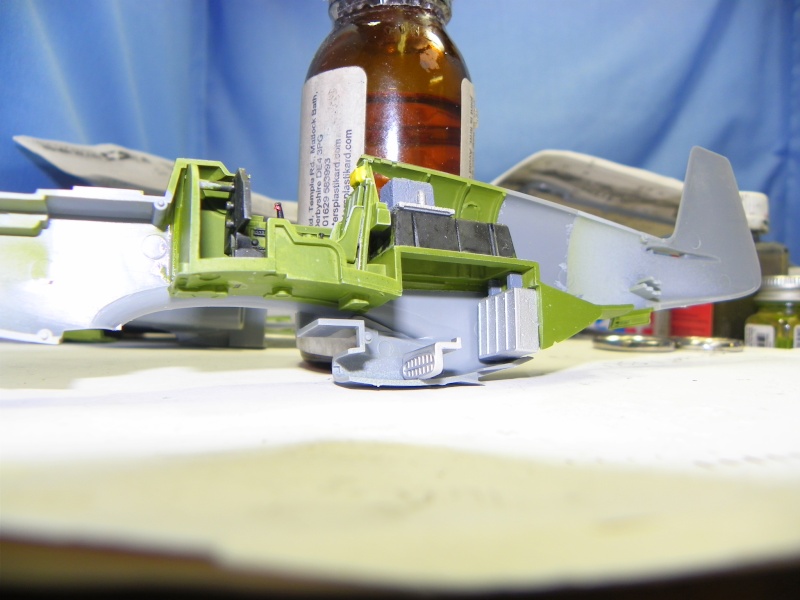
Here are a couple shots of Step 1 and 2 done. Ready to put the halves of the fuselage together. Before I do that I want to make sure that I have everything right. Once those two halves are MEK'ed together there will be do backing up.
All comments, questions and suggestions are welcome. Heavy on the suggestions. ;D
Next update as soon as I can get it done. Thanks for looking.
OK, here we go.This is my first update on this Community Build. I really can't remember the last time I built an airplane. I don't even have to remember it to know it was a glue bomb. This is a well thought out kit that seems to be going together pretty well. No fitment issues that I have found yet.
Had to start with step one and work my way through. Normally on a car I just start putting stuff together in a mock up and then go from there. I am not familiar enough with planes to do that. Thanks for the tip on the Interior Green Paint Al. I would have been trying to mix it the way the instructions said and who knows where that would have ended up. So here is all the Interior Green Stuff.
Here are a couple pictures of the interior. The instructions called for all the switches to be black. I didn't like that so did them with Reds,Greens and Silver to show them off more.
Those that build planes will notice that the pedals are missing. I am not sure where they are. They left the tweezers at Mach 8 headed form hyperspace. I figured that it would not be noticeable once everything was put together.
Here are a couple shots of Step 1 and 2 done. Ready to put the halves of the fuselage together. Before I do that I want to make sure that I have everything right. Once those two halves are MEK'ed together there will be do backing up.
All comments, questions and suggestions are welcome. Heavy on the suggestions. ;D
Next update as soon as I can get it done. Thanks for looking.
Guest- Guest
Re: RAF Mustang III
![]() by Guest Thu 28 Feb 2013, 11:06 pm
by Guest Thu 28 Feb 2013, 11:06 pm
Thanks for the kind words guys.
Saturday I had Sue take me to Walmart for some Candy Corn and other stuff. While there we wondered down the paint aisle and this stuff caught my eye so I got a can of each color.
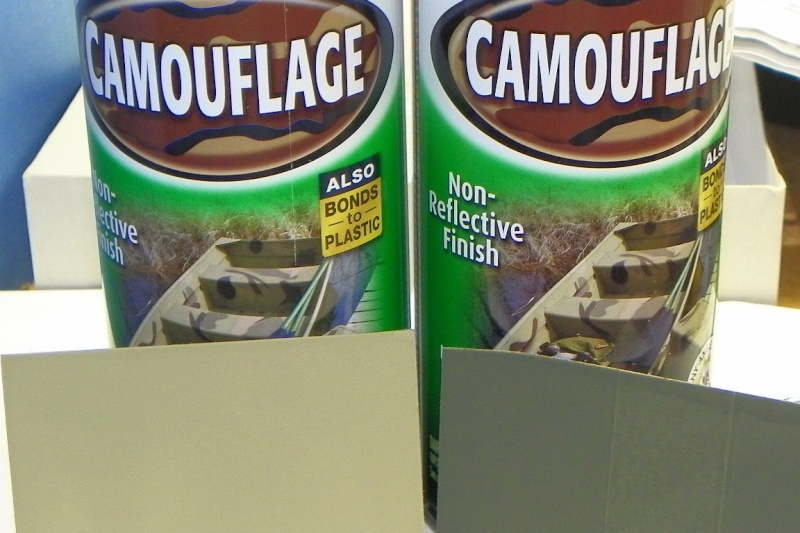
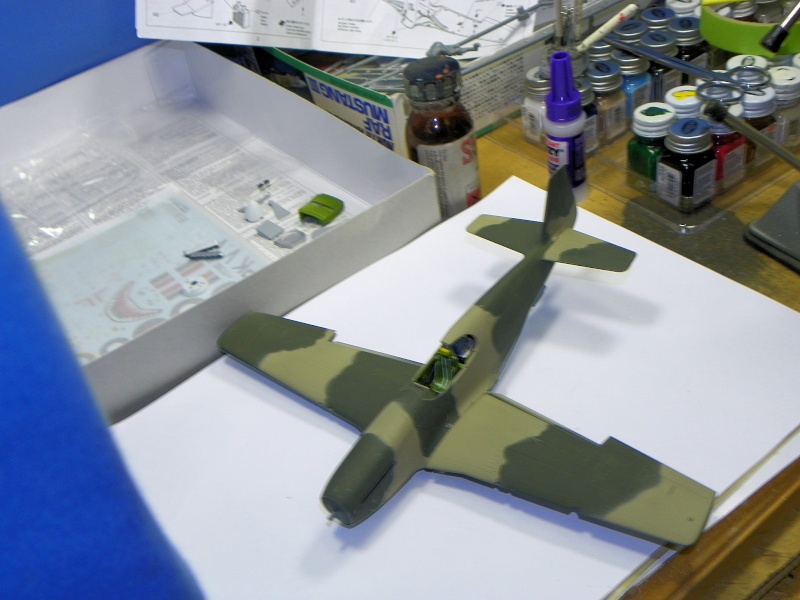
So right or wrong that's the colors of my plane. I had the Flat Light Grey in a bottle so I mixed it up for the airbrush. Then armed with the primer, Green, tan and Grey I went into the paint booth. When it was all over it looks like this. This is a mock up only. I still haven't masked and added the Tan.

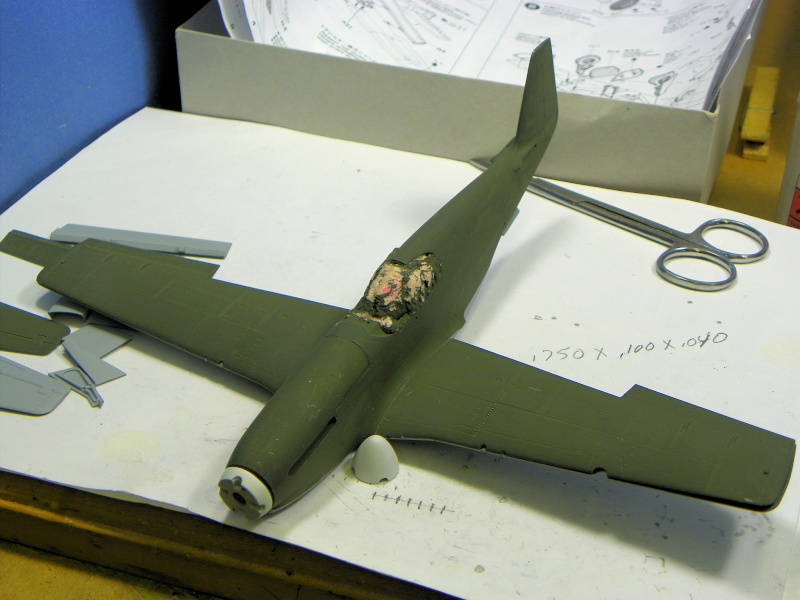
The truth is that the green is not that dark In real life. Just hard to get the lighting ring. So how I need to mask off for the Tan color and then do some small detail painting before starting final assembly.
Thanks for looking in all questions, comments and suggestions welcome.
Saturday I had Sue take me to Walmart for some Candy Corn and other stuff. While there we wondered down the paint aisle and this stuff caught my eye so I got a can of each color.
So right or wrong that's the colors of my plane. I had the Flat Light Grey in a bottle so I mixed it up for the airbrush. Then armed with the primer, Green, tan and Grey I went into the paint booth. When it was all over it looks like this. This is a mock up only. I still haven't masked and added the Tan.
The truth is that the green is not that dark In real life. Just hard to get the lighting ring. So how I need to mask off for the Tan color and then do some small detail painting before starting final assembly.
Thanks for looking in all questions, comments and suggestions welcome.
Guest- Guest
Re: RAF Mustang III
![]() by Guest Thu 28 Feb 2013, 11:18 pm
by Guest Thu 28 Feb 2013, 11:18 pm
Thanks for the kind words guys.
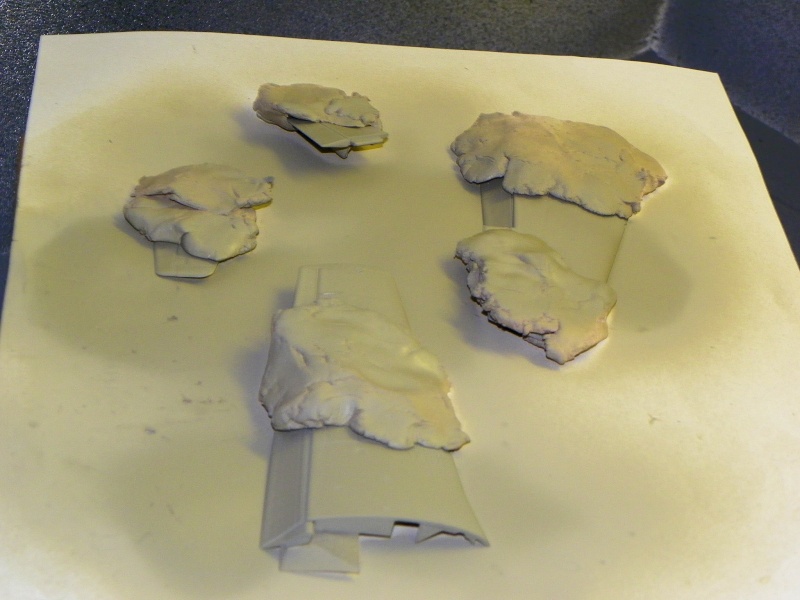
Well today was pretty productive for me. Started out by splitting a bag of Candy Corn with my 3 year old grandson for breakfast. So while I was all amped up and he was buzzing around the house at 92.7 MPH. I decided to have a go at the camouflage on this build.
I started out by taking the trusty can of play dough and breaking it into small pieces that I could flatten. Then kinda laid them around on the wings.
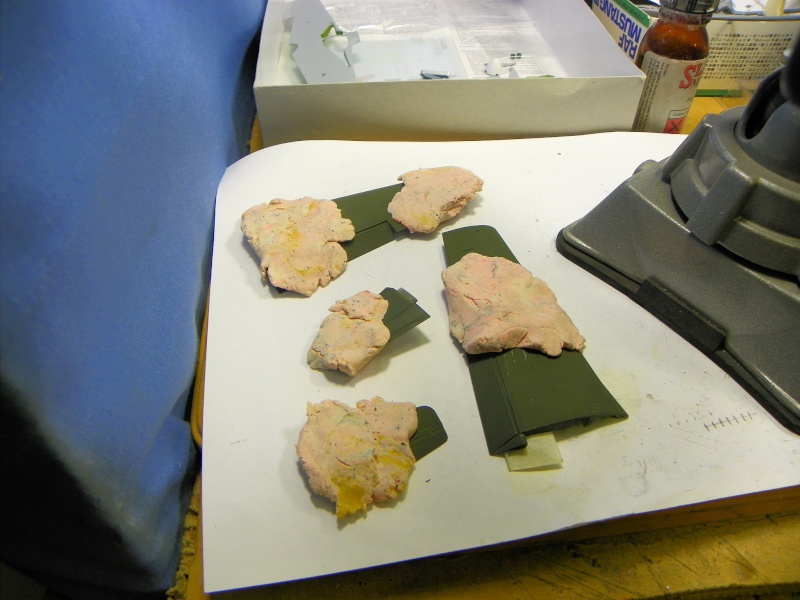
Then I masked off the Gray on the under body of the plane and wrapped some pieces of Play dough around on it.
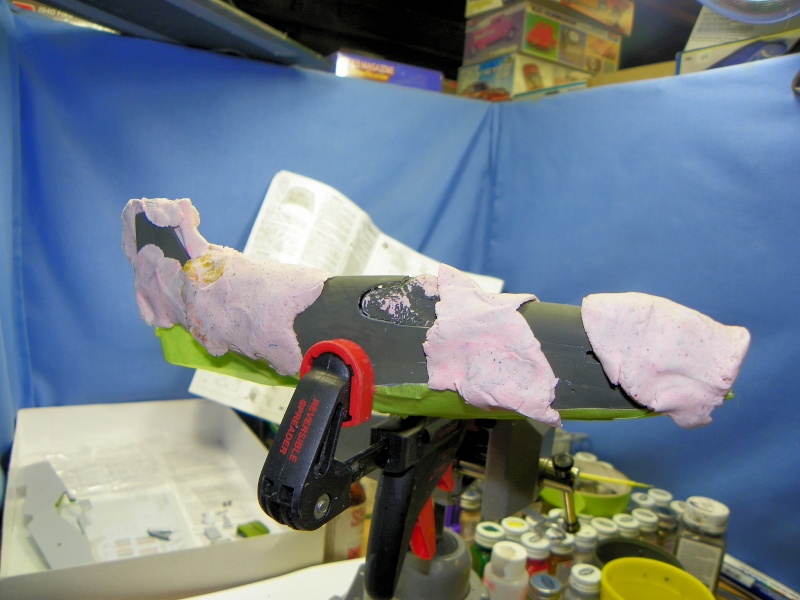
Then into the paint booth everything went and I shot a coupe light coats of the Tan paint on everything.
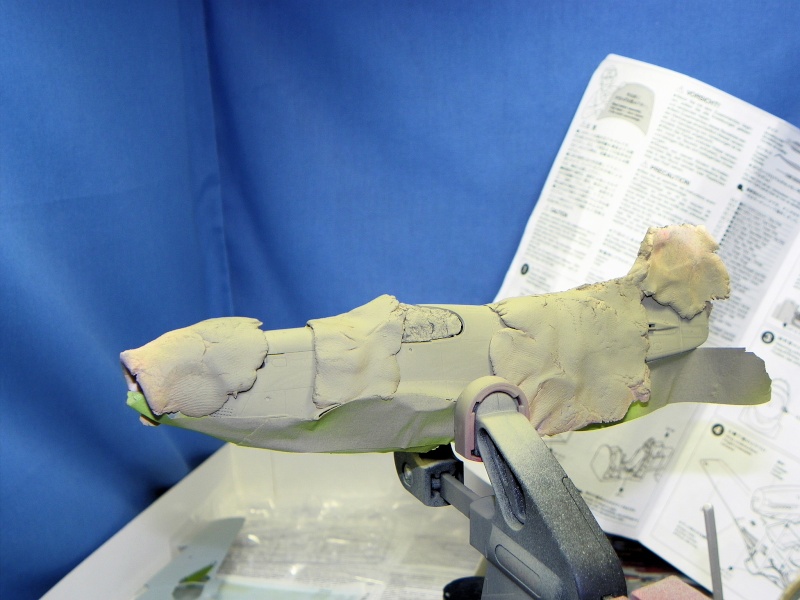
Then I waited about an hour for the Krylon Camouflage paint to dry. It drys very fast compared to other Krylon products I have used. I removed all the Play Dough and open the cockpit back up ( also masked with play dough). When it was all cleaned up here is how it looked.
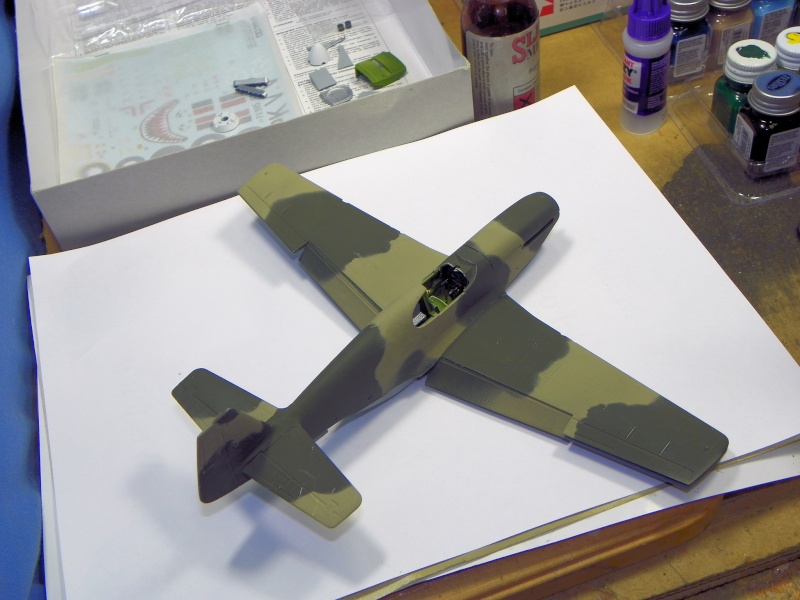
So that's that. To hear me tell the story I think my first camo job turned out pretty good. But then again can you recall mess up Camouflage?
So now I have so painting to do and need to study the next few steps on the instructions. Get myself ready before I start gluing things together.
Thanks for looking in. All comments, questions and suggestions welcome.
Well today was pretty productive for me. Started out by splitting a bag of Candy Corn with my 3 year old grandson for breakfast. So while I was all amped up and he was buzzing around the house at 92.7 MPH. I decided to have a go at the camouflage on this build.
I started out by taking the trusty can of play dough and breaking it into small pieces that I could flatten. Then kinda laid them around on the wings.
Then I masked off the Gray on the under body of the plane and wrapped some pieces of Play dough around on it.
Then into the paint booth everything went and I shot a coupe light coats of the Tan paint on everything.
Then I waited about an hour for the Krylon Camouflage paint to dry. It drys very fast compared to other Krylon products I have used. I removed all the Play Dough and open the cockpit back up ( also masked with play dough). When it was all cleaned up here is how it looked.
So that's that. To hear me tell the story I think my first camo job turned out pretty good. But then again can you recall mess up Camouflage?
So now I have so painting to do and need to study the next few steps on the instructions. Get myself ready before I start gluing things together.
Thanks for looking in. All comments, questions and suggestions welcome.
Guest- Guest
Re: RAF Mustang III
![]() by Guest Thu 28 Feb 2013, 11:28 pm
by Guest Thu 28 Feb 2013, 11:28 pm
Well it's way past time for an update, so here we go.
My Heel is giving me less problems now and I am able to model for more than 15 or 20 minutes at a time. So the progress should pickup some.
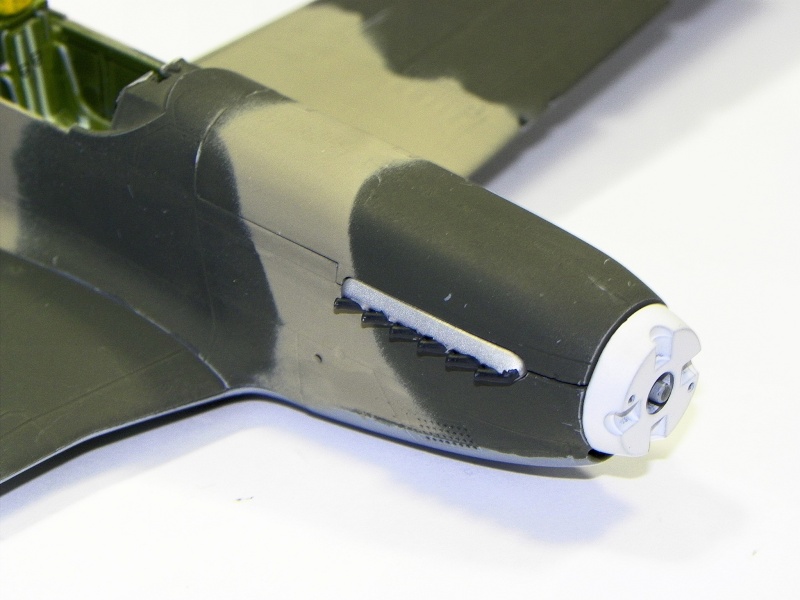
This is the exhaust all painted up and mocked up to see how it would look.
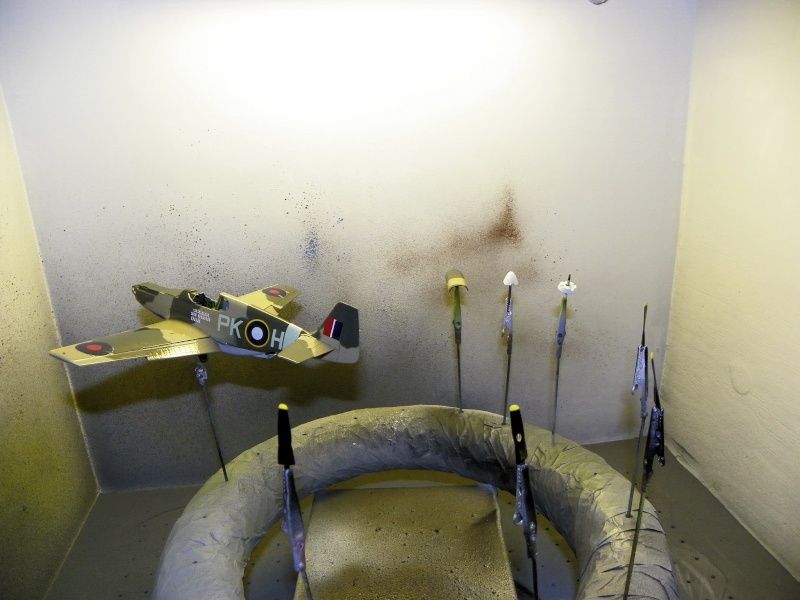
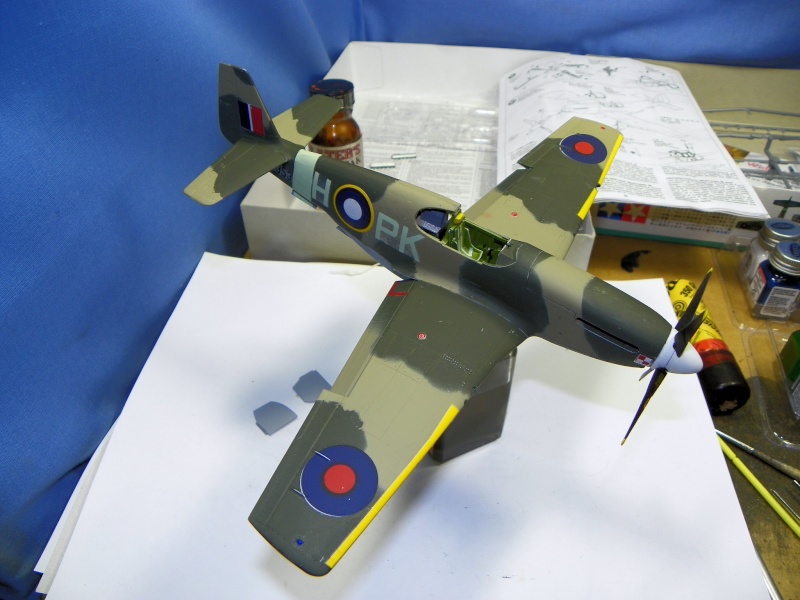
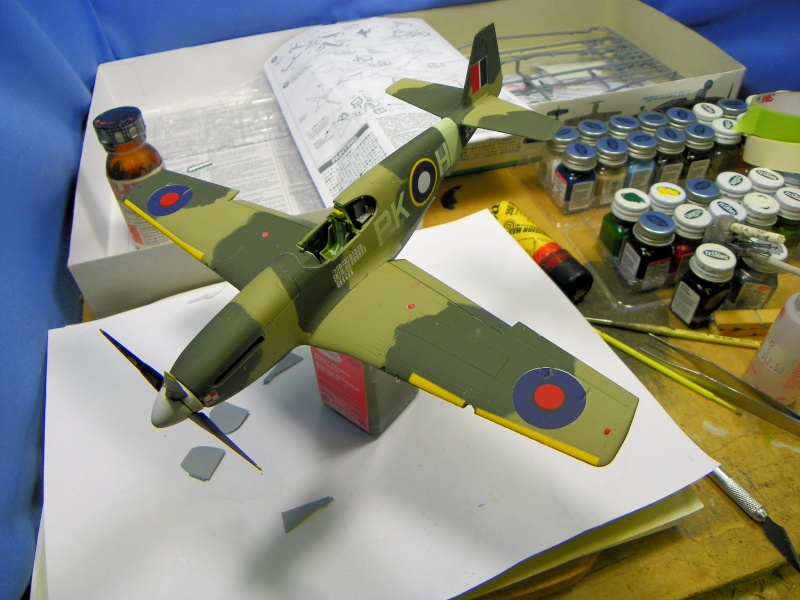
Spent quite awhile decaling this beast. I didn't put all the decals on because some of the little ones,like this, just disappear when put on the green paint. So I was selective in the decals only using the ones that showed up.
So here it is in the paint booth getting Dull Coat after the decals have been applied.
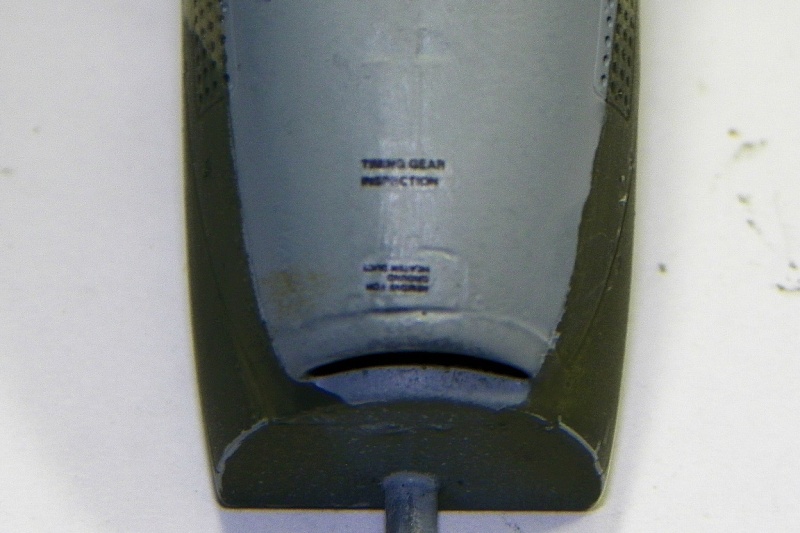
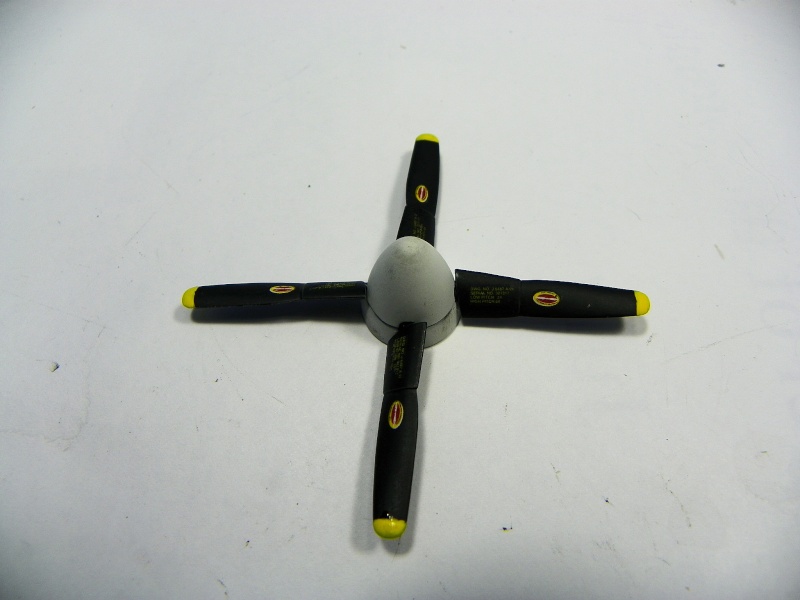
Propeller all done and ready to install.
Couple of shots of the dull coated mock up.
So now I just have some doodah stuff to do and then put it together. Paint the bombs and landing gear, plus some little things that I am not quite sure what they are. I am thinking one more update and then off to the NMA.
Thanks for looking all comments, questions and suggestions are welcome
My Heel is giving me less problems now and I am able to model for more than 15 or 20 minutes at a time. So the progress should pickup some.
This is the exhaust all painted up and mocked up to see how it would look.
Spent quite awhile decaling this beast. I didn't put all the decals on because some of the little ones,like this, just disappear when put on the green paint. So I was selective in the decals only using the ones that showed up.
So here it is in the paint booth getting Dull Coat after the decals have been applied.
Propeller all done and ready to install.
Couple of shots of the dull coated mock up.
So now I just have some doodah stuff to do and then put it together. Paint the bombs and landing gear, plus some little things that I am not quite sure what they are. I am thinking one more update and then off to the NMA.
Thanks for looking all comments, questions and suggestions are welcome
Guest- Guest
Guest- Guest
Re: RAF Mustang III
![]() by Guest Fri 01 Mar 2013, 12:22 am
by Guest Fri 01 Mar 2013, 12:22 am
I wonder what it could be?
I was told they made a lot of these. :scratch:
I was told they made a lot of these. :scratch:
Guest- Guest
Re: RAF Mustang III
![]() by Skid Wed 06 Mar 2013, 9:29 am
by Skid Wed 06 Mar 2013, 9:29 am
A sense of dejavu just came over me!! LOL
_________________
Al.
Constructive criticism is always welcome.
“Success always demands a greater effort.” Winston Churchill
"Success is failure turned inside out" Unknown

Skid- Admin
- Posts : 7129
Join date : 2013-02-15
Age : 75
Location : Newcastle. Good Old Blighty. -

Re: RAF Mustang III
![]() by harron68 Thu 07 Mar 2013, 1:06 am
by harron68 Thu 07 Mar 2013, 1:06 am
I'm no expert, but from body paint finish to decals to cockpit, I think it's superb! Tamiyamakes good kits and the best of us do them proud. Thanks for a fine construction and fantastic up-close photos!
harron68- Advanced Member

- Posts : 3616
Join date : 2013-02-28
Age : 73
Location : MIDWEST
Guest- Guest
Skid's :: Works In Progress :: Aircraft
Page 1 of 1
Permissions in this forum:
You cannot reply to topics in this forum|
|
|