
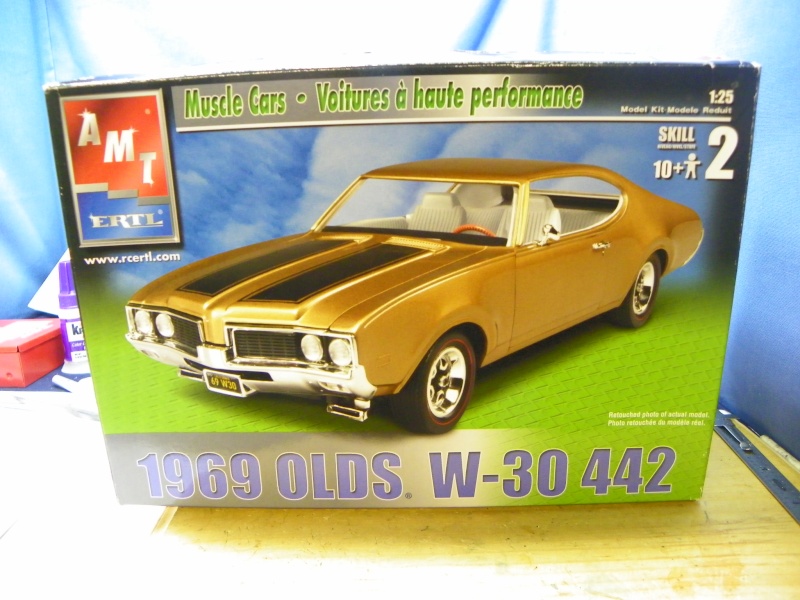
1969 Olds 442 W-30
2 posters
Skid's :: Works In Progress :: Road cars
Page 1 of 1

1969 Olds 442 W-30
![]() by Guest Sun 24 Mar 2013, 9:29 pm
by Guest Sun 24 Mar 2013, 9:29 pm
What to do, I am waiting for the community project "Any 1937 Ford" to start on February 1st. I am waiting on decal paper to finish the Orange Crate. So here we are. I was going to try a 24 hour build at another forum board but because of a death in the family I won't be able to. I had my kit picked out and the exterior color and interior colors and thought Why not build it anyhow. The hard work is done. So this will be a box stock Muscle car. The reason I picked it is because it was open. I am trying to build all my open kits before I start on the sealed stuff. So here it is.
It won't be a perfect car. The color is going to be a Nissan color called Autumn Maple Metallic. The interior will be Black and Gray or Silver and Gray. I haven't got that far yet.

The body is in color but I don't have the pictures ready to post yet. So I'll be back soon probably tomorrow to get this going.
It won't be a perfect car. The color is going to be a Nissan color called Autumn Maple Metallic. The interior will be Black and Gray or Silver and Gray. I haven't got that far yet.
The body is in color but I don't have the pictures ready to post yet. So I'll be back soon probably tomorrow to get this going.
Guest- Guest
Re: 1969 Olds 442 W-30
![]() by Guest Sun 24 Mar 2013, 9:41 pm
by Guest Sun 24 Mar 2013, 9:41 pm
Bang I am off and running. ;D Here is where I am at.
Body in color.

This one shows the metallic a little better.

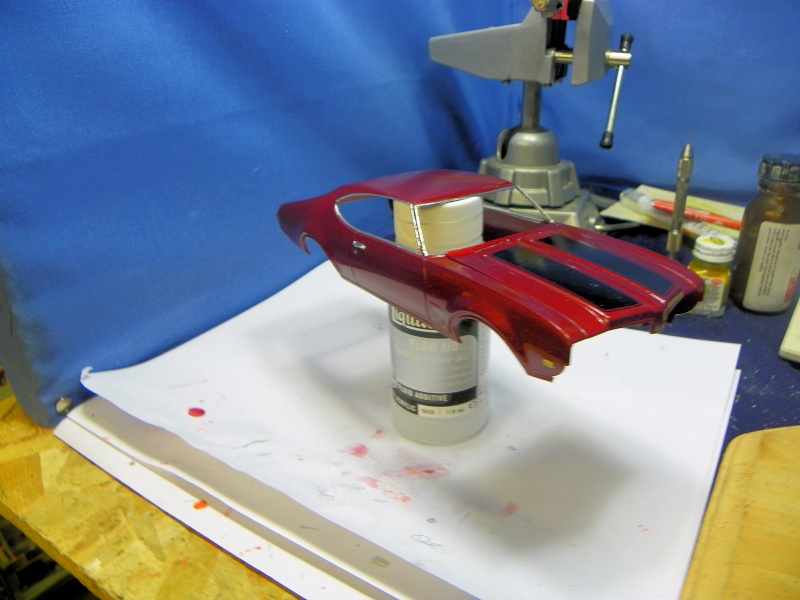
Once it is wet sanded with 2000 and the paint flattens out it turns redder. All that's planned here is to highlight the emblems and some BMF for the trim. Then a couple small decals and clear coat.
Got the frame picked out of the under pan. That is Gunmetal. I will do the gas tank in Steel and call it good.

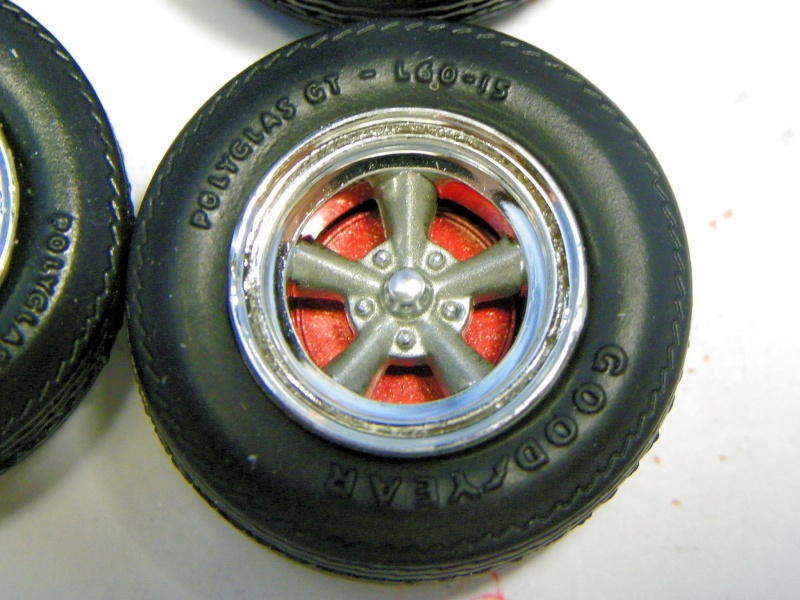
For wheels and tires I will use the kit stuff. I decided on the American Mags. The stock wheels were messed up on th chrome tree. These old Americans are period correct and always look good. I painted the centers with steel to give it a darked look. The backing plates are body color with clear coat on them. It gives you an idea of how much redder the paint turns.

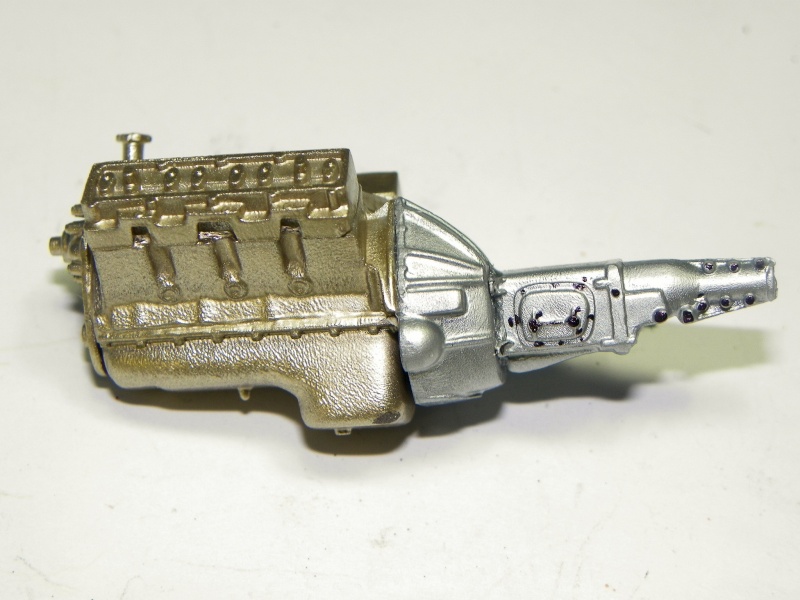
I got the engine block put together and painted. I couldn't find any Oldsmobile Gold engine paint in town. The color is Dulpi-Color Driftwood Gold. It is a GM color.

Here is the tranny and Bell housing all put together. The texture on the engine block is something I haven't seen in a kit engine before. Makes it look more like a cast iron block. I thought "Why brother you can't see that in the car?" but it nice.
So that's where it is all at. I will spend the day on this one and see where it is at by evening. Thanks for looking in. All comments and questions are welcome.
Body in color.
This one shows the metallic a little better.
Once it is wet sanded with 2000 and the paint flattens out it turns redder. All that's planned here is to highlight the emblems and some BMF for the trim. Then a couple small decals and clear coat.
Got the frame picked out of the under pan. That is Gunmetal. I will do the gas tank in Steel and call it good.
For wheels and tires I will use the kit stuff. I decided on the American Mags. The stock wheels were messed up on th chrome tree. These old Americans are period correct and always look good. I painted the centers with steel to give it a darked look. The backing plates are body color with clear coat on them. It gives you an idea of how much redder the paint turns.
I got the engine block put together and painted. I couldn't find any Oldsmobile Gold engine paint in town. The color is Dulpi-Color Driftwood Gold. It is a GM color.
Here is the tranny and Bell housing all put together. The texture on the engine block is something I haven't seen in a kit engine before. Makes it look more like a cast iron block. I thought "Why brother you can't see that in the car?" but it nice.
So that's where it is all at. I will spend the day on this one and see where it is at by evening. Thanks for looking in. All comments and questions are welcome.
Guest- Guest
Re: 1969 Olds 442 W-30
![]() by Guest Sun 24 Mar 2013, 9:52 pm
by Guest Sun 24 Mar 2013, 9:52 pm
Thanks for the comments everyone. I can't believe it's been 4 days since my last update. Seems like only yesterday. ::)
I have been working on this a little at a time. I do what I can when I can. Next week is wide open and I hope to have this one and the Orange Crate both finished. That way I am ready for that 37 Ford. 8-)
Since the last update I have the engine parts all painted and detailed where they will be detailed, After I had the distributor drilled and wired I thought man you should have used yellow spark plug wires (like the ole Accel's) but that was hind sight. I put new blue one's on it and then painted the coil yellow like and old Accel master blaster. I guess this is like a wedding car. Something old, something new, something borrowed, something blue.
So here is the engine as of now.


When I was researching the W-30 engine to find the engine color everyone that I found had a bright Red air cleaner with black air intake hoses coming off of it. I just don't know about doing that. It doesn't look right with a big old bright red air cleaner sitting in the middle of the engine bay. I will probably leave it chrome. Might paint the bottom black and leave the lid chrome. Not sure yet.
The fire wall is all done.

All the chassis parts are painted and detailed. Front and rear.


The body is all decal-ed and cleared. I haven't cut and buffed it yet but this will give you and idea of the final look.


So that's it for now. I am going to work out the final interior colors and work on that while the clear sits and gases out. Then I will put this bad boy together. See ya at the next update.
Thanks for looking in. All comments and questions are welcome.
I have been working on this a little at a time. I do what I can when I can. Next week is wide open and I hope to have this one and the Orange Crate both finished. That way I am ready for that 37 Ford. 8-)
Since the last update I have the engine parts all painted and detailed where they will be detailed, After I had the distributor drilled and wired I thought man you should have used yellow spark plug wires (like the ole Accel's) but that was hind sight. I put new blue one's on it and then painted the coil yellow like and old Accel master blaster. I guess this is like a wedding car. Something old, something new, something borrowed, something blue.
So here is the engine as of now.
When I was researching the W-30 engine to find the engine color everyone that I found had a bright Red air cleaner with black air intake hoses coming off of it. I just don't know about doing that. It doesn't look right with a big old bright red air cleaner sitting in the middle of the engine bay. I will probably leave it chrome. Might paint the bottom black and leave the lid chrome. Not sure yet.
The fire wall is all done.
All the chassis parts are painted and detailed. Front and rear.
The body is all decal-ed and cleared. I haven't cut and buffed it yet but this will give you and idea of the final look.
So that's it for now. I am going to work out the final interior colors and work on that while the clear sits and gases out. Then I will put this bad boy together. See ya at the next update.
Thanks for looking in. All comments and questions are welcome.
Guest- Guest
Re: 1969 Olds 442 W-30
![]() by Guest Sun 24 Mar 2013, 9:55 pm
by Guest Sun 24 Mar 2013, 9:55 pm
You know that is a good idea Al. I am going to spray an old air chrome air cleaner with Dulpi-color Red Anodized paint and sere how it looks. That way I got the original all safe and sane. Thanks .
As far as drill the distributor well it's easier now than it used to be. I used to use .025 wire for spark plug wires. But always knew it was way big. That's like 5/8 " in scale. I checked the wires on several pre wired distributors that Bob Woldeit had. The wire was .013 to .015" depending on you made it. When I started working with craft wire I found the 28 or 30 guage is perfect. It is .013 30 guage and .015 28 guage. So I went down to a .0135 " drill bit That's a #80 the smallest one they make. So I use my straight pin center punch and make a small dimple in the cap and then with no pressure just start turning the drill bit If you are lucky and have the pin vise straight you will have a perfect size hole for the wire to go into.
If you need drill bits then I suggest you try here.
www.widgetsupply.com/
The drill index that holds #61 to #80 over here you pay 20 to 30 dollars for in a hobby shop. You can buy that index for $3.79 I buy them 5 at a time. Then when I break or lose one of them little bits I still have a back up. You can also buy all the drill sizes separate 10 to a pack.
I have 2 pin vises in one I keep a .025" drill bit. That is a common size I use all the time. Straight pins are .023 to .025 so I am ready to make a hole for a pin. The other one I use with my wire guage drill index and drill what ever I need.
I hope that all makes sense. I have practiced on a lot if distributors. It's not always pretty. Paint can hide a bunch of sins.
I guess the only real tip is don't press on the pin vise when you drill, if you do it will slide off to the side and then it's a bear to get a hole drilled down through there.
Guest- Guest
Re: 1969 Olds 442 W-30
![]() by Guest Sun 24 Mar 2013, 10:07 pm
by Guest Sun 24 Mar 2013, 10:07 pm
Hey guys I am back. I want to thank everyone for the comments, they sure do make it more fun. If it was any more fun I am sure it would be illegal.
I guess it is almost time to put this one to bed, or to NMA.
After the body was in color I checked the stance to make sure it was what I wanted.

Al had said in another post that I should Red Anodize the air cleaner. Well I tried it both ways.
Chrome.

Red Anodize.

I really liked that so I went ahead and painted the ram air air cleaner with Dulpi-color Red Anodize paint. 2 light coats. Then it was time to move on to the interior. I decided on doing it in 2 tone gray and silver, with black faced guages.


Flocked with Medium Gray flocking.

Here it is all finished. I couldn't find any 3/32" ribbon in gray, so I painted some typing paper with gray primer and cut it into 3/32" strips. The buckles are PE parts that were in my box of extra stuff.

Then it was time to finish the engine. I painted the chrome fan with Dulpi-color Blue Anodized paint. Wanted it to look like the Flex-Lite fans we used to run. The spark plug wires are just hanging loose. I think they look OK. Not perfect but OK.


All that's left now is to put this together and write the NMA and kit review for it. I can say that I would never have made this in 24 hours. Total work time on it is 21 hours and that's over 4 or 5 days. And it's still not done. It is the first time I every kept track of the time in a build. I think next year I will be ready with a curbside something for the 24 hour build.
Thanks for looking in, See ya at the NMA. Maybe tomorrow. This has been a fun quick build and the model turned out way better than I thought it would.
I guess it is almost time to put this one to bed, or to NMA.
After the body was in color I checked the stance to make sure it was what I wanted.
Al had said in another post that I should Red Anodize the air cleaner. Well I tried it both ways.
Chrome.
Red Anodize.
I really liked that so I went ahead and painted the ram air air cleaner with Dulpi-color Red Anodize paint. 2 light coats. Then it was time to move on to the interior. I decided on doing it in 2 tone gray and silver, with black faced guages.
Flocked with Medium Gray flocking.
Here it is all finished. I couldn't find any 3/32" ribbon in gray, so I painted some typing paper with gray primer and cut it into 3/32" strips. The buckles are PE parts that were in my box of extra stuff.
Then it was time to finish the engine. I painted the chrome fan with Dulpi-color Blue Anodized paint. Wanted it to look like the Flex-Lite fans we used to run. The spark plug wires are just hanging loose. I think they look OK. Not perfect but OK.
All that's left now is to put this together and write the NMA and kit review for it. I can say that I would never have made this in 24 hours. Total work time on it is 21 hours and that's over 4 or 5 days. And it's still not done. It is the first time I every kept track of the time in a build. I think next year I will be ready with a curbside something for the 24 hour build.
Thanks for looking in, See ya at the NMA. Maybe tomorrow. This has been a fun quick build and the model turned out way better than I thought it would.
Guest- Guest
Re: 1969 Olds 442 W-30
![]() by harron68 Wed 03 Apr 2013, 11:35 pm
by harron68 Wed 03 Apr 2013, 11:35 pm
Nice work. The distributor notes help us make 'em look much better. I like the extra time you took on the chassis. This shows how even a relatively "stock" build can be creative and a quality model, thanks!
harron68- Advanced Member

- Posts : 3616
Join date : 2013-02-28
Age : 73
Location : MIDWEST
Re: 1969 Olds 442 W-30
![]() by Tumbler75 Thu 04 Apr 2013, 4:06 pm
by Tumbler75 Thu 04 Apr 2013, 4:06 pm
I remember this beauty! Excellently done and the right shade of red too. Keep'em comin' Buck!

Tumbler75- Intermediate Member

- Posts : 854
Join date : 2013-02-25
Age : 49
Location : Prosperity, SC
Skid's :: Works In Progress :: Road cars
Page 1 of 1
Permissions in this forum:
You cannot reply to topics in this forum|
|
|