
Lotus 43 BRM, Jim Clark, 1966 US GP Watkins Glen. MFH 1/20.
3 posters
Skid's :: Works In Progress :: Race cars
Page 1 of 1

Lotus 43 BRM, Jim Clark, 1966 US GP Watkins Glen. MFH 1/20.
![]() by Pg265 Wed 19 Apr 2023, 6:27 pm
by Pg265 Wed 19 Apr 2023, 6:27 pm
Good evening,
British Racing Green is in the spotlight!
I love this magnificent little F1: Thin, racy, equipped with a BRM engine with an unusual architecture (it's an H16) ... and it's a Lotus!
The kit is really superb and the assembly is one of the smartest I have ever seen.
So I started this edit on November 21 ... with an end goal for early 2021.

There will be some rivets to install...
The bodywork elements are all drilled to accommodate the riveting in 0.5 and 0.4.
Part of the assembly is secured by screws; the holes are drilled and tapped at 1.4.
The underside of the chassis is stripped of the embossed Classic Team Lotus logo and a die-cut aluminum foil for the new flat bottom.


After the blank assembly of the hull, I immediately proceeded to cut the thermoformed windshields: I will be quieter during the final assembly.

The start of the construction of the engine validates the correct installation of its support on the frame, among other things.
I take this opportunity to make all the holes intended to receive all the accessories and equipment of the 16 cylinders.
I took 2 piston / connecting rod assemblies from the engine for a (maybe) later use.


Several painting sessions have been carried out today.
We also had to keep the engine running a bit and move the gearbox and clutch forward.[br]A few changes are being made to this set and more are coming.
Otherwise, a lot of tests, adjustments, preparation for the assemblies to come ...


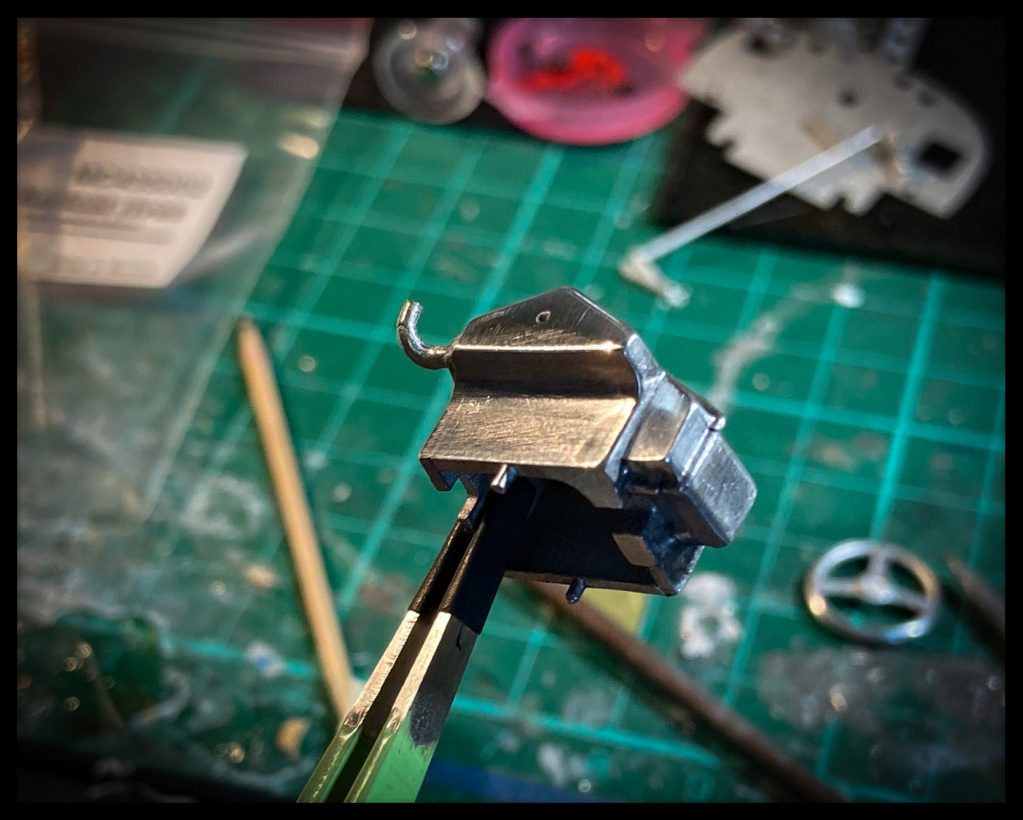
I did a test on one of the proposed cam cover versions and a test on the engine ...
I will use the other, equipped with an engraved and riveted plate, the red version may be useful for a small presentation.
I started connecting the ignition circuit on the lower benches and validated the assembly of the box components.
I like the color, obtained by mixing, but will certainly be worked on a bit.


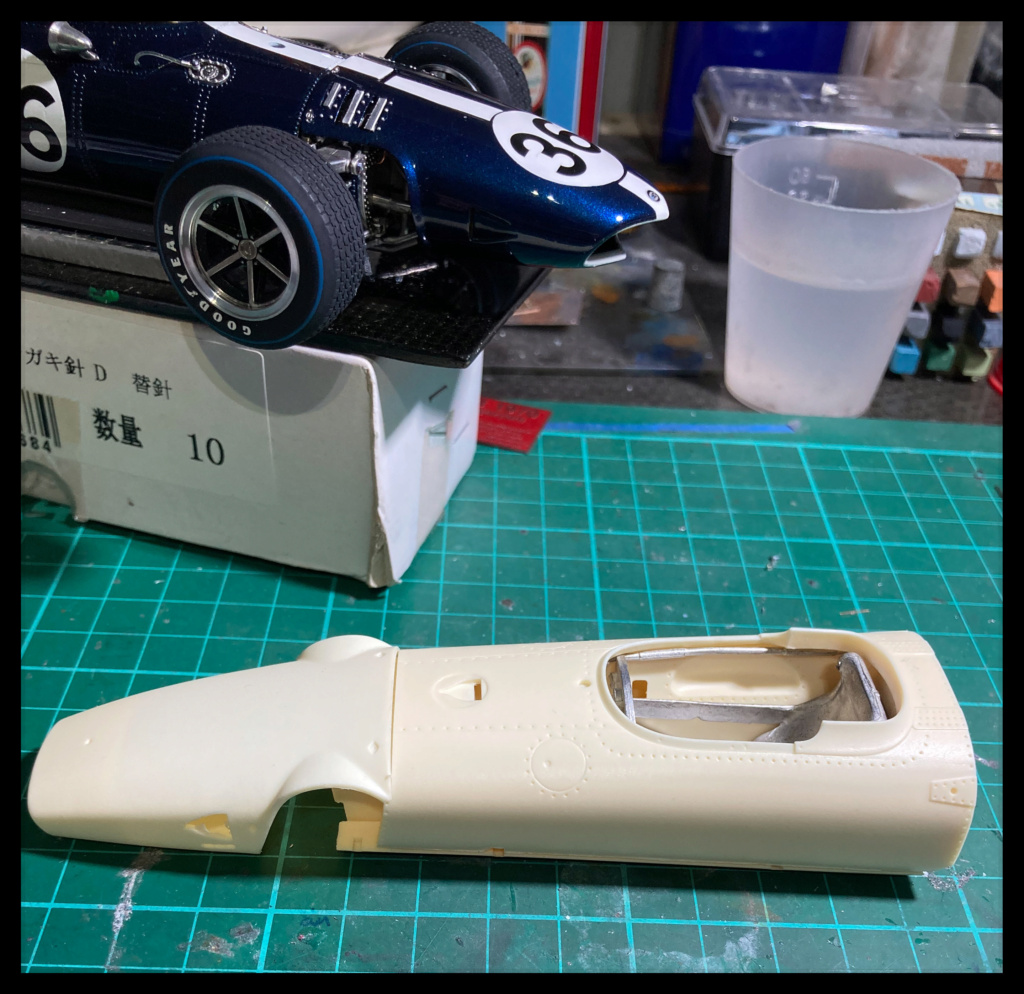
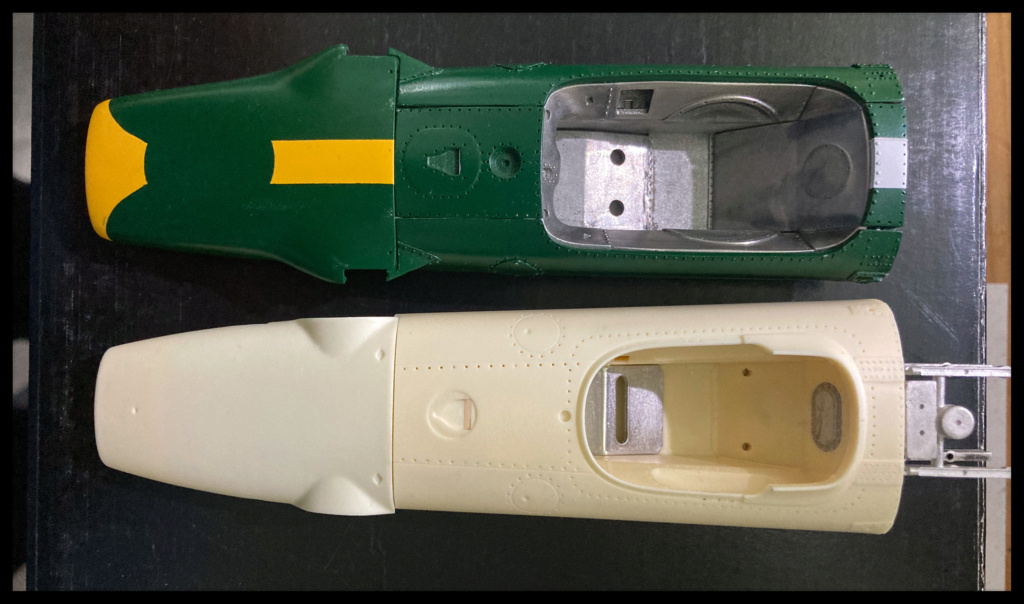
Small comparison with his little sister:[br]the Type 43 is wider, but thinner on its front part than the Lotus 49.
I focused on the hull and the interior.
A little riveting, the hull will be finished later.
I decided to use slightly more rounded heads for the cockpit in order to highlight them more due to their location; a kind of scale effect what.
Those of the hull are of the same diameter, 0.5mm, but flatter. The engine support reinforcements will be 0.4.
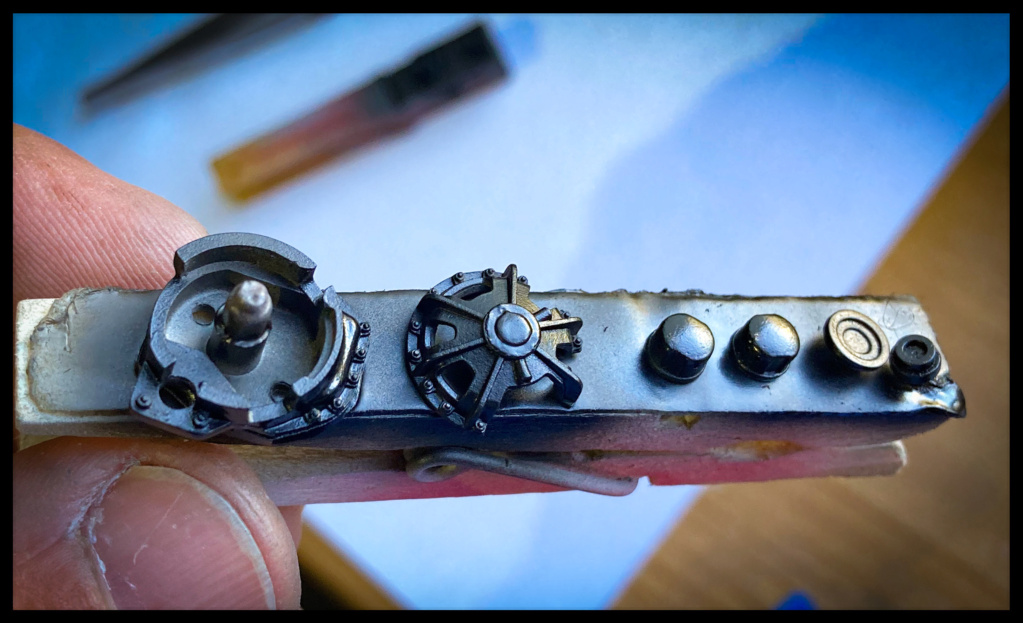
The cockpit was then primed, painted and worked with oils and the dashboard detailed on both sides.
A vintage photo allowed me to perfect its decoration and put the news in the “Dymo” strip.
The gear lever is detailed with a machined bolt and its washer, its pommel painted in acrylic and oil then dressed with its Lotus logo.
It will receive a light touch of varnish tomorrow.
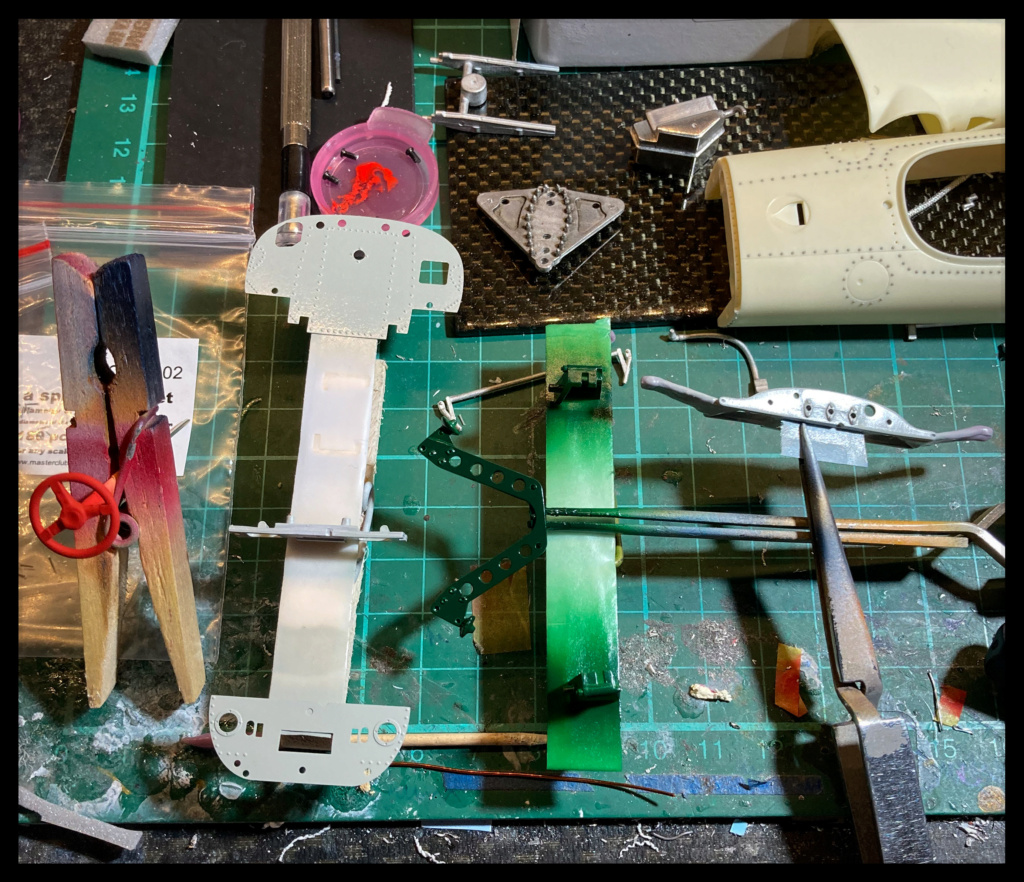
Some pictures to illustrate my point:


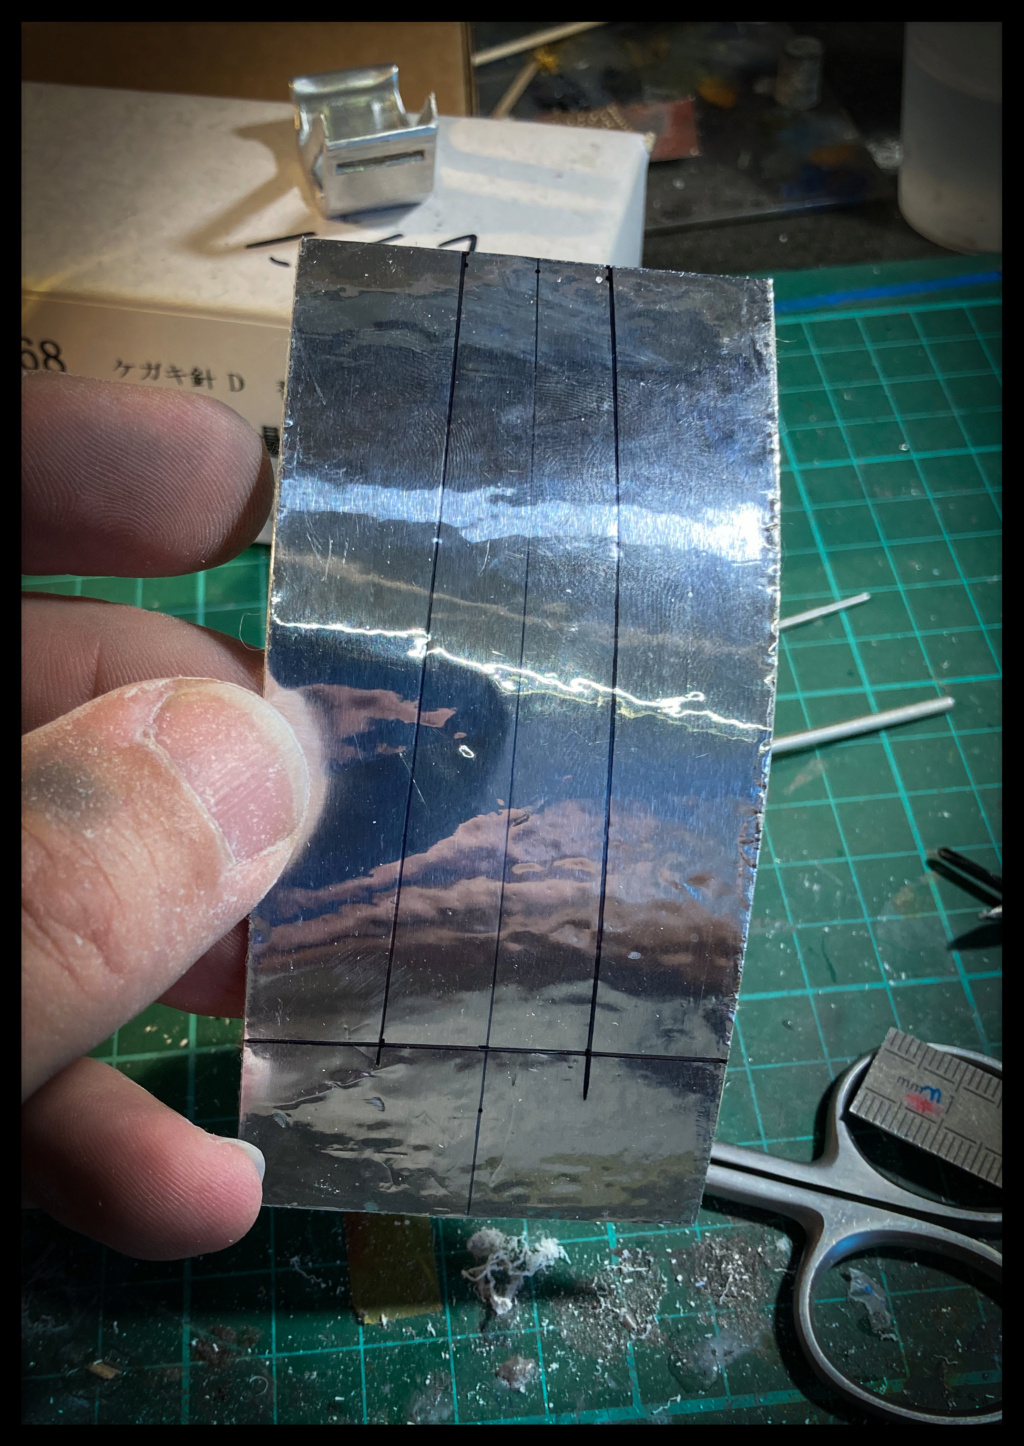
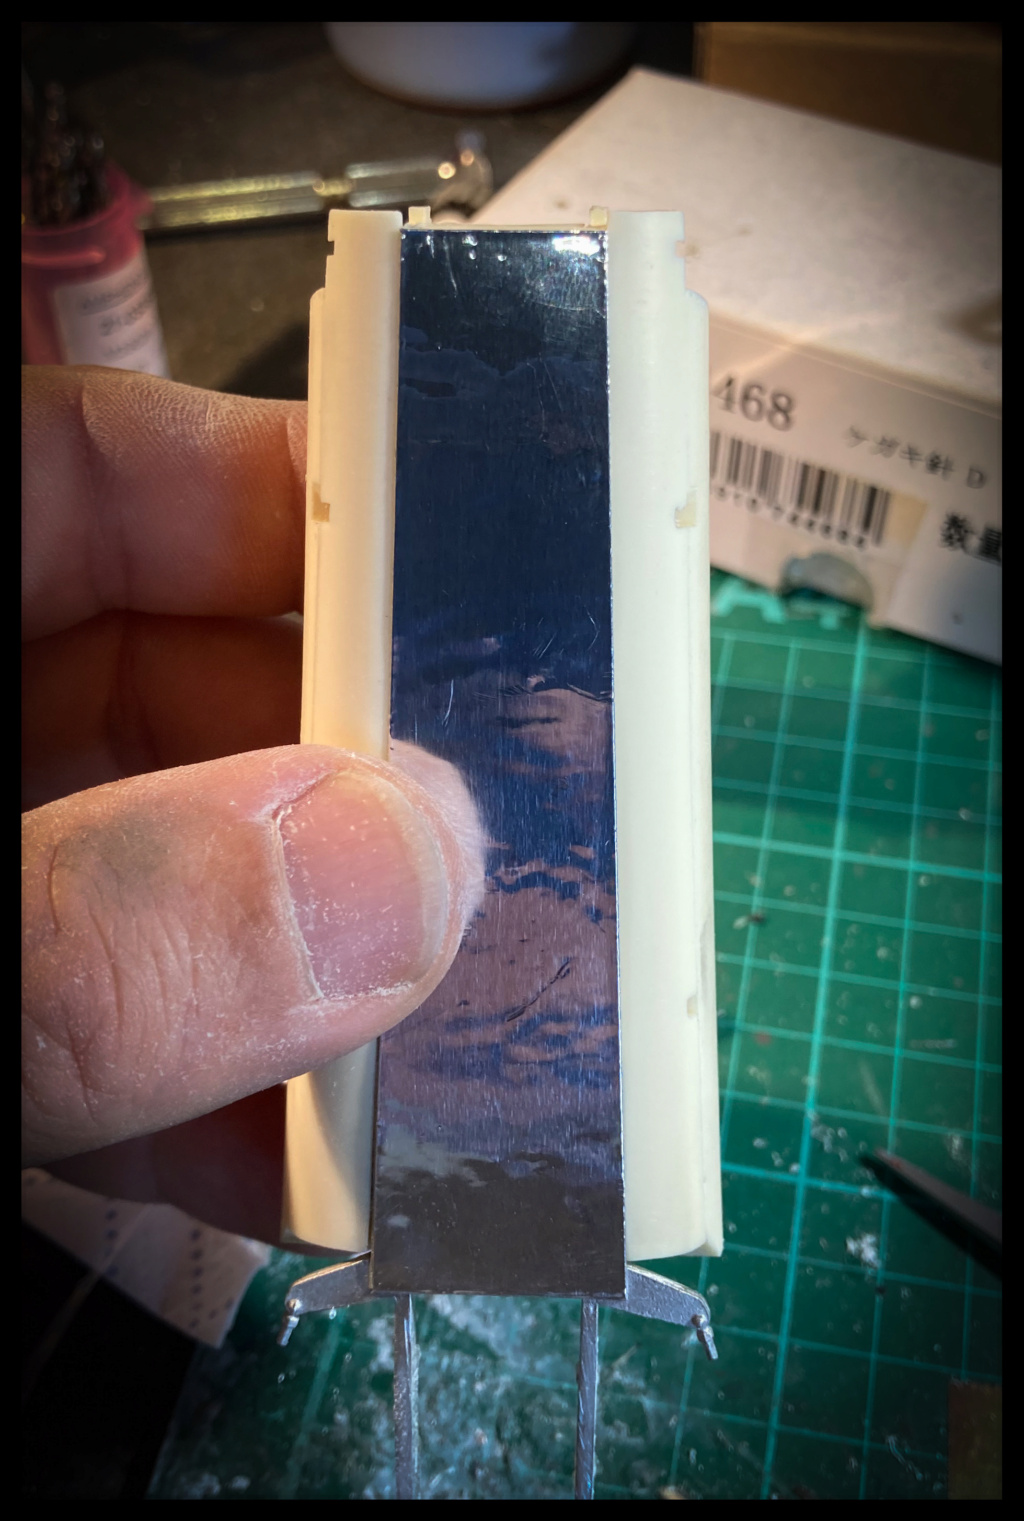
Solder for the front tank
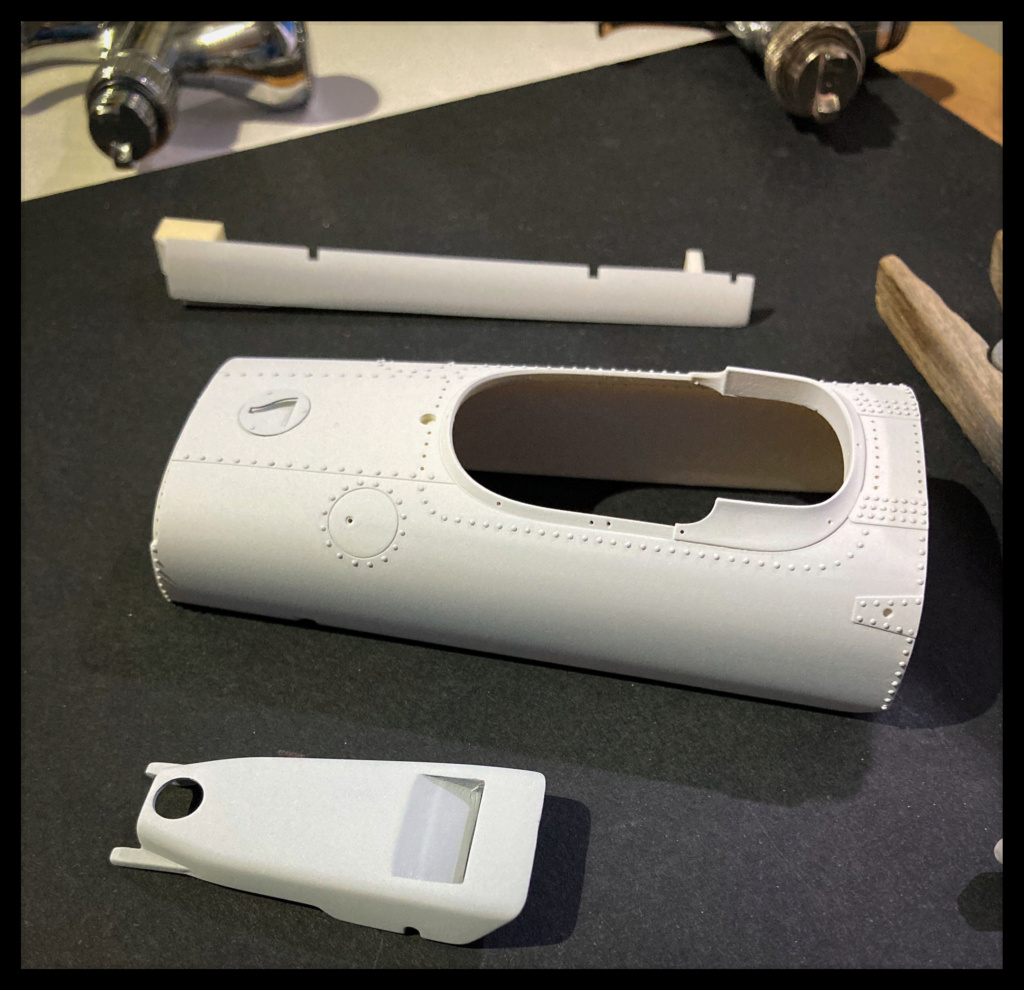
Parts primed.

Red, Grey and Green;Enamel, acrylic & polyurethane.

I have finished riveting the hull, except for the central part which will be after painting.
I have done a little work on the part of the engine that will remain visible.
The other side will be equipped with the scoop.


The engine is almost finished.
As expected, the right side is a little less detailed than the left as it will be fitted with the large intake scoop.
I still installed the injection tubes without connecting them to the pump: nothing can be seen anyway...Two options are available for the scoops: White Metal (without installing the cones) or thermoformed, very thin to install on a "bracket" located between the cones.
The Lucas identification plates (Superb!) Are transferred onto an extremely thin sheet of aluminum.
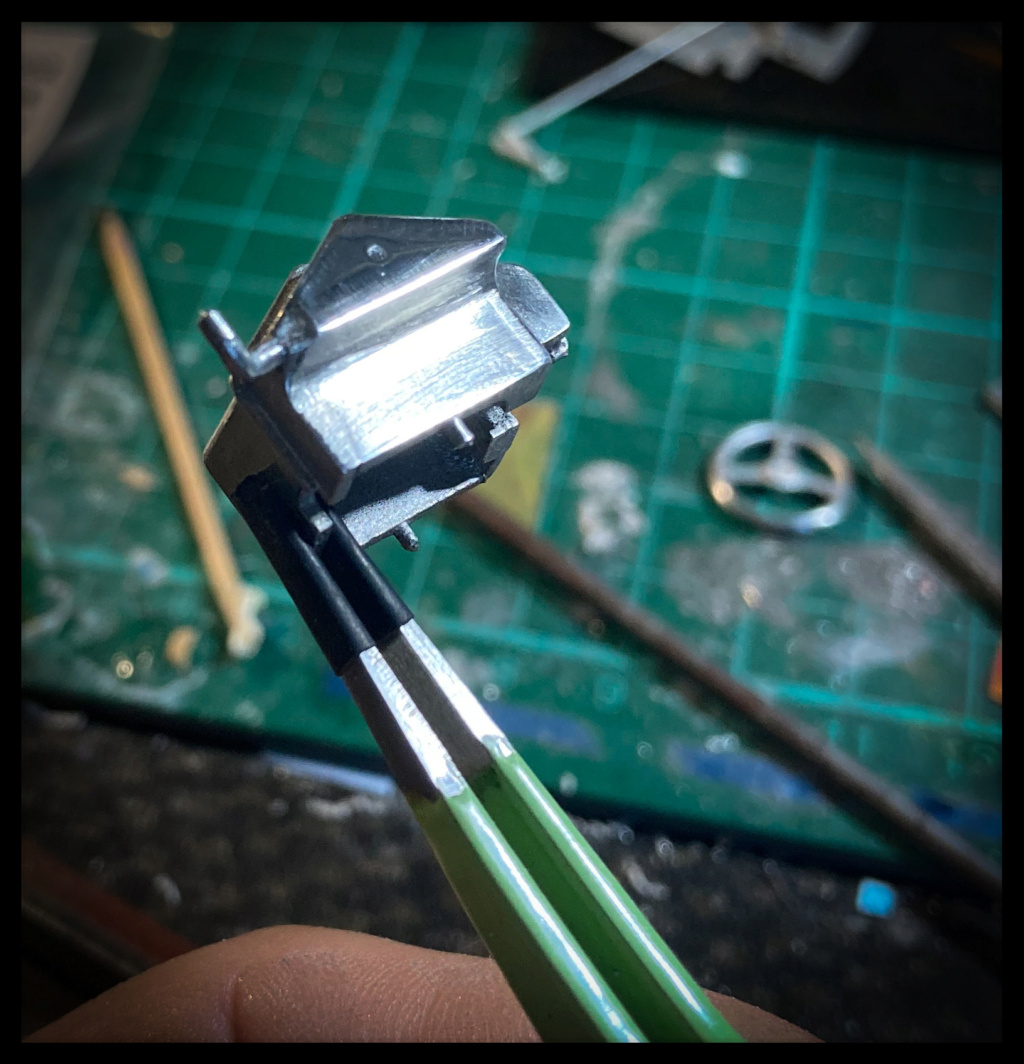
The upper cam covers have been changed, as planned there too, and fitted with the BRM plates engraved as in reality.
Red paint is diffused by capillary with a fine brush.
Other parts are prepared and then primed.


Voilà.
More soon.
Pascal
British Racing Green is in the spotlight!
I love this magnificent little F1: Thin, racy, equipped with a BRM engine with an unusual architecture (it's an H16) ... and it's a Lotus!
The kit is really superb and the assembly is one of the smartest I have ever seen.
So I started this edit on November 21 ... with an end goal for early 2021.

There will be some rivets to install...
The bodywork elements are all drilled to accommodate the riveting in 0.5 and 0.4.
Part of the assembly is secured by screws; the holes are drilled and tapped at 1.4.
The underside of the chassis is stripped of the embossed Classic Team Lotus logo and a die-cut aluminum foil for the new flat bottom.


After the blank assembly of the hull, I immediately proceeded to cut the thermoformed windshields: I will be quieter during the final assembly.

The start of the construction of the engine validates the correct installation of its support on the frame, among other things.
I take this opportunity to make all the holes intended to receive all the accessories and equipment of the 16 cylinders.
I took 2 piston / connecting rod assemblies from the engine for a (maybe) later use.


Several painting sessions have been carried out today.
We also had to keep the engine running a bit and move the gearbox and clutch forward.[br]A few changes are being made to this set and more are coming.
Otherwise, a lot of tests, adjustments, preparation for the assemblies to come ...


I did a test on one of the proposed cam cover versions and a test on the engine ...
I will use the other, equipped with an engraved and riveted plate, the red version may be useful for a small presentation.
I started connecting the ignition circuit on the lower benches and validated the assembly of the box components.
I like the color, obtained by mixing, but will certainly be worked on a bit.


Small comparison with his little sister:[br]the Type 43 is wider, but thinner on its front part than the Lotus 49.


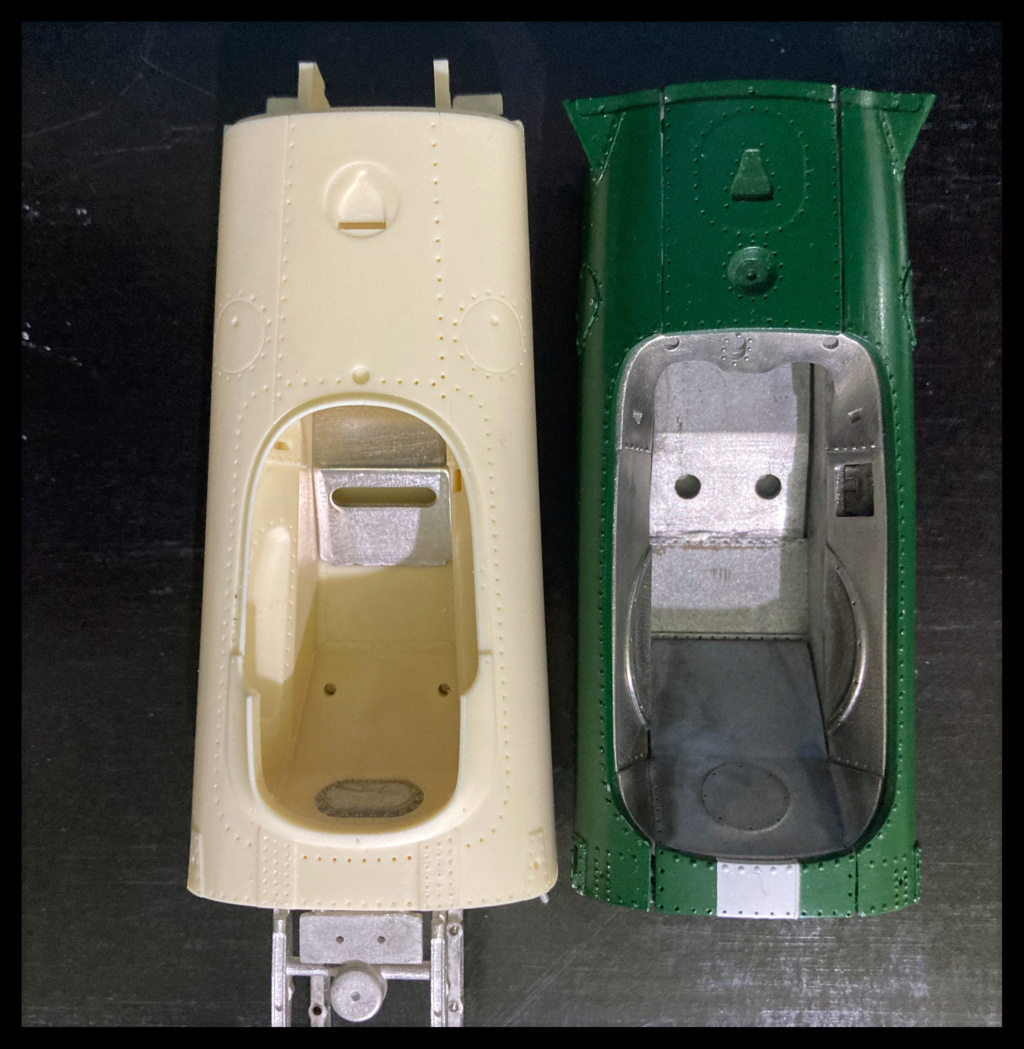
I focused on the hull and the interior.
A little riveting, the hull will be finished later.
I decided to use slightly more rounded heads for the cockpit in order to highlight them more due to their location; a kind of scale effect what.
Those of the hull are of the same diameter, 0.5mm, but flatter. The engine support reinforcements will be 0.4.
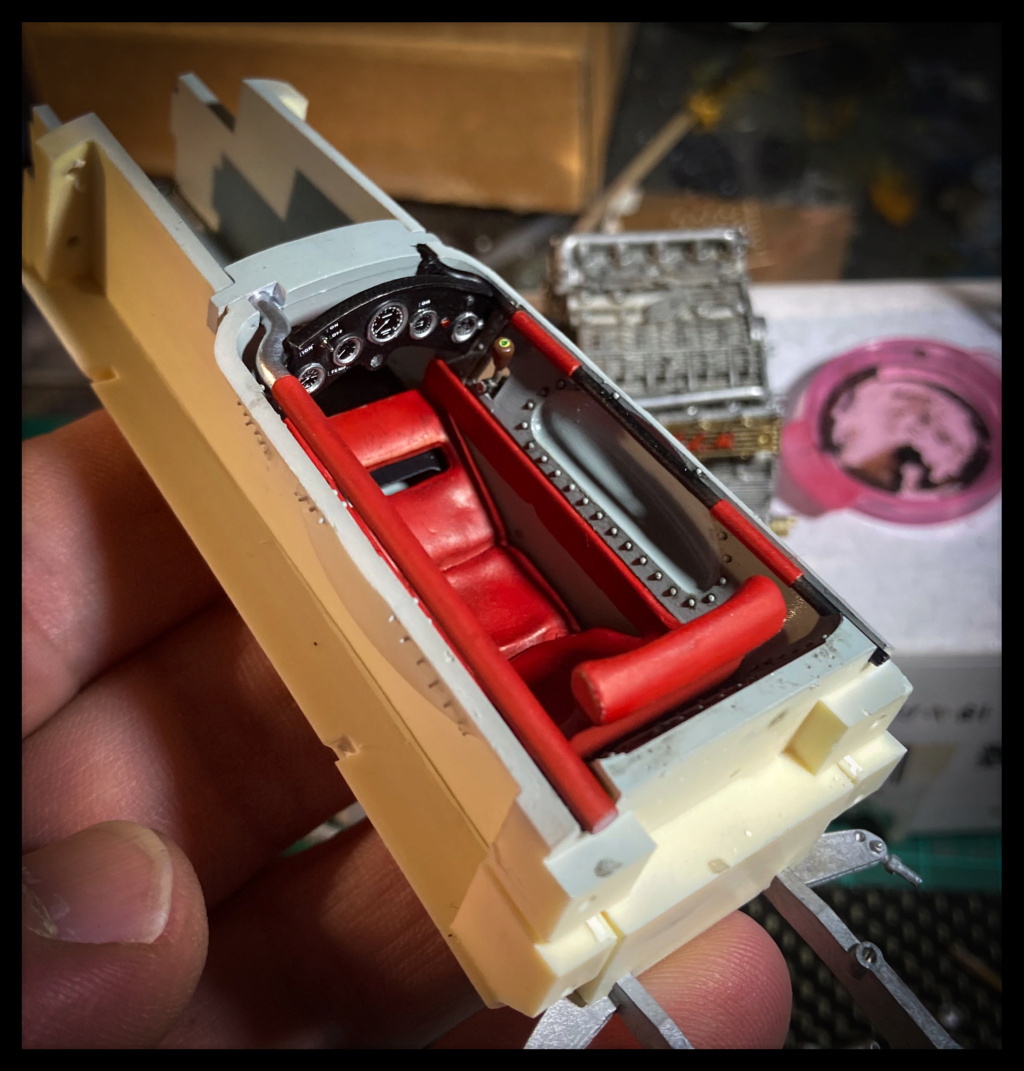
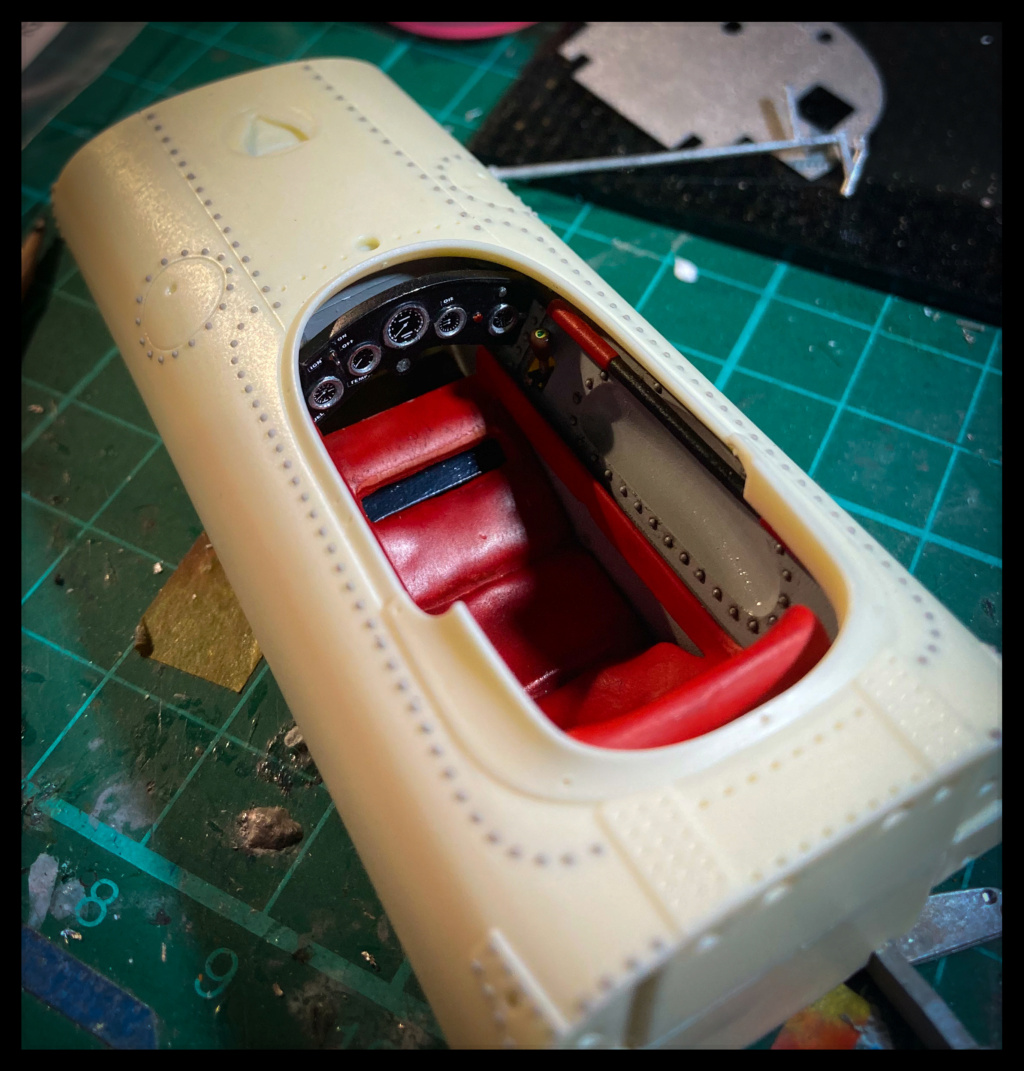
The cockpit was then primed, painted and worked with oils and the dashboard detailed on both sides.
A vintage photo allowed me to perfect its decoration and put the news in the “Dymo” strip.
The gear lever is detailed with a machined bolt and its washer, its pommel painted in acrylic and oil then dressed with its Lotus logo.
It will receive a light touch of varnish tomorrow.
Some pictures to illustrate my point:


Solder for the front tank
Parts primed.


Red, Grey and Green;Enamel, acrylic & polyurethane.


I have finished riveting the hull, except for the central part which will be after painting.
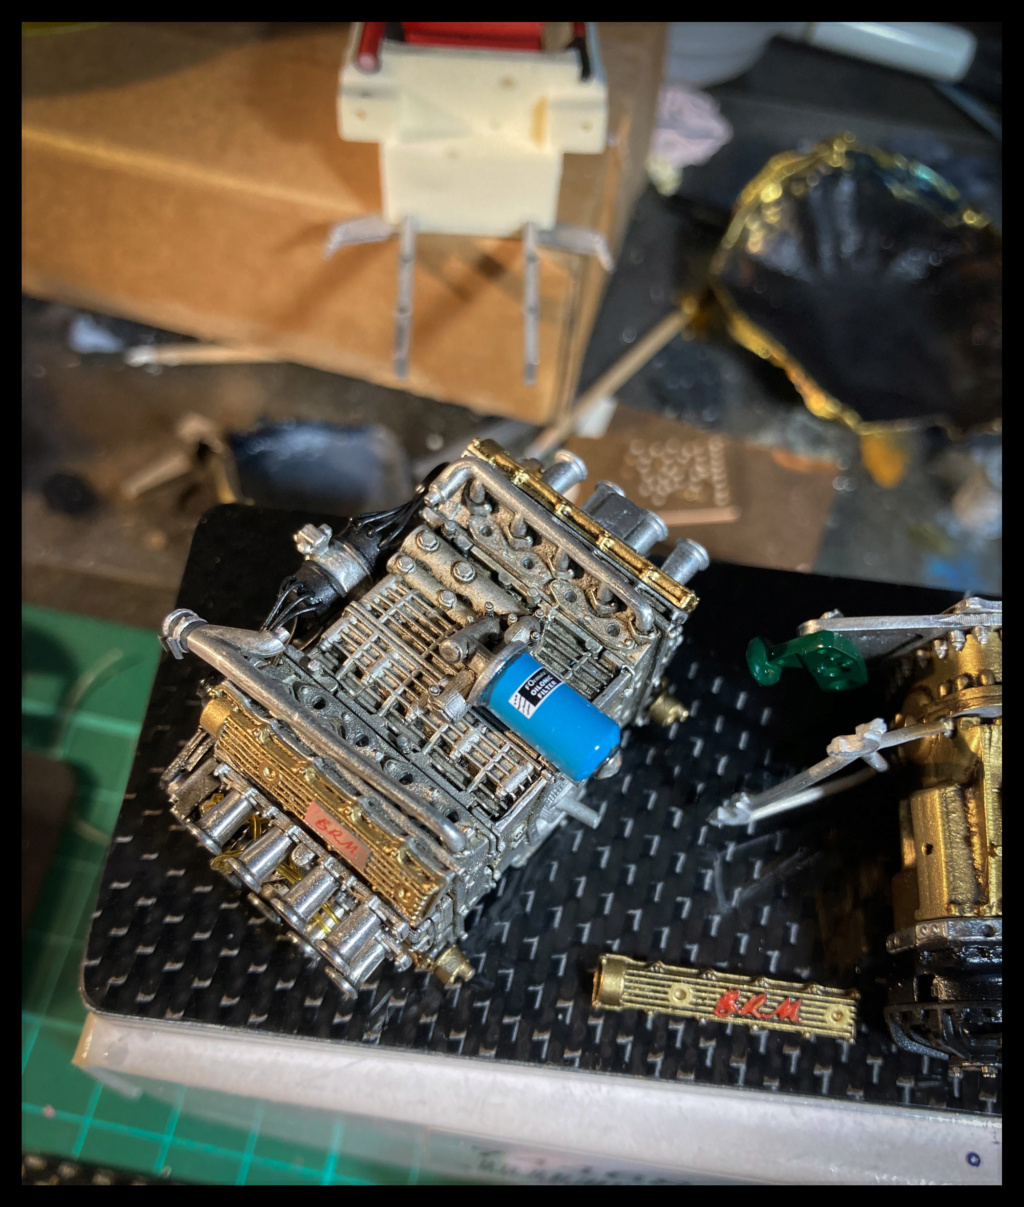
I have done a little work on the part of the engine that will remain visible.
The other side will be equipped with the scoop.


The engine is almost finished.
As expected, the right side is a little less detailed than the left as it will be fitted with the large intake scoop.
I still installed the injection tubes without connecting them to the pump: nothing can be seen anyway...Two options are available for the scoops: White Metal (without installing the cones) or thermoformed, very thin to install on a "bracket" located between the cones.
The Lucas identification plates (Superb!) Are transferred onto an extremely thin sheet of aluminum.
The upper cam covers have been changed, as planned there too, and fitted with the BRM plates engraved as in reality.
Red paint is diffused by capillary with a fine brush.
Other parts are prepared and then primed.


Voilà.
More soon.
Pascal
Pg265- New Member

- Posts : 51
Join date : 2021-08-08
Johnag and Mr Hirakawa like this post
Re: Lotus 43 BRM, Jim Clark, 1966 US GP Watkins Glen. MFH 1/20.
![]() by Johnag Wed 19 Apr 2023, 7:17 pm
by Johnag Wed 19 Apr 2023, 7:17 pm
Hi Pascal,
The details on these MFH kits are amazing, I've never heard of them before, thank you for showing and sharing your work with us Sir...
Andy...
The details on these MFH kits are amazing, I've never heard of them before, thank you for showing and sharing your work with us Sir...
Andy...
_________________
Andy...
Life isn't about how to survive the storm, but how to dance in the rain...

Johnag- Moderator

- Posts : 1576
Join date : 2013-10-12
Age : 58
Location : North Wales, U.K... -

Pg265 likes this post
Re: Lotus 43 BRM, Jim Clark, 1966 US GP Watkins Glen. MFH 1/20.
![]() by Pg265 Sat 22 Apr 2023, 9:48 pm
by Pg265 Sat 22 Apr 2023, 9:48 pm
Hi,
Thank you very much Andy!
The assembly continues with a painting session.
Titanium white then Lotus yellow.
I photocopied the decal sheet onto a Kabuki Tamiya mask sheet.
The copy of the yellow decals is cut and then used to mask the yellow.
Then, British Racing Green and unmask.
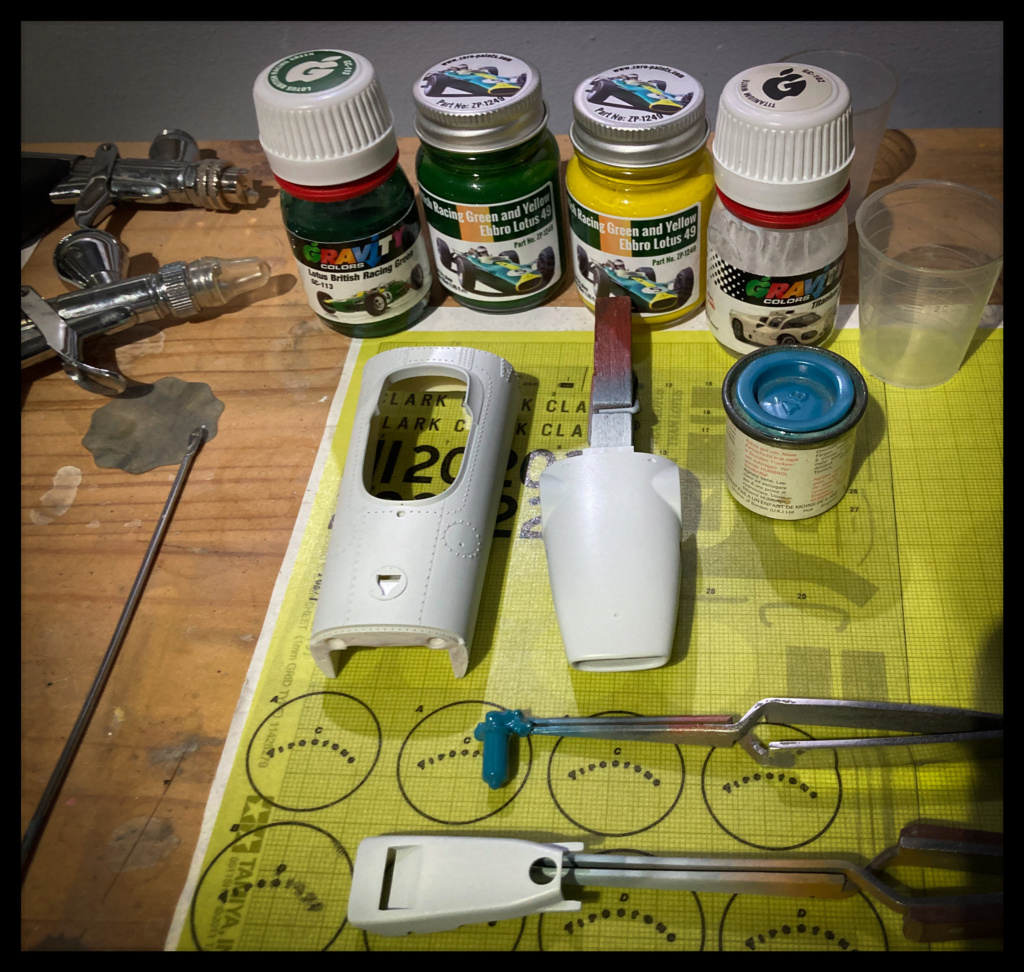


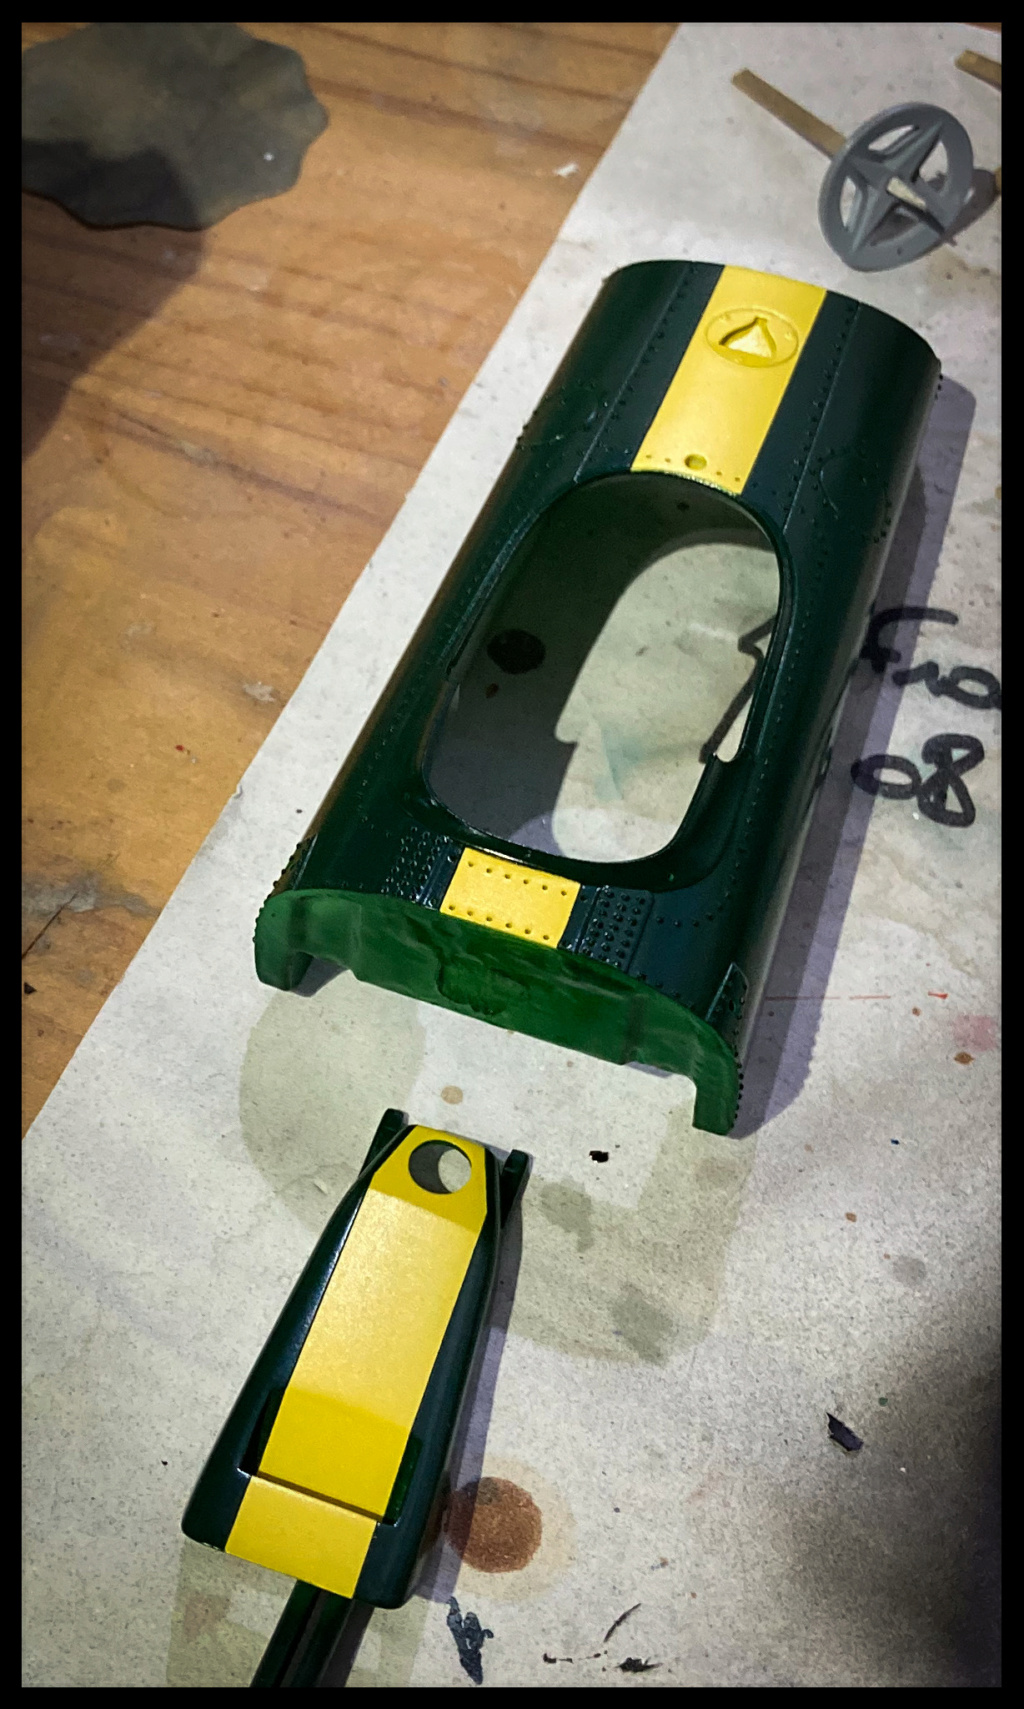

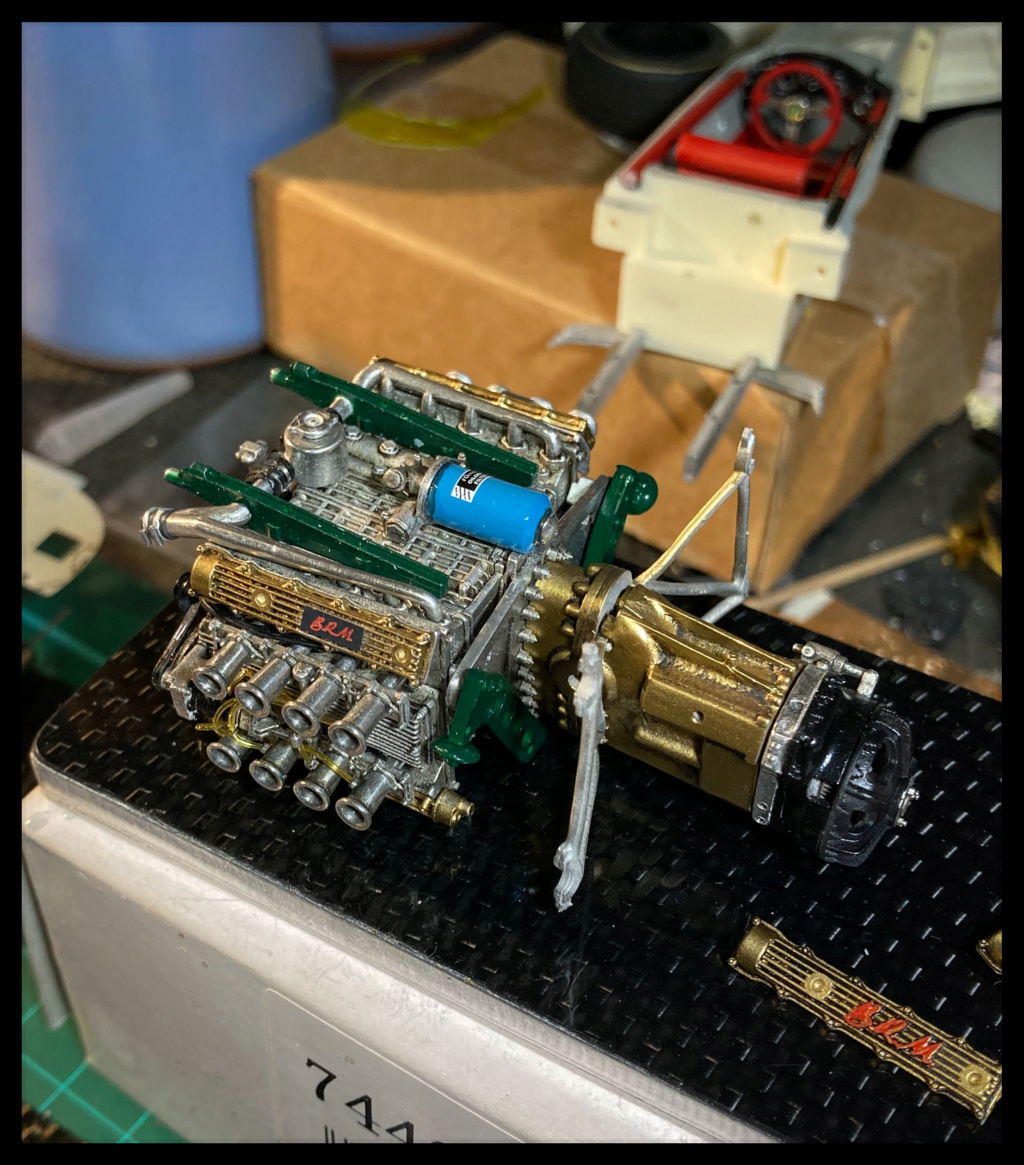
The engine will be able to be equipped with its filter.
Seam lines removed.

The varnish is passed and the pieces dry in their box.


In the meantime, I have done a temporary assembly of the upper frame.
The hoses of the water pipes and installed their clamps are installed.
I have represented the latter in self-amalgamating tape intended among other things ... to repair hoses.

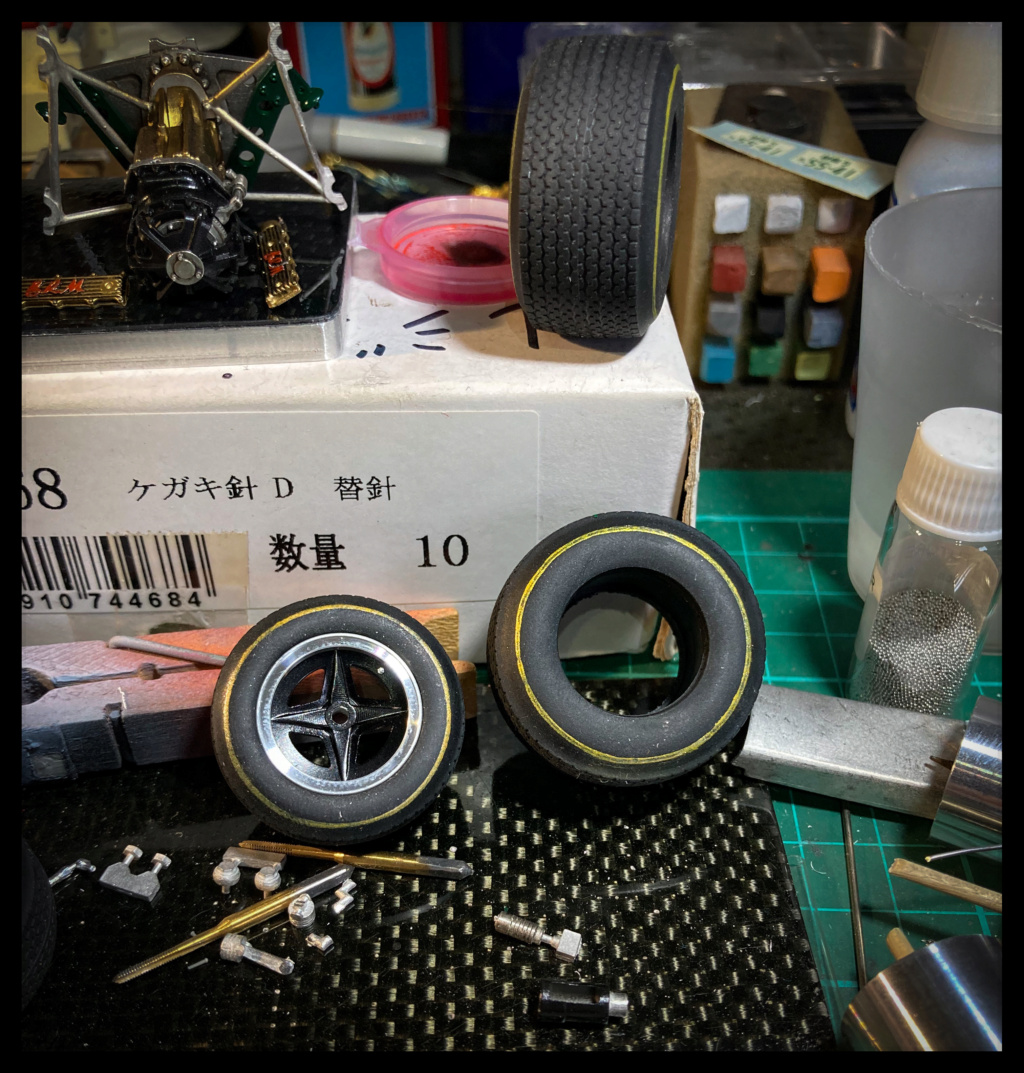
I also tested a new, easier method for the tires gold ring using a template and a gold pen: it could be improved, but it could be worse.
Pascal
Thank you very much Andy!
The assembly continues with a painting session.
Titanium white then Lotus yellow.
I photocopied the decal sheet onto a Kabuki Tamiya mask sheet.
The copy of the yellow decals is cut and then used to mask the yellow.
Then, British Racing Green and unmask.


The engine will be able to be equipped with its filter.

Seam lines removed.

The varnish is passed and the pieces dry in their box.


In the meantime, I have done a temporary assembly of the upper frame.
The hoses of the water pipes and installed their clamps are installed.
I have represented the latter in self-amalgamating tape intended among other things ... to repair hoses.


I also tested a new, easier method for the tires gold ring using a template and a gold pen: it could be improved, but it could be worse.

Pascal
Pg265- New Member
- Posts : 51
Join date : 2021-08-08
Mike C likes this post
Re: Lotus 43 BRM, Jim Clark, 1966 US GP Watkins Glen. MFH 1/20.
![]() by Pg265 Tue 09 May 2023, 8:22 pm
by Pg265 Tue 09 May 2023, 8:22 pm
Hi everybody,
The decoration is at the beginning and the assembly is progressing slowly.
I also made a small aluminum plate for the presentation of the finished model.
I photocopied the instructions on a Kabuki Tamiya mask sheet, as already done for the body parts masks.
I then cut out the lettering freehand ... and it can be improved upon (sighs ...)
Then a fairly thick primer coat followed by a semi matt black coat and a very light sanding with 8000 to give this aspect and this very slight relief effect.
Four rivets, the cam covers for the BRM recall and voila.


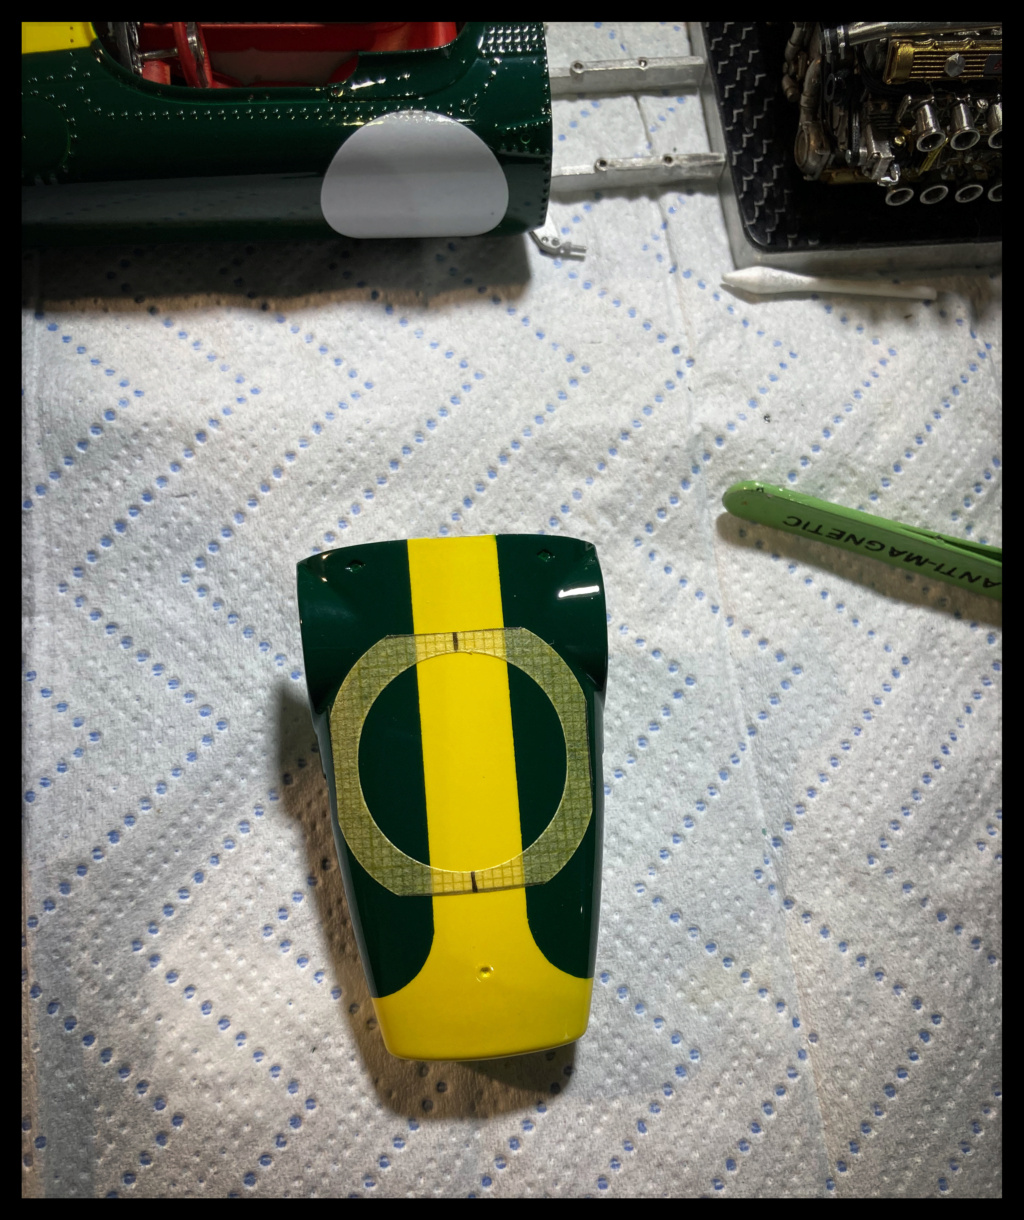
A test allowed me to confirm a problem with the transparency of the decal of the white roundel on the nose.
So I cut out a mask, put on a very light coat of primer, then titanium white.
Here is the result after rapid removal of the masking.
I will wipe it down tomorrow to smooth the outline and apply another decal and the # 1.


Work on the front of the car and more particularly on the radiator and its bracket.
The inside of the radiator is filled in with 1/10 aluminum foil covered with rows of 0.5 lead wire to simulate the coil ... not much can be seen.
The set is adjusted and ready to paint.


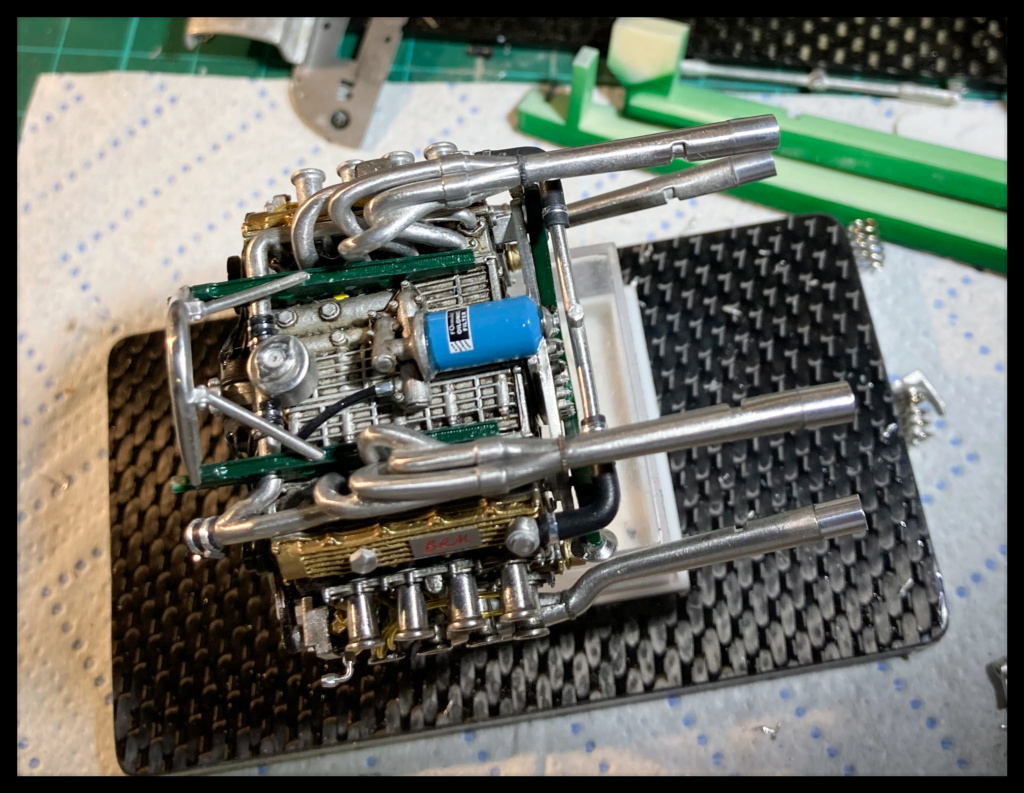
I also worked a bit on the H16 and its exhaust.
Adjusted, sanded and prepared he also receives a weld bead at the exit of the 4 in 1.
A little bi-component tomorrow on the exits and we can move on to primer and white paint.


A little blank test to validate certain assemblies, but above all to have fun and happy that it is starting to take shape.


More soon.
Pascal
The decoration is at the beginning and the assembly is progressing slowly.
I also made a small aluminum plate for the presentation of the finished model.
I photocopied the instructions on a Kabuki Tamiya mask sheet, as already done for the body parts masks.
I then cut out the lettering freehand ... and it can be improved upon (sighs ...)
Then a fairly thick primer coat followed by a semi matt black coat and a very light sanding with 8000 to give this aspect and this very slight relief effect.
Four rivets, the cam covers for the BRM recall and voila.


A test allowed me to confirm a problem with the transparency of the decal of the white roundel on the nose.
So I cut out a mask, put on a very light coat of primer, then titanium white.
Here is the result after rapid removal of the masking.
I will wipe it down tomorrow to smooth the outline and apply another decal and the # 1.


Work on the front of the car and more particularly on the radiator and its bracket.
The inside of the radiator is filled in with 1/10 aluminum foil covered with rows of 0.5 lead wire to simulate the coil ... not much can be seen.
The set is adjusted and ready to paint.
I also worked a bit on the H16 and its exhaust.
Adjusted, sanded and prepared he also receives a weld bead at the exit of the 4 in 1.
A little bi-component tomorrow on the exits and we can move on to primer and white paint.
A little blank test to validate certain assemblies, but above all to have fun and happy that it is starting to take shape.
More soon.
Pascal
Pg265- New Member
- Posts : 51
Join date : 2021-08-08
Johnag, Mr Hirakawa and Mike C like this post
Re: Lotus 43 BRM, Jim Clark, 1966 US GP Watkins Glen. MFH 1/20.
![]() by Ron234 Wed 10 May 2023, 10:02 am
by Ron234 Wed 10 May 2023, 10:02 am
Fantastic stuff 
....quick removal of masking is good to let the new paint flow, so that it doesn’t leave a hard edge.
....quick removal of masking is good to let the new paint flow, so that it doesn’t leave a hard edge.

Ron234- Moderator
- Posts : 697
Join date : 2023-05-02
Location : The sunny borders of North Yorkshire and County Durham.
Johnag and Pg265 like this post
Re: Lotus 43 BRM, Jim Clark, 1966 US GP Watkins Glen. MFH 1/20.
![]() by Pg265 Thu 11 May 2023, 5:51 pm
by Pg265 Thu 11 May 2023, 5:51 pm
Good evening,
Thank you very much Ron234!
I love this race car!
Quite a few small things on which preparation, painting and / or blank assembly work is necessary: it will go faster during the subsequent assembly phases of these subassemblies.
The exhaust has been prepped and painted, I have also started to make it more "operational" with a first oil pass of 3 tones.
Same fight for the radiator and the shock absorber springs.
The shade of these is a mix of BRG and white to conform to my doc.
The remaining rivets (central strip) are primed and painted. They will be varnished with other elements also awaiting varnish.


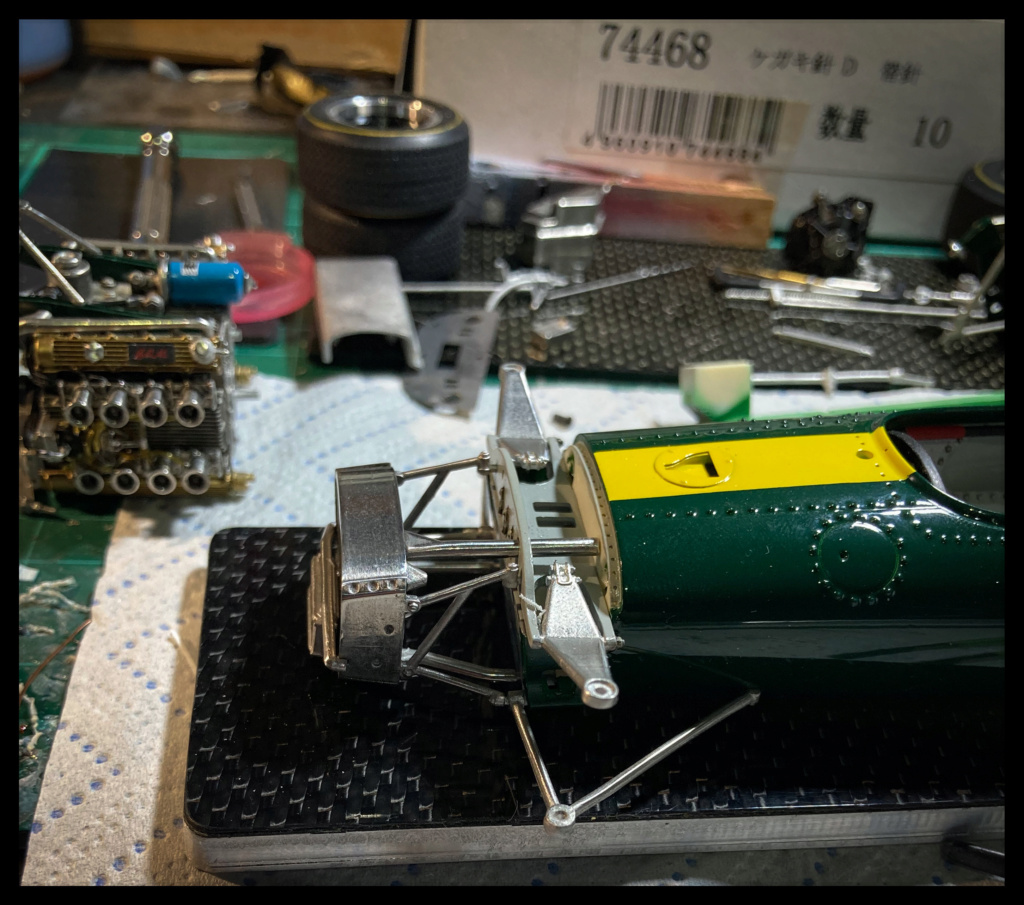
Blank mounting of the front bulkhead with the shock absorbers installed on the upper arms: this test almost allows him to finalize the front of the Lotus and its radiator.
The crankset is installed for good.


The front and rear bulkheads are now in place, as are the front sills and lower wishbones.
The radiator and powertrain are blank mounted to ensure the correct positioning of the pipes and adjust the alignment of the elements.
The same goes for the exhausts on which I still have to pass a blow of airbrush to blacken the outlets, oils and pastels to bring a little life ...


And then ... La CATA !!
A false movement by putting down the engine, the hull caught up in extremis: I breathe !!
But, a little "clicking" alerts me ...
I'm looking everywhere and all of a sudden: no more gear lever !!!
He fell into the shell, inaccessible !!
After some thought, I grabbed a small diameter cutting disc and ... cut off the tub to retrieve it.
Lever (Very!!) well stuck, bathtub cleaned, an Alu "part" is prepared, then painted and the seat reinstalled: like new!
Big waste of time then, but...
The front end is almost finished, everything hooked up, the brake and clutch master cylinders wired.
The discs are "run in" and the calipers are being prepared.
The left front assembly is installed, the caliper wired and fitted with a banjo fitting.
The nose has undergone a drastic slimming cure.


More soon!
Pascal
Thank you very much Ron234!
I love this race car!
Quite a few small things on which preparation, painting and / or blank assembly work is necessary: it will go faster during the subsequent assembly phases of these subassemblies.
The exhaust has been prepped and painted, I have also started to make it more "operational" with a first oil pass of 3 tones.
Same fight for the radiator and the shock absorber springs.
The shade of these is a mix of BRG and white to conform to my doc.
The remaining rivets (central strip) are primed and painted. They will be varnished with other elements also awaiting varnish.


Blank mounting of the front bulkhead with the shock absorbers installed on the upper arms: this test almost allows him to finalize the front of the Lotus and its radiator.
The crankset is installed for good.


The front and rear bulkheads are now in place, as are the front sills and lower wishbones.
The radiator and powertrain are blank mounted to ensure the correct positioning of the pipes and adjust the alignment of the elements.
The same goes for the exhausts on which I still have to pass a blow of airbrush to blacken the outlets, oils and pastels to bring a little life ...


And then ... La CATA !!
A false movement by putting down the engine, the hull caught up in extremis: I breathe !!
But, a little "clicking" alerts me ...
I'm looking everywhere and all of a sudden: no more gear lever !!!
He fell into the shell, inaccessible !!
After some thought, I grabbed a small diameter cutting disc and ... cut off the tub to retrieve it.
Lever (Very!!) well stuck, bathtub cleaned, an Alu "part" is prepared, then painted and the seat reinstalled: like new!
Big waste of time then, but...
The front end is almost finished, everything hooked up, the brake and clutch master cylinders wired.
The discs are "run in" and the calipers are being prepared.
The left front assembly is installed, the caliper wired and fitted with a banjo fitting.
The nose has undergone a drastic slimming cure.


More soon!
Pascal
Pg265- New Member
- Posts : 51
Join date : 2021-08-08
Johnag and Ron234 like this post
Re: Lotus 43 BRM, Jim Clark, 1966 US GP Watkins Glen. MFH 1/20.
![]() by Ron234 Fri 12 May 2023, 8:41 am
by Ron234 Fri 12 May 2023, 8:41 am
Yes, so much of this detail is obscured once the whole thing comes together, however, just knowing it is there is satisfying.
Excellent !
Excellent !
Ron234- Moderator
- Posts : 697
Join date : 2023-05-02
Location : The sunny borders of North Yorkshire and County Durham.
Pg265 likes this post
Re: Lotus 43 BRM, Jim Clark, 1966 US GP Watkins Glen. MFH 1/20.
![]() by Pg265 Mon 25 Dec 2023, 9:04 am
by Pg265 Mon 25 Dec 2023, 9:04 am
Hi,
Merry Xmas to all of you modeling guys!
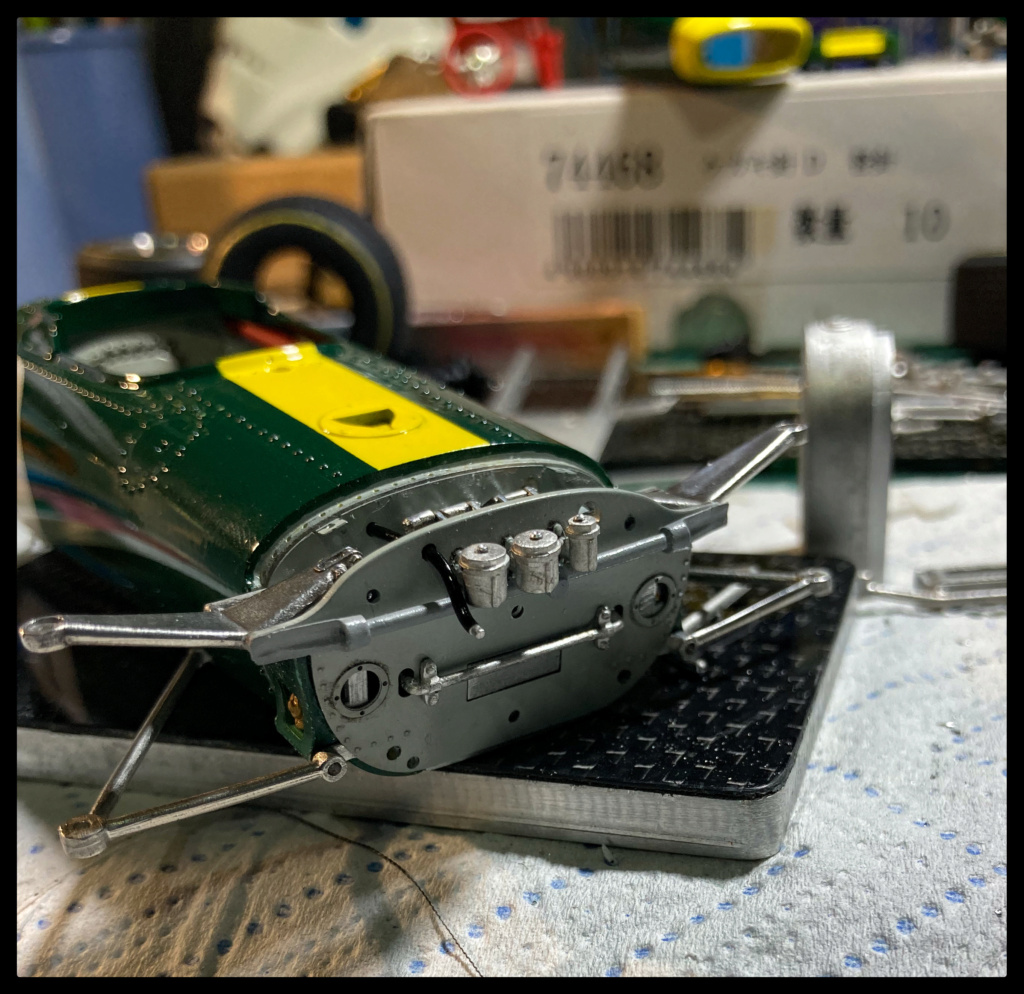
Working on the rear.


Well, it's taking shape.
Sorry for the photos, which I just took, in a lighting that could be improved, to say the least.
I finished assembling the transmission, secured the engine to the hull, and attached the gearbox to the engine and tie rods.
The box is detailed (but it's not finished), the clutch hydraulics connected as well as the starter.
The oil fittings are being installed with the high pressure hoses ...
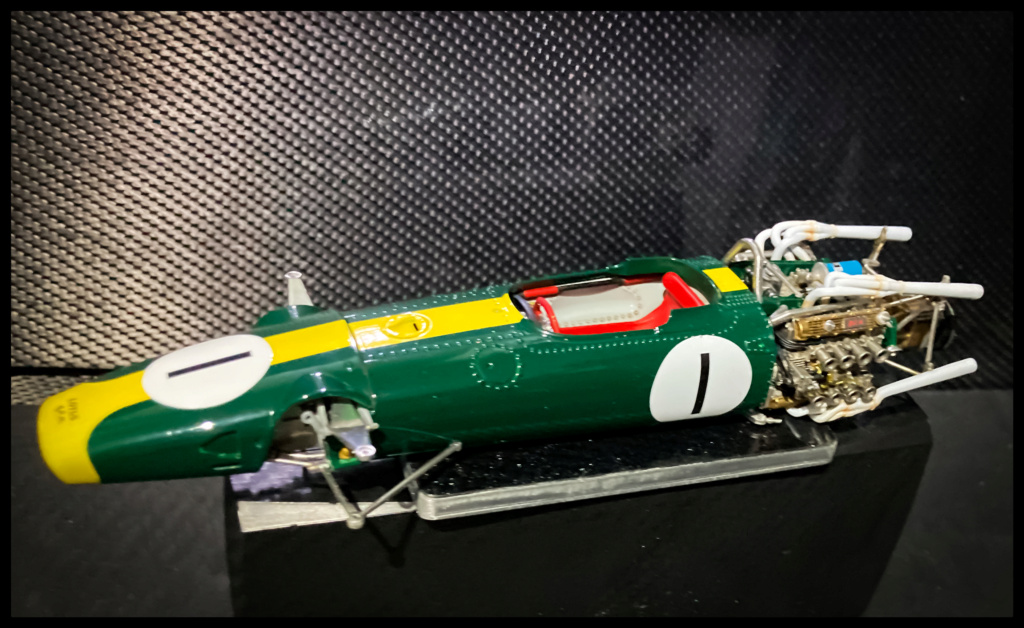
The bodywork elements are positioned correctly with each other; tomorrow I take pictures of the beautiful undressed and maybe on her wheels.


So here it is naked and on its wheels and equipped with its exhausts.
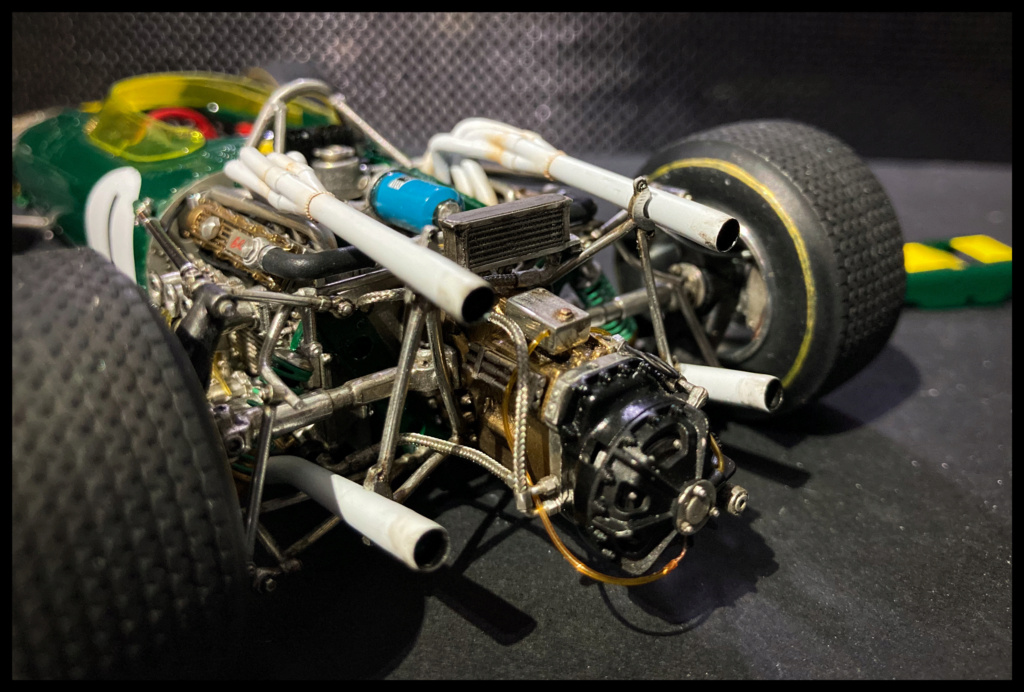
the brake lines are installed at the rear as well as at the front.
The oil cooler is installed, complete with new fittings and braided hose.
I will soon have to take care of fixing the 2 windshields, which have been laid blank for the moment.
A serious cleaning step will be necessary beforehand, as will the installation of the yellow stripes and the "Team Lotus" decals.
But it has never been so close to the end.


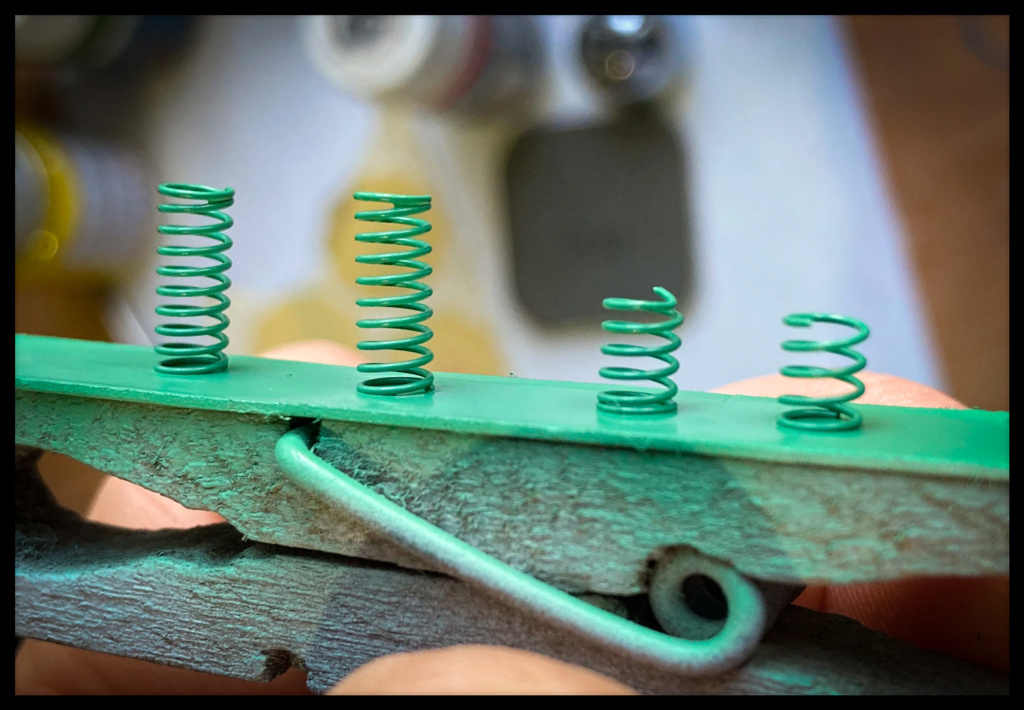
New thinner and softer springs built and installed

Various shades sprayed on the exhaust tips, then pastels.
I wanted to depict the « oil sprinkles/splash(?...)» so I let some China ink out for an hour, and sprayed at very low pressure.


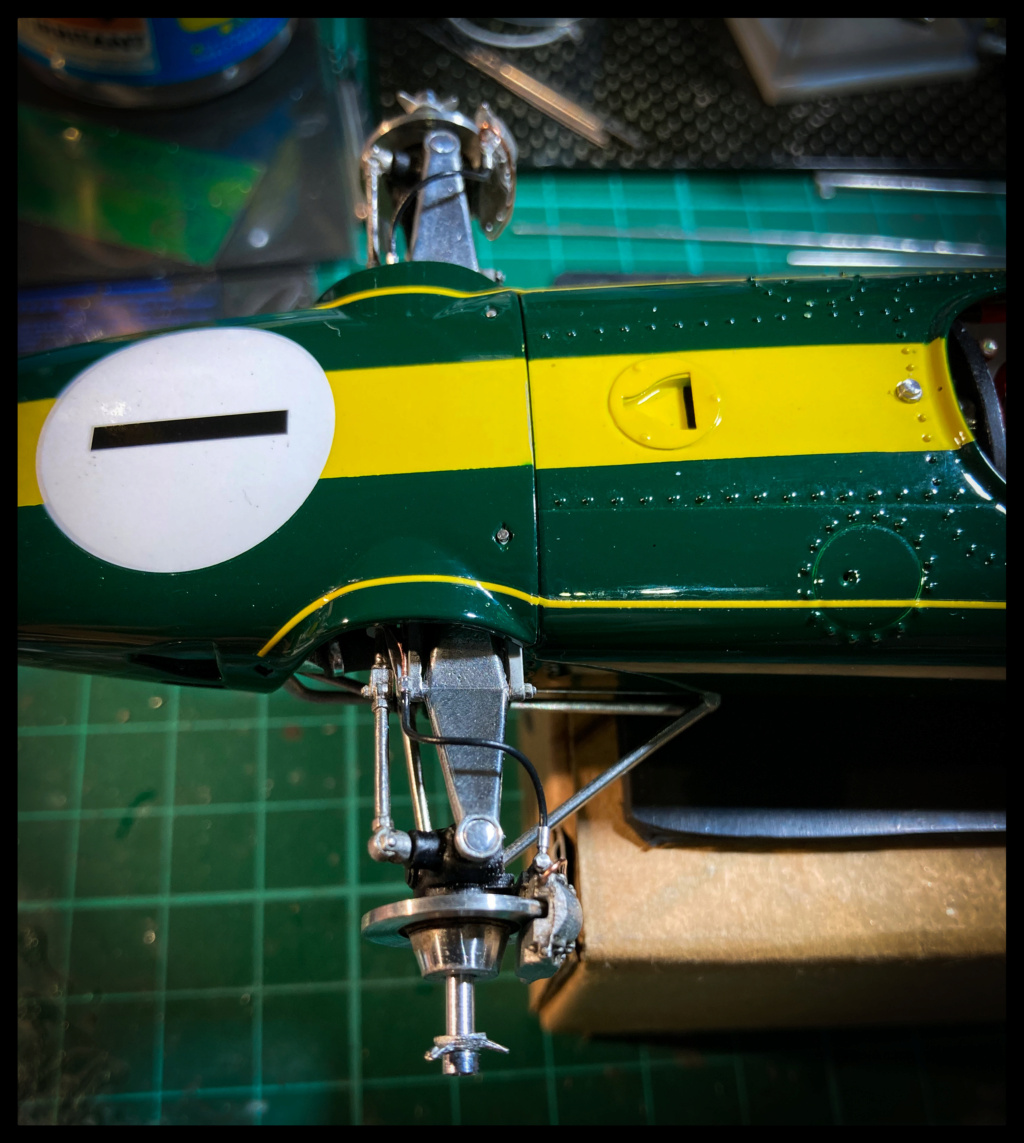
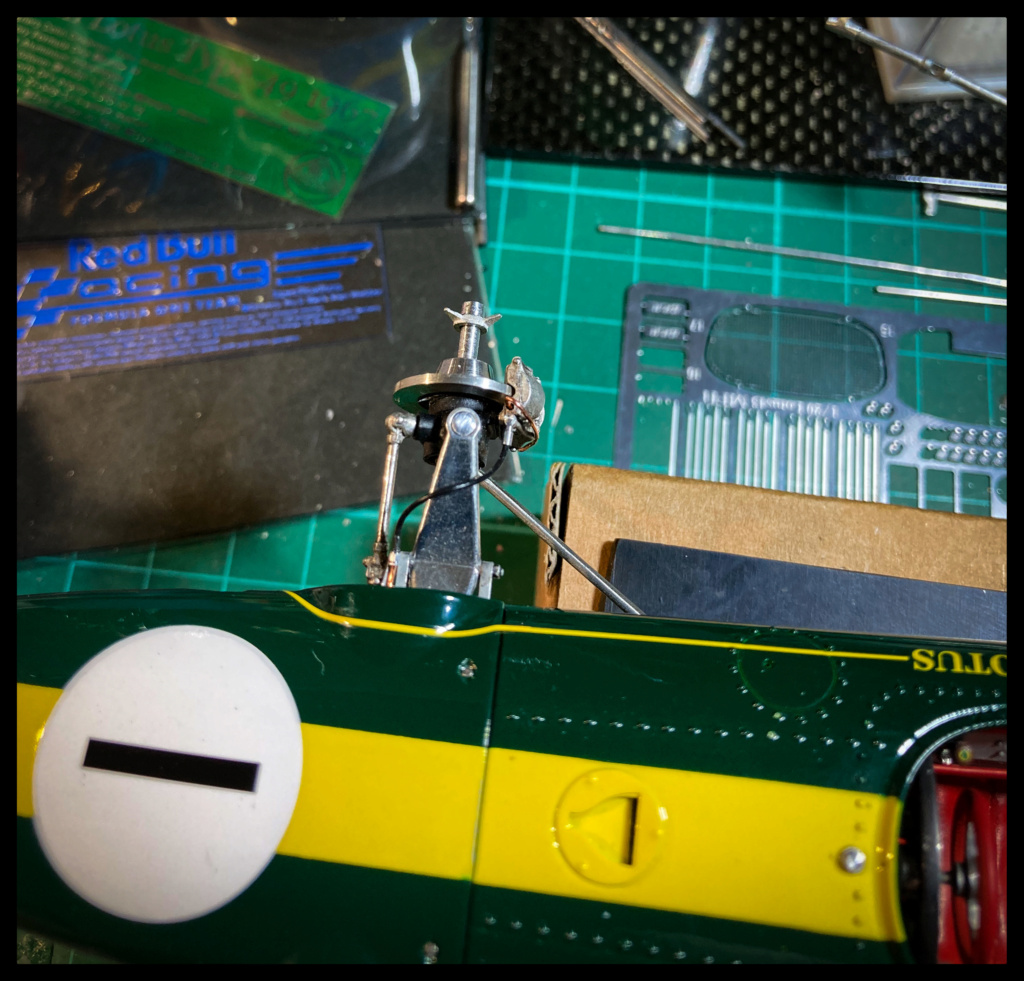
Yellow stripes and TEAM LOTUS installed


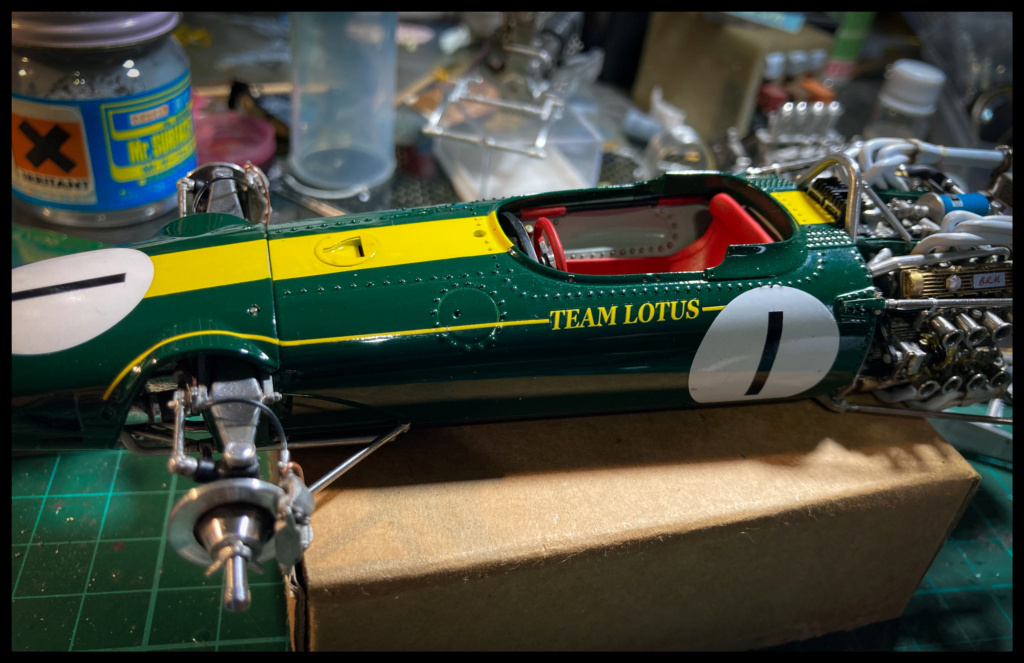
Thin Alu covers to hide the upper wishbone screw heads.
Vues d’ensemble:
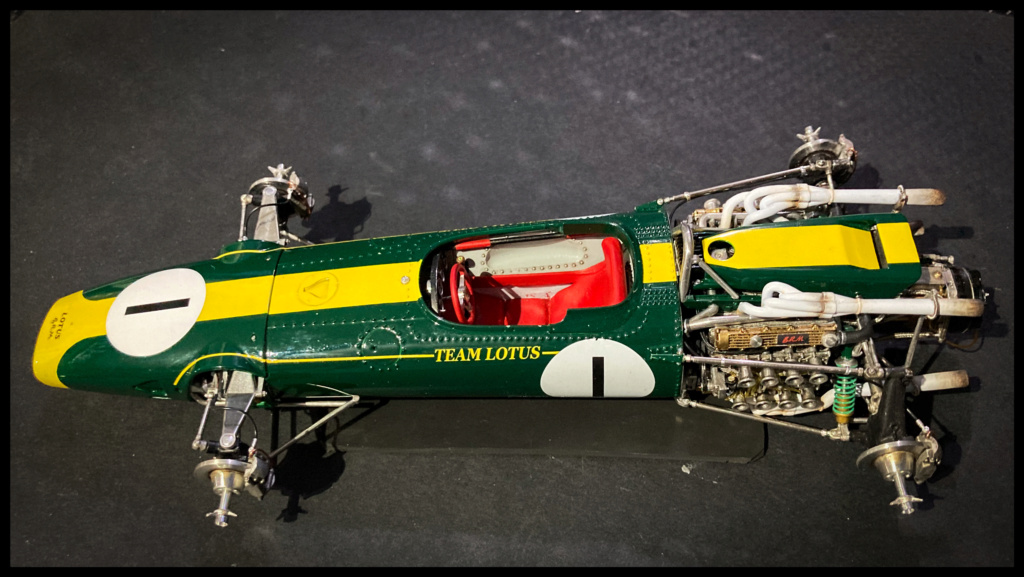


Voilà.
Pascal
Merry Xmas to all of you modeling guys!
Working on the rear.


Well, it's taking shape.
Sorry for the photos, which I just took, in a lighting that could be improved, to say the least.
I finished assembling the transmission, secured the engine to the hull, and attached the gearbox to the engine and tie rods.
The box is detailed (but it's not finished), the clutch hydraulics connected as well as the starter.
The oil fittings are being installed with the high pressure hoses ...
The bodywork elements are positioned correctly with each other; tomorrow I take pictures of the beautiful undressed and maybe on her wheels.


So here it is naked and on its wheels and equipped with its exhausts.
the brake lines are installed at the rear as well as at the front.
The oil cooler is installed, complete with new fittings and braided hose.
I will soon have to take care of fixing the 2 windshields, which have been laid blank for the moment.
A serious cleaning step will be necessary beforehand, as will the installation of the yellow stripes and the "Team Lotus" decals.
But it has never been so close to the end.


New thinner and softer springs built and installed

Various shades sprayed on the exhaust tips, then pastels.
I wanted to depict the « oil sprinkles/splash(?...)» so I let some China ink out for an hour, and sprayed at very low pressure.


Yellow stripes and TEAM LOTUS installed


Thin Alu covers to hide the upper wishbone screw heads.


Vues d’ensemble:


Voilà.
Pascal
Pg265- New Member
- Posts : 51
Join date : 2021-08-08
Mr Hirakawa likes this post
Re: Lotus 43 BRM, Jim Clark, 1966 US GP Watkins Glen. MFH 1/20.
![]() by Ron234 Tue 26 Dec 2023, 10:57 am
by Ron234 Tue 26 Dec 2023, 10:57 am
More fascinating stuff. Even though it’s not a subject I build, I can appreciate the care and quality in the model, with details and tips I can use on my own builds.
Yep, great work Pascal.
Yep, great work Pascal.
Ron234- Moderator
- Posts : 697
Join date : 2023-05-02
Location : The sunny borders of North Yorkshire and County Durham.
Pg265 likes this post
Sponsored content
» Lotus 25 Climax. Jim Clark '63 F1 Championship Car
» Lotus 25 Climax. Jim Clark '63 F1 Championship Car
» Jim Clark
» Remembering Jim Clark
» Lotus 107B
» Lotus 25 Climax. Jim Clark '63 F1 Championship Car
» Jim Clark
» Remembering Jim Clark
» Lotus 107B
Skid's :: Works In Progress :: Race cars
Page 1 of 1
Permissions in this forum:
You cannot reply to topics in this forum|
|
|