
Challenger 1 1959
Skid's :: Works In Progress :: Race cars
Page 1 of 2 • 1, 2 ![]()

Challenger 1 1959
![]() by Guest Sun 03 Mar 2013, 6:01 pm
by Guest Sun 03 Mar 2013, 6:01 pm
My goal is to have it done this year. I would like to show it next year. Maybe side by side with the 1960 version of this car I built.
Guest- Guest
Re: Challenger 1 1959
![]() by Guest Sun 03 Mar 2013, 6:25 pm
by Guest Sun 03 Mar 2013, 6:25 pm
It turns out that the Challenger first went to the slat flats and dry lakes as a streamlined dragster with 2 fuel injected hemis in it. This was 1958. Yes that means that I might build it one more time. Here is the only picture I have found of it in that configuration.

Here is what it says about the car then.
In 1958 M/T while on his way to a national drag race he stopped by the salt flats with a twin engine Hemi dragster, he took it onto the salt flats and run it setting a new record of 294 MPH which was 25 MPH faster than the previous record which took seven years to set by the previous record holder. This made Mickey decided to build a car which would go 400 MPH.
This car was actually a Streamlined Dragster. The total cost for Mickey to build the car and set the record was about $8000.00
Then in 1959 he took the car back with 4 fuel injected Pontiac engines. I read somewhere that the engines were 389's but can't find that tech now. Here is how it looked then.


Here is what Thompson Motor Sports says about the car.
Mickey Thompson built this car on his own and on October 6, 1959 M/T drove it to a World Speed Record of 363.48 MPH and the world speed record in A/BFS Class which stood till 1990 when Al Teage broke it at 389.372 MPH. In 1960 Mickey made a one way run of 406.60 MPH.
The first major technical problem was finding tires capable of safe operation at speeds greater than ever achieved on land. The problem seemed so insurmountable that the project came close to dying at birth.
Mickey had went to various major companies and asked them for tires capable of going well over 400 MPH. The Reaction: negative, Get Lost. Until he went to Goodyear Tire & Rubber Company.
Goodyear executives listened attentively to M/T's plans, deliberated, and said "OK, we'll build them."
To M/T's luck, All concerned happened to be in the right place at the right time. Goodyear engineers had been working on development studies for a radically new type of tire involving principles not to be found in any other commercially available tire.
Goodyear's design engineer Gene McMannis (See Special Note Below) working on their mechanical structure and chemist Jim Loulan concentrating on their compounding
So that's what it's all about. To build it I will use this kit.

The kit won't go to waste. I plan to use the Showboat to build an Allison powered 4 wheel drive dragster down the road. At this time I want to thank Dave Holmes for selling me the kit at a fair price. These kits sell for stupid money on E-bay. I have seen the Challenger 1 kit go for over $100.00 by itself.
Anyway that's what the project is all about. The body mods are not going to be that tough. I think the hardest part of the build will be the engine mods and making the front wheel covers. I am thinking there will be cokes cans involved with that, not sure just thinking ahead.
If you want to see more research pictures you can look here. I will add more as I find them.
http://s1155.beta.photobucket.com/user/Zbuckster/library/bModel%20Car%20Build%20Up%20Gallery/Racing/Salt%20Flats/Challenger1959
I will start with the engines. I am going to setup an assembly line now. See ya in a coupe days with an update.
All questions and comments are welcome.
Guest- Guest
Guest- Guest
Re: Challenger 1 1959
![]() by Guest Sun 03 Mar 2013, 7:47 pm
by Guest Sun 03 Mar 2013, 7:47 pm
I have already built several multi-engined cars so I have a system that is like and assembly line. I keep all the engine parts together once they are cleaned and fitted. You might think those heads, blocks, schattershields, timing gear covers, etc. are all the same but they aren't. So I keep the engines together until they a put together.
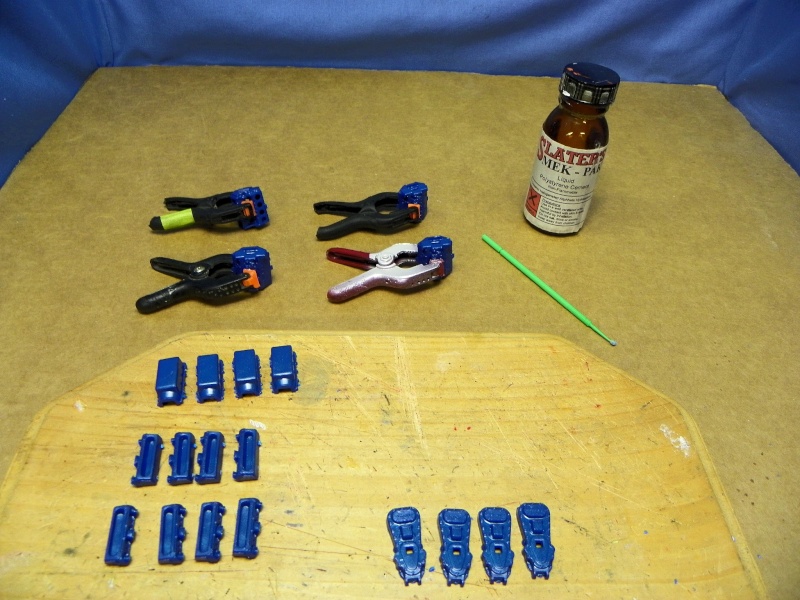
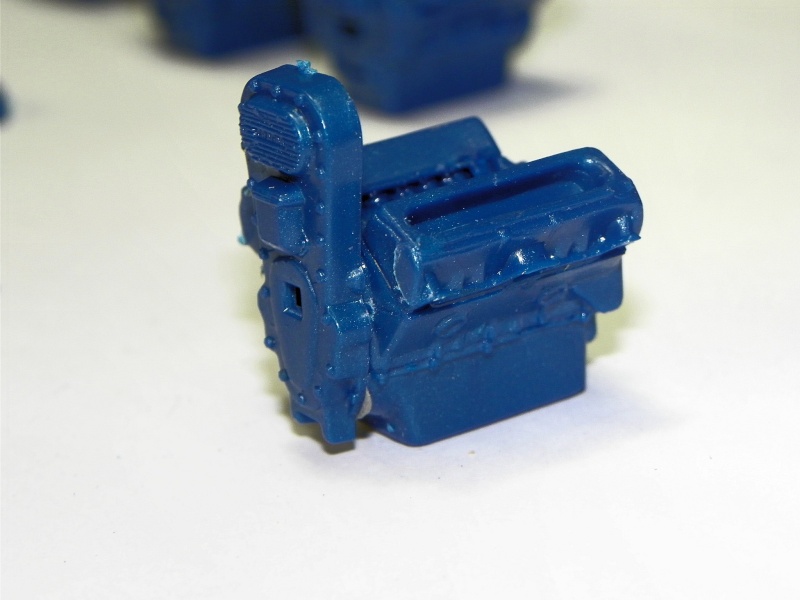
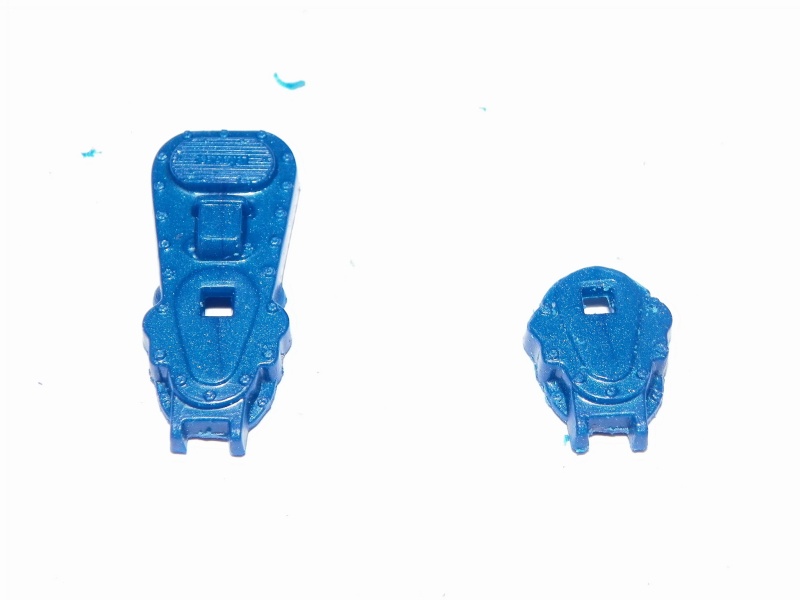
After getting the long blocks built I hit the first fabrication spot. The kit has the blower belt shields and the timing gear covers cast as one piece. There won't be any blowers on this car. I was going to hunt around for 4 timing gear covers but then decided against it. I still need to be able to use the front mounted magneto drive so I need the fat timing gear cover. That way it looks like it holds the extra gears needed to drive the magneto. So I cut the top of the blower belt shield off and then bent some small pieces of styrene to fill the hole at the top of the cover. then I melted some spruce in MEK and made a putty to smooth the top. After it sat up I filed and sanded them smooth, primered and painted. Then accented the bolts. Here's some pictures, thy are worth a thousand words.


Having that done I can how make some Valley covers to cover the lifter gallery. I will use business card stock to do that. Learning to work with paper. The fuel injectors will be fabricated and then put right on the head, so there is no plenum chamber on the setup. More on that when we get that far.
Got the frame put together and painted.

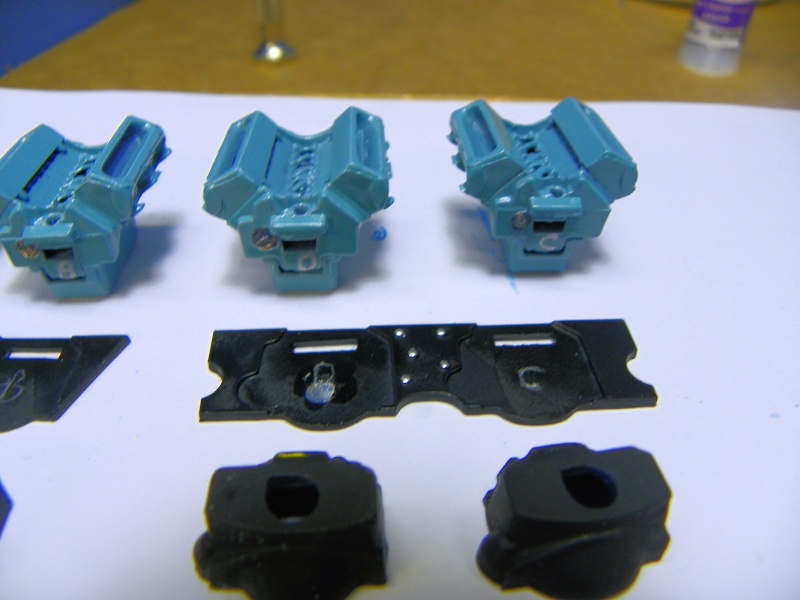
Back to the assembly line. The instructions refer to the engines as A,B,C,D so I did the same. After the firewall were done I had to fit each engine to a certain place so I lettered them in a place that won't show when they are finished.


Fuel tanks are done and fitted.

Transmissions are done.

Water tanks (radiators) are finished and the wheels and tires are ready to go. As I get something done I put into a model box and it waits it turn to come back for the next step.

I'll be back soon with another update. I'll try to keep them shorter. I guess I got on a roll and just kept working.
Thanks for looking in all questions and comments are welcome.
Guest- Guest
Re: Challenger 1 1959
![]() by Guest Sun 03 Mar 2013, 8:01 pm
by Guest Sun 03 Mar 2013, 8:01 pm
While working on the engines and power train I decided to start on the body modifications, I know that things have to sit and the filler needs to harden and set so I figured I could do that and keep going with the other. Plus it gets the first fabrication step out of the way. So I took the upper body center section and went to work.
Started with this.
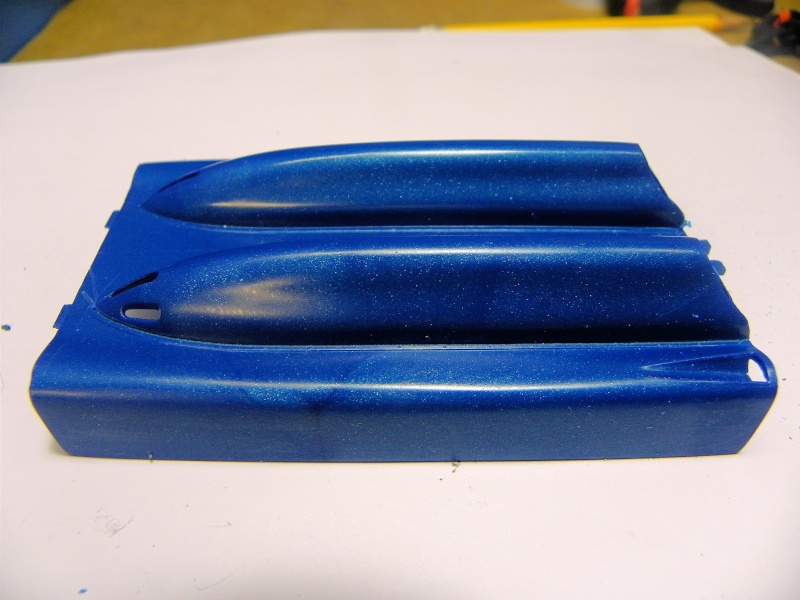
Using the back side of a #11 blade I remover the scoops and cleaned up the holes.

The plastic measured .030" so I made some filler pieces from .030" styrene sheet and MEK'ed them into place.

Then using home made filler I applied a coat.

I went to bed and let it set next morning it was a twisted, distorted piece of junk. I wish I would have taken pictures of it then but was so upset I forgot to. So I took a block of modeling clay and filled it up. With the clay buck in place I sanded the top down flat.

That seemed to relieve the stress points and it remained flat and true when I removed the clay. I did add a couple reinforcement strips underneath to help it hold it's shape. While this was my first stumble on this build I am sure it won't be the last. The worst thing that it will do it change the way the car is displayed.
So while all that was going on I kept working on the do-dah stuff. got the Fire extinguisher's done, magnetos, fuel pumps, spark plug wires and boots.


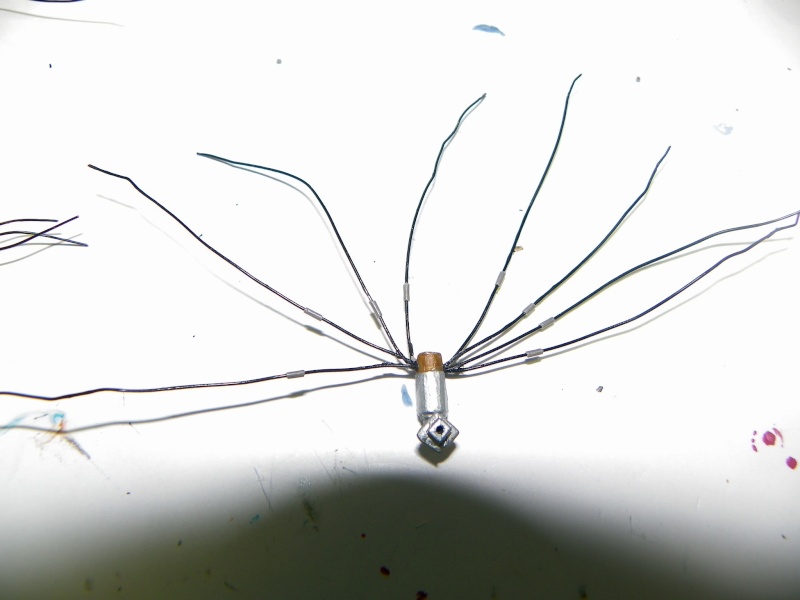
Also got the exhaust system done.

This is the 16 legged thing that ate Tampa. Not really ;) It seems the black spark plug wire I have been using looks purple when you photograph it. So this time I gave the wire a coat of black lacquer. Now it's looks right.
So that's were we are at on this one. I have been working on the grandkids playhouse during the day and this build at night so it is going slower than I had thought at first.
The next major step will be making the front wheel covers. Any ideas on that would be greatly appreciated.
Thanks for looking in I will try to update more often so it flows a little better. All questions and comments are welcome.
Guest- Guest
Re: Challenger 1 1959
![]() by Guest Sun 03 Mar 2013, 8:10 pm
by Guest Sun 03 Mar 2013, 8:10 pm
Thanks to those that are following along. I know it's kind of a weird subject to model , but it will be a true one of a kind when done.
The main focus of the build will be the engines. I couldn't find the correct fuel injection system in a kit so decided to fabricate what I need. I didn't have the right size styrene to work with, yesterday I went to American Lake VA Hospital for some tests. When they were done with me I went to a small Hobby shop and found what I needed so work on the engines will start up again now.
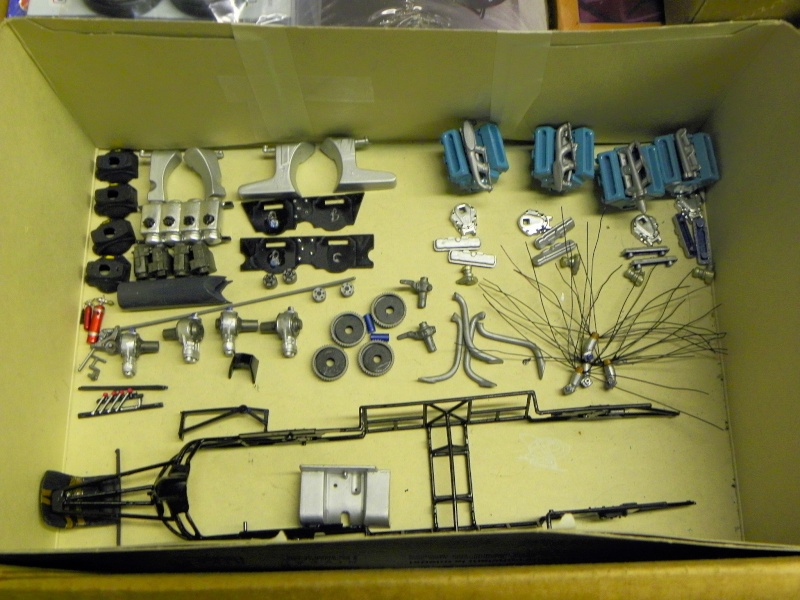
In the mean time I have still been doing the little do-da things and working on the body work. As you can see the box of stuff ready to go is filling up.
Here is the body mock up on the frame. This is a check of the fit of the reworked center section.


So that brings you up to date. I have been experimenting with some different craft wire, brass beads and styrene strips. I think the fuel injection system is gonna be pretty close. See ya in a couple days with some more.
All comments and questions are welcome.
Guest- Guest
Re: Challenger 1 1959
![]() by Guest Sun 03 Mar 2013, 8:26 pm
by Guest Sun 03 Mar 2013, 8:26 pm
First big deal. Last weekend when I went to the Billetproof Rod Run I bought a book that is copyright 1959. "Griffith Borgeson on Hot Rods" Right on the cover is the very car I am building. Inside There are a bunch of articles but the Challenger 1 part is 8 pages of tech and 21 photos. The article was written before the car was raced. It gives no speeds. It does have weight, height, width, all that stuff.

Anyway this answered a lot of questions I had about the injection system. It is exactly the system I thought it was. Now to replicate it. So here it is the place where the magic happens.

The stuff I am using is Evergreen styrene strip .030x.100 for the runners. The injectors are wiring Ferrell's I don't know the size but they are .231 tall and .068 in diameter. The fuel block will be a #1 bead crimp (brass). The lines will be .018 black craft wire and .012 silver craft wire.
Drilling the styrene without breaking it is harder than I ever thought it would be. But now I have built one of the eight needed and have a system that I think will be better. I have to drill each hole three times and the last one is oh so touchy. I am drilling everything by hand no drill motor. Any way here is the proto-type.

as you can see the ferrell's were to tall and had to be shortened. These are .130 to .133 long.

 [/ur]
[/ur]Any way That's what I am up to until I can get 7 more of these built.
One more picture, I forgot the fuel block.
[url=https://servimg.com/view/18126742/398]

So thanks for looking in That's what I will be up to for the next however long it takes. ;D All comments and questions are welcome.
Last edited by Zbuckster on Sun 03 Mar 2013, 9:33 pm; edited 1 time in total
Guest- Guest
Re: Challenger 1 1959
![]() by Guest Sun 03 Mar 2013, 8:36 pm
by Guest Sun 03 Mar 2013, 8:36 pm
The last update I was drilling the styrene strip to hold the shortened ferrell's that will be the injector's. So here is the group photo I promised you.

Then I built all the fuel blocks.

That was when I realized I need to drill a hole in each one of those injectors so the fuel line will have a place to go. The silver fuel line is .012" so I was thinking that a .015" hole would be about right. Broke the first drill bit immediately after starting to drill the hole.
So I need a way to hold the injector tube and a jig that would let me drill the hole in the same place every time. So I came up with this jig.

Then drilled a hole in the top of it.
Now I can drill 32 of them and have the hole close enough to being the the same place every time.

This is a mock up of the first one.

So that's it for me. I know it doesn't seem like much but it's quite bit. That jig is not the first one I built. Had to build 3 before I got one the worked right. I used the parts from the broken ones to build them so no waste. ;)
All comments and questions are welcome. I will be back soon with another update. Thanks for looking in.
Guest- Guest
Re: Challenger 1 1959
![]() by Guest Sun 03 Mar 2013, 8:58 pm
by Guest Sun 03 Mar 2013, 8:58 pm
I finally got all 32 injector tubes drilled. While I was doing that I was painting and detailing other parts,. What all that means is that the "To Do Box" only has the intakes systems and body in it.

I got the fuel lines measured out and drilled the 4 Moon Tanks to accept them. This gives you the final mock up view of that system.

The problem I have been trying to work out is the fuel block mounting. In the real car it looks like some type of bracket has been made to mount it in the middle of the engine. After 4 attempts at it I finally decided on this one. I took some .060 I Beam styrene. Then cut it to 45 degrees on each end and then centered it on the intake runners.


I know it looks a little chunky in the pictures but being only .060" wide, the fuel block will sit on top of it and when the fuel lines are run to the injectors and back to the fuel pump I don't think it will be all that noticeable. I used the I Beam because strips of styrene that are .010" to .030" thick are to flimsy.
So the only thing left to do is work out the front wheel covers. I am thinking about talking to a machinist and just see how much to make a pair.
OK I am out of here. I have some other things to do before I leave for the Goodguys Model show tomorrow AM. I took 7 models up to Puyallup on Thursday. Going back to get them tomorrow and see the rod run.
Guest- Guest
Re: Challenger 1 1959
![]() by VirusX Sun 03 Mar 2013, 9:06 pm
by VirusX Sun 03 Mar 2013, 9:06 pm

VirusX- New Member

- Posts : 73
Join date : 2013-03-01
Age : 37
Location : Cold Lake, Alberta, Canada
Re: Challenger 1 1959
![]() by Guest Sun 03 Mar 2013, 9:28 pm
by Guest Sun 03 Mar 2013, 9:28 pm
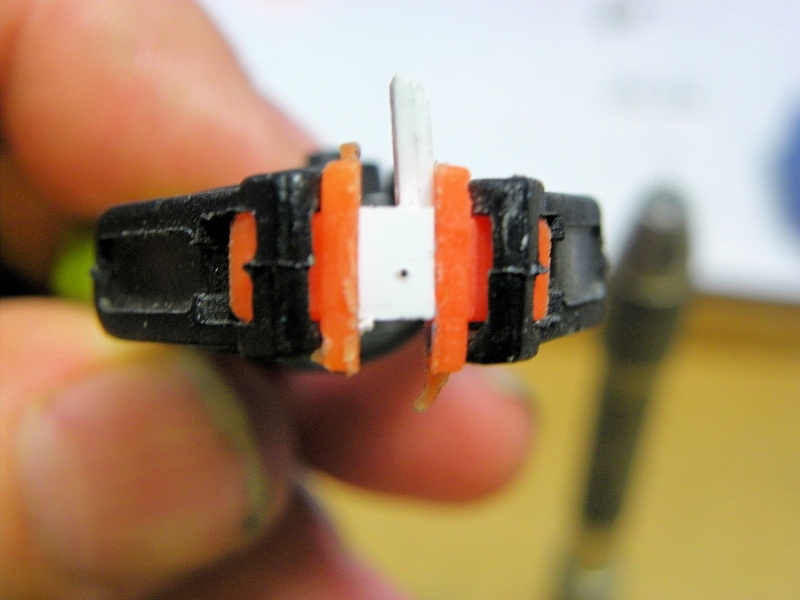
I have the intake system to the point that t you will be able to figure out what I have been up to anyway and what the system will look like.
Her re is the finished intake painted with Orr-Lac Dull Aluminum paint.

What I didn't like is the Pontiac Blue engine paint being seen in the holes. So I took some printer paper and painted it with Rust-Oleum Metallic Brass paint. I cut it into strips .096" wide and glued it to the back of the intake runners.
Now when you look into the short tube of the injector you will see what appears to be the brass throttle butterfly.
Here is a mock up to show you how it will look.

The .012" silver craft wire that makes up the fuel lines will go into the small hole. It will go all the way to the bottom of the tube. When you look into it it looks like the steel throttle shaft in the center on the brass butterfly. That wasn't planned but an accident I can live with. So that's about it for now. Gouing to take a break from this one for a couple weeks while I build the Camaro. See ya soon and thanks for following along. All comments and questions are welcome.
Guest- Guest
Re: Challenger 1 1959
![]() by Guest Sun 03 Mar 2013, 9:42 pm
by Guest Sun 03 Mar 2013, 9:42 pm
This all started at Model Fest in March when I sat in on a scratch building seminar that Pete and Steve put on. After hearing the they had a lathe I approached them after the seminar and ask them about doing some commission work for me. We talked about it and exchanged email addresses. So several emails changed hands. Steve had access to a Challenger 1 kit so they got a wheel and hub and measured everything. I didn't have to mail them my parts I was happy about that, you never know where your mail is headed. Anyway they went on line and found some reference photos that I didn't have. I am going to post them here so they will be archived with the build.
This one shows the rear wheel cover that I didn't know he used.

Car all dressed up and ready to go.

No skin.


So armed with those research photos and a kit wheel they drew up this blueprint.

So after all the dust settled this is what I got.

There is more to the story than that. After they did all this work and produced this quality product they would not let me pay them for anything. Pete told me he had been to ZMC and rear the OTB (really like Al's comment about multi-engined builds) and he was just happy to be part of the build. Glad to contribute to the project. I was dumb founded. So after all this time I didn't have to buy a lathe nor a mill and learn how to use them I just had to meet the right people at the right time. Thanks to both of you.
So now the next question is "When will we see this on the bench again?" I am going to finish the Giveaway Truck and the Community Build #3 and then go back to this one. If I can have it ready to show by next years Portland Roadster Show I will be super happy, that's my goal.
Thanks for looking in and taking time to follow along. I'll be back as soon as I can.
Guest- Guest
Re: Challenger 1 1959
![]() by Guest Sun 03 Mar 2013, 9:46 pm
by Guest Sun 03 Mar 2013, 9:46 pm
I did a quick mock up to see what they would look like on the rims and tires. Looks awesome.

Guest- Guest
Re: Challenger 1 1959
![]() by Guest Sun 03 Mar 2013, 10:03 pm
by Guest Sun 03 Mar 2013, 10:03 pm


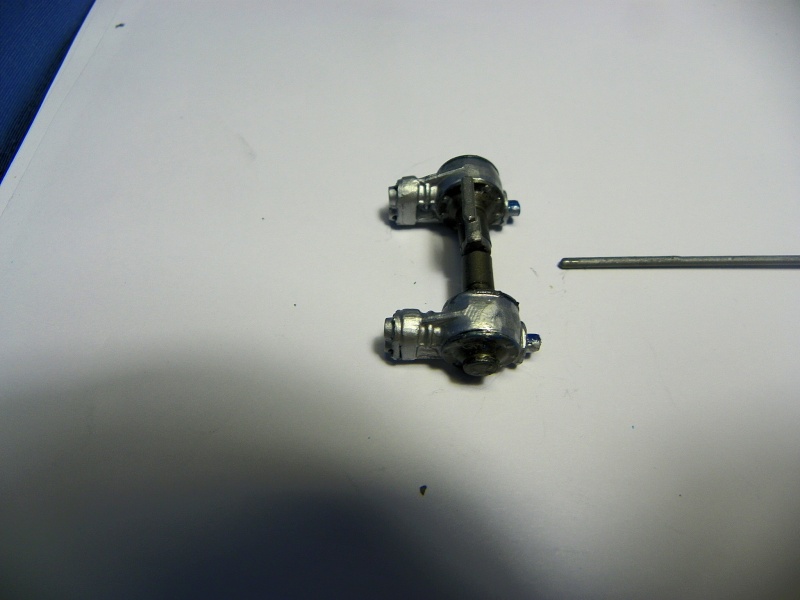
Last time I was at Shipwreck Beads I found some beads made of brass that are square. They are kinda twisted but were to long to be in scale anyway. I cut each bead into 3 pieces. Filed the ends smooth and enlarged the hole in the middle from .020" to .035". Then I could get all the fuel line through them. The black fuel line (hose) is .018" the steel lines are .012". I think they look a lot better.

After getting 4 of them made. I started looking for some type of line divider. I found just the thing on a spark plug loom PE part tree. They are square and route the lines as they should be. I tried to get a good picture of them but it's tough they are super small.

So now I will continue on with the engine work until all 4 are done and the same. I will post updates as I go. I need to replicate what you see here a total of 8 times so 7 more to go. That's two for each engine.
Thanks for looking in all questions and comments are welcome.
Guest- Guest
Re: Challenger 1 1959
![]() by Guest Sun 03 Mar 2013, 10:11 pm
by Guest Sun 03 Mar 2013, 10:11 pm
The spark plug loom divider that I decided to use looks like this.

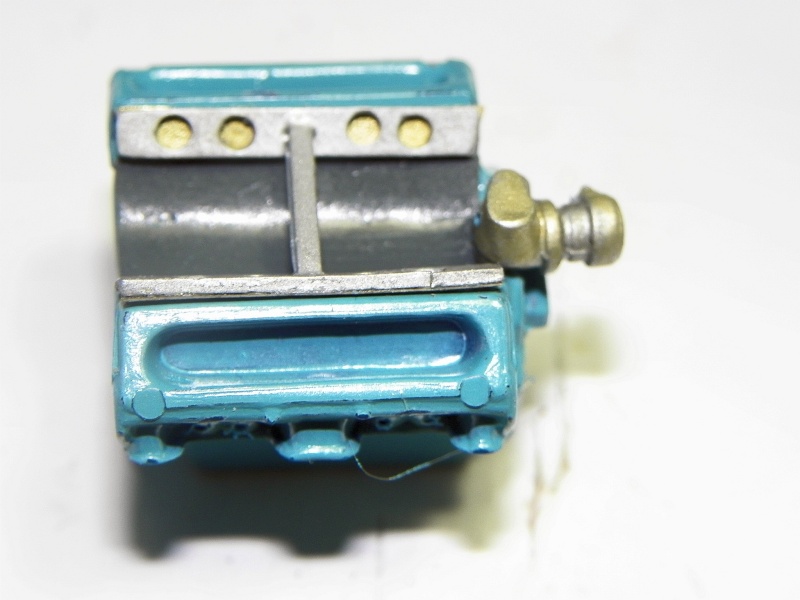
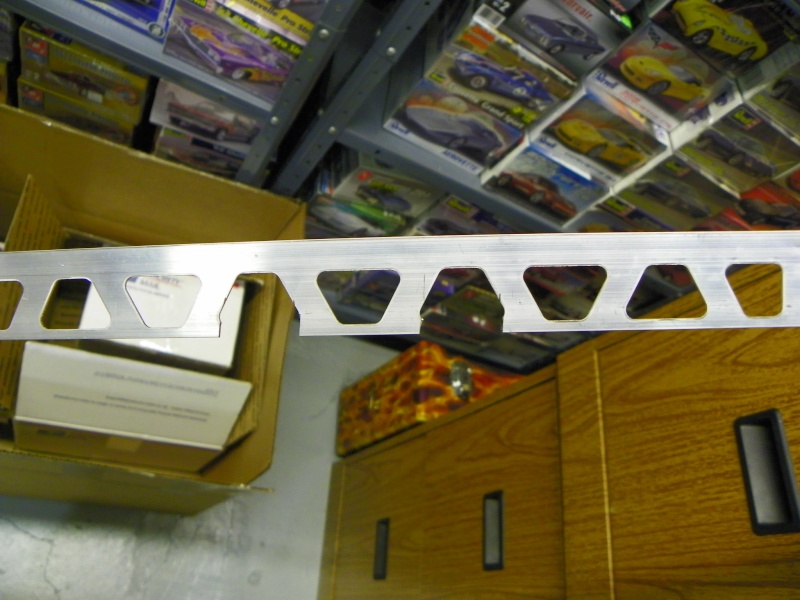
That is the easiest way I had to share that with you. When they are put onto the fuel line harness they can be hard to see. So I got all 8 of them in place and was ready to move on. When I got my home made styrene injector rails I had made out and went to put the injector tubes in them. I broke them all to pieces. Wow I thought those need to be stronger. After building the Aluminum Fuel Tank for Knfuzed and have the real Aluminum Wheel covers that Pete made, I really like the look of real metal on the models. It is so much better than Aluminum paint. So I went in search of some strips of Aluminum that was about .030" to .040" in thickness and about .100" in width. Plus it had to be longer than .750" so I could make it fit the motor. Many Internet searches turned up nothing. Then Yesterday I went to Home Depot to get some nails and saw this piece of metal.

I am not sure what it's for. I found it in the Carpeting and floor tile section. So I vested 8 bucks and brought it home. All I really wanted was this part. But had to buy the whole thing.
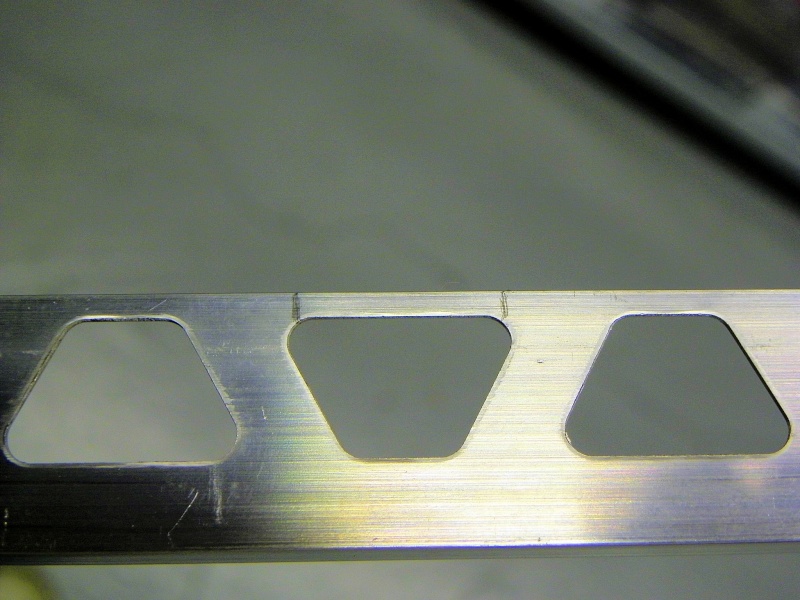
So I can cut a piece of Aluminum that is .750"X .100" X .040". Measure for center and then drill it with a .070 drill bit to put the injector tubes in place. This is within .003" of the styrene ones I built so good to go.
So The first one I built was way out of whack. I wasn't center with my drilling. The second one I built was very close to what I want but I did get one tube a little high so will make another. Once I get a pattern that I like I can make all 8 , using it as a jig and be set.
Here is the second pro to type. The center punch mark in the center will be where a bracket goes to mount the fuel block on.

So that's where I am at with this one. We are having very nice weather here for the last 4 days and I have been catching up on my yard work and the such. I will put more time into this and have an update again next week.
Thanks for looking in all comments and questions are welcome.
Last edited by Zbuckster on Mon 04 Mar 2013, 1:35 am; edited 1 time in total
Guest- Guest
Re: Challenger 1 1959
![]() by Guest Sun 03 Mar 2013, 10:13 pm
by Guest Sun 03 Mar 2013, 10:13 pm
After many attempts a cannot seem to duplicate the fuel injector rails with enough consistency to call it a go. What I need to do is get an X,Y table for my drill press or step up and buy a mill or a mini lathe with a mill attachment. Until that time I don't want to continue to frustrate myself with the failed attempts. Here are some pictures.

You can see that I have 4 of them that I might use, but the injector tubes aren't spaced right on any of them. 4 rails 4 different spacings. So back in the box it goes. I need to build something that doesn't require this degree of scratch building to bet some confidence back. I am not giving up just stepping back for a bit.
Guest- Guest
Re: Challenger 1 1959
![]() by Guest Sun 03 Mar 2013, 10:20 pm
by Guest Sun 03 Mar 2013, 10:20 pm
Guest- Guest
Re: Challenger 1 1959
![]() by Sam Sun 03 Mar 2013, 10:37 pm
by Sam Sun 03 Mar 2013, 10:37 pm
last year i bought a big lot of kits off craigslist and it it was the Monster Machines double kit like what you started with. inside the box was an original 1960 car craft mag, featuring the twin engine version of the showboat, called the Red Bomb. SoI plan on using the pics from the mag as reference and will turn the Showboat into the Red Bomb.

Sam- Resident member

- Posts : 1962
Join date : 2013-02-23
Age : 57
Location : Back in Toledo, Oregon
Re: Challenger 1 1959
![]() by Shelby Sun 03 Mar 2013, 10:44 pm
by Shelby Sun 03 Mar 2013, 10:44 pm

Shelby- Intermediate Member

- Posts : 947
Join date : 2013-03-02
Location : Alberta, Canada
Re: Challenger 1 1959
![]() by Geezerman Mon 04 Mar 2013, 12:25 am
by Geezerman Mon 04 Mar 2013, 12:25 am
Hope to see you finishing it up.

Geezerman- Advanced Member
- Posts : 3651
Join date : 2013-02-24
Age : 88
Location : Gulf coast of central Florids
Re: Challenger 1 1959
![]() by harron68 Wed 06 Mar 2013, 2:15 am
by harron68 Wed 06 Mar 2013, 2:15 am
harron68- Advanced Member
- Posts : 3616
Join date : 2013-02-28
Age : 73
Location : MIDWEST
Re: Challenger 1 1959
![]() by Skid Wed 06 Mar 2013, 9:21 am
by Skid Wed 06 Mar 2013, 9:21 am
_________________
Al.
Constructive criticism is always welcome.
“Success always demands a greater effort.” Winston Churchill
"Success is failure turned inside out" Unknown

Skid- Admin
- Posts : 7128
Join date : 2013-02-15
Age : 75
Location : Newcastle. Good Old Blighty. -

Re: Challenger 1 1959
![]() by dogfish7 Fri 08 Mar 2013, 4:05 pm
by dogfish7 Fri 08 Mar 2013, 4:05 pm
dogfish7- Intermediate Member
- Posts : 668
Join date : 2013-02-27
Age : 77
Location : Hoodsport, WA
Re: Challenger 1 1959
![]() by craig betts Sat 16 Mar 2013, 1:19 am
by craig betts Sat 16 Mar 2013, 1:19 am

craig betts- New Member
- Posts : 233
Join date : 2013-02-22
Location : New Brunswick,Canada
Page 1 of 2 • 1, 2 ![]()
» 1959 TR3 Club Racer
» 1959 Eldorado Convertible
» 1959-2009 Chevy Crash
» 1959 Cadillac S&S Hearse - "The Undertaker"
Skid's :: Works In Progress :: Race cars
|
|
|