
Salt Shaker Bonneville Bug
+10
harron68
Brizio
dogfish7
Skid
BrentH
Johnag
webby
Geezerman
Tumbler75
pete s
14 posters
Skid's :: Works In Progress :: Race cars
Page 2 of 3
Page 2 of 3 •  1, 2, 3
 ![]()

Geezerman- Advanced Member

- Posts : 3651
Join date : 2013-02-24
Age : 88
Location : Gulf coast of central Florids
Brizio- Rookie Member

- Posts : 471
Join date : 2013-02-25
Re: Salt Shaker Bonneville Bug
![]() by Johnag Mon 23 Dec 2013, 3:32 pm
by Johnag Mon 23 Dec 2013, 3:32 pm
Hi Pete,
This is stunning, love all the home made bits, you have taken this to a new level Sir...
Andy...
This is stunning, love all the home made bits, you have taken this to a new level Sir...
Andy...
_________________
Andy...
Life isn't about how to survive the storm, but how to dance in the rain...

Johnag- Moderator

- Posts : 1576
Join date : 2013-10-12
Age : 58
Location : North Wales, U.K... -

Re: Salt Shaker Bonneville Bug
![]() by harron68 Mon 23 Dec 2013, 11:25 pm
by harron68 Mon 23 Dec 2013, 11:25 pm
THIS IS COOL! I can't add more except to say we await the next fotos!
harron68- Advanced Member
- Posts : 3616
Join date : 2013-02-28
Age : 73
Location : MIDWEST
Re: Salt Shaker Bonneville Bug
![]() by pete s Tue 24 Dec 2013, 3:59 am
by pete s Tue 24 Dec 2013, 3:59 am
Got a few detail things done in the last two days. First, the parts and mockup of the steering were completed. The rack is turned aluminum, with the other parts a combination of brass and wire.


Most of this is going to be hard to see with the lowered suspension. but that's OK. I know it is there!!!
The decal sheet artwork for this is almost done, with just some minor sizing of the lettering required.
I also needed to add the rear wing, so here is a photo from the magazine, followed by the one that was scratch built from .005 brass:
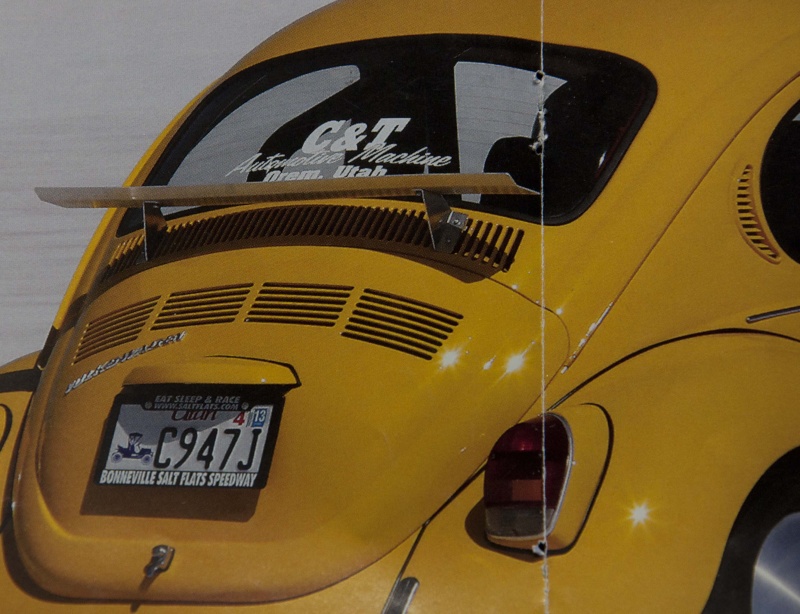


The rear wing will be painted Alcad aluminum, and is pinned to the body with rods and small nuts.
After Christmas, it will be time to prime all the parts and start final painting. The paint to be used is Scale Finishes school bus yellow. It is base/clear acrylic lacquer. There is a lot of yellow to spray, as a lot of the interior and all the exterior are this color. The slots in the lower front of the body, as well as the cooling slots for the rear decklid need to be darkened. So I will be trying out Brent's tutorial on using the fine line paint pen! This should be just the ticket for this detail.
Most of this is going to be hard to see with the lowered suspension. but that's OK. I know it is there!!!
The decal sheet artwork for this is almost done, with just some minor sizing of the lettering required.
I also needed to add the rear wing, so here is a photo from the magazine, followed by the one that was scratch built from .005 brass:
The rear wing will be painted Alcad aluminum, and is pinned to the body with rods and small nuts.
After Christmas, it will be time to prime all the parts and start final painting. The paint to be used is Scale Finishes school bus yellow. It is base/clear acrylic lacquer. There is a lot of yellow to spray, as a lot of the interior and all the exterior are this color. The slots in the lower front of the body, as well as the cooling slots for the rear decklid need to be darkened. So I will be trying out Brent's tutorial on using the fine line paint pen! This should be just the ticket for this detail.

pete s- Intermediate Member

- Posts : 797
Join date : 2013-02-26
Age : 73
Location : Beaverton, OR
Geezerman- Advanced Member
- Posts : 3651
Join date : 2013-02-24
Age : 88
Location : Gulf coast of central Florids
Re: Salt Shaker Bonneville Bug
![]() by dublin boy Wed 25 Dec 2013, 7:19 pm
by dublin boy Wed 25 Dec 2013, 7:19 pm
Amazing metalwork Pete, specially the steering rack.

dublin boy- Moderator
- Posts : 3862
Join date : 2013-02-27
Re: Salt Shaker Bonneville Bug
![]() by Skid Wed 25 Dec 2013, 10:17 pm
by Skid Wed 25 Dec 2013, 10:17 pm
This is great work Pete. 001
_________________
Al.
Constructive criticism is always welcome.
“Success always demands a greater effort.” Winston Churchill
"Success is failure turned inside out" Unknown

Skid- Admin
- Posts : 7128
Join date : 2013-02-15
Age : 75
Location : Newcastle. Good Old Blighty. -

BrentH- New Member
- Posts : 236
Join date : 2013-05-21
Re: Salt Shaker Bonneville Bug
![]() by pete s Thu 09 Jan 2014, 3:12 am
by pete s Thu 09 Jan 2014, 3:12 am
Salt Shaker is now ready for it's color coats. Most of it is school bus yellow:

The two plastic spoons are samples using the same Scale Finishes school bus yellow, but with gray and white primer. The gray primer turned the color a greenish yellow. White primer left the yellow just like it was supposed to be. Primer was switched to white after a lot of it was already gray. We are now good to go.
The two plastic spoons are samples using the same Scale Finishes school bus yellow, but with gray and white primer. The gray primer turned the color a greenish yellow.
White primer left the yellow just like it was supposed to be. Primer was switched to white after a lot of it was already gray. We are now good to go.
pete s- Intermediate Member
- Posts : 797
Join date : 2013-02-26
Age : 73
Location : Beaverton, OR
Sam- Resident member
- Posts : 1962
Join date : 2013-02-23
Age : 57
Location : Back in Toledo, Oregon
dogfish7- Intermediate Member
- Posts : 668
Join date : 2013-02-27
Age : 77
Location : Hoodsport, WA
Re: Salt Shaker Bonneville Bug
![]() by Guest Wed 15 Jan 2014, 10:48 am
by Guest Wed 15 Jan 2014, 10:48 am
I do like the modifications. It helps having a real car to compare. Like it !
Guest- Guest
Re: Salt Shaker Bonneville Bug
![]() by pete s Sat 01 Feb 2014, 12:22 am
by pete s Sat 01 Feb 2014, 12:22 am
OK, it has been a while, so time for an update. The body and parts are all painted school bus yellow and now out-gassing prior to a coat of clear. The decal sheets are done, and printed on Stevens Decal Paper. So it was time to work on the other bits.
Here is a picture of the engine/trans. Still need to install the dizzy, and route the wires. Linkage is in, as is the fuel plumbing and exhaust. Stinger will go on after it is in the car (so I don't knock it off). Square part is the deep sump that goes under the engine.

Here is a photo of some of the interior parts. The seats are two tone to match the car color. Also shown is the scratch built MSD ignition box, the battery and the sheetmetal rear wing. Wing is made of .005 brass shim stock, and painted Alcad polished aluminum.

Next is the main chassis pan. It needed to be two tone, as the interior portion matches the body color. Rear brakes are plumbed, and the interior has fuel, brake and electrical lines. Steering rack has also been mounted.

Lastly, I am going to try out something very new to me. When I attended the GSL event last May, they had a great seminar on home plating, using the Caswell Cobalt/Nickel system. I bought this, and am going to use it for the first time on some parts. Here is what you get with the system:

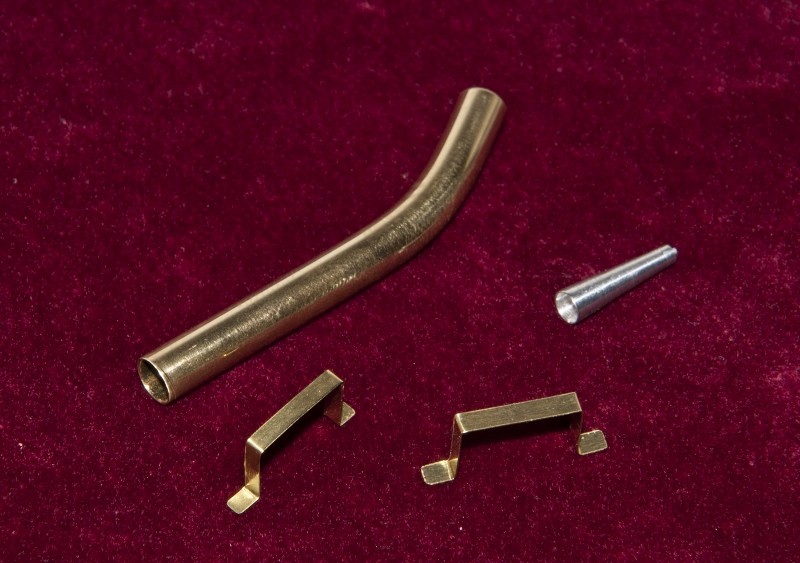
This is done on a hot plate, and requires no electrolysis. It only works on metal, so I am going to plate the exhaust stinger, the straps that hold the fuel cell and an exhaust pipe that is for another project (the Pike's Peak Race Truck). Here are the parts all polished and ready for the bath!
So I will report on the plating process next time. The results will be interesting to see!!
Here is a picture of the engine/trans. Still need to install the dizzy, and route the wires. Linkage is in, as is the fuel plumbing and exhaust. Stinger will go on after it is in the car (so I don't knock it off). Square part is the deep sump that goes under the engine.
Here is a photo of some of the interior parts. The seats are two tone to match the car color. Also shown is the scratch built MSD ignition box, the battery and the sheetmetal rear wing. Wing is made of .005 brass shim stock, and painted Alcad polished aluminum.
Next is the main chassis pan. It needed to be two tone, as the interior portion matches the body color. Rear brakes are plumbed, and the interior has fuel, brake and electrical lines. Steering rack has also been mounted.
Lastly, I am going to try out something very new to me. When I attended the GSL event last May, they had a great seminar on home plating, using the Caswell Cobalt/Nickel system. I bought this, and am going to use it for the first time on some parts. Here is what you get with the system:
This is done on a hot plate, and requires no electrolysis. It only works on metal, so I am going to plate the exhaust stinger, the straps that hold the fuel cell and an exhaust pipe that is for another project (the Pike's Peak Race Truck). Here are the parts all polished and ready for the bath!
So I will report on the plating process next time. The results will be interesting to see!!
pete s- Intermediate Member
- Posts : 797
Join date : 2013-02-26
Age : 73
Location : Beaverton, OR
Re: Salt Shaker Bonneville Bug
![]() by Guest Sat 01 Feb 2014, 2:33 am
by Guest Sat 01 Feb 2014, 2:33 am
The work you have done is great. The Chrome plating is very interesting. I have never heard of. I am very curious about how it will turn out.
Guest- Guest
Re: Salt Shaker Bonneville Bug
![]() by Geezerman Sat 01 Feb 2014, 1:05 pm
by Geezerman Sat 01 Feb 2014, 1:05 pm
Your work is just way over the top, Pete !!!!!

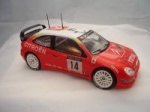
I remember that awesome truck too. That's another masterpiece in the works !
I remember that awesome truck too. That's another masterpiece in the works !
Geezerman- Advanced Member
- Posts : 3651
Join date : 2013-02-24
Age : 88
Location : Gulf coast of central Florids
Re: Salt Shaker Bonneville Bug
![]() by pete s Sat 01 Feb 2014, 4:15 pm
by pete s Sat 01 Feb 2014, 4:15 pm
Thanks for the kind words.
Clay, I will be returning to the truck after the bug is done. The truck is going to the GSL in May of 2015, and there is still a ton of work to do!
Clay, I will be returning to the truck after the bug is done. The truck is going to the GSL in May of 2015, and there is still a ton of work to do!
pete s- Intermediate Member
- Posts : 797
Join date : 2013-02-26
Age : 73
Location : Beaverton, OR
Re: Salt Shaker Bonneville Bug
![]() by pete s Mon 10 Feb 2014, 3:37 am
by pete s Mon 10 Feb 2014, 3:37 am
In Portland, we endured 8 inches of snow and then freezing rain on top of that this weekend. Pretty much shut down the city. So it was time to stay indoors and work on the Bug.
As the enamel paint on the body is still hardening prior to clearcoat, good progress was made on the chassis and interior. Here is a photo of how this stands now:

Here is a close-up of the front clip. With the front hood opening, the detail is required for the fuel cell, battery, fuel plumbing and electrical wiring. Still need to add the mounting straps for the fuel cell and some dash wiring.

Here are views of the engine and tranny. It is fully wired and plumbed. Needs to have the fan belt, exhaust stinger and remote oil filter plumbing.


Here is the scratch built front suspension, with master cylinder and brake plumbing.

So if you put all three of these together as a mockup, add in the seats and roll bar, here is what you get:


So should be able to clear the body in the next couple of days. Work will proceed on the dash and interior.
Any hints on a good way to do the fan belt?
As the enamel paint on the body is still hardening prior to clearcoat, good progress was made on the chassis and interior. Here is a photo of how this stands now:
Here is a close-up of the front clip. With the front hood opening, the detail is required for the fuel cell, battery, fuel plumbing and electrical wiring. Still need to add the mounting straps for the fuel cell and some dash wiring.
Here are views of the engine and tranny. It is fully wired and plumbed. Needs to have the fan belt, exhaust stinger and remote oil filter plumbing.
Here is the scratch built front suspension, with master cylinder and brake plumbing.
So if you put all three of these together as a mockup, add in the seats and roll bar, here is what you get:
So should be able to clear the body in the next couple of days. Work will proceed on the dash and interior.
Any hints on a good way to do the fan belt?
pete s- Intermediate Member
- Posts : 797
Join date : 2013-02-26
Age : 73
Location : Beaverton, OR
Re: Salt Shaker Bonneville Bug
![]() by Sam Mon 10 Feb 2014, 4:22 am
by Sam Mon 10 Feb 2014, 4:22 am
That looks AWESOME Pete !!!
By the way, could you introduce me to the Freightliner engineer who designed the doors...preferably in a dark alley.
By the way, could you introduce me to the Freightliner engineer who designed the doors...preferably in a dark alley.
Sam- Resident member
- Posts : 1962
Join date : 2013-02-23
Age : 57
Location : Back in Toledo, Oregon
Re: Salt Shaker Bonneville Bug
![]() by Guest Mon 10 Feb 2014, 10:14 am
by Guest Mon 10 Feb 2014, 10:14 am
Fantastic detail - absolutely brilliant.
It's a pity a lot is covered with the body.
When my eyes were better, and I added more detail,
I just used a narrow strip if masking tape, suitably coloured, for fan belts
- might work for you ??
It's a pity a lot is covered with the body.
When my eyes were better, and I added more detail,
I just used a narrow strip if masking tape, suitably coloured, for fan belts
- might work for you ??
Guest- Guest
Re: Salt Shaker Bonneville Bug
![]() by Guest Mon 10 Feb 2014, 4:30 pm
by Guest Mon 10 Feb 2014, 4:30 pm
Pete that is a great looking build. You even added the clutch cable. man I have put a ton of them in. LOL
Guest- Guest
Page 2 of 3 • 1, 2, 3 ![]()
» Salt Flats '17
» Bonneville salt '17
» Paint Shaker
» Testors 1/32 salt flat racer
» 1/6th Scale Hemi with Shaker Scoop
» Bonneville salt '17
» Paint Shaker
» Testors 1/32 salt flat racer
» 1/6th Scale Hemi with Shaker Scoop
Skid's :: Works In Progress :: Race cars
Page 2 of 3
Permissions in this forum:
You cannot reply to topics in this forum|
|
|