
Tamiya Yamaha XV1600 Roadstar
3 posters
Page 1 of 1

Tamiya Yamaha XV1600 Roadstar
![]() by Mike C Sun 22 Dec 2019, 4:29 pm
by Mike C Sun 22 Dec 2019, 4:29 pm
This is my latest project. I'm building this for my club (Atlanta Car Model Enthusiasts) for a kit review as this is the third kit I've done for them. I also have a Street Rider figure to with it. These kits haven't been released yet too. And my club gives us the kits for free to review and build any way you want. Here's the box art:
Here's the engine installed into the frame. The main frame goes together quite easily as there's two sides and a small middle piece. The engine color calls for polished aluminum. So I used the AlClad Polished Alum color. The engine also assembles very nicely and pretty easily too.


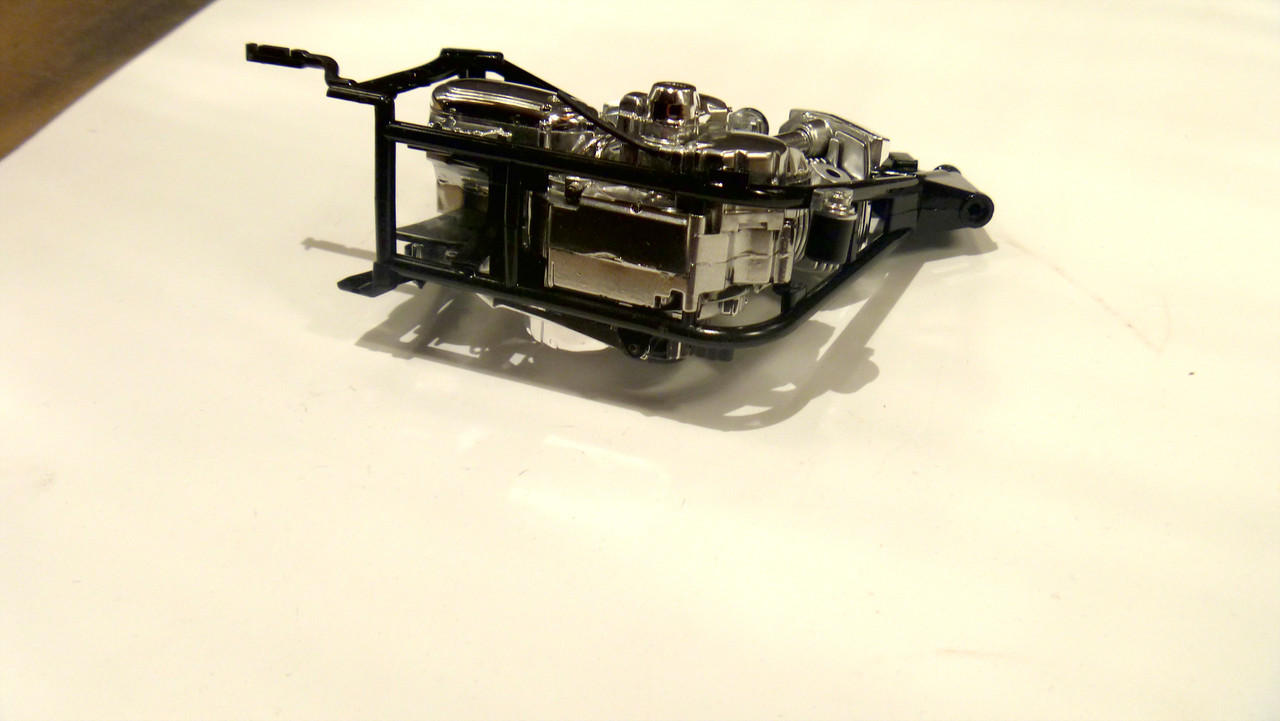
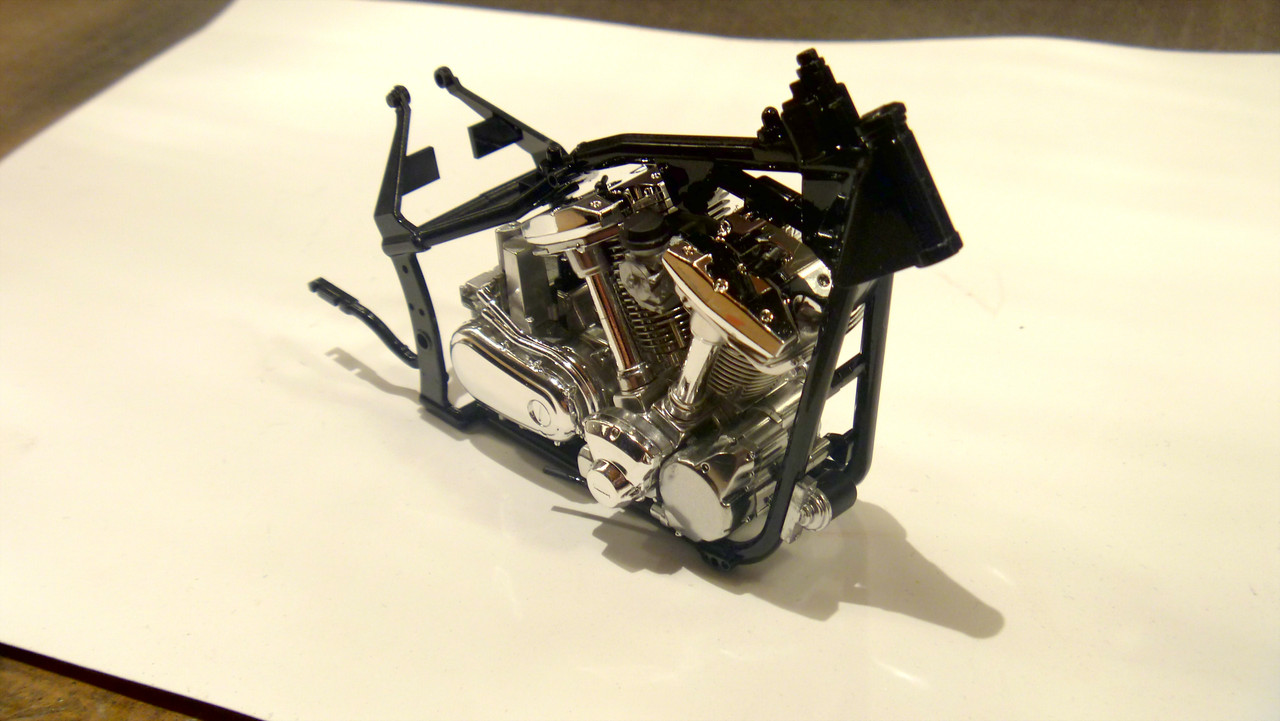
Here's the engine installed into the frame. The main frame goes together quite easily as there's two sides and a small middle piece. The engine color calls for polished aluminum. So I used the AlClad Polished Alum color. The engine also assembles very nicely and pretty easily too.

Mike C- Rookie Member

- Posts : 453
Join date : 2016-06-09
Age : 69
Location : Roswell, GA USA
Re: Tamiya Yamaha XV1600 Roadstar
![]() by Mike C Mon 23 Dec 2019, 8:48 pm
by Mike C Mon 23 Dec 2019, 8:48 pm
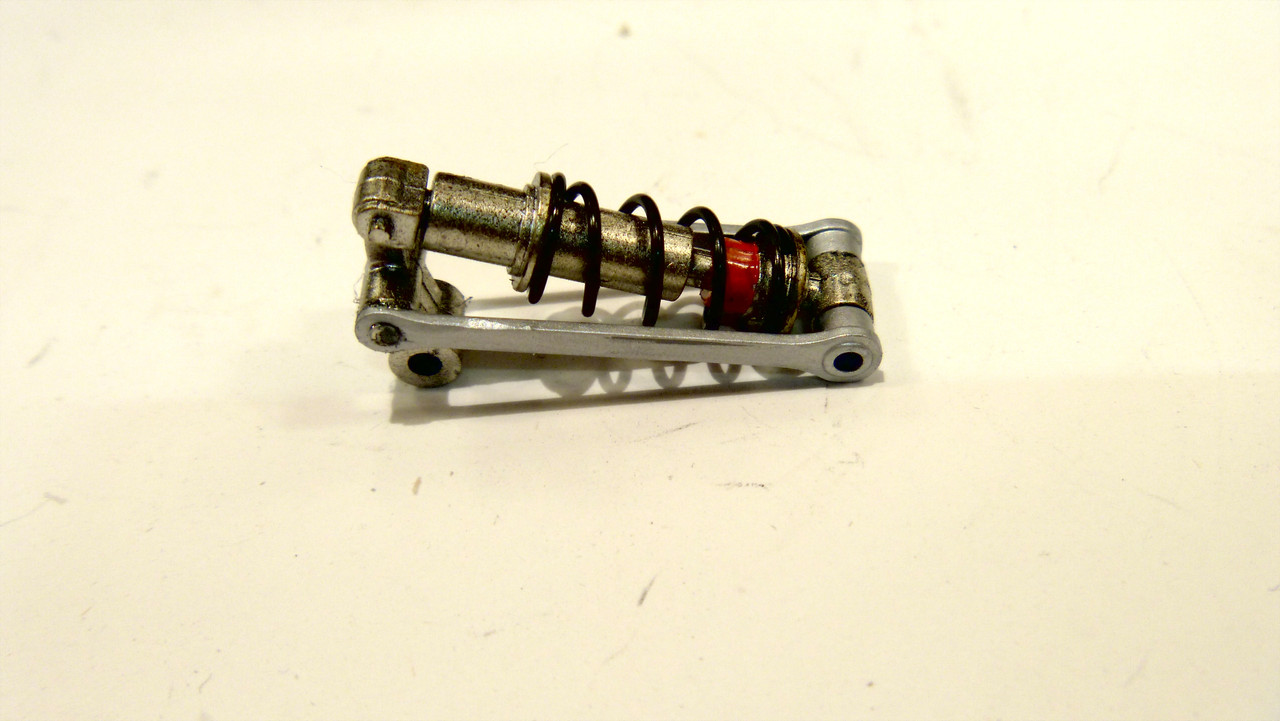
Here’s the shock assembly. It was pretty easy to build and paint. I used the AlClad Titanium Silver as opposed to the Tamiya color, although I have both.
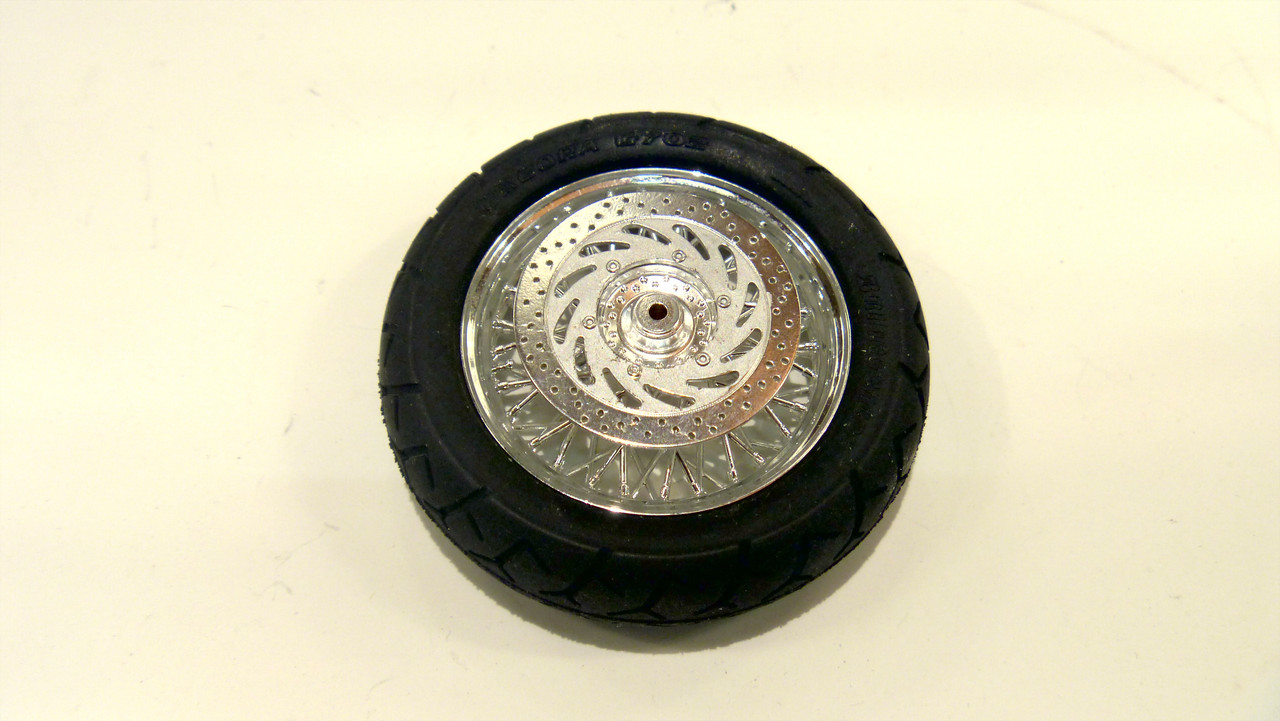
The wheel assembly is a little trickier. First I had to drill out all those little holes in the brake rotor. It goes together easy enough but there are little mating pins on the inside ends of the spokes to align with the hubs. I used CA on it. There is an inner brass tube for the axle. Once it’s together you have to insert it into the tire. You have to be more careful than on the racing type bikes with the one piece wheels. You don’t want to push against the spoke while inserting the wheel into the tire. That’s a good way to break the spokes and then you’re in some real trouble. The spokes look very good too. So as you can see I got the wheel into the tire correctly.

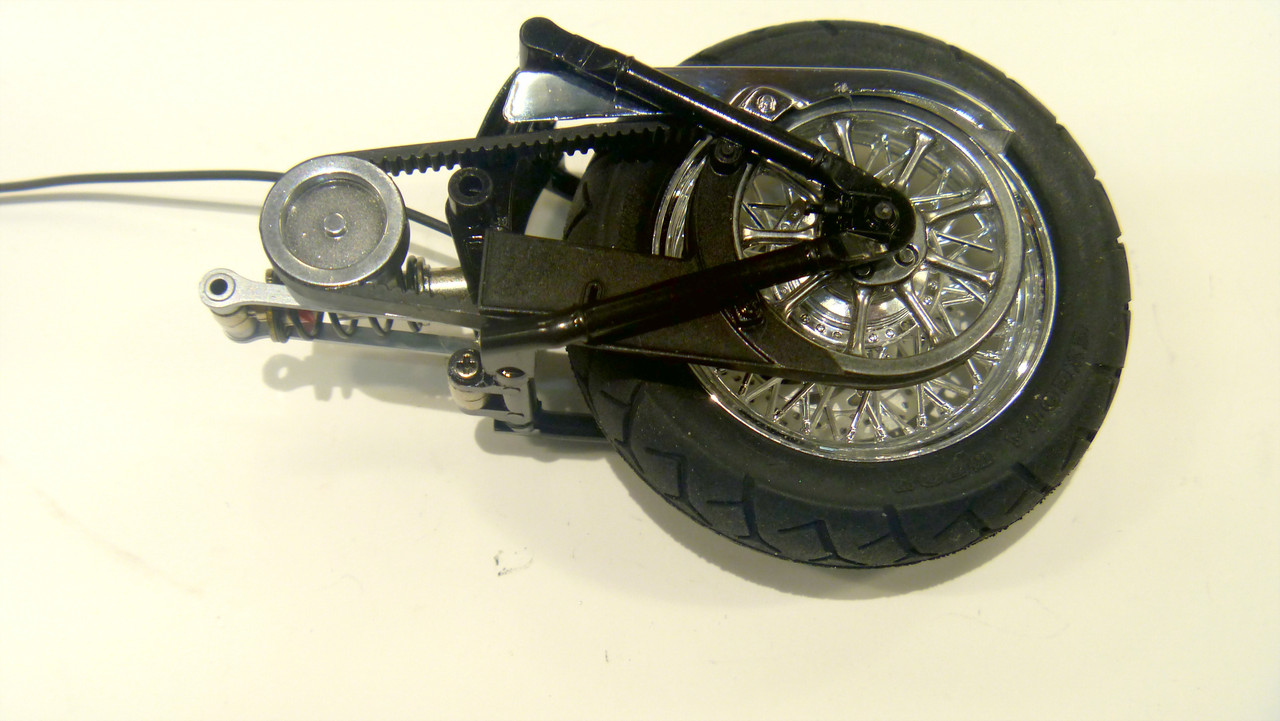
I have the belt and pulleys all painted up. I painted the pulleys with AlClad Polished Aluminim. One detail that’s a little lacking is that they didn’t mold the teeth into the rear pulley on the inside where the pulley is exposed. The front doesn’t matter as it will be hidden anyway. I masked over the pulleys so I could brush paint the flat black onto the belt without messing up the pulley sides because the belt’s height is a little above the pulley’s and I wanted the paing to cover it.

The wheel assembly is a little trickier. First I had to drill out all those little holes in the brake rotor. It goes together easy enough but there are little mating pins on the inside ends of the spokes to align with the hubs. I used CA on it. There is an inner brass tube for the axle. Once it’s together you have to insert it into the tire. You have to be more careful than on the racing type bikes with the one piece wheels. You don’t want to push against the spoke while inserting the wheel into the tire. That’s a good way to break the spokes and then you’re in some real trouble. The spokes look very good too. So as you can see I got the wheel into the tire correctly.
I have the belt and pulleys all painted up. I painted the pulleys with AlClad Polished Aluminim. One detail that’s a little lacking is that they didn’t mold the teeth into the rear pulley on the inside where the pulley is exposed. The front doesn’t matter as it will be hidden anyway. I masked over the pulleys so I could brush paint the flat black onto the belt without messing up the pulley sides because the belt’s height is a little above the pulley’s and I wanted the paing to cover it.
Mike C- Rookie Member
- Posts : 453
Join date : 2016-06-09
Age : 69
Location : Roswell, GA USA
Re: Tamiya Yamaha XV1600 Roadstar
![]() by beowulf Mon 23 Dec 2019, 11:38 pm
by beowulf Mon 23 Dec 2019, 11:38 pm
nice
always wanted to try this kit myself so will be great to see one go together
always wanted to try this kit myself so will be great to see one go together

beowulf- Resident member

- Posts : 2469
Join date : 2013-05-02
Age : 62
Location : Monkey Hanger Town, UK
Re: Tamiya Yamaha XV1600 Roadstar
![]() by Mike C Wed 25 Dec 2019, 4:35 pm
by Mike C Wed 25 Dec 2019, 4:35 pm
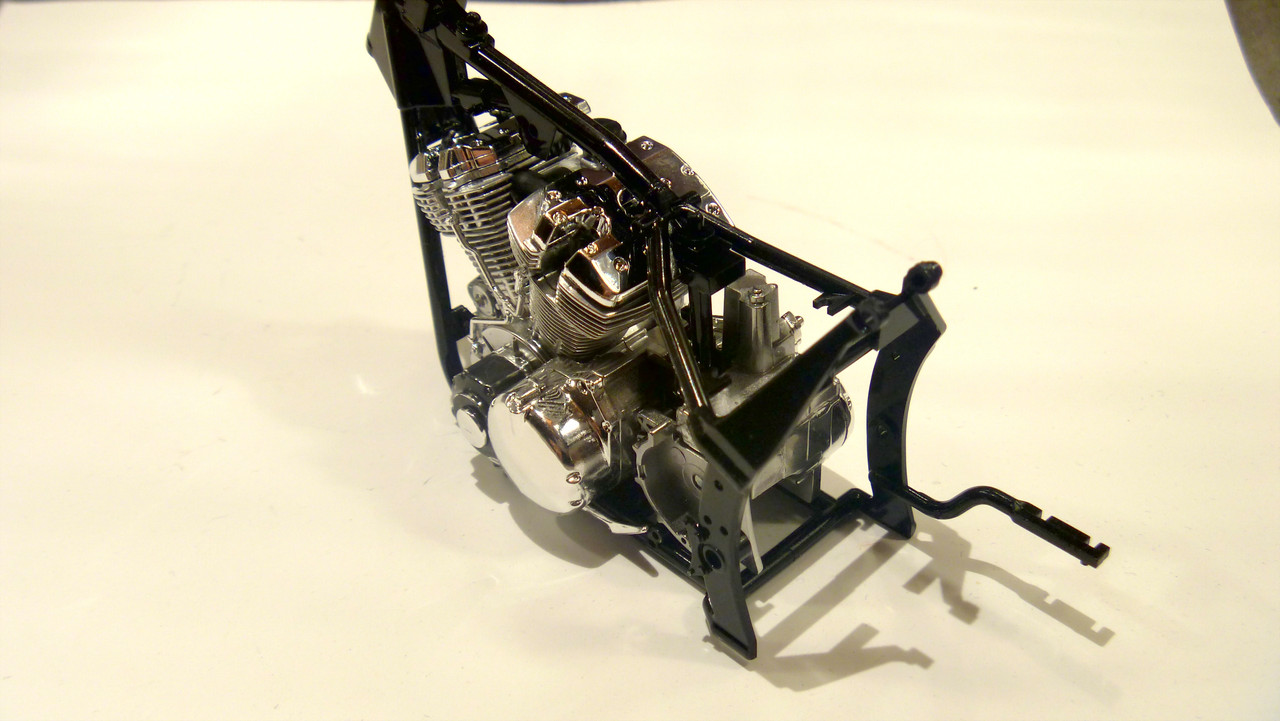
The rear swing arm went together fairly easily. But it was a bit tricky getting together the left side with the belt/pulleys and lower belt guard together. Once that assembly was dry then the rest was pretty smooth.

So far this kit has been going together very well. Next is installing the rear swing arm into the frame. That went pretty easy too.

So far this kit has been going together very well. Next is installing the rear swing arm into the frame. That went pretty easy too.
Mike C- Rookie Member
- Posts : 453
Join date : 2016-06-09
Age : 69
Location : Roswell, GA USA
Re: Tamiya Yamaha XV1600 Roadstar
![]() by Mike C Mon 30 Dec 2019, 5:09 pm
by Mike C Mon 30 Dec 2019, 5:09 pm
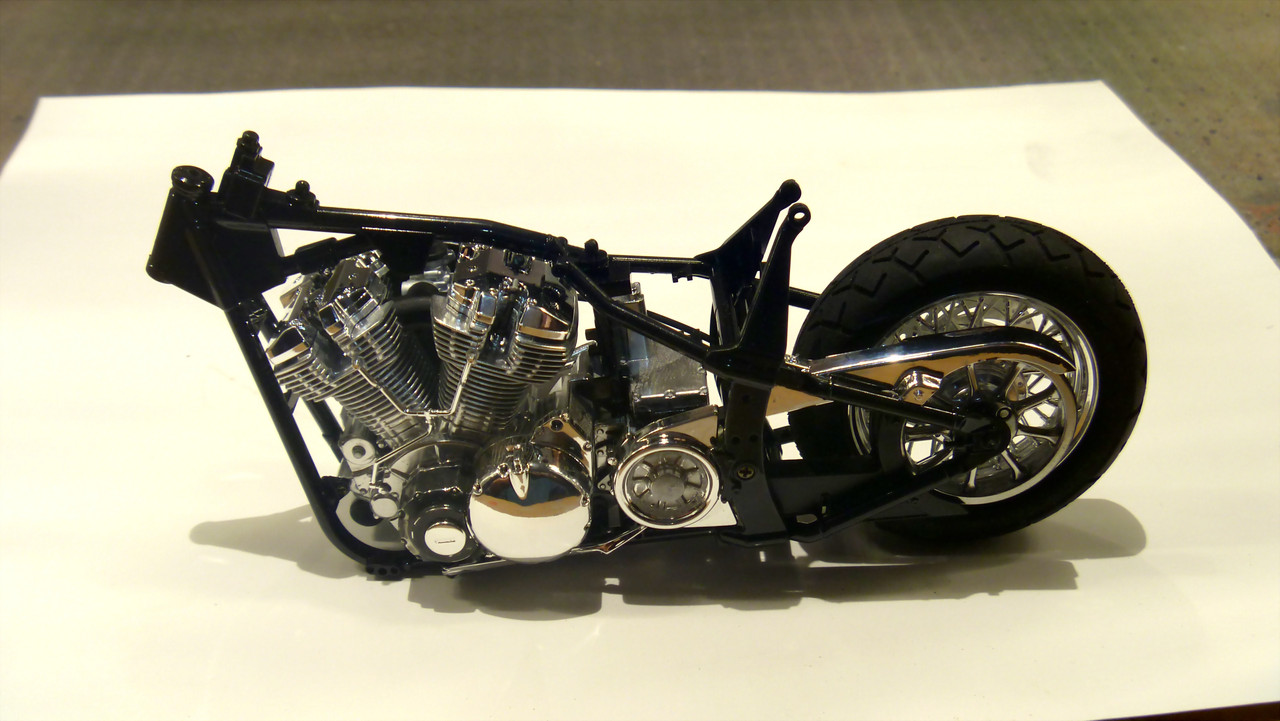
Here's some newly painted parts. I used Testors gloss black and Tamiya's champagne gold. The Tamiya paint sprays nice out of the can but it's not a high gloss. I got a real high gloss out of the black. But I just clear coated all of it so now it's all high gloss. It's glass smooth and needs no polishing, just waxing. I think I'm finally learning how to airbrush with my Grex Tritium properly.

Mike C- Rookie Member
- Posts : 453
Join date : 2016-06-09
Age : 69
Location : Roswell, GA USA
Re: Tamiya Yamaha XV1600 Roadstar
![]() by Mike C Sun 05 Jan 2020, 12:08 am
by Mike C Sun 05 Jan 2020, 12:08 am
Now it's starting to look like a bike. Next will be more of the small details to finish it off.

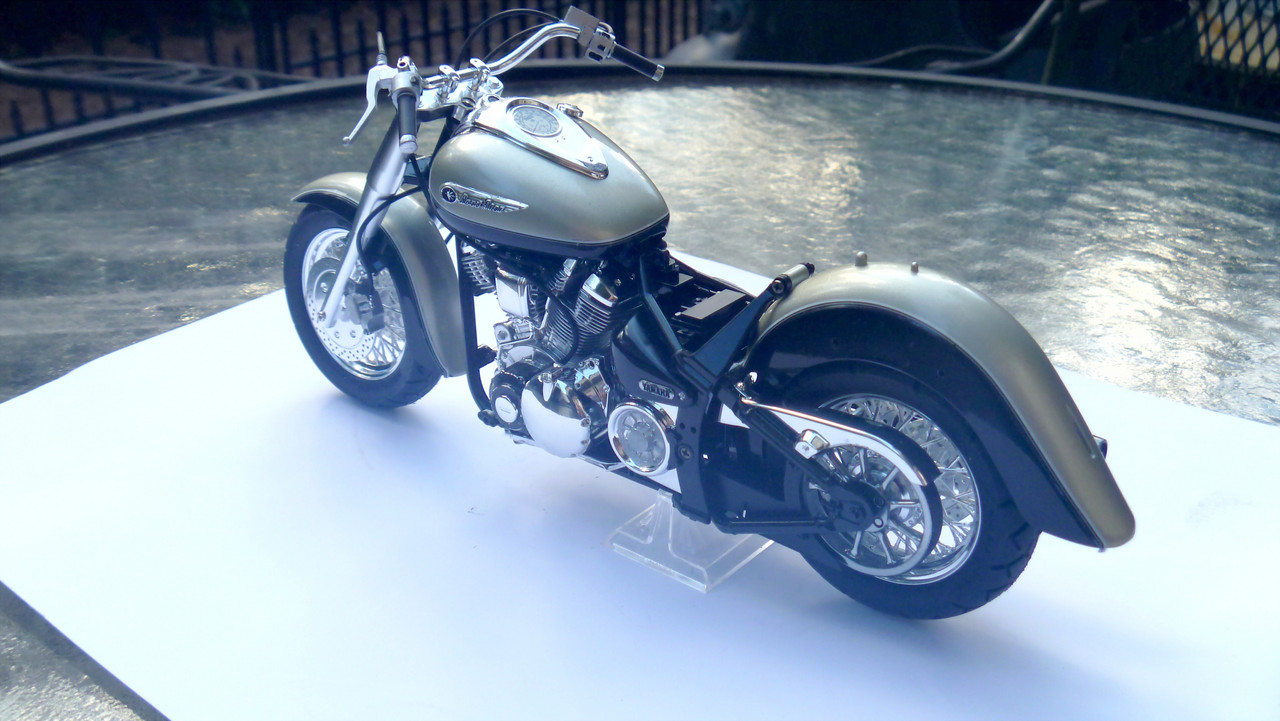
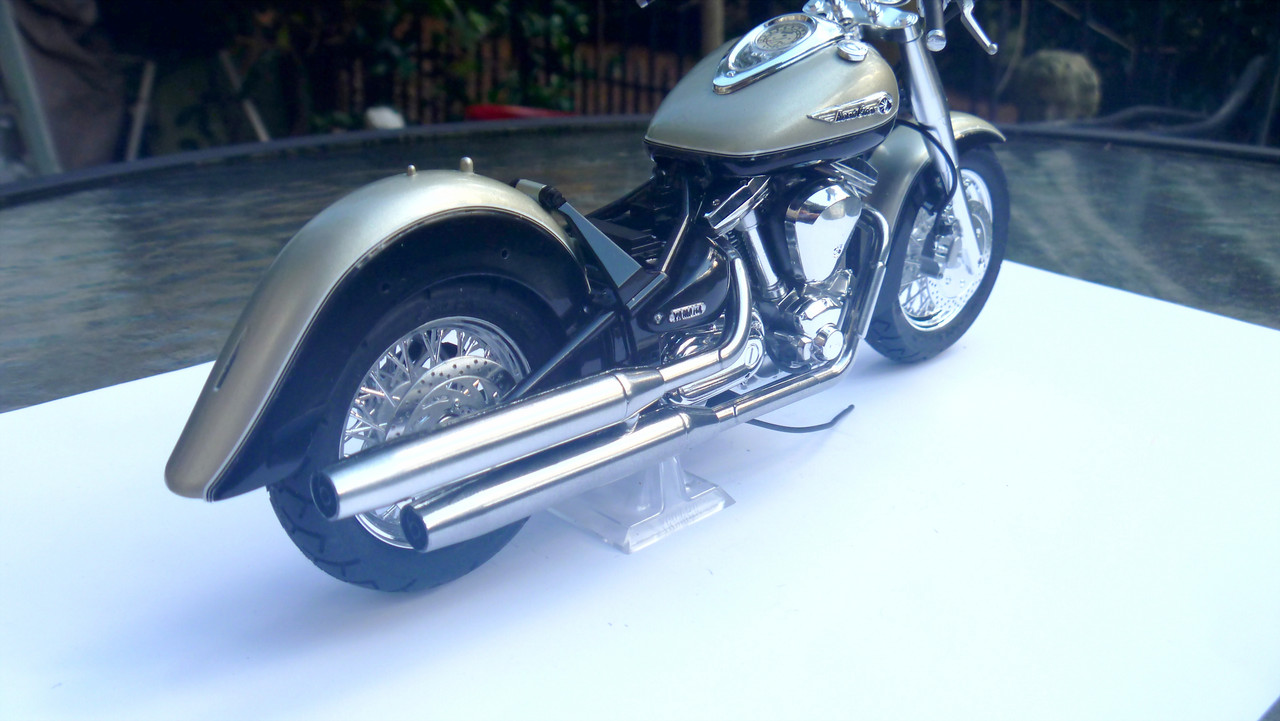
Last edited by Mike C on Sat 11 Jan 2020, 5:20 pm; edited 1 time in total
Mike C- Rookie Member
- Posts : 453
Join date : 2016-06-09
Age : 69
Location : Roswell, GA USA
Re: Tamiya Yamaha XV1600 Roadstar
![]() by KatsZenJammer Sat 11 Jan 2020, 4:42 pm
by KatsZenJammer Sat 11 Jan 2020, 4:42 pm
Looking awesome! Love the Tamiya kits in general but this one looks like a very nice one.

KatsZenJammer- Resident member
- Posts : 2600
Join date : 2016-05-20
Age : 57
Location : Vancouver, BC
Re: Tamiya Yamaha XV1600 Roadstar
![]() by Mike C Sat 18 Jan 2020, 8:29 pm
by Mike C Sat 18 Jan 2020, 8:29 pm
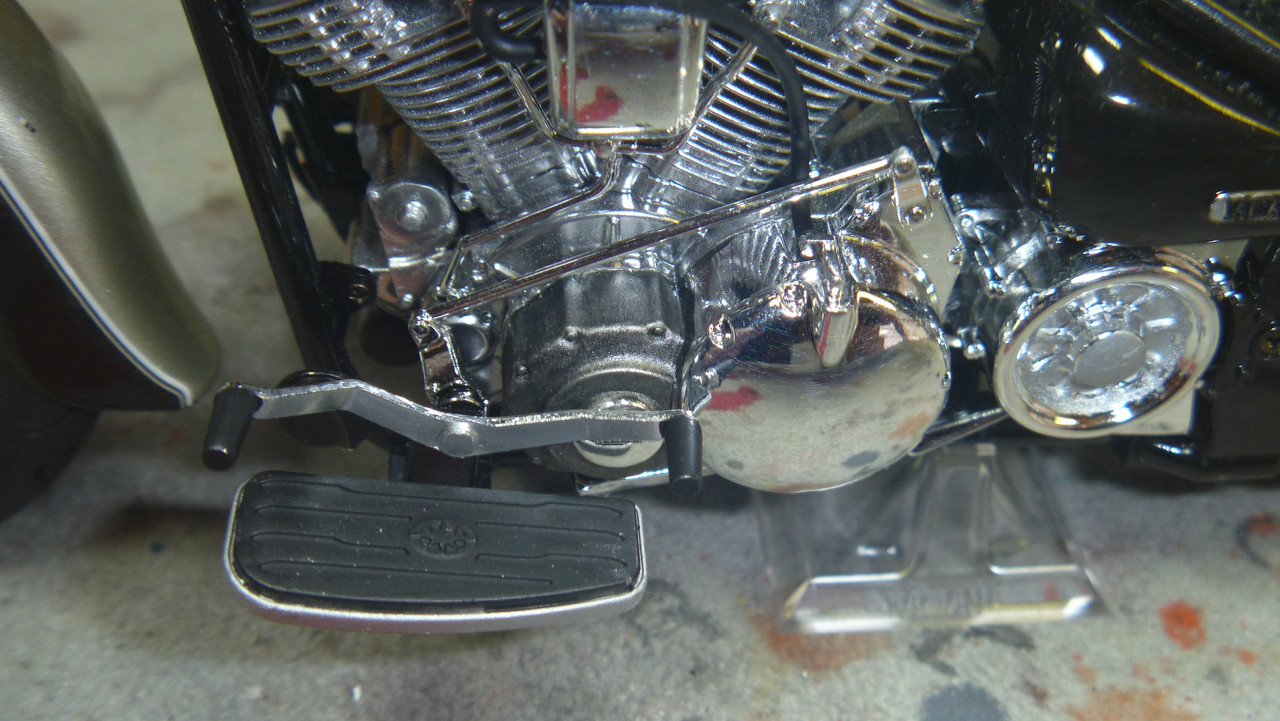
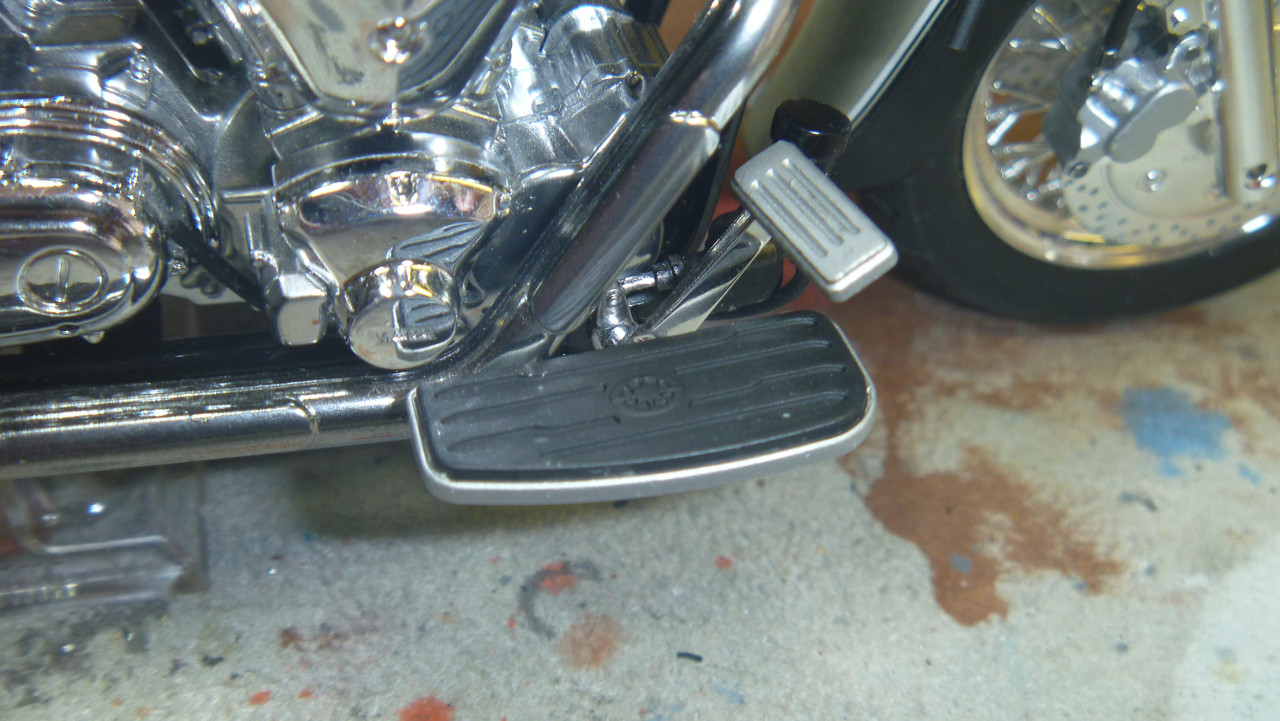
Here's some closeups of the footrest assemblies.
Mike C- Rookie Member
- Posts : 453
Join date : 2016-06-09
Age : 69
Location : Roswell, GA USA
» Tamiya Yamaha TZ250m (1994)
» Tamiya Yamaha R1M
» Tamiya Yamaha YZR-M1
» Tamiya 1/12 Yamaha TZ250M
» Tamiya 1/12 Yamaha TZ250M
» Tamiya Yamaha R1M
» Tamiya Yamaha YZR-M1
» Tamiya 1/12 Yamaha TZ250M
» Tamiya 1/12 Yamaha TZ250M
Page 1 of 1
Permissions in this forum:
You cannot reply to topics in this forum|
|
|