
Salvage rod #3
Skid's :: Works In Progress :: Road cars
Page 1 of 2 • 1, 2 ![]()

Salvage rod #3
![]() by Geezerman Sat 27 Sep 2014, 12:33 am
by Geezerman Sat 27 Sep 2014, 12:33 am
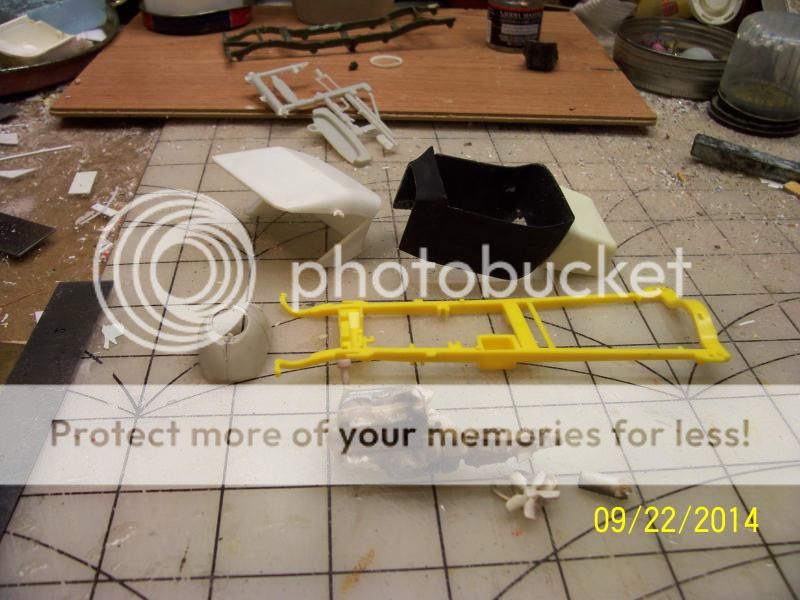
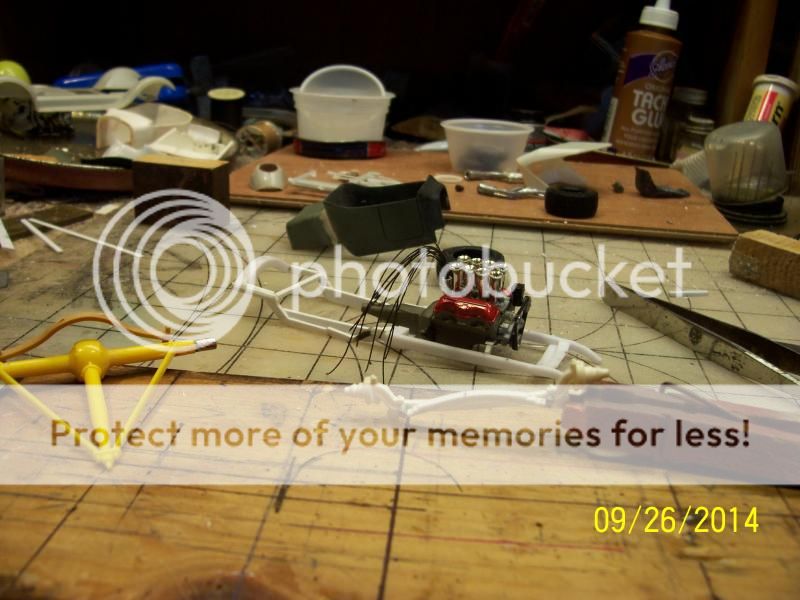
Added a rear kick up to an old Ford frame.
A big Chev engine was in dire need of some TLC.
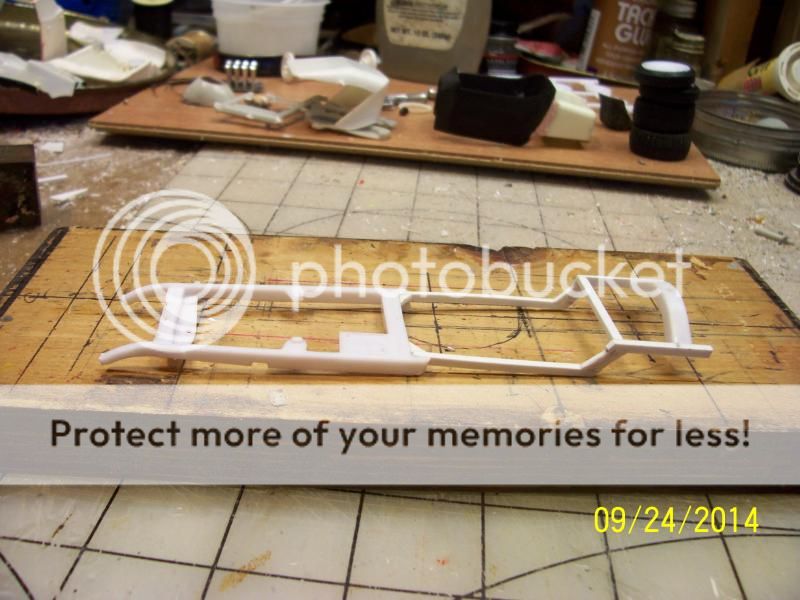
After some changes, the frame fits a little better.
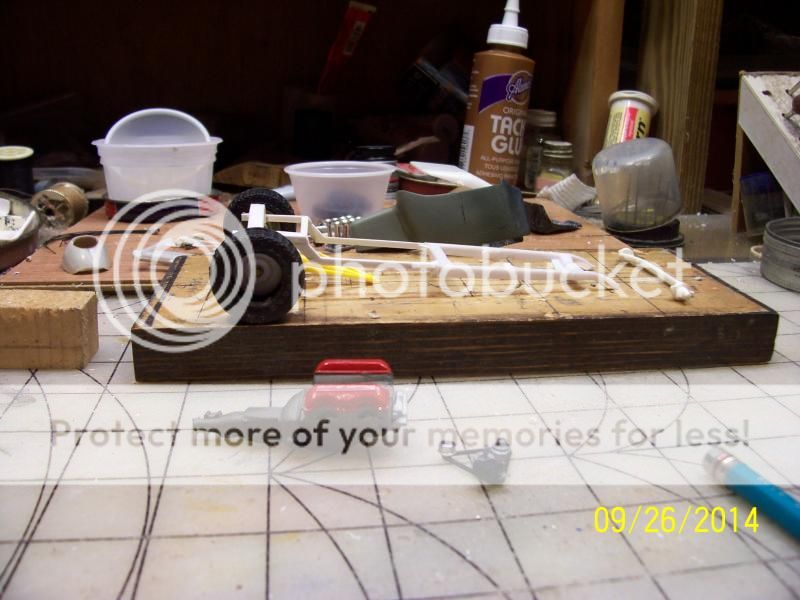
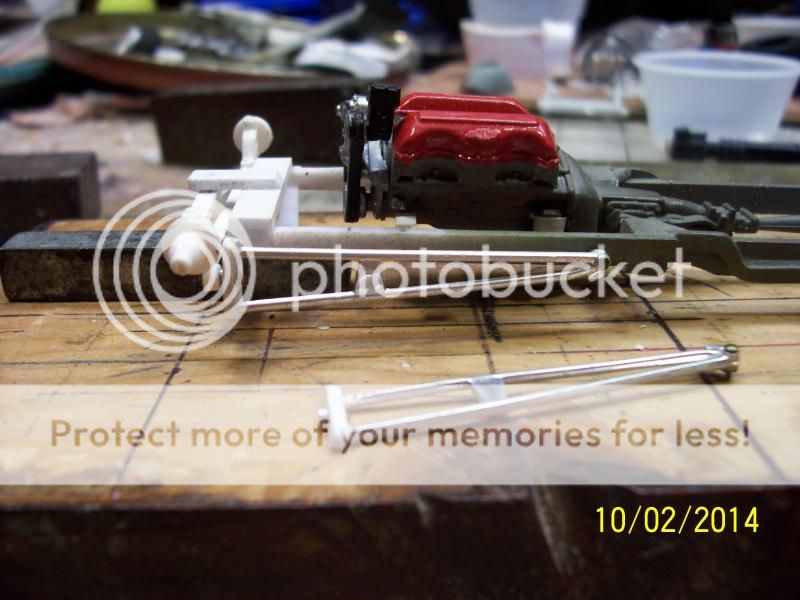
Today, I made a low profile spring for the front end.

Geezerman- Advanced Member

- Posts : 3651
Join date : 2013-02-24
Age : 88
Location : Gulf coast of central Florids


john2308- Full Member

- Posts : 1142
Join date : 2013-04-10
Age : 79
Location : Phoenix, AZ
Re: Salvage rod #3
![]() by itsonlyakit Sat 27 Sep 2014, 8:02 am
by itsonlyakit Sat 27 Sep 2014, 8:02 am
Great motor choice.
Cheers Eh!

itsonlyakit- New Member

- Posts : 114
Join date : 2013-02-28
Age : 75
Location : Victoria B.C. Canada
Re: Salvage rod #3
![]() by Guest Sat 27 Sep 2014, 9:22 am
by Guest Sat 27 Sep 2014, 9:22 am
Guest- Guest
Re: Salvage rod #3
![]() by Geezerman Sat 27 Sep 2014, 11:35 am
by Geezerman Sat 27 Sep 2014, 11:35 am
itsonlyakit wrote:I am lost in the magic already, LOL,where did the yellow frame go ??
Great motor choice.
Cheers Eh!
I had two, there was a reason I went with the white one but I forget what it was.

Geezerman- Advanced Member
- Posts : 3651
Join date : 2013-02-24
Age : 88
Location : Gulf coast of central Florids
Re: Salvage rod #3
![]() by Guest Sat 27 Sep 2014, 12:19 pm
by Guest Sat 27 Sep 2014, 12:19 pm
Guest- Guest
Re: Salvage rod #3
![]() by harron68 Sat 27 Sep 2014, 1:43 pm
by harron68 Sat 27 Sep 2014, 1:43 pm
harron68- Advanced Member
- Posts : 3616
Join date : 2013-02-28
Age : 73
Location : MIDWEST
Re: Salvage rod #3
![]() by RetiredMike Sat 27 Sep 2014, 3:00 pm
by RetiredMike Sat 27 Sep 2014, 3:00 pm

RetiredMike- Advanced Member
- Posts : 3525
Join date : 2013-04-27
Age : 73
Location : Valparaiso, Indiana
Re: Salvage rod #3
![]() by Geezerman Sat 27 Sep 2014, 4:45 pm
by Geezerman Sat 27 Sep 2014, 4:45 pm
BTW, The front crossmembers were different on the two frames. This one seemed more suitable to a suicide front end..... if I decide to go that way.
Geezerman- Advanced Member
- Posts : 3651
Join date : 2013-02-24
Age : 88
Location : Gulf coast of central Florids

Sam- Resident member
- Posts : 1962
Join date : 2013-02-23
Age : 57
Location : Back in Toledo, Oregon
Brizio- Rookie Member
- Posts : 471
Join date : 2013-02-25
Re: Salvage rod #3
![]() by Guest Sun 28 Sep 2014, 5:07 pm
by Guest Sun 28 Sep 2014, 5:07 pm
I have a friend in Hoquiam that is building a Fiat Topolino as a street legal Gasser. He has used and old 409 "W" series engine but it now makes close to 500 cubic inches. Not sure how he pulled it off but it has to do with using a 427 crankshaft and an over bore. I think he said it was 494 cubic inches.
Guest- Guest
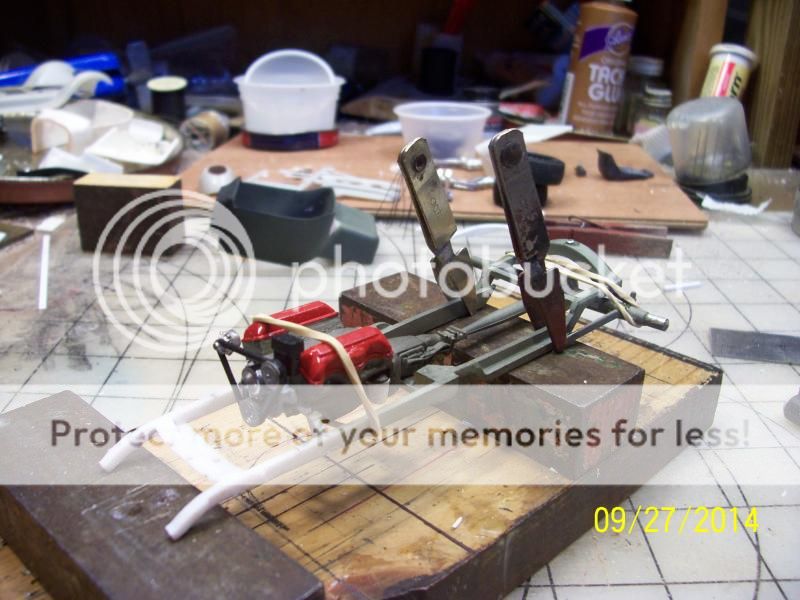
 External rear shocks.
Geezerman- Advanced Member
- Posts : 3651
Join date : 2013-02-24
Age : 88
Location : Gulf coast of central Florids
Re: Salvage rod #3
![]() by Geezerman Mon 29 Sep 2014, 7:12 pm
by Geezerman Mon 29 Sep 2014, 7:12 pm
Geezerman- Advanced Member
- Posts : 3651
Join date : 2013-02-24
Age : 88
Location : Gulf coast of central Florids
Re: Salvage rod #3
![]() by Skid Mon 29 Sep 2014, 7:15 pm
by Skid Mon 29 Sep 2014, 7:15 pm

_________________
Al.
Constructive criticism is always welcome.
“Success always demands a greater effort.” Winston Churchill
"Success is failure turned inside out" Unknown

Skid- Admin
- Posts : 7128
Join date : 2013-02-15
Age : 75
Location : Newcastle. Good Old Blighty. -

Re: Salvage rod #3
![]() by Guest Tue 30 Sep 2014, 5:30 pm
by Guest Tue 30 Sep 2014, 5:30 pm
Guest- Guest
Re: Salvage rod #3
![]() by Geezerman Tue 30 Sep 2014, 6:15 pm
by Geezerman Tue 30 Sep 2014, 6:15 pm
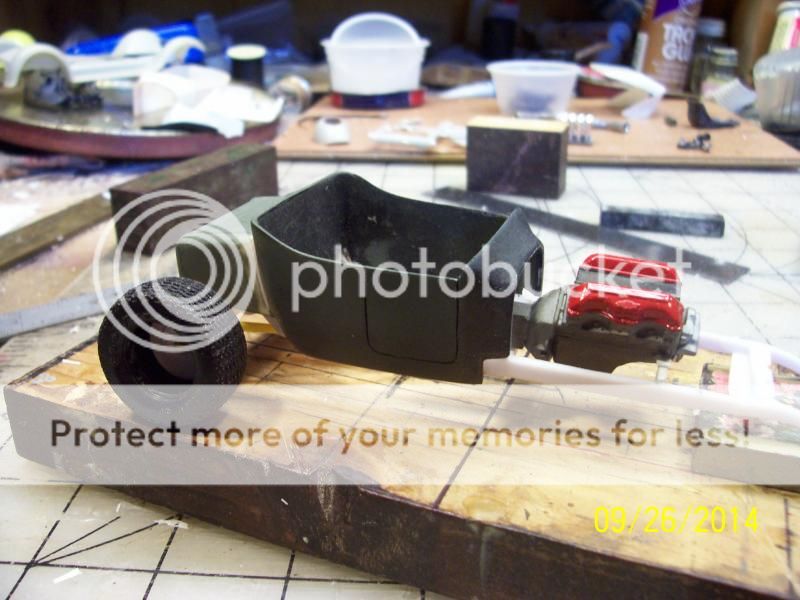
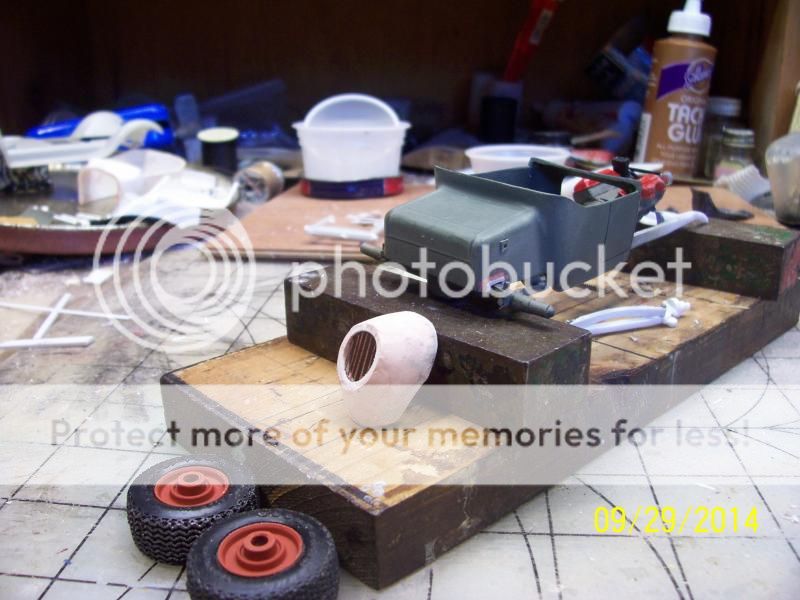
Zbuckster wrote:Loving it. That Track Nose really looks good. It will rock when finished. I showed it to Butcher Bob yesterday ( He was going to make one using 2 1940 Ford hoods) I think it changed his mind. he really liked it also.
Thanks, Buck.
Had a guy on DPMCC say that it looked thick. I explained ton him that I had built up the opening and that was Bondo curing. Have worked it down some and it's looking a lot better. Using copper wires for a grill opening. Etching soda can aluminum didn't work out for me.
Geezerman- Advanced Member
- Posts : 3651
Join date : 2013-02-24
Age : 88
Location : Gulf coast of central Florids
Re: Salvage rod #3
![]() by Guest Tue 30 Sep 2014, 7:54 pm
by Guest Tue 30 Sep 2014, 7:54 pm
Guest- Guest
Re: Salvage rod #3
![]() by Geezerman Fri 03 Oct 2014, 4:48 pm
by Geezerman Fri 03 Oct 2014, 4:48 pm
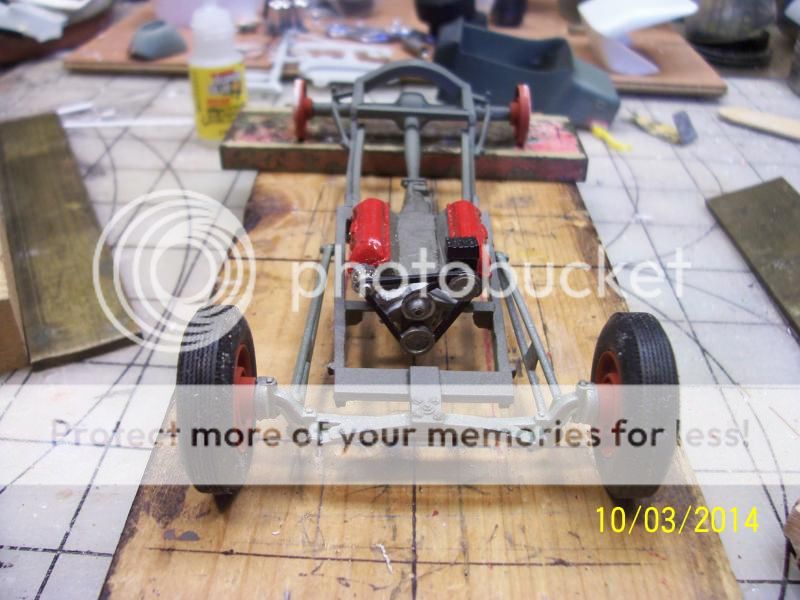
Yesterday nothing seemed right. The frame was twisted a bit and I discovered that I had the rear end crooked! So I disassembled the whole thing !


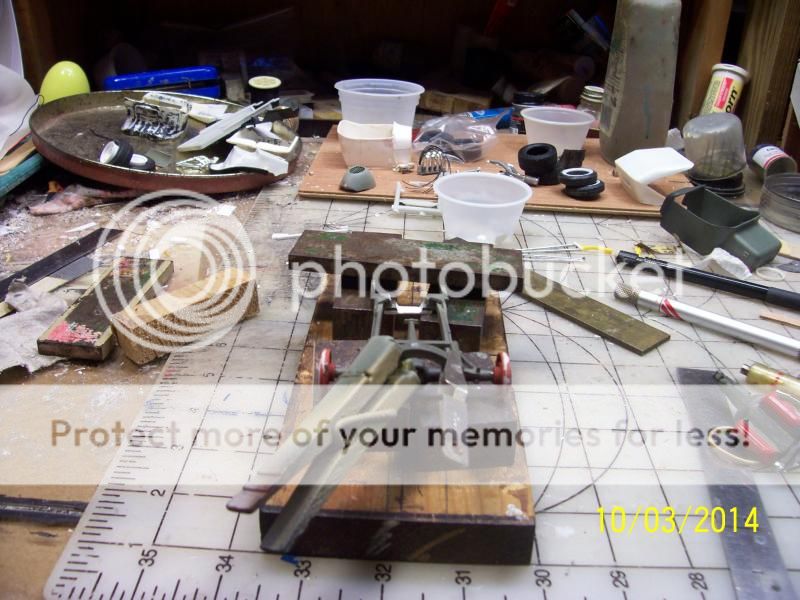
Today, I think I have everything squared away and the front end assembled. Now, I may be able to go ahead!
Geezerman- Advanced Member
- Posts : 3651
Join date : 2013-02-24
Age : 88
Location : Gulf coast of central Florids
Re: Salvage rod #3
![]() by Guest Fri 03 Oct 2014, 5:35 pm
by Guest Fri 03 Oct 2014, 5:35 pm
Guest- Guest
Re: Salvage rod #3
![]() by Geezerman Sat 04 Oct 2014, 12:00 am
by Geezerman Sat 04 Oct 2014, 12:00 am
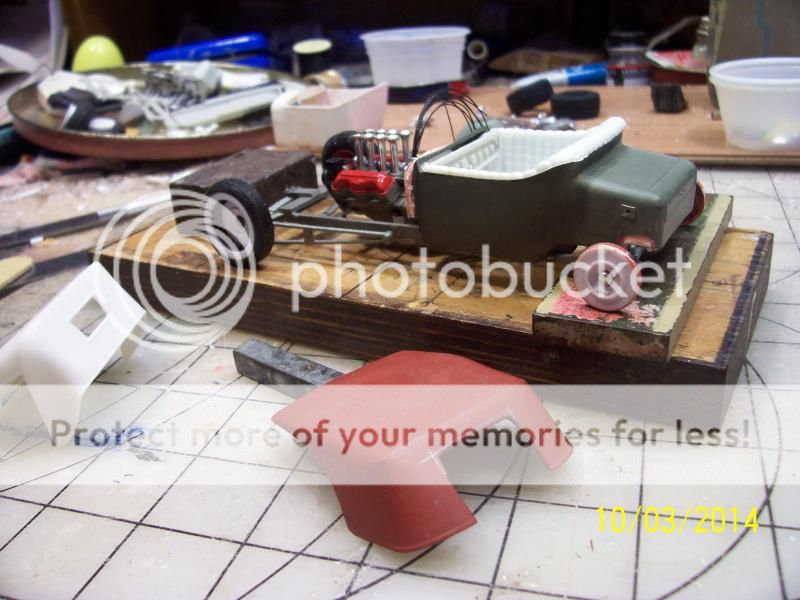
Went out again this afternoon. Installed a firewall, fit a dash to a tufted interior, and looked at some tops.
Someone modified this brown one and the thought of a Carson top struck me. I started on it, but, there was a lot to overcome. I seen a lot of stuff I had to do before I could modify it. It had to be narrowed and chopped, and there was a boatload of bracing on the inside where it had been narrowed by someone else..
So I dug around and found this baby. Still a lot of work. I have removed the rear window, (it'll have to be fit to the top once I have that narrowed. Looks like fitting it to the back of the seat may get interesting.

And, I'll have to form some side windows, and make a new front edge.

Geezerman- Advanced Member
- Posts : 3651
Join date : 2013-02-24
Age : 88
Location : Gulf coast of central Florids
Re: Salvage rod #3
![]() by Skid Sat 04 Oct 2014, 1:02 am
by Skid Sat 04 Oct 2014, 1:02 am
_________________
Al.
Constructive criticism is always welcome.
“Success always demands a greater effort.” Winston Churchill
"Success is failure turned inside out" Unknown
Skid- Admin
- Posts : 7128
Join date : 2013-02-15
Age : 75
Location : Newcastle. Good Old Blighty. -
Re: Salvage rod #3
![]() by Geezerman Sat 04 Oct 2014, 10:30 pm
by Geezerman Sat 04 Oct 2014, 10:30 pm
I split the top and reinserted the rear window. Trying to figure out how to match it up with the seat.
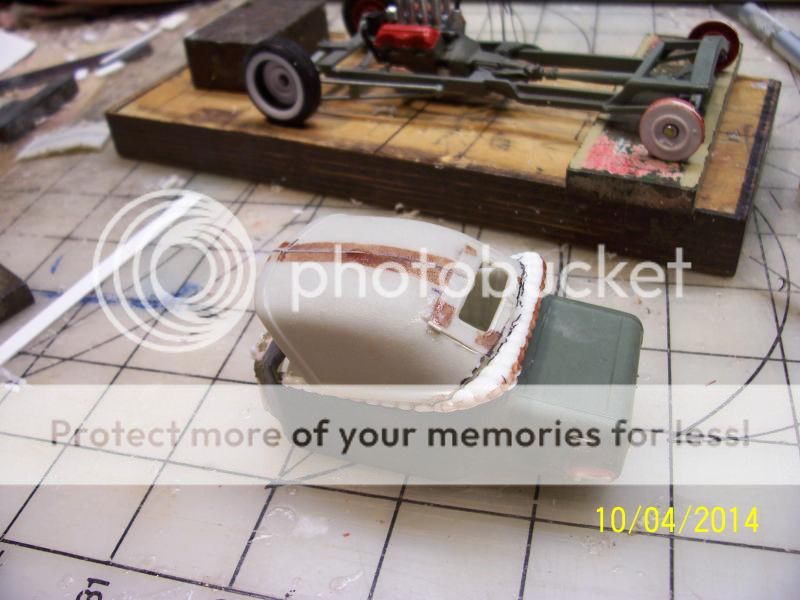
I should have set the window piece in higher. I have to cut some off the bottom. And I found out that I should have tapered my section job to be wider in the rear and I had to add some material to the bottom of the window opening to be able to take more off of the bottom of the top to get it low enough.
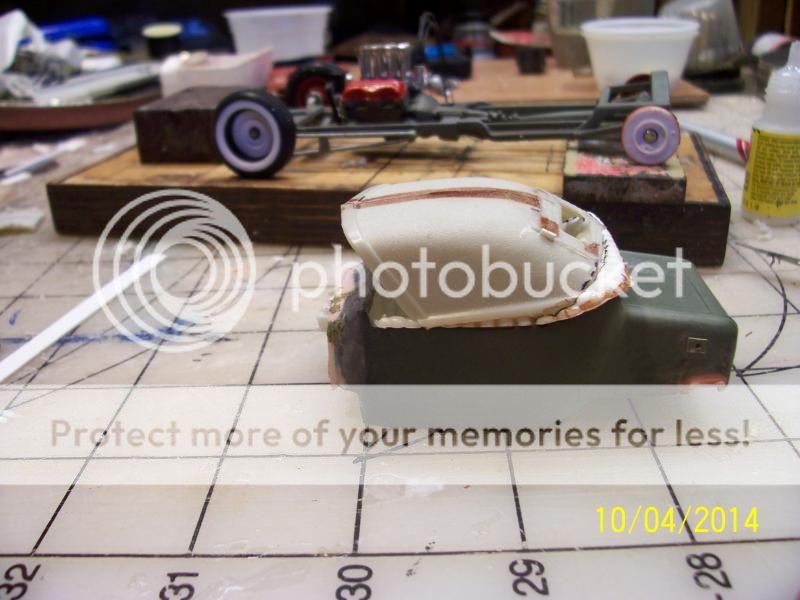

This is not going to work! I resplit the top and have widened the rear to be the same as the seat back. Going to a boat load of fitting still!

Geezerman- Advanced Member
- Posts : 3651
Join date : 2013-02-24
Age : 88
Location : Gulf coast of central Florids
Re: Salvage rod #3
![]() by Sam Sat 04 Oct 2014, 10:55 pm
by Sam Sat 04 Oct 2014, 10:55 pm

Sam- Resident member
- Posts : 1962
Join date : 2013-02-23
Age : 57
Location : Back in Toledo, Oregon
Re: Salvage rod #3
![]() by Guest Sun 05 Oct 2014, 2:07 am
by Guest Sun 05 Oct 2014, 2:07 am
Guest- Guest
Page 1 of 2 • 1, 2 ![]()
» Salvage #3
» '40 Ford convertable salvage
» One more salvage build
» '57 Salvage bash-up
Skid's :: Works In Progress :: Road cars
|
|
|